How to repair torn headphones. What to do if one earbud does not work? How to make headphones yourself: tips. Loose or broken wire
It is known that the breakage of the plug at the end of the wire is the most common headphone malfunction.
From frequent kinks, strong jerks and other mechanical loads, thin wires break or tear. In this case, as a rule, one ear stops working, or, as in my case, both at once.
Sometimes there is a break in the common wire, in which case the sound is distorted beyond recognition: high and medium frequencies almost completely disappear. This is due to the fact that the right and left amplifiers of the phone / player turn on in antiphase and their output signals almost completely cancel each other out.
It also happens that the stereo effect simply disappears.
Often there is no sound in the ears, but the microphone works as if nothing had happened. However, if the microphone wire breaks, then the control buttons on the headset cord stop working together with the microphone.
Most often, the cause of any described malfunction is a broken wire in the immediate vicinity of the plug. 
Sometimes wire damage is visible to the naked eye, but more often it is hidden under the insulation.
How to fix headphones at home if the wire has come off the plug
Now I will tell you how to fix vacuum droplet headphones with your own hands if the wire has come off the plug.
I will show the repair process using the example of the Monster Beats by dr Dre headphones that I got along with the HTC Sensation XE phone. They served faithfully for almost 4 years, until, in the end, the plug broke.
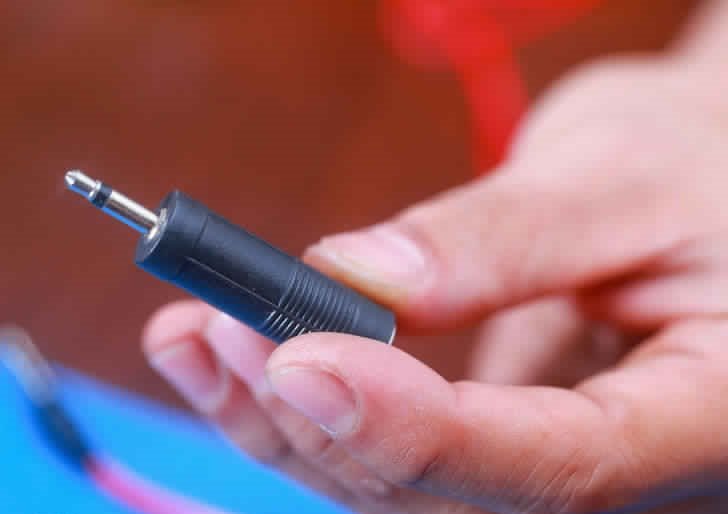
The plug in these headphones is a regular mini-jack (3.5 mm) with four contacts - right ear, left ear, microphone and common. By the way, interestingly, this headset has buttons so that you can rewind songs back and forth, but there are no special contacts on the connector for them. For all the buttons, in some miraculous way, the same microphone contact is used.
In short, now I will try to repair these headphones at home, and if something goes wrong - and fuck it! I'm going to buy new ones. Moreover, the choice today is simply huge. And all the more so since I'm far from an audiophile and any one will do for me, as long as they are comfortable.
Initially, the headphones looked like this: 
Headphones with a microphone and control buttons, so the plug has 4 pins, and inside there are 5 wires. The headset connector, of course, is non-separable. 
As I said, this repair method is only suitable if the problem is in the connector - one earpiece, the right or left ear, the microphone does not work, the buttons are not pressed, the sound disappears if you move the wire at the plug, etc. and so on.
So, if you are firmly convinced that the headphone plug really needs to be replaced, let's move on.
How to fix headphones if one ear (or both) does not work
In order for us to get the highest quality and super-creative plug that no one else has, we need:
- Two .38 caliber shells. Suitable from a Makarov pistol or the like. For example, I took brass sleeves from trauma (AKBS 9mm P.A.)
- Drill with drills (3, 3.5, 7 and 9.5mm)
- Hacksaw for metal
- Epoxy adhesive
- Syringe for 5 cubes
- small vise
- Sandpaper
- Soldering iron with a sharp tip (solder, flux and an aspirin tablet are welcome)
- A small board, about 30x30 mm and about 20 mm thick
We will make an L-shaped plug, because. it is better than straight (more reliable and more compact). So let's go.
Step 1
To begin with, we will make a small tool for the convenience of working with the sleeves, so that you can safely clamp them in a vise without crushing or scratching them. We take our piece of wood and drill a hole in it with a 9.5 mm drill, then we cut it with a hacksaw.
You need to get something like this: 
Step 2
Now we can process our shells without fear of spoiling their chic appearance: 
Step 3
Since I had spent cartridges, there were dents on the primers from the striker. But we need everything to be beautiful, so we knock out both primers with an awl, a hammer and straight arms: 
Then we straighten one of them with light blows from the inside with something suitable (I took a shank from a broken drill of a suitable diameter).
For greater beauty, you can grind a little more with sandpaper: 
After that, we press a beautiful and even capsule into its original place: 
If your shells are brand new, not fired, then we knock out only the primer from one of them (you can immediately throw it away, it will not be needed). We do not touch the second sleeve yet.
Step 4
Then we clamp the sleeve without a primer in a vise and drill the bottom from the inside with a 7 mm drill. You need to drill in such a way as to make the bottom of the sleeve as thin as possible. Those. the drill should almost get close to the hole from under the primer (I left about 0.5 mm margin).
Then carefully cut off the bottom to get such a puck: 
Step 5
Now we take our sleeve with a primer and shorten it to 13 mm: 
We carefully process the edges with sandpaper to get an even and strictly perpendicular cut to the axis of the sleeve.
As a result, the two halves should fit perfectly into each other: 
Step 6
It's time to deal with the old plug and wires.
To begin with, very carefully, using a sharp knife, we undo the old connector to remove all unnecessary and leave only the plug itself with four pins and soldered wires: 

We remember, but rather we write down where which wire was soldered. My HTC headphones (with microphone) had the following pinout: 
Step 7
We unsolder the old wires from the connector, strip the cable, tin the ends and shrink a piece of heat shrink (diameter 2.5 mm, length 21 mm).
For tinning wires in varnish insulation, it would be nice to take an aspirin tablet, but I didn’t have one, so I managed with ordinary rosin. If you work with aspirin, then know that the vapors of this muck are terribly poisonous. You have been warned. 

Step 8
We drill a hole of suitable diameter in the wall of the sleeve. In my case, a 3 mm hole turned out to be ideal: 
Step 9
We pass the cable through the hole and solder the wires of the headphones and microphone (in strict accordance with the pinout!): 
Step 10
 Well, the last stage: using a syringe, we measure out 0.5 ml of hardener and 5 ml of epoxy resin. Mix the ingredients thoroughly with each other.
Then, to drive out all the air bubbles, heat the mixture in a water bath to 80 degrees.
We fill our sleeve with the resulting composition to the brim, put everything in its place and, with the help of ingenuity and improvised devices, fix it all for at least 12 hours (or better for a day): 
The last step
When everything hardens, we take the structure into the light of day and get aesthetic pleasure from the work done.
What could be nicer than fixing broken phone headphones yourself? 


Oh, if I also had headphones in the form of cartridges - in general, it would be a fairy tale :) 
If this is too complicated for you and you would like something simpler and faster, then we bring to your attention the restoration of the headphone plug using an old ballpoint pen and epoxy.
Well, now you know exactly what to do if the headphones in the jack are broken. And if your arms and legs grow from different places, then everything will work out much more better, than me!

In the daily life of a modern person, headphones are an indispensable attribute that allows you to enjoy listening to your favorite music and audio books anywhere and anytime. Unfortunately, this gadget is not eternal and prone to breakage. In such a situation, you have to think about whether it is possible to repair the headphones with your own hands, or is it better to buy new ones. It is recommended not to rush to throw away the old ones, as the broken ones, in most cases, can be repaired at home. How to fix the headphones yourself, and will be discussed in this article.
Headphones are a fairly simple device, so all the faults can be listed literally on the fingers. Common reasons why headphones stopped working include the following:
- plug failure;
- defective headphone cord;
- the volume control has failed.
Plug failure
If the headphones are broken, the first thing to pay attention to cable connection point. Often the cause of the breakdown lies precisely in this place. Due to frequent bends, the cable cores break, so the signal does not pass into one “ear” of the gadget or into both at once. The microphone may also not work.
Breakdown is easy enough to detect. It is necessary, with the gadget turned on, to try to bend the cable in the place of the alleged breakdown in different directions. If at the same time a sound appears or a crack is heard, then this means that one of the strands of the wire is broken. What to do if a problem spot is found on the cable?
To repair headphones, do the following.
- Cut the plug from the cable.
- To repair the plug will be used inside of the old with a little modification. To remove this part, you need to use a clerical knife to cut the plastic shell, as shown in the figure below.

- After cutting the plastic, remove the insides of the plug. You will see contacts with several thin wires of different colors soldered to them. In the same way, you can disassemble the headphones from the iPhone.

- Remember or draw on paper to which pin, what color wire was connected. The figures below show standard wiring diagrams cable core. The color of the conductors may differ in different models, in this case, green is the left channel, red is the right channel, and copper (without insulation) is the common one.


- If you need to repair headphones with a microphone that are connected with one plug (usually there are 2 plugs on the cable), then the wiring diagram will be as in the figure below.

- Next, you need to release the inner cable cores from the outer (general) insulation.

- Headphones without a soldering iron cannot be repaired. This is due to the fact that it is necessary to connect the common wires and tin the ends of all conductors with the help of flux and solder. Since the conductors are covered with insulation (varnish), the tinning process will be a little difficult. To make it easier, it is recommended to use a lighter to lightly burn the ends of the wires. You can also clean the tips of the varnish layer with a regular knife.

- To continue repairing headphones with your own hands, for example, Defender headphones, you need to find ballpoint pen, from which you need only one part, namely the lower one. It will serve as a housing for the plug.

- Prepare a small piece of heat shrink tubing to protect the wire from sharp bends.

- At the next stage, you will need to put the tip of the handle and heat shrink on the cable, and then solder the tinned ends of the wires to the plug part.
- We solder the contacts, strictly following the wiring diagram (using our sketch).

- After you have soldered all the conductors, you need to check whether the headphones work or not. For this you can use a multimeter and call all contacts. If there is no device, then simply plug the plug into the phone jack and turn on music playback on it. Make sure that both headset channels work separately by turning the balance control in the equalizer.
- If the test result is positive, wear heat shrink tube to the place of soldering and using a lighter or a building hair dryer, achieve a snug fit to the plug.

- To proceed, prepare a small amount of epoxy.

- Add a few drops of resin to the tip of the pen, and put it on the soldered plug. This completes the repair of the headset.

The procedure for replacing the plug is the same for all types of headsets, for example, such as: Beats By Dr headphones, Sennheiser (Sennheiser) HD 215, Razer Kraken (Kraken) Pro, as well as for Steelseries Siberia v2 headphones, Audio-technica ATH-ES7 and headphones Defender.
Faulty headphone cord
How to repair headphones if the headset cord is broken? You can try to find fracture site the inner cores of the cable, probing and bending all its sections while the gadget is running. If you hear a crack or sound during the test, then mark this place with a marker. Further, at the break point, the cable is cut and stripped. After that, the tips of thin conductors must be soldered, observing the color, and insulated.
If the break point is not found, then the entire cord will need to be replaced.. The following example will show the repair of vacuum headphones.

Replacing the cord in large headphones
Large gadgets, such as, for example, Philips headphones or Sven headphones for a computer, differ from in-ear ones only in the size of the speaker (membrane in small gadgets). Difficulties may arise when trying to get to the speaker in order to solder the wire contacts.
Different manufacturers of headsets have different ways to open them. These can be latches that are difficult to detect or hidden screws hidden under soft “pads” - ear cushions. For example, the question often arises, how to disassemble the Sennheiser HD203 headphones?
This is done simply.

When repairing Steelseries Siberia headphones, the ear pads are held glue-based. You can remove them by gently prying with a screwdriver, after which you can find the fasteners. In some models, latches are used instead of screws, which, if pressed hard, can be broken. If they break, you will have to glue the cups of the gadget, after which they will become non-separable.

In the Razer Kraken headphones, the ear pads are not glued, and are easily removed.
By the way, the Audio-Technica ES7 headphones have hinges for turning the cups. Therefore, if you, when repairing a gadget, disassemble it, then you need to be careful.

The Philips SHD 8600 headset is free from all the disadvantages associated with replacing the plug and cable, as it is a representative wireless devices.
Problems with volume control
How to fix headphones if there are problems with the volume control in the form of sound loss or crackling? In this case, you can use graphite grease to apply it to the resistive layer to restore contact. After that, the headset should function without problems.

If after lubrication the headset continues to work poorly, then the regulator must be replaced with a new one.
Thus, in most cases, before you run out and buy a new headset, you can repair it yourself. This will require a soldering iron with a thin tip and skills in handling it.
Each of us once faced such an unpleasant problem as broken headphones. Most often, telephone headphones fail. This is due to the constant deformation of the thin connecting wire, which is twisted and rewound every time the device is put into a pocket or bag. From frequent kinks the core of the wire may break, and then one or both headphones stop reproducing sound. Consider how to fix your favorite headphones if their wire breaks.
To repair a headset with a broken wire, the owner needs to stock up on the right tool and the determination to see it through. Having discovered a breakdown, the first step is to find out in which of the wires a gap has formed.. In this case, experts resort to a multimeter, tester or voltmeter.
Check for wire breaks is carried out as follows.

There are times when the device does not stop beeping - this means that the problem is not in the cable, but in the speakers themselves.
How to repair a broken wire
If the study showed that the cable still broke, you will have to connect it. This procedure is carried out in several stages.

When a headset breaks, many owners are interested in whether it is possible to repair headphones with their own hands. without soldering iron. The experts say no. All wires require reliable soldering to ensure stable contact. Twists that are not fixed with solder will constantly disintegrate, and there is no question of sound quality.
Repair of a headset with a function of adding sound and a microphone
Headphones equipped with a microphone do not differ fundamentally from a standard system. However, in order to know how to make them work, you need to understand some of the nuances of functioning. The causes of problems in such a headset, as in conventional headphones, can be wire breaks, failed plugs or broken headphone membranes that need to be replaced.
Sometimes exotic breakdowns occur in the form of wire stretching. This situation is not typical, since in ordinary life the wires are more likely to be crushed than stretched. In this case, the damaged section of the cable is well palpable - a strong thinning of the core will be noticeable in this area. You can fix the breakdown with the help of an already familiar soldering iron. Remove the insulation and protective varnish from the wire. Experts say that this can be done with a candle or a lighter. After that, their ends are tinned and a reliable soldering is carried out - do-it-yourself headphone repair is over.
For additional protection, you can cover the solder with a new layer of protective varnish, it prevents oxidation and minor damage.
Repairing broken headphone wires is easier than you think, but it takes some time. Stock up on all the necessary materials so as not to interrupt the process and not leave bare parts unattended. Be careful with small wires, because they are very easy to damage with wire cutters or a knife.
How often does it happen that recently purchased headphones begin to "jump". The sound in one of them begins to be supplemented by wheezing, interference, and over time it may disappear altogether. Can the headphones be repaired or do they need to be taken to a service center, or maybe it's time to buy new ones? First, you can try to fix them yourself.
How to fix your own headphones?
So, before we tell you how to fix the headphones if one of them stopped working, we will give a list of the necessary tools and materials for this.
If the headphones require small screws, you will need a screwdriver of the correct size. In addition, you need a clerical knife and a lighter. You will probably need electrical tape or epoxy to join the broken wires together. You can also connect parts with a soldering iron and heat shrink tubing. Also, a multimeter will not hurt, helping to find the place of the gap.
So how do you fix your headphones if one doesn't work? Most often, a breakdown occurs due to a break inside the cord or simply poor build quality. To fix these problems, special skills and knowledge are not required. You need to first find out the exact location of the problem.
If the sound in the earphone is accompanied by noise and interference, and over time the sound in it disappears completely, you need to walk along the cord with your fingers, plug in the headphones and turn on the sound. Especially carefully feel the folds and the area where the wire enters the earpiece. When you stumble upon a problematic area, you will hear a characteristic sound.
Depending on where the breakdown is located, your further actions may develop according to several scenarios. If the break is inside the earpiece, you need to open it. If the earpiece has screws, unscrew them. Small earbuds are often simply glued on the sides, so that they can be opened with the tip of a regular knife.
To determine the location of a break in an open earpiece, walk along the cord while listening to the sound. When you find a spot, cut the wire below it, strip it to a wire, and solder it to the original connection.
Many headphones have a knot inside, so before you solder the wires, tie them too. Before assembling the headphones, check the sound in them again. You can glue them back together using epoxy glue.
If the reason that one ear does not work is in a break inside the plug, before you fix the headphones, you need to find the place of the break. Similarly, run your fingers along the wire and listen to the sound. When you find the problem area, you will need to get to the inner wire to cut it.
First, strip the plug from the rubber, find the junction of the connector and the wire, cut off the non-working area and fasten it with a new one. Restore the cleaned area with epoxy glue. You can additionally wrap the plug on top with threads or put on a thick plastic sheath from another wire.
How to use a multimeter?
If you were unable to find the breakage by probing and  bending wires, use a special device. You can buy it at an electronics store or borrow it from friends.
Set up the multimeter in this way: set it to test the electrical conductivity, insert the black probe into the hole marked COM, and the red one into the hole marked Ω, mA or))).
Test the wires with a multimeter: it will squeak in places where there are no breaks. Only you need to apply it to the wires without winding. You need to carefully remove it in two small areas - next to the plug and next to the earpiece. If the multimeter beeps near the plug, then the problem is in the earpiece, and vice versa.
Sooner or later, each person will face the fact that the headphones for the phone (or one earphone) stop working and think about the question: “How to fix the headphones?”. For this simple process, you need to stock up on time, knowledge and the necessary tools.
What to do if one earbud does not work?
When the headphones are broken, you need to take up the multimeter / tester / voltmeter. Testing is done by checking the wires. The characteristic sound that the equipment makes informs the owner that there are no breaks in the wires. But the silence makes it clear that the problem lies precisely in the headphone cable. Therefore, to check the integrity of the wires, it is best to use some kind of tester to determine the reason why one earphone stopped working.
How to test:
- Two cuts are made near the plug and earpiece speaker.
- After that, a protective winding will be visible on the wires. Usually it is transparent. The wrap must be removed. All this must be done carefully.
- To make sure the integrity of the wire, you need to take up the measuring equipment. If this is a multimeter, then you need to place the black and red probes at the cut points. If a characteristic squeak is heard, then the wires are intact.
- If the measuring equipment continues to make a sound, then you need to make another cut between the first two. This action must be repeated until the multimeter detects the location of the breakdown.
- Thus, gradually making cuts, you can narrow the circle of searches to a section of cable a couple of centimeters long.
- If the multimeter continues to make sounds on all sections of the cable, then it means that the problem is not in it.
Headphone wire broke. How to fix?

Can headphones be repaired if the cable breaks?
- First of all, if the headphones do not work, you need to take care of removing the insulation and protective winding. To do this, you will need special wire cutters (or a knife). It is enough to clear only 1.25 centimeters, and then continue the cut in the right direction in order to find the place of breakage or rupture of the wires.
- It should be borne in mind that the headphones from the phone usually consist of two wires that are connected together. Each wire has an insulated (signal) and bare (ground) wire.
- Now it's time to cut the wire from the headphones. It needs to be cut in half. It may be that the wire is split. To avoid electrical damage to the cord, both halves of the cord must be shortened to the same length.
- If only one wire is broken, then you can proceed to soldering bypassing cutting and splicing. This will save time, but the result will be the same.
- After the manipulations, you need to put on a heat shrink tube. It is similar to the insulation of headphones.
- After that, it is necessary to cut off the protective winding.
- Twist the wires.
- Solder all connections.
- Heat the heat shrink tubing with a hair dryer to shrink it.
Repair of headphones without a soldering iron
By the way, when the headphones are broken, some people wonder, “Is it possible to fix the headphones without a soldering iron?”. The answer is simple - no. All parts of the headset will need to be soldered. Therefore, if the headphones are broken or if one does not work, you cannot do without this important tool.
Plug repair
If the reason why the headphones do not work is not in the cable, then the plug from the headphones is broken. Then the question arises "How to fix the plug?". To fix it you will have to buy a new part. It is important to pay attention to the number of contacts. Headphone plugs can be divided into two groups - monophonic and stereophonic.
So, after acquiring a new plug, the first thing to do is get rid of the old one. If it twists, then half of the problems are removed by itself. But if the plug from the headphones is soldered to the wires, then you will need to carefully cut it off.
Now you need to expose the wires directly to the cable itself. After that, separate all the wires from each other and twist their ends. Then connect the copper wire to the sleeve. Connect the other two wires to the ring and tip. These are the other two pins on the plug.
The main thing is to connect only the copper wire to the sleeve, and the other two wires can be connected in any order. There is no special color code for them. After that, you need to connect and insulate. If nothing does not work, it means that something is not connected correctly.
How to repair headphones with volume control or with a microphone
Headphones with a microphone are practically no different from all the others, but in order to know what to do you need to have some understanding of how the microphone button or volume control works. The reasons why such headphones break are the same as for a regular headset - damage to the wire, plug or one earphone.
In rare cases, the wire may simply stretch. In this case, the breakage point can be determined by touch, as the wire decreases in thickness. To get rid of this defect, you need to strip the wires, hold them over the fire (this is necessary in order to remove the protective varnish coating), tin the ends and solder them. For additional protection, you can use "cambric" by placing it on the place of soldering.
If the microphone began to transmit sound of poorer quality, you can disassemble it and wipe the microphone head with alcohol, but it is important to ensure that the fabric fibers do not remain on the surface. Dust, dirt or moisture adversely affects this part.
Video instruction
Since the process of repairing headphones is quite complicated, it is best to be guided by video materials:
This video describes the whole process in detail. Stock up on time, patience and the necessary tools to fix your headphones with a microphone.
In contact with