How to open materials in a VKontakte group. How to make an internal page for a group menu in Contact. Formatting a VKontakte group
The goal of the creator of a group on social media. networks to attract more visitors. It is important that the guest wants to join, sign, read information, leave a comment or order a product. The need for the final result differs from the direction of activity.
The first seconds of the stay shape the guest’s further actions. This is why the interface plays a big role.
Factors that leave a guest:
- avatar;
- description;
- Name;
- beautiful and practical menu;
- colorfulness;
- content.
It’s easy to create a practical menu that motivates more than just action. But first you need to figure out what it should be.
What should the menu be like?
Using a well-designed menu, the visitor can easily navigate through it and quickly get answers to their questions. Navigation also allows you to create the right impression of the project.
Three main goals of groups:
- sales;
- increase in traffic;
- increase in active visitors.
For sales, group navigation replaces in-store display.

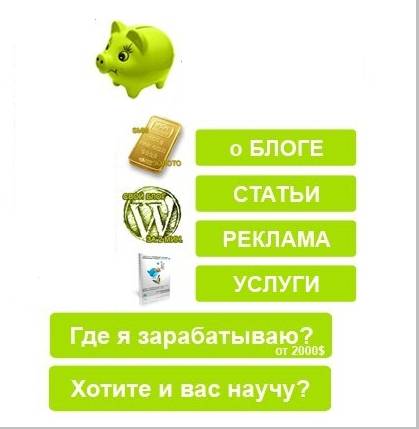
The most important buttons should be here:
- catalog;
- price;
- delivery;
- promotional offers;
- reviews.
To increase traffic, the emphasis is on the content and flavor of the site or blog.

An approximate set of buttons:
video: menu for public
Working with Photoshop
Before you begin, you need to visualize the design or overall appearance, as well as its components. No special knowledge is required, just follow the steps of the instructions.
Algorithm of actions:


This is done using the Rectangular Marquee tool:

Working with graphics:

It should look something like this:

Save the rectangle located on the right as a separate image, setting the size to 200x500 pixels. This is a ready-made avatar, uploaded through the “Upload photo” button in the VK group.

The second picture still needs to be divided by the number of points. This is done in order to assign a link to each button.
First you need to make the markup:

Create fragments:

Saving images:

Technical part
Finished images must be transferred to the group. By following the steps below, this task can be easily completed.
Important! Uploading a menu differs from usually uploading photos or pictures.
Everything in order:

Now the most important thing is why all this was done. Add menu functionality. A separate image must be assigned its own link.
- find the required entry;
- left-click on it;
- copy the URL in the address bar.
- go to the source where you need to transfer the visitor;
- copy the required address.
Save the changes using the corresponding button at the bottom of the window.
Attention! Changes may not be reflected immediately. It is recommended to log out to your main profile and then log back into the group.
How to create a menu in a VKontakte group wiki markup
Wiki markup is a special language used to design web pages in social network groups.
 This tool allows you to create:
- effects;
- unusual menus;
- signs;
- navigation elements;
- format text.
In a word, this markup allows you to create a mini VKontakte website. This is very convenient, especially for sales and recruiting subscribers.
This design intuitively forces the visitor to stay and click on the button. That is, it delays and stimulates action - and this is exactly what is needed.
Visually, such a system is very similar to HTML layout. But it does not require long training and a special mindset.
Video: menu with search by category
Nuances of creation
Actually, what was done above (dividing and loading the image) are already markup elements. This is the advantage of this tool. Automatic transformation into tags when simply loading images.
However, it is important to know the individual tags to help add even more functionality and beauty. For example, when we fill individual parts of the image, white stripes may form between them. You can remove them by simply adding the noborder tag.
Like this: []
The main tags are presented in the table below:

Photo: tags used for marking
Working with pictures
Where options is replaced with:
- noborder- removing the frame around the image;
- nopadding- removing spaces between images;
- plain- insert a link to the image. Designed as text, without graphics;
- nolink- removing the link to the picture;
- box- opening an image in a window;
- NNNxYYYpx or NNNpx- sets the photo size in pixels.
Creating a table
Regardless of what kind of menu (text or graphic) you create, you are unlikely to do without inserting a table. Otherwise, you can simply paste the text into the news field and not format it, wasting so much time.

A table is created using a special set of characters, where each of them is responsible for a specific part of the table:
- {| symbol of the beginning of the table, without it there cannot be a table. Always used;
- |+ is responsible for positioning the table title in the center. Placed after the characters at the beginning of the table. Use as desired;
- | denotes the beginning of a new line and cell;
- | a character that makes the cell transparent;
- ! makes the cell darker. If it is absent, the previous sign must be used;
- |} means the end of the table. The optional character, however, is used to prevent an error from occurring.
When filling out a table, the contents of each cell must be placed after the | sign, and when separating cells, you need to duplicate the row types like this: || or!!.
Markup features
There are many unwritten rules, and this causes a lot of trouble for novice programmers. As a rule, everything is learned through practice. Everyone finds their own loopholes, everyone faces their own difficulties.

In order to avoid basic mistakes, you should familiarize yourself with the main ones:
- you need to be careful when resizing the picture - if it is less than 131 pixels, its quality will deteriorate significantly;
- The width of the image should not exceed 610px;
- It is prohibited to place more than 17 unclosed tags on one wiki page;
- when changing the width of the image, its height changes automatically and proportionally;
- a list inside a table should be created using a tag
; - There should be no more than 8 list elements in one line of markup.
To create beautiful and functional navigation, you need to know the basics of Photoshop and wiki markup. However, the latter contains its own nuances, which, when faced with by a beginner, can get stuck and confused for a long time.
Important! Check that all tags are closed. Keep it consistent.
The main assistant in this matter is attentiveness and strict adherence to instructions. The official VK page, which is called wiki markup, can always help.
And today, I decided to continue this topic and talk about how to create VKontakte graphic menu. After all, not every webmaster who wants to beautifully design his group will be satisfied with a text menu. Now, perhaps, a graphical menu is more relevant, since various images are perceived much better by visitors than text links. And with the help of graphics you can create something really beautiful and colorful.
Where to start?
Well, naturally, you should start by selecting suitable graphics or drawing a menu from scratch. Of course, not everyone can draw a menu from scratch. But the problem can be solved, since the World Wide Web is full of various graphics, both free and paid, with the help of which you can implement your plans. At this stage, I will not go into details, since it is not difficult to find pictures on the Internet, and I do not know how to draw. I’ll start right away with the fact that we already have suitable graphics, but what to do next is not clear?
After you have downloaded or drawn the menu, you need to cut it. What is this for? This is necessary to create separate links for a particular image. Since, if our menu is placed entirely in a group, then it will not be possible to create more than one link, or I don’t know something. In addition, our menu needs to be adjusted in size, that is, it’s immediately worth considering that the maximum visible width is 388 pixels (one image), and the rest will either be cropped or adjusted to the dimensions that you specify when creating the menu in the group, while the image may stretch or, on the contrary, shrink, which can ruin the original idea. It is also worth considering that, for example, for a horizontal menu we will have to focus on a width equal to 370 pixels, otherwise the menu will not line up horizontally.
So, I will show, for example, the most common buttons. I will do all manipulations with graphics using Photoshop, so I recommend that you use it too. After we have sorted out the sizes, all that remains is to cut the menu. To do this, you can use the convenient “cutting” tool.

Simply select the required areas with these tools, for example:
And save it for web devices.

In the window that appears, we can select the image format, its quality and much more. In this case, I will choose the format: JPEG and the best quality, and leave the rest as it is and save the VKontakte graphic menu.

Let's go to our group page. And we do some preparatory actions: In community management, we connect “materials” and save. If something is not clear at this stage, then read the article about the VKontakte text menu, everything is detailed there, it is said about it.
After this, we need to upload our pictures that we received when cutting the menu. That is, click “add photos”.


Once the images are uploaded, we can start creating the menu. To do this, click on “edit” next to the latest news.

And now, we can add the code for our menu. In my case, it will look like this:
So, let's take a closer look at what's going on here:
photo-48249652_297601976 - the path to our image. The path is formed as follows: album number_number of the photo itself. How to find out the path to our image? It's very simple. We go to the photo album in which our pictures are located and click on the desired image. Then, in the address bar we will see the full path to our image.

130x46px;nopadding; — image options: 130x46px; - the width and height of our image (may differ from the size of the image itself) - for a vertical menu on VKoktakte it is not necessary to indicate; nopadding; - no spaces - when using this option, all spaces (indents) are removed and the images are merged into one.
Here's what I got:

The horizontal menu on VKontakte is done according to the same principle. The only difference is that when writing code, new menu items do not need to be placed on a new line. And also, do not forget that with this arrangement of images, we can only use 370 pixels of width. I slightly corrected the code shown above and this is what I got:
[][][]
And this is what it looks like:

And I would also like to add: There are situations when we need to insert a picture into the menu, but it should not be a link. It should serve as decoration. To do this, just use the “nolink” option. Here is a clear example: The same horizontal menu, only the first button is not an active link, but a simple picture.
[][][]
Well, that's basically all. As you can see, making a graphic menu on VKontakte is not difficult, the most important thing is to draw it. And then, using all the knowledge gained in this article, you can make the best menu for your VKontakte group. And I want to note that horizontal and vertical menus can be combined, thereby achieving absolute uniqueness.
Now any manipulations in VKontakte groups (menu, navigation, pagination, news, etc.) will be much easier to perform, for this you just need to study my Video Course on the technical secrets of VKontakte groups. You asked for video lessons, and I recorded a whole video course - take it!!!
Happy experimenting!
The goal of the creator of a group on social media. networks to attract more visitors. It is important that the guest wants to join, sign, read information, leave a comment or order a product. The need for the final result differs from the direction of activity.
The first seconds of the stay shape the guest’s further actions. This is why the interface plays a big role.
Factors that leave a guest:
- avatar;
- description;
- Name;
- beautiful and practical menu;
- colorfulness;
- content.
It’s easy to create a practical menu that motivates more than just action. But first you need to figure out what it should be.
What should the menu be like?
Using a well-designed menu, the visitor can easily navigate through it and quickly get answers to their questions. Navigation also allows you to create the right impression of the project.
Three main goals of groups:
- sales;
- increase in traffic;
- increase in active visitors.
For sales, group navigation replaces in-store display.

The most important buttons should be here:
- catalog;
- price;
- delivery;
- promotional offers;
- reviews.
To increase traffic, the emphasis is on the content and flavor of the site or blog.
An approximate set of buttons:
- interesting articles;
- useful information;
- subscribe;
- reviews.
To increase the activity of participants, they should be stimulated with promotions, surveys and interesting and unusual content.
We offer the following buttons:
- subscribe to news;
- ask an interesting thematic question;
- stock;
- questionnaire;
- vote.

Let's look at how to create a menu for a VKontakte group, all the technical aspects that require minimal knowledge of a graphic editor and the basics of working with VKontakte.
We create in stages
Creating navigation is an interesting, complex and lengthy process. But the result is worth it.
The whole process is divided into 2 stages:
- working with photoshop;
- technical addition.
video: menu for public
Working with Photoshop
Before you begin, you need to visualize the design or overall appearance, as well as its components. No special knowledge is required, just follow the steps of the instructions.
Algorithm of actions:


This is done using the Rectangular Marquee tool:

Working with graphics:

It should look something like this:
Save the rectangle located on the right as a separate image, setting the size to 200x500 pixels. This is a ready-made avatar, uploaded through the “Upload photo” button in the VK group.

The second picture still needs to be divided by the number of points. This is done in order to assign a link to each button.
First you need to make the markup:

Create fragments:

Saving images:
- click File – Save for web;

- enter a name;
- specify the JPEG format;
- set the best quality;
- check the boxes for “Progressive and Built-in profile”;
- The last button is “Save”.
- go to the group;
- turn on the news feed;

- next to the “Latest News” bar, click “Edit”;
- change the name to a menu or something similar;
- add pictures using a button in the form of a camera;

- the result will be something like this:
- find the required entry;
- left-click on it;
- copy the URL in the address bar.
How to clean your computer from unnecessary programs? Instructions here.
Technical part
Finished images must be transferred to the group. By following the steps below, this task can be easily completed.
Important! Uploading a menu differs from usually uploading photos or pictures.
Everything in order:
Now the most important thing is why all this was done. Add menu functionality. A separate image must be assigned its own link.
- go to the source where you need to transfer the visitor;
- copy the required address.

Save the changes using the corresponding button at the bottom of the window.
Attention! Changes may not be reflected immediately. It is recommended to log out to your main profile and then log back into the group.
How to create a menu in a VKontakte group wiki markup
Wiki markup is a special language used to design web pages in social network groups.

This tool allows you to create:
- effects;
- unusual menus;
- signs;
- navigation elements;
- format text.
In a word, this markup allows you to create a mini VKontakte website. This is very convenient, especially for sales and recruiting subscribers.
This design intuitively forces the visitor to stay and click on the button. That is, it delays and stimulates action - and this is exactly what is needed.
Visually, such a system is very similar to HTML layout. But it does not require long training and a special mindset.
Video: menu with search by category
Nuances of creation
Actually, what was done above (dividing and loading the image) are already markup elements. This is the advantage of this tool. Automatic transformation into tags when simply loading images.
However, it is important to know the individual tags to help add even more functionality and beauty. For example, when we fill individual parts of the image, white stripes may form between them. You can remove them by simply adding the noborder tag.
Like this: []
The main tags are presented in the table below:

Working with pictures
[] .
Where options is replaced with:
- noborder- removing the frame around the image;
- nopadding- removing spaces between images;
- plain- insert a link to the image. Designed as text, without graphics;
- nolink- removing the link to the picture;
- box- opening an image in a window;
- NNNxYYYpx or NNNpx- sets the photo size in pixels.
Creating a table
Regardless of what kind of menu (text or graphic) you create, you are unlikely to do without inserting a table. Otherwise, you can simply paste the text into the news field and not format it, wasting so much time.

A table is created using a special set of characters, where each of them is responsible for a specific part of the table:

To the question “how to create a menu for a VKontakte group” there are three main answer options: order from a specialist, create using an online designer, or tinker, delve into some of the intricacies of the issue and do everything yourself.
In this article we will look at all three options one by one. By the way, if you still doubt the need for a menu for your group or public, then be sure to read.
So here are three ways to create a menu:

Each of them, of course, has its own advantages and disadvantages. Below we will talk about the first two in a little more detail. And for those who still decide to take the third path and do everything themselves, we have written a detailed guide (instructions).
By the way, for those who prefer to receive information through videos rather than read long texts, there is a video:
Path #1. Order menu creation from a specialist designer
The advantages of this method are relative speed and minimal participation on your part. Disadvantages - the highest price and the chance to get a beautiful, but incorrect menu (we have prepared about the main mistakes when creating a menu). In addition, you still need to find a performer. Here we can recommend looking for it on the kwork.ru service, in the “Design of groups in social networks” section.
Path #2. Using the online constructor
Here, of course, we will recommend our designer, whose website you are currently on. You can try it for free. Payment is made only if the result suits you and you decide to upload the resulting menu to your group. The advantages of this route are that it is the fastest. In addition, if necessary, you can always quickly edit and reload your menu for half the cost of creation. This is more convenient than searching for a designer every time you need, for example, to add or remove an item from a menu. The disadvantages of this method are that you will have to work quite a bit on your own.
Path #3. Do it all yourself
The advantages of this path are obvious: it is free, and you acquire new skills. The disadvantages are: you need some skills and quite a lot of time (for the first time). Here's what you need:
- Be able to confidently use a graphics editor. For example, PhotoShop. When making a menu, you will first need to make an image of the correct dimensions (down to the pixel, no “about”!), and then cut it correctly (break it into fragments)
- Be able to understand instructions and read them carefully
- Don’t give up and don’t despair if something doesn’t work out the first time
If you think you can handle all this, then let's get started.
Step #0. General information about how the VK group menus are structured
The menu for the group is made from wiki pages, the creation of which is supported by VK. Wiki pages are special pages that can only be created in public pages. They differ from regular posts in that they can use so-called wiki markup. This markup is special code that is converted into additional formatting objects. To make it clearer, let us explain. For example, in regular posts you can use only plain text, but wiki markup allows you to highlight parts of the text in bold or italics. That is, it introduces additional design options. In particular, the ability to post images, when clicked on, the user will be redirected to a link. It is these additional formatting options that are used to create the VK public menu. We will tell you exactly how to do this below.
Step #1. Preparatory stage
If you have an existing group, we recommend creating a new one. For testing and experiments. Otherwise, during the learning process, you risk inundating your subscribers with strange and unnecessary updates.
So you've created a new group. Let's now find out the identifier (ID) of your group. The group ID is its unique VKontakte number. Go to your group and click on “Community Posts” (if there are no posts in the group, then “No Posts” will appear instead of “Community Posts”). You will be redirected to a new page with an address like this:
https://vk.com/wall- XXX?own=1
Instead of XXX you will have a set of numbers (and only numbers!). This is your community ID. For example, in our test group this is 154457305.
Now let's create a new wiki page in the group. To do this, we will create a link like this:
http://vk.com/pages?oid=- group_id&p= Page_name
http://vk.com/pages?oid=- 154457305 &p= Menu
Open the resulting link in your browser (copy it into the address bar of your browser and go to the address). That's it, you have created a wiki page called “Menu” (if, of course, you specified “Menu” as the page name in the link). You should see text like this: “The Menu page is empty. Fill it with content." In the upper right corner there is a pencil icon (). Click on it to go to editing the page.
The VK wiki page editor has two modes: graphic and markup mode. Modes are switched using the button in the upper right part of the editor (). When the button is highlighted in blue, it means that markup mode is enabled. The visual editing mode is more convenient, because allows you to do without knowledge of wiki markup syntax, but its functionality is extremely limited: you can only do the simplest things in it. Basically you will have to deal with markup mode.
Notice two things. Firstly, to the left of the button for switching editing modes there is a button for calling up help information on wiki markup (). A very useful thing, especially for beginners. The second point you need to pay attention to is the address of the wiki page. You will see something like this in your browser's address bar:
http://vk.com/page-group_id _XXX?act=edit§ion=edit
Part of the address before the "?" - this is the address of your wiki page. Write it down somewhere: in VK there is no way to see a list of your wiki pages and links to them. To go to the one you need, you need to know its address or use the link to create a wiki page again. When using the latter method, keep in mind that the pages, if they already exist, are not recreated.
Step #2. Making a simple menu for a VKontakte group
So, we have created a wiki page “Menu”. Go to the editor's markup mode and add the following code:
Click on the “Preview” button, which is located at the bottom of the editor. You should see a list of three links. The first two are external and lead to the main pages of Yandex and Google, respectively. The third link is internal. It leads to a public VK with ID “1” (this is the official VK group for developers). If your preview displays your code, and not links (which you can click on) - it means you entered the code in visual editing mode, and not in markup mode. Be careful!
Please note that external links in the VK wiki code are formatted with single brackets, and internal links with double brackets. In this case, internal VK links are indicated not as the usual website address, but as a pointer to a particular VK object. For example, a pointer to a group has the following form:
club group_id
On VKontakte there are pointers not only to groups, but also to individual photographs, posts, wiki pages, user pages, audio recordings, etc. Each index has its own recording form. We'll use some of them later and look at them in more detail.
Be sure to save the page. Basically, we've just created a very basic navigation page. Which is nothing more than the simplest menu for VKontakte group. Of course, this is not a graphical menu yet, but even it can cope with the main task of the menu - quickly direct users to the desired public location. We'll look at how to make a graphical menu a little later.
Now let's figure out how and where you can use wiki pages.
Step #3. Where can I post VKontakte wiki pages?
There are two main places: you can create a post with a link to the wiki page or post it in the “Materials” section of your community.
Let's start with the first option. Start adding a new post to your group wall. First, attach any photo to it. It is better to take a fairly large photo whose width is greater than its height. Then insert into the text of the entry you are creating a link to the wiki page you created with a simple menu. This is what we asked you to write down a little earlier. Let us remind you that the link looks like this ( you will have different numbers):
http://vk.com/page-121237693_72827423

Now delete text links from the input field. The link itself under the photo will not disappear. But if you leave the link address in the text field, it will appear as text in the post. Publish the post, reload the browser page with the main page of your group and pin the created post. Reload the page again. As a result of these manipulations, you should get something like this:

Click on the photo in the pinned post: your wiki page should appear with a simple group menu.
So, we learned that wiki pages can be attached to posts. In particular - to the assigned post. The second place where you can use wiki markup is the “Materials” section.
Go to the community settings and find there managing community sections (services). Mark "Materials" as "Restricted". A new item will now appear at the top of your community's home page. It is located to the right of the “Information” item. When you first turn on materials in a group, this item is called “Latest News” by default. This is what it looks like:

Go to this new item. Click on the “Edit” checkbox. As a result, you will find yourself in the wiki page editor you are already familiar with. The only difference is that there is an input field for the page name. Change it from "Latest News" to "Menu2". IN markup editing mode enter the following code:
"""Menu option for the "Materials" section"""
[]
Make a preview (links already familiar to us should appear) and save the page. Essentially, this page is the main (root) wiki page of your group. True, there is no special practical meaning in this difference from other wiki pages.
Go to your group's main page, reload it and see what happens. We recommend viewing your group from a mobile browser and from the VK application. You will notice that the arrangement of elements and the operating logic are slightly different everywhere. You need to have a good understanding of what belongs to what and where it is shown.
We learned that menus can be placed in two places. It is preferable to make it both as a pinned post and in the “Materials” section. Remember two things:
- The pinned post will be seen by 98% of your visitors, and only 25-40% of the most curious will get to the materials section, as well as loyal old users of your group who know that there is something useful there.
- A pinned entry with a picture to open the menu can be supplemented with text. This way you won't lose this pinned post feature. But you shouldn’t overdo it either: the more text, the lower the link to open your menu will be.
Wiki markup is not the most powerful tool and not the most convenient. Its functionality is very limited. In addition, it was developed at the dawn of the development of VKontakte and exclusively for its browser version on desktop computers and laptops. Therefore, its work in the application and on mobile devices is best described by the expression “as God wishes.” Unfortunately, there is nothing better in VK yet.
By the way. You can link from one wiki page to another. It works something like this: the user opens (for example, using a link image in a post) the first wiki page. And it contains links to other wiki pages. Clicking on these links will open the corresponding wiki page. In this way you can create quite complex and multi-level menus and, for example, instructions. However, we do not advise you to get too carried away with this unnecessarily.
Step #4. How to make a menu in a VKontakte group. Graphic
So, the basic principles have been mastered. Let's move on to designing a graphical menu. Let’s immediately say that we will create a fairly simple menu: a vertical row of buttons with links. But don’t rush to say “no, I wanted a super complex menu” and close this guide. Now we will explain why.
Firstly, moving from simple to complex is usually the most effective way to master new knowledge. By learning how to make a relatively simple menu, you will learn 90% of the techniques for creating menus for VK groups.
And secondly, as we have already said, VK wiki markup was introduced at a time when few people had even heard of mobile applications. Our conditionally “simple” menu will work as correctly and efficiently as possible everywhere: in the browser version of VK, in mobile browsers and, finally, in the application. Many “complex” menus cannot boast of this. Moreover, in most cases, a “simple” menu will work better than a “complex” one, which “falls apart” when viewed in the official VKontakte application. Most often, it is better to focus on this menu option. Yes, there are some pretty ornate menu implementations. You can experiment with them too. But our experience says that they will add virtually no real benefit - conversions, purchases and reputation. But there may well be problems.
Our test menu will look like this:

Just two buttons. The first will lead to the main page of Yandex, and the second will lead to the VK group “VKontakte Team”.
The vertical graphic menu in VK is an image cut into strips. These stripes are placed with markings one below the other on the wiki page. Some of these "lanes" are assigned links. When you click on such a link image, you actually follow this link. One page is one link. Some bands (for example, intermediate ones, which are located between points), on the contrary, are assigned the absence of a link. Such stripes become “unclickable”.
Making a vertical graphic menu for a VK group comes down to the following sequence of actions:
- The first thing you need to do is draw a menu. The width must be strictly 600px(pixels). We recommend making the menu no more than 900px in height. It is best to save the result in PNG format, or in extreme cases - JPG. Use drawing tools that are familiar and convenient to you (such as Photoshop or GIMP). The result here depends 95% on your creative and technical skills. Even if you don’t know how to use graphic editors at all, don’t despair. The skills that will be sufficient can be acquired in a maximum of a couple of hours. There is a huge amount of reference and educational information on the Internet. In addition, the ability to use a graphic editor at least a little is very, very useful for public administrators. You won't waste your time.
- Next, the picture with the menu is cut into horizontal stripes. You can do this in any way convenient for you: from the familiar Photoshop to various online services. If you have no idea how to do this, just ask your favorite search engine. We will not describe in detail the technical part of the cutting process: there are dozens of methods, some are suitable for some users, but not for others. When cutting, you must follow one simple rule: the height of one strip should not be less than 60px. Otherwise, you may have problems with displaying the menu in the application and in mobile browsers: so-called. "white stripes" between images.
- The cut "strips" are uploaded to the group album or album on the group admin page. We recommend the second option. In any case, an album with cut-out parts of the menu should be in the public domain. Otherwise, those users for whom album images are not available will not see your menu!
- Wiki markup code is compiled and inserted into the desired wiki page.
- The group contains a pinned post with an image link to a wiki page with a menu. We wrote in detail above about how such a post is made. In addition, the code (with minor changes) can be added to the root wiki page (the item to the right of the “Information” item appears when the “Materials” section is enabled. For more details, see above).
Now let’s look at loading parts of the menu and wiki code in more detail. We have prepared for you. It has two directories: “1” and “2”. The first contains parts of the most primitive and simple cutting option for our menu - into two parts. Download the archive, upload images (1.png and 2.png) from directory “1” to a new album (on your page or in a group).
We have two “strips”: the top (with the “Yandex” button) and the bottom (with the “VK Team” button). Both will be link images. In the wiki markup this is done with code like this:
"LINK"- this is the target link. For example, https://yandex.ru/. In addition to the usual external links can be an indication of a VKontakte object: post, user page or group. For example, so that after clicking a button there is a transition to the “VKontakte Team” community, you can specify both its address (https://vk.com/team) and a pointer to it (club22822305). In principle, there will be no difference. External links (those that do not lead to VK resources) we we recommend reducing by using
As you know, when a person reads or lands on a particular web resource, he or she pays attention to the design and interface for the first 8 seconds. At the same time, he makes sure of good or bad usability (ease of use). A menu in a group on the VKontakte social network, which we will talk about today and look at the principle of its construction using an example, allows you not only to colorfully present information and “distinguish yourself” from your competitors for the better, but also to identify exactly those items and make changes to them accents that are needed.
Just look at a few examples to understand how beautiful and convenient it is:


Let's get started. To begin with, it should be noted that if you want to make the menu yourself from scratch, then you will need all of the following information. If you already have a design, you can skip part of the article and go directly to its placement and wiki markup.
Menu design
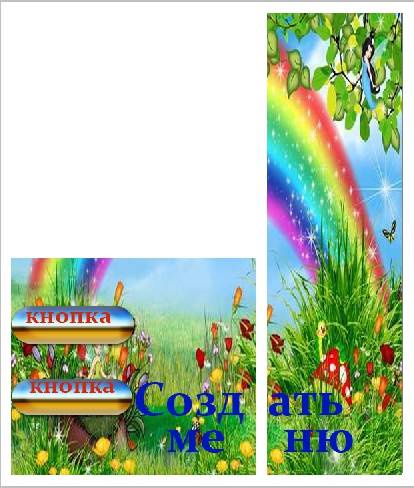
Allows you to complete the basis for a future project. To complete this part of the work, knowledge of a program such as Adobe Photoshop is welcome. This is what the size template looks like in which we will implement the future beautiful menu.

The width of the avatar is 200 pixels, the height is 500. The main menu image is 510*308. As a result, we will get such a beautiful “menu” at the end.


Please note that depending on the information written after the group name, the height of the picture on the right (avatar) may change, and accordingly, everything located nearby may shift!
This PSD layout source was implemented as an example. Download .
We will not focus on how the template was made; we will immediately begin preparing it for placement in a new or existing group. Open the file in Photoshop.
First of all, save the avatar. One of the ways to quickly save if everything in the file is structured and there are few elements (as in our case). Turn off the visibility of layers we don't need.

Go to the “Image” section and select the “Trimming” operation.

At the output we get:


If the resulting image is large, you can use the “Save for Web” tool. The command is also located in the "File" section.
We perform a similar operation with the image that will be displayed when the menu is initially displayed. In our case, we leave visible the “open menu” folder and the “menu background” in the “menu with car” folder. The result is:

Now you need to save and cut the second level of the menu. To do this, leave the “menu background” visible in the “menu with car” folder and add “Second level menu” to it.

Then we will use the “Cutting” tool, which can be found in the menu on the left.

We “cut” our picture into appropriate parts. In our case there will be three of them.

This completes the preparatory part. Let's move on to the main stage.
Wiki markup of the finished menu on VKontakte.
First of all, you need to upload a group photo or avatar by clicking on the link of the same name and selecting the file we need.


Then be sure to perform the following sequence of actions. Go to “Community Management” and in the “Sections” item opposite the “Materials” button, select “Restricted”.


This must be done so that users and group members cannot change and/or edit additional items, including menus.
After the operation is completed, we upload our cut pictures to the community album.

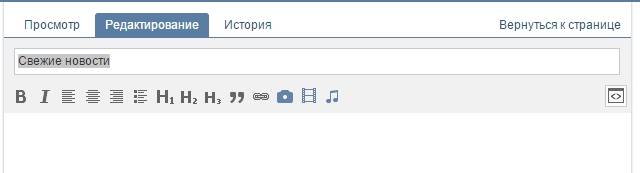
Go to the “Latest News” section, select “Edit” and get to the editor menu.


To speed up the process, use the “Camera” key and click “Select from community photos.”


After adding, go back to the editor menu and press the “<>", in which we will make further editing. We also immediately rename the section and instead of “Latest news” we write in our case “GROUP MENU”.


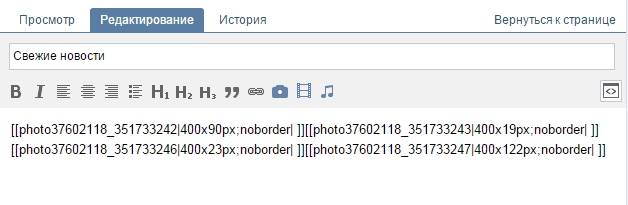
The general structure of each sliced part looks like this in the markup - [], where:
id – identifier (number) of the picture you uploaded;
X and Y – horizontal and vertical image size in pixels;
Looking at the template, we edit our wiki markup and periodically go to the “Preview” section, which visually displays the changes we have made.
All images must be closed with a tag at once (and not, as is the default, each image)


Since we have already left the tag centering the image alone, in order to get rid of the “unpleasant” distances between parts of the overall image, we should insert the “nopadding” tag as follows: []
This is what happens in the end.


Now you should click on the “GROUP MENU” tab, then “edit”.

Important! To copy the required address, in our version, click on the “GROUP MENU” and copy the “correct link” from there.


Go to the main page and click “Add entry”. Don't forget to immediately change the author of the post!


Click on the “ellipses” to the right of the entry and click on the “Pin” tab.

After that, refresh the page and enjoy the resulting result, which looks like this:

When you click on "Open menu".

As you can see, making a menu on the VKontakte social network is quite easy and simple. It is enough to have a light level of knowledge of using Photoshop and wiki markup. The better and more intuitive the design, the more willing and often the potential user will come and return to your group.
If you want a truly unique and stunning group design in compliance with the corporate style and accompanying elements, then contact a professional designer, or you can test the scope of your talents yourself. Good luck to you in all your endeavors!