How to get the most out of your SSD - a quick guide. Fine-tuning an SSD drive - optimization guide
Currently, an ever-growing number of Windows and other OS users choose SSDs as the main storage devices in personal computers and laptops. This is due to the large number of advantages of this technology:
- high speed of functioning of the Windows operating system and applications in comparison with conventional HDDs;
- low power consumption and noise even at maximum load;
- high fault tolerance under overloads and adverse external conditions;
- optimization of the latest versions of Windows and non-Windows-like systems for working with SSDs.
But besides the obvious advantages, there are also some disadvantages of this type of media:
- high cost compared to the price of classic HDDs;
- limited number of rewrite cycles, which reduces the “lifetime” of the device;
It is obvious that this type of media will become increasingly widespread. Therefore, we provide a detailed sequence of steps for installing the Windows operating system on an SSD.
Preparing your computer and media for installing Windows
 Before using the SSD, make sure that its antistatic packaging is not damaged. Otherwise, the static voltage generated during operation can not only damage the stored information, but also damage the media. Avoid touching connectors or exposed parts of the drive.
Update your motherboard's BIOS to the latest version available and make sure the SATA mode is set to AHCI. At this point, the preparatory stage of setting up the system moves to the next stage.
Installing media into your computer
 When installing it in a personal desktop computer case, you must take into account the fact that the SSD drive has a 2.5-inch form factor. This means that it is necessary to have a suitable compartment in the design of the system unit rack or to use special mounting brackets and screws. It’s worth adding right away that unstable fixation of the SSD is highly discouraged, because Strong vibration can reduce the life of the device.
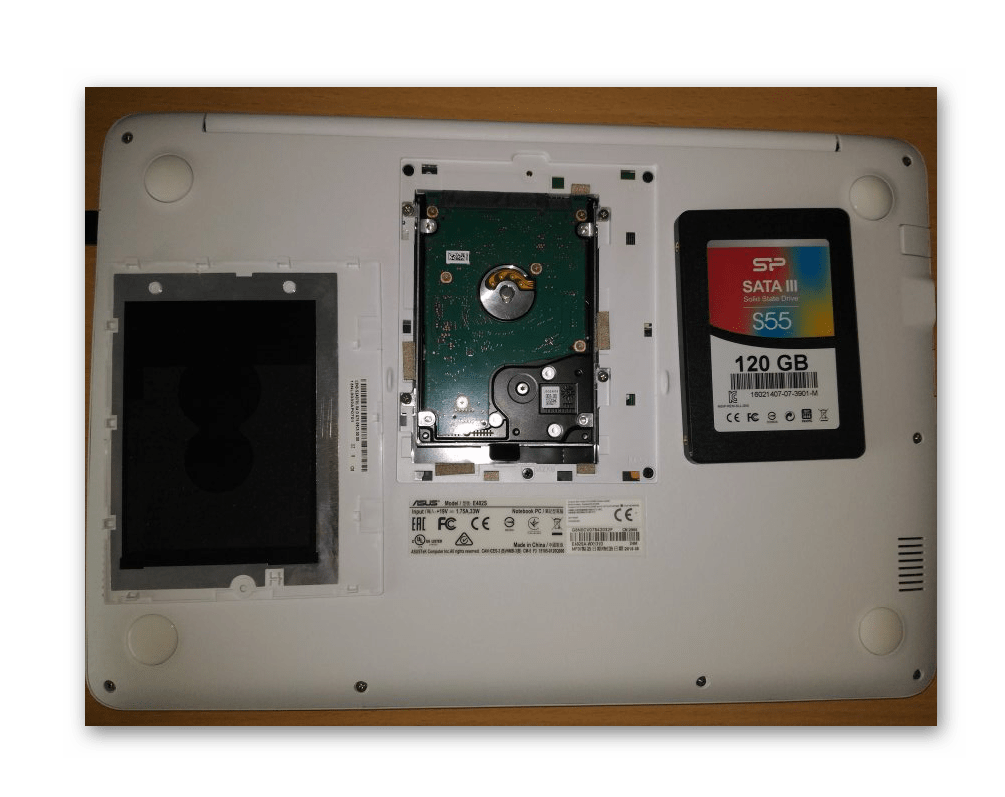
If you own a laptop, the mounting process will become much easier, since compact devices use storage media of exactly this form factor. So installing a new SSD will be limited to switching contacts from an already used disk.
In any case, after fixing the disk, you need to connect it. Two cables are used for this. The first is the power cable and comes from the power supply. For user comfort, this cable is equipped with a notch mount that will reduce the likelihood of incorrect connection. If your system does not have a suitable wire, you can purchase an inexpensive “adapter”.
The second cable is a signal cable and is used for data transmission. Most modern SSDs use a SATA connector, which is also equipped with a notch for proper connection. One end of the cable is plugged into the data carrier connector, the other into the motherboard. Before purchasing an SSD, make sure your motherboard has SATA connectors as there are no data cable adapters available. 
Connect the power cables and turn on the computer. At startup, the BIOS recognizes the media and you can proceed to the next step of the instructions. Otherwise, check that all steps of this algorithm have been completed. If, after reconnecting, the media is not recognized by the system, then there is a high probability that the device is incompatible with your motherboard or that one of the devices is faulty.
Installing Related Software
You can proceed directly to the installation of the Windows operating system. There are practically no special features of this process from installing software products on the HDD. The steps are almost the same, starting from formatting the disk, etc. The only important thing is to correctly configure the BIOS settings. After the computer starts and the system recognizes all components, you must select the device from which information will be read before installation. This can be a CD or DVD, or a bootable USB flash drive. To select, you can use the BootMenu (keys F10-F12 depending on the brand of the computer) or select the required SSD media as the first device in the BIOS settings. 
Next, we carry out the standard steps for or another operating system - step by step we follow the instructions of the installer program (formatting the media, selecting regional settings, etc.). An important point: if you install the system on a completely new disk, it will not be divided into logical partitions. In this case, you need to think in advance about how best to do the partitioning and perform this operation in the installer at the stage before formatting.
More interesting for the user may be the option of cloning an existing operating system onto a new medium. This method is very convenient, since SSD media are highly integrated with the system and will allow the operating system to start without problems. The latest versions of the tools allow you to clone a wide range of versions of Windows and other systems. To carry out this operation, it is convenient to use a tool such as Acronis® True Image HD.
To run it, you need to use a boot device, but the operating algorithm itself is very simple. Select on the “Tools and utilities” tab > Click the “Clone disk” button (Quick cloning in some translation options) > Select “Automatic (recommended)” to activate the quick system cloning mode. During operation, the program will automatically format the media. For more accurate copying, it is recommended to specify the operating system type, up to the Windows version. Select the source disk (HDD) > Click the “Next” button, then select the target disk (SSD) > Click the “Next” button. After rebooting the system, you can start Windows from the solid-state drive.
Notes for various operating systems
Modern users pay great attention not only to Windows, but also to other operating systems. Let's look at the features of installing them on a solid-state SSD drive.
- MacOS. While holding down the Optoins button in the menu item, open the system boot window. To run installation on an SSD, you may need to additionally specify the target media type. In some driver versions, this media type may be recognized as FDD or HDD. Therefore, it may not be selected as the first device. The disk will be formatted before installing the OS.
- Unix systems. When installing the operating system, the hard drive will be formatted. Therefore, in case of switching from Windows, it is recommended to copy important information to a third-party independent medium.
Related posts:

Connecting various devices to a computer is difficult for many users, especially if the device must be installed inside the system unit. In such cases, the multitude of wires and various connectors is especially intimidating. Today we will talk about how to properly connect an SSD to a computer.
So, you purchased a solid-state drive and now the task is to connect it to your computer or laptop. First, we'll talk about how to connect the drive to a computer, since there are more different nuances here, and then we'll move on to the laptop.
Connecting the SSD to the computer
Before connecting the drive to the computer, you should make sure that there is still room for it and the necessary cables. Otherwise, you will have to disconnect some of the installed devices - hard drives or disk drives (which work with the SATA interface).
Connecting the disk will take place in several stages:
- Opening the system unit;
- Consolidation;
- Connection.
At the first stage, no difficulties should arise. You just need to unscrew the bolts and remove the side cover. Depending on the housing design, it is sometimes necessary to remove both covers.

There is a special compartment for mounting hard drives in the system unit. In most cases, it is located closer to the front panel; it is almost impossible not to notice it. SSDs are usually smaller in size than magnetic disks. That is why they sometimes come with special slides that allow you to secure the SSD. If you don’t have such a sled, you can install it in the card reader compartment or come up with a more clever solution to fix the drive in the case.

Now comes the most difficult stage - directly connecting the disk to the computer. It takes some care to do it right. The fact is that modern motherboards have several SATA interfaces, which differ in data transfer speed. And if you connect your drive to the wrong SATA, it will not work at full capacity.

In order to use the full potential of solid-state drives, they must be connected to the SATA III interface, which is capable of providing data transfer rates of 600 Mbps. As a rule, such connectors (interfaces) are highlighted in color. We find such a connector and connect our drive to it.

Next, all that remains is to connect the power and that’s it, the SSD will be ready for use. If you are connecting the device for the first time, then do not be afraid of connecting it incorrectly. All connectors have a special key that will not allow you to insert it incorrectly.

Connecting an SSD to a laptop
Installing a solid state drive in a laptop is somewhat easier than in a computer. The difficulty here is usually to open the laptop lid.

In most models, the hard drive bays have their own cover, so there is no need to completely disassemble the laptop.
We find the required compartment, unscrew the bolts and carefully disconnect the hard drive and insert the SSD in its place. As a rule, all the connectors here are rigidly fixed, so to disconnect the drive, you need to move it a little to the side. To connect, on the contrary, slightly move it towards the connectors. If you feel that the disc is not inserted, then you should not use excessive force; perhaps you are simply inserting it incorrectly.

Ultimately, having installed the drive, all that remains is to securely fix it, and then tighten the laptop case.
Conclusion
Now, guided by these short instructions, you can easily figure out how to connect drives not only to a computer, but also to a laptop. As you can see, this is done quite simply, which means that almost anyone can install a solid-state drive.
When replacing an HDD with an SSD, you can either transfer the existing OS from the old drive by cloning it or install a new copy of the OS. Disk cloning requires assigning a partition at least as large as the source, and SSD drives are typically smaller than hard drives, so you need to back up and remove unnecessary files from the source.
On your computer, connect the SSD to the SATA slot, leaving your HDD connected. Also, replace the HDD with an SSD, and then connect the HDD to your computer as an external drive. The USB drive converts the drive's SATA connector to USB format so you can use it as removable storage. Boot from the external drive, select Temporary Boot Options or a similar option in the BIOS splash screen, and then select the external USB hard drive from boot options.
Cloning the boot partition
Before cloning your hard drive, defragment it using a disk defragmentation and optimization tool. Select the partition, then click the Analyze and Optimize button and defragment the disk if necessary. Next, you need to shrink the partition to fit the new drive using the Disk Management utility; Press the “Windows” key, type “diskmgmt.msc” (without quotes) and press the “Enter” key to open it. Right-click on the partition, select “Shrink Volume” and then, in the “Enter the Amount of Space to Shrink in MB” field, enter the number of megabytes to remove everything unnecessary from this partition so that it is suitable for an SSD. Transfer files to the new SSD using a disk cloning program such as Clonezilla, EaseUS Todo Backup or Acronis. Each of these programs works differently, but they all include an option that directly allows you to transfer files from the old drive to the new one. Select this option from the main menu, and then select your source and destination drives when prompted.
OS installation and fine tuning
When you don't have many applications installed on your HDD, installing a fresh version of the OS is a little easier than cloning since it doesn't require any additional software. Installing an OS on an SSD is no different from installing it on a hard drive, but when using an SSD drive as a boot drive, some minor settings are required. Enable the Enhanced Host Controller Interface for the SSD by opening Regedit and selecting the following directory:
HKEY_LOCAL_MACHINE\SYSTEM\CurrentControlSet\services
Click the “msahci” button, then click the “Start” button twice and make sure that the DWORD type parameter is set to 0. Confirm the same Start DWORD parameter in the pciide directory. Restart your computer and go into the BIOS, then select “Storage” or similar in the BIOS. In your SSD storage options, select “AHCI” so that Windows recognizes the drive as an SSD. Before exiting the BIOS, open the Boot Options menu and follow the on-screen instructions in Boot Order to install the SSD first.
Optimizing your system
After loading Windows onto the SSD, open Defragment and optimize your drives, and then select Your SSD from the menu. The applet displays the SSD next to the drive letter because Windows recognizes it as an AHCI device. Windows doesn't know whether to defragment it or not, which shortens the life of the disk by making unnecessary writes and erasing bytes. Instead, Windows automatically turns on the Trim feature to optimize SSD performance. Trims are special commands that the OS sends to your SSD to compensate for the difference in how the SSD and HDD process data. SSD data is processed instantly, except for a few seconds or minutes, the HDD needs time to move its mechanical head to search for blocks of data that become fragmented as the disk spins. The disadvantage of using it as a boot SSD is that after writing and deleting data, 10,000 to 100,000 times, the flash memory degrades and no longer stores data. To extend the life of your SSD drive, store documents, media and other files on a HDD with large storage capacity.
The installation of solid-state drives by default on laptops and computers has only recently begun, and a device purchased just 1-2 years ago is most likely equipped with a regular SATA HDD. This option is also not bad - especially if the SATA III interface is used, but conventional hard drives are not capable of providing maximum performance.
What you will need to install an SSD drive
A user who wants to speed up access to information will need:
- Increasing the speed of working with data;
- Reduced energy consumption and weight (important for laptops);
- No need to defragment the disk.
Tip: If the computer is old enough (single-core processor, less than 4 GB of memory and the motherboard was released 5-6 years ago), there is no point in installing an SSD. In this case, even updating the hardware will not help speed up the system. And you will have to change the entire device.
Installing an SSD on a computer
The standard size of a solid state drive is 2.5 inches. 3.5-inch versions were also produced, but due to the fact that they were most often installed on laptops, only the smallest drives remained (including 1.8-inch and M2 formats). This means that for installation on a PC, an SSD requires the use of so-called sleds, or racks - devices for securing the disk inside bays designed for standard HDDs and disk drives. And, although, thanks to the light weight of the solid-state drive, it weighs little and can only be mounted on one side of the system unit case, you should not do this - it is safer to purchase a small adapter from 3.5 to 2.5 inches.
Installing the disk is carried out in several stages:
- The computer turns off;
- The power supply is turned off using a button on the back of the system unit;
- The power button is pressed and held for several seconds. In this case, a de-energized computer will naturally not start, but static electricity will be removed from the motherboard and other parts;
- The PC case is disassembled (usually only one panel is removed for this, most often the left one, but sometimes you have to disassemble the system unit almost completely;
- The SSD is installed in place (for a PC, it is not necessary to remove the HHD already there) using a sled adapter and secured with screws. Fasteners are included with the device;
- The installed disk is connected to the motherboard via a SATA cable and the corresponding slot on the motherboard;
- The disk and the computer's power supply are connected;
- Assemble the system unit and configure the SSD.
As a rule, maximum performance of the drive will be ensured only when it is connected to a SATA 3.0 connector or higher at speeds of up to 6 GB/s. On the board it is usually distinguished from others by its black color and markings. If there are no designations for SATA 3.0, you should read the documentation for the motherboard.
It is worth noting that SSD drives do not tolerate heating to high temperatures. Therefore, when adding a new drive, it is worth taking care of improving the cooling system. To do this, you can provide, for example, an additional cooler measuring 80x80 or 120x120 in the side of the system unit. Such a fan will perfectly cool not only a solid-state drive, but also a regular drive.
Setting up work
After installing the disk, you first need to configure the media for optimal performance and increased service life:
Go to BIOS (or UEFI) by one of the methods available in your operating system. The easiest way to do this is for Windows 7 by pressing the function key during reboot (different motherboard or laptop manufacturers use different letters);
Install the SSD drive first in the list of devices (if it is not the only drive);
- Save changes and restart your computer.
Now you can either transfer the system to a solid-state drive so as not to install it again. Or leave the old OS if the SSD will not be used as a system drive. When choosing the first option, you should use either the built-in Windows tools (they are available in systems starting from version 7 and higher) or applications such as Acronis True Image. In the second case, when the system remains on the HDD, the same hard drive should be left first in the boot list in the BIOS.
Installation on a laptop
Installing SSDs on a laptop is slightly different. First of all, due to the fact that there is less space inside the laptop computer case and, most likely, to connect a second drive the user will have to remove the first one. But after installation, the laptop will work faster, and the battery life will practically not decrease, even if you reconnect the old HDD.
To install, the user will need a standard SSD and a drive adapter. The main installation steps include:
- Turning off the power to the laptop (by removing the battery);
- Open the back cover and carefully remove the HDD. In this case, the cable and power cord are disconnected;
- Installing an SSD drive in place of the hard drive with connecting a cable;
- Installing HDD using an adapter;
- Returning the laptop lid to its place;
- Turning on the laptop and setting up the system.
HDD installation
It is advisable to install the hard drive back in cases where the system remains on it. Or, if the size of the SSD is not sufficient to accommodate all the necessary information, and the solid-state drive itself is used to store only system files and the operating system. At the same time, the data transfer speed of the optical drive is quite sufficient to support the operation of the HDD. But it will no longer be possible to ensure the effective use of SSDs in this way. Therefore, a standard laptop hard drive is inserted into the adapter, and the drive is removed - especially since today it is practically not used.
The adapter for connecting the HDD is selected according to the thickness of the drive, which can be equal to 12.7 or 9.5 mm. Next, the following actions are performed in turn:
- The drive is installed inside the adapter;
- The optical drive is removed from the laptop (in most models it is held on by one screw). To do this, you need to open the drive (usually it is enough to press a button with a thin needle inside a special hole on the panel in front of the button;
- The panel is removed from the drive tray and installed on the adapter so that replacement does not affect the appearance of the device;
- The hard drive in the adapter is placed in place of the drive;
- The screw that now secures the HDD is tightened.
System setup
After replacing the hard drive and installing the solid state, the system should automatically detect the type of new device and install all the software necessary for it. Another utility like Migrate OS to SSD may be needed if you need to move the operating system from an old disk to a new one. Now you can move on to the main steps to optimize the system. These include:
- enabling the TRIM function;
- disable automatic disk defragmentation;
- prohibiting indexing of files and allowing their caching.
The TRIM function, necessary in order to promptly detect the space remaining after deleting files, has been included in Windows since version 7. If it is disabled, disk performance will degrade over time.
To check if the function works, open a command prompt as an administrator and enter the fsutil behavior query disabledeletenotify command. If the result is 1, then TRIM is not working. You can enable it by calling the line again and entering fsutil behavior query|set DisableDeleteNotify = 0.
Disabling defragmentation
Defragmentation is a completely unnecessary feature for SSD drives. Moreover, in some cases, frequent execution of the process can even reduce the life of the drive. To prevent this from happening, defragmentation is disabled using the Run menu (Win+R) and the dfrgui command. In the window that opens, schedule optimization is disabled.
You can enable caching, which allows the disk to process files faster, by entering the devmgmt.msc command in the Run menu. This will open Device Manager, where you can open the properties of the desired drive and enable file caching in the policies tab.
Disk operation prevention
After installing a new disk, improvements in system parameters can be seen immediately after booting. Especially if the SSD is selected as the main drive and the system boots from it. First of all, the loading time is reduced, and secondly, the disk performance index increases almost to the maximum value.
However, in order for the disk to last as long as possible, you should adhere to certain rules for its use:
- to increase the resource on the SSD, you should leave at least 10–15% of free space;
- During use, you should make sure that the latest drivers for the drive are installed in the system. They are usually found on the manufacturer's website. Most often, with each new firmware, the number of drive capabilities is updated and its service life increases;
- Do not exceed the recommended amount of information rewritten in one cycle. For different SSD models, this volume reaches from 10 to 33% of the total;
- To check the disk resource, you should periodically run programs to detect errors and the number of hours already worked - such as SSD Life.
We have talked about the many advantages of so-called solid-state (SSD) devices many times. Switching from a classic magnetic disk to an SSD will speed up your computer to such an extent that the difference will be noticeable, so to speak, with the naked eye, that is, without the help of specialized tests. We are talking about super-fast file copying, instant launch of the operating system and applications, including heavy-duty games and graphics programs such as Adobe Photoshop.
And despite this, many users are still wary of taking this extremely beneficial step. They have their rationale, of course, rooted in some still unresolved weaknesses in SSD technology. However, with careful planning and the willingness to invest a little personal time and effort, they can be easily neutralized. Here's how.
Divide and conquer
It's no secret that in order to get the most out of an SSD device, it must be used as a system drive. In other words, the operating system must be installed on it.
When running, Windows (and any other operating environment) makes a large number of accesses to the system disk. Thanks to its high speed, an SSD disk can reduce the time of these calls several times and speed up the overall system performance significantly.
Unfortunately, the lightning-fast response of this class of drive still comes from the prohibitive price per gigabyte of space. As a result, most users get a device with very high speeds and relatively limited (by modern standards) capacity - often ranging from 120 to 250 GB.
This is further complicated by the fact that the performance of an SSD gradually decreases as its capacity is filled. This is due to the specific features of the technology for recording and storing information that is used by this type of disk. Therefore, to get the most out of a solid-state drive, it is recommended to keep at least 30-40 percent of its capacity unused.
Most operating systems, and especially Windows, love to write whatever they want to the system partition. As a result, if you let the operating system decide where to save files and install applications, you may receive a warning that there is not enough free space on the system disk.
It makes the most sense to install on the SSD only the operating system (Windows) and a few important programs that you work with every day - say, Microsoft Office, Adobe Photoshop, Skype, antivirus software. But in this case, a reasonable question arises: “Where should I keep everything else?”
One possible option is to connect a regular hard drive in addition to the SSD. This is an ideal solution for bulky programs and files, which, however, do not necessarily need the high speeds provided by an SSD. This may include a collection of music files, digital photo albums, and films in digital format. If you are an avid gamer, then this can be most games. In principle, you can install only the game you are currently playing with on the SSD, and leave the rest of the collection on the HDD.
But what if you have a laptop and its design does not allow installing a second drive? In this case, you can save your files and install applications on your external hard drive. If using a bulky HDD seems far from the most practical solution, then use a USB flash memory. Today the market offers models with impressive volume and super-compact sizes that are incredibly small and almost invisible when connected to a laptop’s USB port.

Of course, there are certain inconveniences in storing some information on external media, because you must always carry it with you. If you forget a USB flash drive or external HDD at home, you will forget everything stored on it.
Move programs
Now that you know the pros and cons of storing files on an SSD and an additional drive, it's time to say a few words about how to put it into practice.
The easiest and fastest way is to select an alternative drive instead of the default location during installation of the corresponding application (usually the Program Files folder on the system drive). But how can you move already installed programs without wasting valuable time reinstalling them?
Some applications, such as Steam (a client that manages a library of games distributed through Valve's digital service of the same name), offer a simple and fast solution for just this. In particular, Steam allows you to move all your installed games with a few clicks.
Just open the settings menu, find the “Downloads” section, click on the “Steam Library Folders” button and, instead of the default system partition, specify a new location. The Steam Agent will take care of the rest of the work and move all downloaded and installed games to the new location you specified.

Unfortunately, not all installed programs can be moved as easily, and if you simply copy their folder to another drive or partition, they may no longer work correctly, or stop working altogether. Fortunately, Windows has a solution to this problem - so-called “symlinks”. They are created using a special system command, and their purpose is to “trick” Windows that the program is installed on a certain (disk) partition, when in fact it is located on something completely different.
Let's say you have a program installed in the C:\Programs folder. Move it to another drive in a folder with the same name: D:\Programs. The mklink command, which works on the command line, will help you create a symbolic link between two folders. In our specific example, the command would be:
mklink /d C:\Programs D:\Programs
After executing the command, Windows will have a symbolic link between the two folders, i.e. the program will be on the D: drive, and the operating system will think that it is on the C: drive.
Move system folders
As you know, Windows organizes all user files in special folders called Libraries. They are designed to store music and video files, digital images and documents.
Although by default these folders are located on the system drive, they can be easily moved to any drive and even to external media.
As already stated, this is an extremely simple operation. Locate these folders on your system drive where they were created by default during Windows installation (C:\Users\Username). Then right-click on the one you want to move, select Properties, Location, Move and select the directory where you want to move the folder. After doing this, the moved folder will still appear in C:\Users\Username, but any files it contains will actually be written to the alternate drive you specified. Using this simple sequence of steps, you can move all the Libraries folders - Music, Videos, Pictures, Documents and Downloads.

Keep it clean
Moving non-essential files and applications is a big first step, but it's not at all sufficient if you want to keep at least 30-40% of your SSD's capacity idle. Once you start actively using it, it will slowly but surely become filled with files, some of which are completely unnecessary. We are mainly talking about temporary files created while various programs are running, which are not always deleted after they are closed; browser cache and unzipped installation files.
For example, two large, competing companies that produce graphics processors - AMD and NVIDIA - regularly release updated versions of their drivers. They can be downloaded and installed automatically, but not all users know that before this they are written to a special folder on the system drive - usually C:\Nvidia or C:\AMD. Over time, the size of this folder increases significantly, since new versions are released almost every month, and each of them weighs several hundred megabytes.
As for other causes of “disk contamination,” they can be easily eliminated using a small but very useful and completely free program, which I have already mentioned several times on the pages of the site. It scans and removes from the disk all unnecessary temporary and spooled files, old system libraries, outdated operating system archive records, and more.
If after all this you find that your SSD space is still low, check what exactly is taking up space using another small and free tool: WinDirStat. It will tell you who is the culprit of occupied valuable gigabytes.
Limit the number of entries
Besides the high price per gigabyte, there is another reason why many people are still reluctant to consider solid-state drives - their relatively limited lifespan. The technology on which they are based provides a certain number of rewrite cycles, after which the flash memory chips from which the SSD is made wear out and the device stops working. However, SSD manufacturers are constantly trying to increase their lifespan and have recently made significant progress in this regard.
A recent independent study by Tech Report proved that even budget SSD drives can easily provide 1 PB recording, i.e. 1 petabyte or 1000 terabytes. This is 4-5 years of uninterrupted operation - an indicator by which current-generation SSD drives are fully comparable to hard drives, which usually have an active life of about 6 years.
However, it makes sense to take some precautions to minimize wear on the disc and ensure its longevity.
For example, you can limit the number of writes to it by simply preventing certain programs (all browsers and tools such as Adobe Photoshop) from using the disk buffer. To do this, you need to enter the settings menu of the corresponding program and specify an alternative partition or disk for recording temporary files (cache).
Do not defragment your SSD under any circumstances! This is not only unnecessary, but also a dangerous operation that can shorten the life of the disk.
Defragmentation is a remnant of another technological era and a system for organizing files on a hard drive. For SSD technology, which already provides several times higher file transfer speeds, defragmentation becomes completely unnecessary and even dangerous, since this process involves multiple read and write cycles, which, as already mentioned, can significantly reduce the lifespan of the solid state drive.
Have a great day!