How to make a table in Word online
Creating a table in Microsoft Word is not difficult. However, for some reason, many users try to insert Excel tables into a Word document! But Microsoft Word has its own tables! You can quickly and beautifully insert them onto the document page! How to do this?
Inserting a table in Word 2010 and later
Place the mouse cursor on the page in the place where you want to insert the table. Go to the tab Insert press the button Table.
First way
In the window that opens, move the mouse cursor over the grid and select the required number of cells in the table. In this case, a table with the specified number of cells will be displayed in the document. As long as you have not left-clicked the mouse, its dimensions can be changed by simply moving the cursor in area 1 (Fig. 1). Having selected the desired dimensions, fix them by clicking the left mouse button. And the table will be inserted into the document. If you need more rows and columns, you can add them later or use method 2.
Second way
On the menu Table select a team Insert table(highlighted with orange frame)

Rice. 2
A window will open in front of you Inserting a table.

Rice. 3
In this window you need to enter Number of columns And Number of lines future table. After you specify the number of columns and the number of rows, click OK
The table will appear on the page:
 Rice. 4
Third way
On the menu Table select a team Draw a table(in Fig. 2). The cursor will take the form of a pencil and you can use it to draw a table to suit your taste.

Rice. 5
All of these methods are available in other versions of Microsoft Word. There is a slight difference in the old version of Word 2003. There the call is carried out like this:
In Word 2003 (Word XP), in the menu Table(circled in red pencil in Fig. 6) select: Insert ==> Table(underlined in red pencil).

Rice. 6
Changing tables
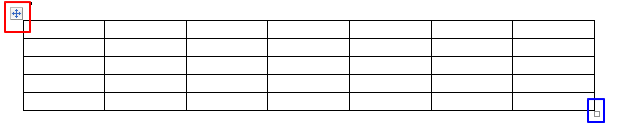
You can change the size of the table by dragging the square in the lower right corner of the table (circled in blue pencil in Fig. 4). You can select the entire table by clicking on the square in the upper left corner of the table (circled in red pencil).
But, more often you will have to do actions on one row or column.
How to select a column? Move the mouse cursor over the table, closer to the top edge of the table. As soon as the cursor turns into a small black arrow (Fig. 7), click on the mouse button and the entire column under this arrow will be highlighted (turn black). If you, without releasing the left mouse button, move the black arrow to the right or left, other columns next to each other will be highlighted. Release the button - the columns will remain selected.

Rice. 7
Now you can do with the text in the selected column all the actions that we covered in the lesson Formatting text in Word - you can change the alignment of the text in the column (center, right, left), you can change the color, font size, etc. .
But in order to clearly see the results of your actions, fill out the table first. After this, practice and develop your skills in working with MS Word tables.

Rice. 8
We learned how to select columns. How can you select rows in a table, you ask?
It's not difficult either. Move the mouse cursor to the left of the table. As soon as it turns into an arrow pointing to the right on the table, press the left mouse button. The line to which the arrow points will immediately be highlighted (see Fig. 8).
If you now, without releasing the mouse button, move the cursor down, other lines will be highlighted. Release the button - the lines will remain selected. You can format the text in the selected rows of the table.
In addition to actions on text in the table, you can perform actions on the rows themselves: delete rows, add rows, merge selected cells, and so on. All this can be done through the menu Working with Tables - Layout(see Figure 8).

Rice. 8
Go to the Layout tab and select the desired action. Just don’t forget to first select the rows or columns that you will “mock”.
Although, it can be made simpler. Select the line and then click right mouse button. will appear context menu with all the actions you can do on a line (see Figure 9)

Rice. 9
Please note that the content of the context menu is different, depending on what you have selected - a row, a column, or the entire table. Select the desired action from the context menu and see the result.
This way you can format the entire table. Align rows or columns centered, right, or left. Highlight the text with color or make it bold. You can change the font size, etc. You can also add rows or columns, merge cells, etc.

Rice. 10
As a result, the table may look like mine in Fig. 10. Oh, you can do it differently, as you like.
A special Excel editor has been developed for working with tables, but it is not necessary to understand such a difficult method in order to create a simple table. You can make a table in Word quite simply and quickly, without any special obstacles and at the same time save a lot of time. There are several ways to create a table; we will consider each separately and provide visual drawings.
Creating a table in Word 2007, 2010, 2013 and 2016
In the latest versions of Microsoft Word, the functionality is not very different from each other. Therefore, let us first analyze the improved versions of the program. So, to make a table, you should follow the step-by-step instructions, after selecting the appropriate option.
Limited table size 10ˣ8
Creating a table without size restrictions
If you have to draw a complex table with a huge number of columns and rows, then this method will be relevant. The following steps need to be taken:


The maximum number of columns is 63, and the number of rows is more than 1001.
Drawing a table with a pencil
For creative types, there is a way to have fun while creating a table. You will have to draw the table with a pencil. Here's how to do it:


Excel table style
If necessary, you can create a table as in Excel, with identical styles. To do this, you need to take the following steps.

Express tables
The advanced functionality of the Word text editor allows you to build a beautiful diagram using express tables. All you need to do is open the “Insert” tab. Next, click on the “Tables” and “Express Tables” icon. Now select the desired option from the drop-down list.
Once you have an understanding of what a table processor is, you can begin to create a simple table in Excel.
But first, let's learn how to rename and save the file in which we will build tables.
What is a book and a sheet
The Excel workspace is a workbook that consists of three sheets by default. Their number can be easily changed, but this will be discussed in another article. Now our task is to figure out how to save an Excel sheet and rename it. Initially, all sheets are named: Sheet1, Sheet2, Sheet3. Move the mouse cursor to the lower left corner, to the name of the sheet, which is now our work area, and call the context menu using the right button.
In the menu that appears, select “Rename”. 
Now instead of Sheet1 you can write any name.
To save the renamed file, click on the “File” tab, save as, select the drive and folder in which we will store our sheet. 
In this way, the entire Excel workbook is saved with any changes in it. How to save an Excel sheet separately from a workbook is a completely different story.
How to create a simple table in Excel
You can start creating a table in Excel 2010 in two ways:
- draw borders, then fill the cells with information;
- enter all the data into the table, then select all its boundaries.
How to create a table in Excel by drawing the necessary borders? It's easy to do. Hold down the left mouse button in the desired location and drag the frame in the desired direction, capturing as many cells as needed. 
There are several ways to draw lines:
Filling out and formatting the table
All that remains is to fill our table with data and give it a finished look. To enter text or numbers into a cell, left-click in the desired place and type the data, press Enter, the cursor will move to the next cell. You can also change or supplement data in the function selection field. 
You can highlight the header, make its background colored, enlarge or change the font. All actions are faster to perform using the same ctrl+1. As a result, we get such a neat and expressive table. 
Video of creating an Excel table:
tvojkomp.ru/kak-narisovat-tablitsu-po-razmeram/Tabular data is often present in text documents to more clearly display some indicators. And the overall perception of the information posted there depends on the correct formatting of the table. Today we’ll figure out how to draw a table in Word based on the size of its columns and rows.
Before creating a table, you need to decide on the number of rows and columns. Next, select the appropriate page orientation. For a wide table, it is preferable to choose landscape, for a narrow table, portrait.
Insert a table with a given number of cells in any way convenient for you. About methods of inserting tables.
Setting the exact size of the table
The next step will allow us to set strict external dimensions of the table.
You must click inside the table to activate the ability to work with it. If you did not specify any additional parameters when inserting a table, then it will be stretched across the width of the entire available text area (in the area of the white scale of the horizontal ruler), and its columns will be automatically aligned in width.To indicate the exact dimensions, go to the tool feed.
In the window that opens, on the tab Table Check the checkbox (indicated by the arrow) and write down the desired table width. Click OK.
/>
If you cannot change the width of the columns to the desired size and when changing the width of one, the width of the other changes, then unchecking the check box will eliminate this inconvenience.
Now the external dimensions of the table will be limited. You will only be able to influence the width of the columns within the table.
Setting the line height
To set row heights throughout the entire table to be the same, select it. Next, in the toolbar, select Working with Tables – Layout – Properties.
/>
In the dialog box, go to the tab Line put a tick in the height checkbox and indicate the required row height and mode (marked with a red frame). Minimum– will set the minimum value for all rows. The maximum height will be limited only by the contents of the cells. Therefore, the height of the rows in the table will vary, as it depends on the content of information. If you want to strictly limit the row height, then set the mode Exactly.
To set the dimensions for one line, just right-click on it to open the context menu. From which to select a team Table properties to set the parameters of the specified line.
Setting the width of the columns
To specify the size of a column, right-click on any cell in it and call up the table properties. Go to the tab Column, set the required width size and click the button Next column or Previous column, move on to specifying the size of other columns in the table. Then click OK.
/>
Now your table will strictly correspond to the specified dimensions.
We hope that the article was useful to you. Watch the video on how you can arrange the pieces and take a screenshot of the position using the Scissors program, which is included with the Windows operating system version 7 and higher.
Word's capabilities are incredibly powerful. Sometimes you can be amazed at what you can't do in this program.
Instructions
Execute table possible in many programs. These include many text and graphics programs, special spreadsheet programs (for example, Excel), and a visual editor. Having understood the principle of its creation, you can easily cope with the task in any of them. Let's try table in Word. By selecting the first item in the “table” menu “draw table", open the "Tables and Borders" window.
At the top of the window there are buttons “draw” table" and "eraser" (to erase unnecessary things).
The center shows the line used to draw the table and its size. By clicking on the triangle on the right, select the line type (solid, dotted, dash-dotted, double, triple, etc.) and thickness.
At the bottom of the window there are formatting buttons (merge/split cells, centering, aligning rows and columns, and others).
Click on the main “draw” button table", the cursor will change (take the shape of a pencil). Everything is ready for drawing.
Standing in the upper left corner, move the cursor down and to the right. You can see behind the cursor - it shows the shape of the future table. As soon as the mouse button is released, the frame line will become (take the form that was selected at the beginning). In order for the lines to be straight and the corners to be straight, you don’t need anything; in drawing mode this happens automatically.
Drawing rows and columns is done in the same way. For columns, move the cursor from top to bottom, for rows from left to right. Each cell can be further divided into rows and .
There is no need to worry about ensuring that the size of the frame and cells exactly matches what is needed. Once the table is created, its size can be easily adjusted.
When the skeleton of the table is ready, fill it with content. Don't worry about font type and size at first. Already filled table format:
finally determine the width of rows and columns based on the content (use the sliders on the ruler for this);
if necessary, change the font size, color and orientation;
define in (by height, by );
change the borders and fill of both cells and tables.
Your table is ready.
In addition to manual formatting, you can use automatic formatting. If the set of standard formats has what you are looking for, it will make the job much easier. You will find automatic formatting in the same window discussed above (the “autoformatting” button). You can also find this function in the “table” menu - insert - table - auto-format.
In addition, you can significantly speed up table formatting by installing additional buttons on the toolbar (align rows and columns, merge/split cells, draw table etc.).