How to copy contacts from htc. How to transfer contacts from phone to computer: several universal methods
When purchasing a new gadget, you probably had to deal with the problem of transferring existing contacts to a new device or personal computer.
There are several relatively quick ways to transfer all existing information from the Android platform to other devices. Let's look at them in more detail.
Transfer to PC
In order to transfer contacts from Android devices to a computer or other gadget with a similar platform, you will need a personal PC itself and a USB cable. The popular MOBILedit program will be used as software support. Finding it is not a problem: you can download the distribution kit from the official website of the developer or from other amateur resources.
Before you transfer contacts from Android to your computer, you need to download the driver for your device. You can choose exactly your gadget model or download drivers for all devices so as not to make a mistake in your choice.

After all drivers are installed, you need to synchronize the devices by going to the “Phone - connection” tab. If an auxiliary help window opens, you need to select the PC Sync connection type. The next stage takes place directly in the phone menu.
Export procedure
Before you transfer contacts from Android to your computer, you need to configure them correctly. Follow these steps in the menu of your gadget:
- “Device Settings” (or simply “Settings”).
- Developer Options.
- Find the “USB Debugging” item and check the box next to it.
In versions of Android 4.2, the procedure is slightly changed: first, open the “Settings” item, then go to the “System” sub-item and click on the “Device Information” value. Next, select “Build number” and check the box next to “USB debugging”.
In the MOBILEDit program, select the “Phone Book” tab and turn on the export mode, where you need to specify the file type (csv or xls) and the location where the information will be stored after the transfer of contacts from Android is successful.
After the files are exported, they can be transferred to another phone with the Android platform. This can be done via Wi-Fi, Bluetooth or a USB cable. Before transferring contacts from Android to another device in 5 minutes, you must select the “Import” menu item in the “MOBILEDIT” program and, after specifying the file names, wait for the contacts to be imported to the new device.
Transferring contacts using the Google service
If your personal computer has access to the Internet, you can export data through your Google account. Before you can transfer contacts from your Android phone to Gmail, you need to sync your phone books.

This is a fairly practical operation, since you can make any changes to your contacts, even when your phone is not at hand. And in order to transfer a contact from your phone to a personal computer or other gadget, you need to activate an account on the additional Google Drive service. The application not only allows you to work with information in terms of copying and moving, but will also help you restore all contacts in case you lose your phone or accidentally delete it.
Google Drive is the easiest way to transfer contacts from Android devices. To do this, just select Gmail, go to the “Contacts” tab, select “Phone Book” and export or import data.
"Yandex Disk"
Another relatively quick way to transfer your contacts to a personal computer or other Android device is Yandex Disk. As in the previous case, we will need a PC with an Internet connection. To get all the features, you need to download the Yandex-Moving software from the service. Moreover, similar software must be installed on your Android phone in order to save all your contacts for export.

Before you transfer contacts from Android to your computer, you need to follow these simple steps:
- launch the Yandex-Moving service on your computer using the same login and password with which you will log in to similar software on your phone;
- in the service settings already on “Android”, go to selecting the item “Moving from phone to computer” or “Moving from phone to phone”;
- the service will ask for a PIN code that was sent to you as an SMS message earlier, and then you need to confirm the move;
- After the contacts transfer procedure is completed, the application will notify you that the data has been successfully exported/imported.
Export contacts without an internet connection
If your computer does not have the ability to log into the Network, then there is an option to copy the phone book using wireless protocols. In this case, the Bluetooth module is considered priority.

Before transferring contacts from Android to a computer or another phone, you must complete the following steps:
- activate Bluetooth on both devices (you may need an additional checkbox in the “Visible to other devices” menu);
- on your phone from which you are going to export contacts, you must enable the search for “new device”;
- Confirm synchronization of both devices by entering the same PIN code;
- go to your phone book and select the contacts you are going to export;
- Click “accept” after the request appears on the receiving device and wait until the transfer process is completed.
Transferring contacts using SD and SIM cards
This is one of the oldest and most proven methods of data transfer, but it is used extremely rarely, and there are very good reasons for this. The main disadvantage of this method is that when exporting contacts, restrictions are introduced on the number of characters in the name and the number of contacts themselves.
In order to perform this procedure, just insert the SD card into the phone and use the drop-down menu to export. The same steps must be done in the case of a SIM card. Then transfer the media to another phone or device (any USB modem will do) and import the data through the contact settings. The maximum number of transferred contacts in this case cannot be more than two hundred names.
Where is it better to store contacts - in the memory of a mobile device or on a SIM card? In the event of a planned transition to service by another mobile operator or when purchasing a new mobile device, in principle, there is no difference. Today, transferring phone numbers does not even need to be done manually, because modern mobile devices are equipped with the function of exporting and importing contacts. Without taking into account force majeure circumstances, the memory of a mobile device will outperform the memory of a SIM card in terms of convenience of data presentation. The smartphone's memory provides unconstrained conditions for naming contacts, while SIM cards strictly limit the length of characters, especially in Cyrillic. You can also combine contacts in the smartphone’s memory into groups, set different ringtones, photos, pictures for subscribers, specify an E-mail, etc.
But the SIM card will be useful when resetting the settings of a mobile device, as well as in the event of its destruction. In this case, of course, the SIM card itself should not be damaged. But if both are destroyed or if you lose your mobile device with contacts, you will either have to say goodbye or make efforts to restore them. In such cases, what mobile operators can usually do is offer call details for a certain period. The most reliable way to store contacts for owners of Android gadgets is a Google account. And not only reliable, but also convenient due to cross-platform. We will talk in detail about the advantages of storing contacts in a Google account and how to transfer data from the phone book of an Android device or SIM card to it in this article.
1. Contacts trusted by Google
After clicking the button to add a new contact in the phone book of the Android device, before opening the data entry form, we will see a request to select the storage location for the contact - mobile device, SIM card and Google account. What benefits will we get by choosing the latter for storing contacts?Storing contacts using a Google account is a guarantee that nothing will ever happen to your data. Today, Google is at the peak of its power, and its potential will last for another couple of decades to come. If there's a safer place to store data than the search giant's servers, it's a paper notepad locked in a fireproof, waterproof container. Even when switching to a mobile device with an operating system other than Android and the ability to synchronize directly with a Google account, contacts can be transferred using the universal vCard export-import file (file with the “.vcf” extension). This, in particular, is supported by Apple devices.
You can change your Android device every day or reset its settings to factory settings; the contact book will be restored a couple of seconds after connecting your Google account and completing the synchronization process. The necessary conditions for this are the presence of the Internet and an active auto-synchronization function, if not the entire account, then at least the contacts application.
Now about the cross-platform mentioned above. Contacts of an Android device can be managed in a browser window on a computer with any desktop operating system - be it Windows, Mac OS, or Linux. The Google Contacts web service is an interface for working with phone book data stored and synchronized on mobile devices. Edits made to contacts within the web service will be available in the Android device's phone book either within a few seconds if the Internet is connected, or when it becomes available. And vice versa: contacts edited in the smartphone’s phone book with an active Internet connection will appear in the Google Contacts web interface.
2. Google Contacts web service
The Google Contacts web service, authorization in which is carried out through a single Google account, can offer convenient functionality for creating and editing contacts, the ability to combine subscribers into groups, search for similar contacts, import-export data, and the ability to restore contacts at any time within the previous 30 -ty days. Plus, the web service displays contact information for Google+ circles - friends, family, acquaintances, subscriptions on the social network itself and on YouTube. These contacts are not synchronized with mobile devices; they are available only in the web interface of the service. But with just one click they can be copied to contacts synchronized with Android devices.And contacts synchronized with Android devices are presented in the main window of the web service, also known as the “All contacts” section. To create a new contact, click the button at the bottom of the browser window.

Enter the subscriber’s name and click “Create”.

We fill in the required fields of the form, if desired, we can add a photo and click “Save”.

Existing entries are edited and deleted using the buttons at the end of each individual contact's line.

Having selected the desired subscriber, directly from the Google Contacts web service window, you can call this subscriber through another Google service - Hangouts. True, calling mobile operator numbers in this way is not a cheap pleasure. And before that, of course, you need to top up your account balance.
3. Connecting a Google account on an Android device
In most cases, connecting a Google account to your Android device is only a matter of time. Without authorization using a single Google account, some of the capabilities of the mobile device simply will not be available. In particular, this applies to access to the Google Play application and game store. Fortunately, creating a Google account is very simple. In case one has not yet been created or connected, on your Android device go to the “Settings” section and click “Add account”.
In earlier versions of Android, this settings section is called “Accounts and Sync.” Inside it you need to click the “Add account” button.
Select an account, respectively, Google.


4. Transfer existing contacts to your Google account
We've figured out the benefits of storing contacts in a Google account, we've looked at connecting it on an Android device, now it's time to put things in order in the phone book. With new contacts, everything is simple - what you will need to do in the future is when creating them, select where they are stored in your Google account. What to do with old entries in the phone or SIM card memory? How to transfer them to your Google account without unnecessary red tape? Let's look at this process using Android version 4.4.2 as an example.On your smartphone, go to the contacts application and select “Settings”. In other versions of Android, this may be a button with three vertical dots or a touch button on the smartphone panel. In the settings we need the “Import-export contacts” section.

In it, select the “Custom import/export” item. In other versions of Android, the option labels may differ, but the essence will be the same.

In the list of sources for obtaining contact data, we indicate either a phone or a SIM card. If you need to export data from both sources, we first work with one, then repeat the procedure with the other. Click “Next”.

The next step is to select the location where the contact data should be transferred. Accordingly, select a Google account. Click “Next”.


In a couple of seconds, you can go to Google Contacts and work with data in the web interface.
But Android is a whimsical platform. In some cases, the described option may not work and may freeze at the stage of exporting data to a Google account. In this case, you can resort to the method of exporting/importing contacts using a universal vCard file format. In the same version of Android 4.4.2, having selected “Import-export contacts” in the phone book settings, select another item – “Export to storage”.

An action confirmation window will follow, where the path to save the vCard file with exported contacts will be indicated.

Now the vCard file should be imported using the Google Contacts web service. By opening its location path in the file manager of the Android device, we can transfer the vCard file to the computer using any available communication channels.

Or we can transfer this file to a computer by connecting a smartphone to it using a USB cable. To import a vCard file by the Google Contacts web service, a computer does not need to be involved. The web service can be opened in a smartphone browser window, but the screen size of not every Android device will make this process quick and convenient. In the Google Contacts web interface, click the “Import” function and select “Import from a CSV or vCard file.”

The Google Contacts website has been switched to the Material Design style, and some of the capabilities of the web service in the new interface format do not yet work. But these opportunities open up when you switch to the old interface format in a new tab. Click “Go to previous version of contacts”.

Click “Import contacts”.

In the window that appears, click the browse button labeled “Select file” and specify the path to the file with exported contacts (remember, its extension is “.vcf”). Next, click the “Import” button.

After this, all entries in the smartphone’s phone book will appear in the web interface of the Google Contacts service.
Importing and exporting contacts is also possible using third-party applications from the Google Play store. But there is no need for them, since the standard Android functionality can completely cope with these responsibilities. Thus, even the old version of Android 2.3 supports the ability to transfer contacts to a Google account from the phone’s memory or SIM card. In the contacts application, you need to open the settings with the touch button and select “Merge with Google”. This is the option to transfer contacts to a Google account, however, only for entries in the phone’s memory. To transfer all contacts to your Google account, you must first copy those stored on the SIM card to the phone's memory. This is done by clicking the “Import-export” inscription and then selecting the “Import from SIM card” item.


5. Force synchronization of contacts on Android device
If changes to contact data made in the Google Contacts web interface must be urgently displayed in the phone book of an Android device, and synchronization is delayed, this process can be forced. Go to Android settings, select the “Accounts” section (in earlier versions of the platform, as mentioned, this section is called “Accounts and synchronization”), select “Google”.
We enter the synchronization parameters.

We find the “Contacts” item and by clicking on it, we force synchronization of the phone book.

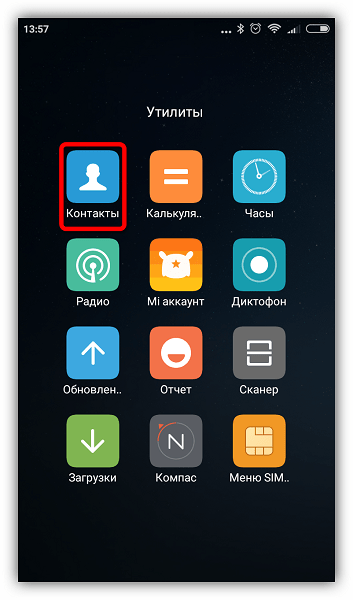
Smartphones and tablets have become an integral part of the daily lives of most of the population. To communicate with another user, just go to “Contacts” and call or send a text message to the subscriber in a few clicks.
Gadgets running on the Android operating system have a built-in function that allows you to synchronize contacts. However, not many people know about this, and therefore smartphone owners often face the problem of how to save contacts from Android to a computer or another phone.
What is contact synchronization and why is it necessary?
It's no secret that smartphone thefts have become more frequent in recent years. Also, many may simply lose their gadget. Sometimes, during unexpected situations, the phone can be seriously damaged. In such cases, it can be difficult to restore all contacts, since almost no one uses the address book anymore.
To avoid such problems, you need to prepare in advance and find out how to save contacts from Android to your computer. Due to the fact that the Android operating system was developed by Google, synchronizing contacts is quite simple.
All data is uploaded to cloud storage, where the user can view and edit it. In addition, data can be accessed from any device: smartphone, tablet, computer.
This function is useful when changing gadgets; just connect your Google account to your smartphone, and all contacts will be automatically restored.
How to synchronize on a smartphone or tablet?
Synchronizing contacts on a smartphone is quite simple. The following provides information on how to save contacts from Android to a computer step by step.

In order for data synchronization to succeed, you must be registered with Google. Then:
- Open the Settings menu on your smartphone.
- Go to the “Accounts and Synchronization” tab.
- Click on the “Add account” item.
- From the list provided, select “Add a new account” if you need to register with Google. Or “Link an existing one” if the mailbox is already registered.
- Enter your account details.
- Exit the Settings menu and go to Contacts.
- Open the settings menu and select “Import/Export”.
- From the drop-down list, select the location from which the data will be copied: SIM card, phone memory or memory card.
- After selecting the contact location, you need to select the account with which the data will be synchronized.
- Select the desired contacts and click “Copy”.
How to save contacts from Android to computer?
Contacts synchronization is complete. All that remains is to find out how to save contacts from Android to your computer. Now you can view all contacts transferred to cloud storage from your computer. To do this, you need to log in to Google through any browser.
You can view the data in the “Google Contacts” tab, which is located on the email inbox page. This way you can not only view all contacts, but also perform several actions. Data can be edited, copied and deleted. The service allows the user to combine identical contacts.

All that remains is to figure out how to save contacts from Android to your computer and back. In the case of a smartphone, you just need to enter your account details, and they will appear in the phone book. Copying data to your computer is easy. Necessary:
- Go to the “Contacts” tab.
- Select "Advanced".
- In the menu that appears, click on “Export”.
- Select the format in which the data will be saved (vCard, CSV for Outlook and Google CSV).
- Click "Export".
Synchronize data without an Internet connection
There is no need to despair; you can create an additional copy of your contacts using a backup. After this, you don’t have to worry about how to save contacts from Android to your computer. Via USB they will be transferred to secure storage in a few minutes.
Transferring data from a computer to an Android device
After all contacts have been synchronized with the Google account and then exported to the hard drive, the smartphone owner just needs to figure out how to transfer the information back to the phone.

There are several ways to transfer data:
- Via USB connection. Thus, you need to transfer the contacts file from the computer to the phone memory.
- Transfer a file via Bluetooth.
But the easiest way to restore contacts is to add a Google account to your smartphone.
Transferring contacts from an Android device to an Android or iPhone
You can transfer contacts from one smartphone to another without the help of a computer.
In order to copy data to another Android device, you do not need Internet access. Necessary:
- Go to the “Contacts” menu.
- Select "Import/Export".
- Save data to memory card.
- Transfer the file via Bluetooth or insert a memory card into another smartphone and import data from the file.

Unfortunately, this method may not work when transferring data to an iOS device. Different operating systems support different data formats. The most reliable way is to use synchronization through your Google account.
Carrying out the procedure for synchronizing contacts with your Google account or saving the data in a separate file takes just a few minutes. But this action will help protect yourself from losing all contacts in the event of an unforeseen situation.
Nowadays, when smartphones, tablets and social networks have become an integral part of everyday life, many users have problems managing countless contacts. This article discusses several effective ways to save data, using which you can forever forget about the problems associated with finding the necessary phone numbers.
Try to use the correct details of people and companies when entering them into the phone book, as this will help avoid confusion in the future. Also decide in advance where you will store this data. If your contacts are synced with an online account, it will be easier later. To save phone numbers, you can use third-party applications or built-in ones. Which option is better is up to you to choose based on the capabilities of the device and your own needs.
Method 1: Google Contacts
This method is suitable for those who use mail. This way, you can receive recommendations for adding new contacts based on who you're messaging, and easily find the information you need from any device.

This method is convenient because you can always find all your contacts in one place and access them from any device. This means that no import, export and other manipulations will be needed anymore. At the same time, you will need to take measures to strengthen the security of your account and, most importantly, not forget your password. You can also save phone numbers in your Google account using other applications.
Method 2: Built-in Contacts app
The built-in contact management application on Android is easy to use, but functionality may vary depending on the system version.
- Launch the application: it can be found on the home screen or in the “All applications” tab.
- Click on the plus sign. Typically, it is located in the upper or lower right corner of the main application window.
- If a dialog box appears, select an account or save location. Saving on a device or in a Google account is usually available.
- Enter your first name, last name and phone number. To do this, tap on the corresponding input field and, using the keyboard, type the data.
- To add a photo, tap on the icon with the image of a camera or a person’s outline.
- Click "Add field" to enter additional information.
- Click "OK" or "Save" in the upper right corner of the screen to save the created contact. On some devices, this button may look like a check mark.


Your new contact is saved and ready to use. For convenience, you can add frequently used phone numbers to "Favorites", so you can find them faster. Some devices also offer the option to add a shortcut to a contact on the home screen for quick access.
Method 3: Saving the number in the dialer
Probably one of the most common and simplest ways to save phone numbers, available on any device.

Method 4: True Phone
A convenient and functional contact manager, available for free in . With it, you can easily save phone numbers, import and export them, send data to other applications, create reminders, etc.

The issue of saving a backup copy of the phone book of mobile devices is very important for many users. If synchronization with cloud services is disabled, and if information about subscribers is saved to the phone’s memory, and not to an external storage device or SIM card, it will be almost impossible to restore it. Therefore, you will have to decide for yourself the question of how to transfer contacts from your phone to your computer, using universal formats. This is necessary in order to quickly restore them in the event of a breakdown or loss of the device.
How to transfer contacts from phone to computer using the simplest method?
There are several basic methods that allow you to quickly and easily export your phone book to different devices, including personal computers. At the same time, many users very often forget about the universal method, which within a few seconds solves the problem of how to transfer contacts from a phone to a computer, preferring wireless transfer or installing additional utilities.
In any modern smartphone and in some older models, in general, you can use a special function to export the entire list of contacts, which is stored in the device memory or on the SIM card.

To do this, just go to the phone book and use this option. In most cases, a list of devices is displayed to which you can export. In this case, it is advisable to select a removable drive on which, after confirmation, a special file in the VCF format will be saved, recognized by all computer and mobile systems. Once the process is complete, all that remains is to find it in the device’s memory and copy it to the desired location on the computer’s hard drive.
Troubleshooting encoding problems
The above method, although the simplest, nevertheless, its main drawback is that the saved test file has UTF-8 encoding, and most Windows systems by default try to open it using the Windows 1251 standard, as a result of which instead of the usual Russian letters strange icons are displayed.
To remedy the situation, you can write special tags or use a small utility called Sublime Text, which is much simpler. Even the portable version, which does not require installation on a hard drive, is perfect. In its file menu, just select activation of the encoding process (Encoding) and specify Cyrillic (Windows 1251) as the final standard. After this, the file will become readable in all applications used to open it.
How to transfer contacts to a computer from a Samsung phone using registration records
A more relevant method is the use of accounts. In the case of Android systems, this is registration in Google services using Gmail, for Windows devices this can be registration with Outlook or a Microsoft account, for Apple gadgets - AppleID.

In any case, you need to log into the service for which the initial registration was made, find the contacts section there and use the export tool. Depending on which device the phone book can subsequently be transferred to, the final format is selected. To simplify your work, it is better to use the universal vCard standard, which is recognized by absolutely all programs designed for this and most operating systems. But even here there are pitfalls. The same Gmail service, even with synchronization enabled on a mobile device, does not always display all entries in the phone book, not to mention those numbers or contacts that are saved on the SIM card, but not entered into the phone’s memory. Therefore, it is better to use other methods.
Transferring contacts using management utilities
But a rather interesting solution to the question of how, for example, to transfer contacts from a Samsung phone to a computer (or from any other model), is to use specialized management utilities developed by the mobile equipment manufacturer specifically for their devices.

So, for Samsung, the Samsung Kies application is used, for Sony gadgets - Sony PC Companion, for LG - LG PC Suite or LG Bridge, for iPhone - iTunes, etc. In any such program installed on a desktop computer or laptop, you can find a special function for saving a contact list in a selected location on your hard drive or removable media.

To solve the problem of how to transfer contacts from a phone to a computer, you can use unified utilities. The best option is to install the MyPhoneExplorer application, which can work with almost all models of mobile devices known today, including outdated phones without operating systems installed on them. True, you won’t be able to create a list in some universal format, but nevertheless, you can export the phone book to Word, Excel, or save the list as an HTML page.
What to do with damaged devices?
It remains to add that it may be impossible to transfer contacts from a broken phone to a computer, depending on the degree of damage. In the best case, you can use your account to which the contact list is linked. Advanced users can be advised to use the Android Debug Bridge protocol, or ADB for short. But this technique can only be applied to those smartphone models on which USB storage was activated before damage or breakdown. Otherwise, no effect should be expected.