How to install a mailbox on your phone. Creating and setting up mail on Android and iOS phones. The benefits of using email
In this article we will tell you how to create an email on your phone using both built-in applications and downloaded from various sources.
Step by step instructions
- The Gmail email client shortcut is a standard application for any Android device. First you need to go into the program and enter your personal data in the appropriate fields, click the “Next” button.

- After which the system will prompt you to select an email address.
- Then you need to come up with a password, which must contain at least 8 characters.

Advice! A good password is one that contains numbers and letters of the Latin alphabet in different cases. Since this is the most difficult password to crack.
- In the next step, enter your mobile phone number in international format.
You can skip this step, but it is not recommended, since if you lose access to your account, a phone number is the easiest, fastest and most reliable way to restore it.

- Then you must accept the terms of use and privacy policy for using the application by clicking the “I Accept” button.

- After this, the user will see on the screen his data and all the services that are available to him to log in through this email address.

- By clicking the “Next” button, wait for the verification to complete.
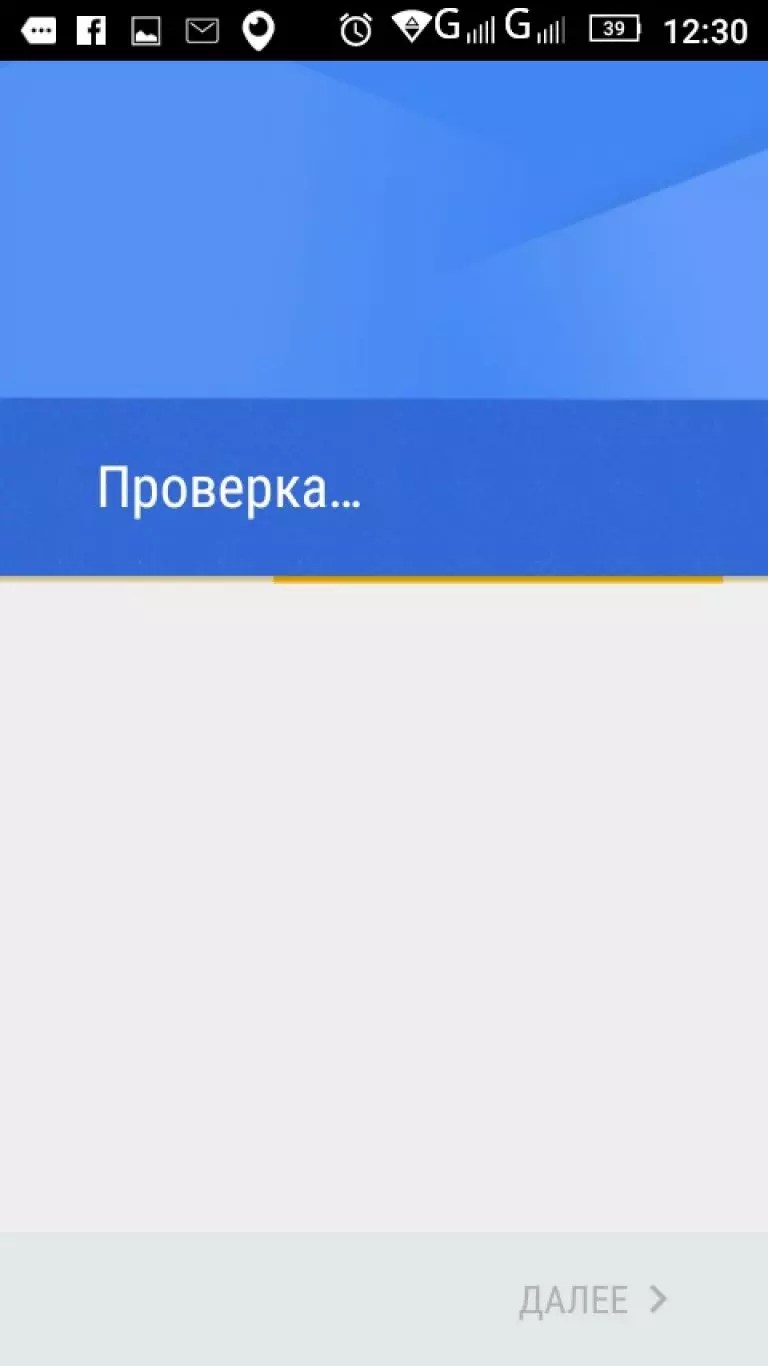
- After the check is completed, the system will prompt the user to subscribe to news from Google by clicking the “Next” button.

After registration, the user is automatically taken to the main page of his mailbox.

Setting up a mailbox through the Mail application
To create mail on another server on devices with the Android operating system, there is a special standard “Mail” application.
You can download other programs from the market, the configuration of which follows the same principle as the standard one.
If the mailbox already exists and you need to install it on your Android phone, then you need to follow the following instructions.
- Sign in to the Mail app

- First you need to enter your email address and click the “Manual setup” button
- In the second stage, the system will prompt you to select an account type. He chooses depending on the domain on which the box is registered.
In the case of working with mail.ru, you need to select “Personal (IMaP)” when there are no accounts in the system or Personal (POPZ) for those smartphones on which accounts were previously created.

- Then enter your password

- After this, you need to configure the mail server and enter or replace the following data for “Personal (IMaP)”
- IMAP server- imap.mail.ru;
- Type of protection- SSL/TLS;
- Port - 993
"Personal(POP3)"
- POP3 server- pop.mail.ru;
- Type of protection- SSL/TLS;
- Port - 995

If you have an email account on your domain [email protected] and you want to receive email on your Android device, then read this guide on how to set up email.
What you will need
Before you start, check availability:

Adding a new email account on Android
You can use any email client on your Android device. For example, we are going to use the Gmail email client, but most of the steps will be almost the same in any other email program.
First of all, go to the email client app on your Android device and here to the section Settings -> Add Account.

Select Other from the list and add your email account.

Enter your email address and click Next.

Select which type of incoming mail server you want to use - POP3 or IMAP. Generally, it is recommended to use IMAP because you can sync all your emails across different devices. Both protocols are fully supported on Hostinger.

Enter your email account password and click Next.

In the incoming server settings, you need to fill in the correct mail server address. On Hostinger you can find your server name under Control Panel –> Mail Settings. After filling, click Next.

If you are using another hosting service other than Hostinger, the automatic configuration of the mail server may not work. In this case, the mail client program may request the following data:
- Username (username)– your email address.
- Password– your email account password.
- Server– usually you can use your domain name or mail.yourdomain.com. Contact your hosting provider to verify this information.
- Port– port numbers can also depend on the provider, but the default ports for POP3 and IMAP are:
- 110 POP3 without SSL
- 143 IMAP without SSL
- 993 IMAP with SSL
- 995 POP3 with SSL
- Security type– this option is used if you want to use a mail server with an SSL/TLS certificate. If you are not using a certificate, select None.
- Delete email from server (delete emails from the server)– if you want to delete letters from the north when you delete them in your mail client, then select the option When I delete from Inbox (when I delete from inbox). If you do not want to delete emails from the server, then select Never (never).
Just like with the incoming server, you need to change the name of the outgoing mail server.

If you use hosting from a provider other than Hostinger, you may need to manually enter the SMTP port and select the security type. It is recommended to select a security type SSL/TLS or STARTTLS and check with your ISP about SMTP ports. When all the data is filled in, click Next.

Select the time interval at which you would like your emails to be synchronized with the server. If you do not need to check your email frequently, we advise you to select the highest value for this parameter to reduce battery consumption. Additionally, you can choose when emails arrive, sync emails from this account, and automatically download attachments when connected via Wi-Fi. If all settings are accepted, then you will receive a confirmation message.

That's all, now you can use your personal email address on your email client on your Android device.
Conclusion
By following the descriptions of actions from this guide, you will be able to solve the problem: how to set up email on Android. Now you can read and reply to email from your phone.
Author
Elena has a professional technical education in the field of information technology and experience in programming in different languages for different platforms and systems. She has devoted more than 10 years to the web industry, working with various CMSs, such as Drupal, Joomla, Magento and, of course, the most popular content management system these days – WordPress. Her articles are always technically verified and accurate, be it a review for WordPress or instructions for setting up your VPS server.
Articles and Lifehacks
Understanding how to set up mail on Android is not at all difficult. By following the step-by-step instructions outlined in this article, you can easily do this completely independently.
Setting up an electronic mailbox on a device running Android occurs through an email program, which can be found in the list of programs already installed on Android.
It is indicated by a postal envelope icon. Setting up your email inbox starts with finding this icon. Next, you need to follow the step-by-step instructions below.
Step by step instructions
- Launching the mail program
Launch your email program by clicking on the email icon.
- Setting up a username and password
In the “E-mail” line, write down the full desired address of your future email in the following form: “[email protected]”).
In the “Password” line, enter a combination of characters that will serve as the login password to the mailbox you created. It is desirable that, in addition to Latin letters (uppercase and lowercase), it contains numbers and other characters that can be “represented” using the keyboard.
- Setting up your incoming mail server
In the "Select account type" window you will be presented with three options:
- IMAP ;
- POP3 ;
- Exchange.
- in the completed “Username” field, nothing needs to be changed;
- The entry hidden by the “******” symbols in the “Password” field will also not need to be changed;
- in the “POP3 Server” field you will need to enter “pop.mail.ru”;
- in the “Port” field, from the proposed options, it is best to select a protected one – “995”;
- in the “Security Type” field, select an entry with six Latin letters and a slash between them: SSL/TLS;
- in the “Delete messages from server” field, it is advisable to select “never” - this means that the messages you receive will be saved on the mail.ru server;
- click “Next”.
- Setting up your mail server for outgoing messages
- the “SMTP” field must be filled with the entry “smtp.mail.ru”;
- field "Port" - numbers 465;
- in the “Security Type” field, select six Latin letters with a slash between them: SSL/TLS;
- in the “Username” and “Password” fields leave everything as it is, you don’t need to change anything;
- click “Next”.
Below you can find, if not all, then almost all the answers to the questions that have arisen on this topic.
The digital world is increasingly integrated into everyday reality. Pay for purchases or bills for housing and communal services, transfer funds, etc. , now it is quite possible without leaving a cozy chair. Well, e-mail has thoroughly entered our lives almost from the origins of the development of the Internet. In our material we want to talk about applications created for the convenience of using email boxes on Android devices.
Specialized email clients
If you have only one mailbox, then the optimal solution would be to choose a specialized client for the Android OS. An example is the Gmail application, installed by default on all Android devices, or Yandex.Mail, the functionality of which allows you to use cloud storage (Yandex disk).
Yandex mail

By installing Yandex mail on Android, you will be able to use the following functions:
- Writing and reading letters (including with attachments);
- Automatic receipt of notifications about new correspondence;
- Searching and grouping letters by topic;
- Filter for notes (“important” or “read”);
- Other.

A very popular and free agent. It works on the principle of open source, which means that anyone can participate in improving the program.
Functions:
- Search and reading;
- Possibility of inserting a signature;
- IMAP push notification;
- Folder synchronization and email marker;
- Save content to SD card.
- Other.

Perhaps the best client for Android. There are paid and free versions available. The difference between them, in general, is insignificant: the budget option does not have a widget and independent buttons for scrolling through letters, but scrolling is easily done by swiping.
Functions:
- Zooming in/out of emails with HTML markup;
- Modern interface with theme change (dark/light);
- Intuitive control of the buttons located at the top of the screen;
- Incoming mail filters and sorting settings;
- Other.
Mail.Ru

An email client for Android that provides all the benefits of the Mail.ru service.
Functions:
- Flexible settings for instant notifications;
- Smart accelerated search;
- Simple and convenient interface;
- Full work with all types of investments;
- Synchronization with other devices;
- Tips for choosing contacts;
- Other.
Mail client for multiple mailboxes
If you manage several mailboxes, then, of course, it is better to use mail clients that can service more than one mailbox from different providers. A striking example of such a client can be considered a free client myMail.
By downloading the myMail application, every Android owner will be able to become the owner of a free mailbox in the [email protected] format. You can attach photos and other attachments to letters, write, read, reply and forward emails with one touch, managing your mail from your smartphone or tablet.
myMail
- Possibility of fast push notifications for all IMAP mailboxes with filters, privacy settings and receipt time;
- Instant search through all contents of the mailbox;
- Friendly interface;
- Function for convenient access to server or local contacts (hint based on the first characters of the name);
- Many other features that make working with letters simple and comfortable.
myMail is a guaranteed operation that combines the following services:
- Google Mail (Gmail with a set of cloud services Google apps);
- Rambler mail;
- AOL Mail;
- Mail.Ru mail;
- Ymail (Yahoo mail);
- Apple (Mac.com, iCloud and com.);
- Microsoft (Office 365 and Live, Outlook, Hotmail, MSN);
- Yandex Mail;
- Meta mail (Meta.ua).
- As well as any other IMAP or POP3 mail services.
Adding and setting up an account is extremely simple: enter your email and password, and the application will do everything you need! myMail automatically detects IMAP, POP3 and SMTP settings.
How to set up mail on Android
Setting up all email clients is almost the same: “Menu”, then “Create a new account”. Below are the server settings of different providers.
Setting up Yandex mail
- Incoming IMAP server;
- Login: identical to the email address;
- Server: imap.yandex.ru;
- In the “port” field we enter: 993;
- Security Type value: SSL/TLS;
- Outgoing SMTP server;
- Server: smtp.yandex.ru;
- Fill in the port field: 465;
- Enter the “security type” value: SSL/TLS
Setting up Mail
- Incoming POP3 server;
- We register the server: pop.mail.ru;
- In the port field we write: 110
- Outgoing SMTP server
- Server: smtp.mail.ru
- Port: 25
Setting up Google mail
- All email clients configure gmail automatically.
- It is not necessary to check the “secure connection TLS/SSL” checkbox.
Setting up MailDroid #80202
- Go to the “menu”, select “add account”;
- From the methods of adding an account, select “manually” (if accounts have not been created in the mail program before, this window appears immediately);
- Select one of the mail protocols (POP3 or IMAP);
- In the next window we indicate: email address, then login (completely identical to the email address), mailbox password, incoming mail server (for POP3 - pop3.megagroup.ru, for IMAP - imap.megagroup.ru), then specify the port (995 for POP3 or 993 for IMAP), in the “outgoing mail server” field – smtp.megagroup.ru, and the outgoing mail port is 587;
- “TLS/SSL Secure Connection” is left blank
- After everything is filled in, click “Next”.
How to set up corporate email

The Google Apps set of cloud services, designed to organize effective collaboration among employees, includes Gmail for business in addition to calendars, video conferencing, online documents, etc.
Functions:
- Spam protection;
- Access from anywhere;
- Accelerated search;
- Manage all access settings;
- Synchronization with a personal computer.
I would like to believe that the material we presented was useful to you. Good luck everyone!
Step-by-step instructions - how to create an email
E-mail has become an integral means of business and personal communication. Young people can no longer imagine how to live without her. And all the memories of the older generation about how they had to go to a meeting point to communicate with family and friends seem like an anachronism today.
Let's not lag behind the times and just as quickly as we once mastered the cell phone, let's conquer the wisdom of the Internet in the same way. And we will start with e-mail, which will allow us to be more mobile in communicating with friends and family, and will also introduce you to many concepts on this still mysterious Internet.
E-mail is especially relevant for our country, where the quality of regular postal services is depressingly low, and rates for international telephone calls are too high. Email is incomparably more reliable, cheaper and faster than regular mail. A paper letter across the CIS can travel for months, and from America it can take six months. In addition, there is never any certainty that the letter will not get lost in the long chain of transportation and flight of correspondence.
By email, a letter reaches anywhere in the world in a few seconds. If it happens that you make a mistake with the address, you will be instantly informed why the letter did not reach the addressee. The cost of sending is negligible and is the price of the minutes you spend on the Internet. The cost does not depend on the distance at which your recipient is located.
1.Create your email address
The most popular search engines in the vastness of Russia, or, as is commonly called, Runet, are Yandex, Mail and Rambler. You can set up a mailbox in any of them, and they will all work great.
Mailboxes can be paid or free. We will install a free email service using Yandex as an example.
Before you go to the post office and register your email address, let’s check again.
Electronic mail (English e-mail) is written in the form xxxxxxxxx (dog)xxxxxxx.xx
xxxxxxxx - your login (alias) e.g., sidorov
dog - @
xxxxxxx.xxx - search engine, yandex.ru
Examples of email addresses in different search engines: [email protected], [email protected], [email protected]
The @ sign, commonly known as “dog” in our pronunciation, is the separator between the login and the search service. There are several versions of why it was called that, but none gives a clear interpretation. Let's accept the one that recognizes that the given symbol (@) looks like a curled up dog. In other countries, this icon is called differently, apparently depending on the associations.
I think you now have an idea of what your email address and the addresses of your friends with whom you will communicate will look like.
The lesson was written at the request of the magazine "60 years is not age"