Kaspersky AVP Tool is a free scanner from Kaspersky Lab. The best virus removal utility according to users
Viruses await us in archives with electronic books, hiding in “useful” software and on the pages of dubious resources. To combat threats, I use a reliable team: antivirus for constant protection and free healing utilities for additional scanning. A month ago I decided to “cheat” on my usual Dr. Web Cure! and test what Kaspersky’s healing utility is capable of. Let's open the article: you will learn how to download and use the Kaspersky Virus Removal Tool and, most importantly, is it suitable for you?
Advantages of the Kaspersky Virus Removal Tool utility
- Allows you to check your computer for viruses for free;
- Lightweight, does not load the system and can work in the background;
- Does not cause software conflict with permanent antivirus;
- Performs a deeper scan compared to other healing utilities.
Disadvantages of Kaspersky Virus Removal Tool
- Compared to Dr. Web Cure! verification takes longer;
- Each time the program is terminated, Kaspersky Virus Removal Tool is removed from the computer. Therefore, you will lose access to quarantined threats;
- The healing utility does not receive updates. To scan again with a fresh signature database, you will have to download the updated version of the utility from the Kaspersky website;
- Kaspersky Internet Security advertising in pop-up windows.
Kaspersky Virus Removal Tool in parallel with Kaspersky antivirus

The question that interested me: is there any point in installing Kaspersky Virus Removal Tool if the main antivirus is from Kaspersky Lab? The anti-virus database is almost identical and Kaspersky’s cleaning utility will not detect “fresh” threats. Therefore, if your choice is Kaspersky antivirus, it is better to use healing utilities from other developers. For example, Dr. Web Cure!
When does it make sense to install Kaspersky Virus Removal Tool in parallel with Kaspersky?
- If you have not updated your anti-virus database for a long time or installed a dubious version of Kaspersky from a torrent;
- The computer is heavily infected and you have suspicions about the functionality of Kaspersky. The Virus Removal Tool utility has a high level of protection and is adapted to work on an infected PC.
How to download Kaspersky healing utility
- To download Kaspersky’s healing utility, go to the Kaspersky Lab website, Virus Removal Tool and click “Download”. The download of the launch file of about 160 MB has begun;
- Run the setup file by double-clicking and wait for the installation to complete. We accept the license agreement and click “Get Started”.
How to use Kaspersky's healing utility
- The “Run scan” window appears. But let's look at the scanning parameters. Click on the “Settings” icon:
- On the “Scanning Area” tab, I advise you to check the boxes next to all drives and folders;
- On the “Protection level” tab, leave the level “recommended”. You can move the slider to the “high” position if your computer is heavily infected;
- On the “Actions” tab, leave the “Prompt upon detection” checkbox or “free up the hands” of the utility, allowing you to independently treat and remove threats.
- Important! If there is software installed on your computer that is perceived as malicious (parsers, cheaters, keyloggers), do not allow Kaspersky to make decisions: it will certainly remove them.
- Save the settings and run Automatic Scan.
- After the scan is completed, look at the list of threats and vulnerabilities on the “Reports” - “Detected threats” tab. I use the context menu option "Go to Description" to get information about each threat: this helps make decisions about treatment or removal.
After testing Kaspersky’s healing utility for a month, I decided to return to Dr. Web Cure! In tandem with Kaspersky antivirus, it provides greater security to my computer. What alternative healing utilities have you tried? Leave links or reviews in the comments.
Infection when visiting sites from mobile devices
Some sites on the Internet have been hacked by attackers targeting mobile device users. By visiting such a site from a computer, you will be taken to a harmless Internet resource, but by accessing it from a smartphone, you will secretly redirected to a site with an unpleasant “surprise”. Using hacked websites, attackers can distribute various malicious programs, the most “popular” of which are various modifications. The victim’s losses depend on what family of Trojans infiltrate your mobile device, i.e., on its malicious load. Read more about this phenomenon in our news.
Attention mobile device users!
Install Dr.Web antivirus for Android on your mobile device with the component URL filter. Cloud Filter will restrict access to inappropriate and potentially dangerous sites in several categories - this is especially important for protecting your children from inappropriate Internet content.
URL filter present only in the full-featured version of Dr.Web for Android (it is not in Dr.Web for Android Light). For buyers of Dr.Web Security Space and Dr.Web Anti-virus, use of Dr.Web for Android - for free.
Attention PC and laptop users!
Install Dr.Web Link Checker
These are free extensions for checking Internet pages and files downloaded from the Internet. Install the extension to your browser and surf the World Wide Web without fear of a virus attack!
Download Dr.Web Link Checker for free for
| Opera |
Using the Dr.Web online file scanner, you can check files that you suspect for free for viruses and malware.
You send your files using your browser, they are uploaded to our server, scanned by the latest version of Dr.Web with a full set of virus database additions, and you receive the scan result.
How to scan a file or several files with Dr.Web Anti-virus online?
- To check 1 file: click on the “Browse..” button and select the file that is suspicious. Click the "Check" button to start scanning.
- The maximum file size is 10 MB.
- To check multiple files: place the files in an archive (WinZip, WinRar or ARJ format) and download this archive by clicking on the “Browse” button. and then click on the “Check” button. The verification protocol will include a report on each file in the archive.
IMPORTANT! The Dr.Web anti-virus scanner will help you determine whether the file(s) you provided for scanning are infected or not, but will not answer your question whether your computer is infected. For a complete scan of your hard drives and system memory, use our free healing utility CureIt! .
You can also check your local network using the centrally managed network utility Dr.Web CureNet!
Send a suspicious file
Kaspersky Virus Removal Tool is a free anti-virus utility for scanning and treating your computer from any virus threats. The program is an anti-virus scanner that is used for a one-time scan and disinfection of a computer.
This antivirus program is not an antivirus that protects the computer in real time, that is, constantly. The main purpose of the program: to find and neutralize virus threats at the user’s request.
Virus scanning is carried out by a software module used in all Kaspersky anti-virus products. The anti-virus utility can be used on an infected computer, including in “”.
Kaspersky Virus Removal Tool can work on a computer in conjunction with another antivirus installed on the computer. According to the developers, there should be no conflicts between them.
Since this anti-virus program does not update the anti-virus databases, for each new scan of the computer you need to download a new version of the program. Antivirus updates are released every two hours.
The main features of the Kaspersky Virus Removal Tool application:
- search for viruses and their treatment
- backing up objects before disinfection or deletion
- protecting system files from accidental deletion
- detection of malicious advertising programs (Adware)
- detection of legal software that can be used by attackers (Riskware)
- saving KVRT operation report
You can download the Kaspersky Virus Removal Tool anti-virus utility from the official website of the manufacturer - Kaspersky Lab. The downloaded file will look like this: “KVRT.exe”.
download kaspersky virus removal tool
The Kaspersky Virus Removal Tool (AVPTool) does not require installation on your computer. After launching the utility, it is placed in a temporary folder, and after finishing its use, immediately after closing the antivirus window, all program data is automatically deleted from the computer.
Installing Kaspersky Virus Removal Tool
Run the antivirus program file. The Kaspersky Virus Removal Tool antivirus program will first initialize on your computer.
Let's first look at the virus scanner settings.
Setting up a computer scan
After opening the Kaspersky Virus Removal Tool program window, follow the “Change settings” link. In the “Settings” window, you can select the necessary objects to be scanned by the antivirus.
By default, the following areas are activated in the program: “System memory”, “Startup objects”, “Boot sectors”. You can add the “System partition” or other objects on your computer for scanning by the anti-virus scanner.

You can add specific folders or drives on your computer to this list. To do this, click on the “Add object...” button, and in the “Browse for folders” window that opens, select the desired object to add to the list for scanning.

You can enable scanning of the entire computer by checking all the boxes and adding all the drives of your computer to this list. Only in this case, you need to take into account that such a check will take a lot of time.
Checking for viruses in Kaspersky Virus Removal Tool
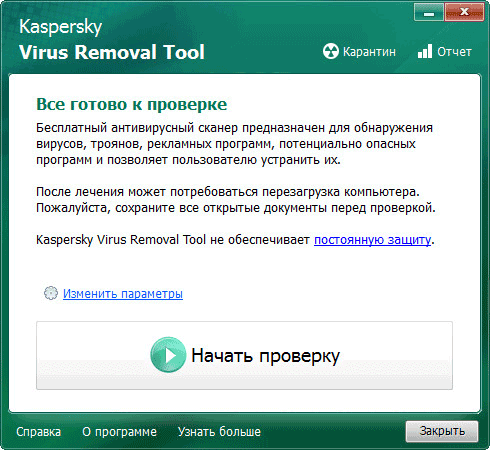
The main window of the KVRT program says: “Everything is ready for testing.” To start scanning your computer for viruses, click on the “Start scanning” button.

Now you need to wait for the anti-virus scan of your computer to complete. You can stop scanning your computer for viruses at any time by clicking the “Finish scan” button.

Upon completion of the scan, summary information about the computer scan will be displayed in the Kaspersky Virus Removal Tool antivirus window. After scanning, no threats were found on my computer.

You can click on the “more details” link to get a more detailed look at the results of checking your computer. In the “Scan Results” window, you can activate the “Show information messages” option to obtain more detailed information.

After completing the inspection, you can read the report on the work done. The report contains information about events that occurred during the scan and information about detected threats.
To receive a report, you need to open the “Reports” tab, which is located on the right side of the program window.

In the “Quarantine” tab, you can take actions with files added to quarantine. You can restore the file to its original location (if necessary), or delete the infected file from your computer.

In the “Learn more” tab you will be offered to purchase paid anti-virus products from Kaspersky Lab.
Removing Kaspersky Virus Removal Tool
To remove Kaspersky Virus Removal Tool, close the program window, after which this program will be removed from your computer. To use the anti-virus utility again, you will need to re-download the program to your computer with the current anti-virus database.
Conclusions of the article
The free anti-virus scanner Kaspersky Virus Removal Tool is designed for a one-time scan and treatment of a computer in the event of a virus infection.
- Letter. Please tell us on your website about, for example, Kaspersky Virus Removal Tool or Kaspersky Security Scan, I think they deserve attention. I just had a dispute with a friend, he tells me that the best anti-virus utility that works without installation on the computer is . I don’t argue, and you often mention it in your articles, it actually finds and neutralizes malware well, but I think the utilities from Kaspersky are no worse than the utilities from Dr.Web. Kaspersky Lab even has a utility called TDSSKiller.exe - it finds and neutralizes malware such as rootkits. There is an article on your website about, but not a word about the above-mentioned utilities. Or you think that they are not effective in fighting viruses. Max.
- Letter No. 2 I downloaded the utility from Kaspersky Kaspersky Security Scan, but it turns out that it does not remove viruses, but simply informs about threats and the security status of your computer. I don’t understand what the point is in using it then. No signature.
- Letter No. 3 Admin, help with advice. When scanning the computer for the presence of rootkits using the Kaspersky utility TDSSKiller, it was found suspicious object, medium danger – Service: sptd. The instructions for using the utility say: copy the suspicious object to quarantine and then send the files to Kaspersky Virus Lab or check for viruses on VirusTotal.com. In short, I copied a suspicious file to quarantine and wanted to check it on the VirusTotal.com website, but I can’t find the quarantine itself, there is no information about this anywhere in the program settings, the Kaspersky forum advised me to carefully read the instructions for using the TDSSKiller program, but there is no such information in the instructions either. No signature.
Free Kaspersky utilities
In this article we will download and use it in combat conditions free Kaspersky utilities- Kaspersky Virus Removal Tool, Kaspersky Security Scan, and anti-rootkit utility TDSSKiller. Let's get acquainted with the Kaspersky Rescue Disk. How everything works for Kaspersky (and it works), you will see for yourself and draw a conclusion.Undoubtedly, it is worth carrying anti-virus utilities from Kaspersky on a flash drive and using them as needed in the fight against viruses. I didn’t write anything about these utilities only because I simply don’t have enough time.
All Kaspersky Lab products incorporate the latest developments in the field of antivirus technologies, including new “cloud” technologies. Take, for example, Kaspersky Virus Removal Tool (AVPTool), a constantly updated free antivirus scanner. It should be used from time to time to scan your computer for the presence of malware. By scanning your computer, this utility neutralizes malicious programs located on your computer: Trojans, Internet worms, rootkits, as well as spyware and adware. Kaspersky Virus Removal Tool can be launched in automatic and manual mode.- But it is important to know that this utility does not provide real-time protection for your computer, that is, Kaspersky Virus Removal Tool will not replace your standard antivirus, but will only help it. Working on your computer, Kaspersky utilities do not conflict with the anti-virus software you have installed.
- Very important note. You should know everything about all the utilities you use so that the situation described in the second letter does not happen. The Kaspersky Security Scan utility does not actually remove viruses, but you still need to use it and now you will see how. We will check the functionality of free Kaspersky utilities on my friend’s computer; when visiting one site that turned out to be malicious, he planted two Trojans for himself - in the Startup folder and the Temp temporary files folder.
Kaspersky Virus Removal Tool
Let's start with the Kaspersky Virus Removal Tool utility, analyze all its settings and check our computer for viruses.
The language is Russian and click Download, then download the program installer to our computer and run it.

We agree to the license agreement and click Get started.

The free utility Kaspersky Virus Removal Tool can be launched in Automatic check, there is also a Manual Treatment mode.

Before you click Run scan, I advise you to go to the program settings. In option Check area, be sure to check My Documents, My Mail and most importantly Disk (C:). Why?

When scanning an infected computer, I did not select Disk (C:) in the settings and the Kaspersky Virus Removal Tool found only one virus in startup,
, but did not find the second malicious program - located in the Temp temporary files folder
. I had to rescan Drive (C:) separately, and only after rescanning was the virus found.
Security level can be left in the middle

Option Action, you can check the box - Prompt when detected.

If the Kaspersky Virus Removal Tool utility detects a virus program on you, it will inform you to Disinfect, (if possible) Delete (recommended) or Skip.

So, let's go, let's press Run scan
The first Trojan program was found after 8 minutes.


The second Trojan, as I already said, was found during a second scan, so do not forget to select drive (C:) for scanning in the program settings. The utility immediately suggested removing the second malicious program.
As for manual treatment. It takes place in three stages. Click Collecting information about the system,

The utility collects the information it needs, which is located in the file avptool_sysinfo.zip 
Next, register on the Kaspersky Lab forum in the Anti-Virus thread, ask your question and attach the archive avptool_sysinfo.zip, you should definitely receive an answer, and sometimes specialists may offer you to run a script, which you need to copy into the Execute script window and click Run script.
http://support.kaspersky.ru/6182
At the end of the utility, the following proposal is received. If you press the button Install protection, we will immediately be taken to a page with paid antivirus solutions from Kaspersky Lab.

Free utility Kaspersky Security Scan
Let's move on to the second Kaspersky Security Scan utility, we will check the same infected computer with two viruses: in Startup and in the Temp temporary files folder.
The Kaspersky Security Scan utility does not remove viruses, but after scanning your computer it provides detailed information about the threats located in your operating system and where they were found, vulnerabilities and other problems. It all looks like this.
Let's go to the page again http://www.kaspersky.ru/virusscanner, select Kaspersky Security Scan and click Download.

Download and run the utility. Again I want to say that if Quick check you are not satisfied, then choose Full check. In my case, the situation with Quick Scan repeated itself; it found only one virus in Startup.

When performing a full scan, the utility found a second malware in temporary files
C:\Users\Username\AppData\Local\Temp
After a while

The free Kaspersky Security Scan utility will give you this report. Click on the arrow.

What is the state of the anti-virus program on your computer? I got a note because my anti-virus program was disabled at the time the utility was running.
If the utility finds malware, it will give you their location.


Rescue Disk Kaspersky Rescue Disk
The advantage of checking the operating system from a rescue boot disk over other utilities is that the malware found in the operating system is inoperative, one might say, simply lying on the hard drive.
Select Kaspersky Rescue Disk and click download.

Download the disk image in ISO format, burn it to a disc. Who doesn’t know how to burn an ISO image onto a blank CD or DVD, read our article
So, after we have burned the image onto a blank CD, we boot our computer from the Kaspersky Rescue Disk. Again, for those who don’t know how, read our article
In this window, to continue loading, you need to press any key on the keyboard.

We choose the language Russian, however, who needs which one.

We accept the conditions - press key 1.

Choose Graphic mode.

Wait for the disks to mount.

Here is the desktop of the Kaspersky Rescue Disk antivirus disk. Let's look at the main capabilities of the disk.
Click on Kaspersky Rescue Disk to open a settings window; there is nothing complicated to manage here. In the settings, we additionally mark drive C: for virus scanning, or if you want all drives, but the scan in this case will take a very long time. Click on the button Run check objects.


Kaspersky Rescue Disk has a registry editor, which you will agree is very convenient; by the way, earlier versions of the disk did not have it.

You can also use the File Manager if you need to move your files from one hard drive partition to another.
And using the built-in browser you can access the Internet.
TDSSKiller - protection against rootkits
Well, the turn has come to the TDSSKiller utility, which can help you detect and neutralize rootkits on your computer. A rootkit is a program for hiding the presence of a malicious program in an operating system, helping an attacker to manage a hacked Windows and hide traces of his malicious activities by hiding destructive processes and the rootkit itself.
You can download it on the official website of Kaspersky Lab; by the way, detailed instructions for using the utility are available at this link http://support.kaspersky.ru/5353?el=88446 Click Download the file TDSSKiller.exe

Download and launch.

If the program displays a window indicating that an update is available for download, click on Download update.

By default, the utility is configured optimally and there is no need to change anything. Click Start checking.


If after scanning the program displays the following window - Suspicious object, medium danger - Service: sptd, then this is not scary. Service: sptd is a service of the program - the Daemon tools disk drive emulator. You may ask - How can you determine whether it’s scary or not?

TDSSKiller can detect the following suspicious services or files:
Hidden service – a hidden key in the registry;
Blocked service– inaccessible key in the registry;
Hidden file – a hidden file on the disk is hidden when enumerated in the standard way;
Locked file- the file on the disk cannot be opened in the standard way;
Spoofed file- when reading, the file contents are not real;
Rootkit.Win32.BackBoot.gen - suspected infected MBR boot record.
For detailed analysis, Kaspersky Lab recommends copying detected objects to quarantine by selecting the Copy to quarantine action (the file will not be deleted!!!), then sending the files to Kaspersky Virus Lab or VirusTotal.com scanning.
Quarantine location is the root of the C:\TDSSKiller_Quarantine driveOpen the website VirusTotal.com, then click Select file

Open and Check


At one time, I established that this file is safe, but to be completely sure, our reader can send it to Kaspersky Virus Lab.
Articles on this topic:
The Virus Removal Tool utility is one of the most effective tools for detecting and eliminating almost any virus program. Its main advantage is that it does not require installation on a computer. Just download and run it, and then it will do everything itself.
This utility has a lot of advantages, including:
- The program is distributed on the Internet completely free of charge.
- The utility has a nice design and is very easy to use. With its help, even a beginner PC user can conduct a full system scan.
- Virus Removal Tool does not conflict with those installed on your computer, so you don’t have to disable them during the scan.
- The utility uses signature and heuristic analysis in its work, which allows it to detect new and unknown viruses.
- The program can treat infected files.
- If the infected computer cannot start in normal mode, you can run this utility in safe mode.
- After the program collects all the necessary information about the installed OS, it will create scripts with which you can perform treatment manually.
But in addition to a wide list of advantages, like any program, Virus Removal Tool has a number of disadvantages:
- The program works online, protecting the system, and scans and disinfects only on demand. After one-time use of the program, it is uninstalled.
- The utility cannot update databases, so before a new scan, you need to delete the old database and load a new one.
- Because The utility is free and does not contain any additional services. For example, the user will not be able to ask Kaspersky Lab a question if he suddenly encounters any difficulties. Answers to questions can only be obtained from other users on Kaspersky forums.
Performing a system check
The Virus Removal Tool utility can be downloaded from the official website using the link below. After downloading and unpacking the archive, you must agree to the license agreement and click the “Get Started” button. Now the antivirus utility is ready to work.
The program already contains recommended parameters for the first system scan. To start scanning, you just need to click “Run scan”. The utility will check all critical areas, and then you can scan the hard drive. To do this, click on the gear icon and check all the boxes in the “Scanning area” column. If there is a large amount of data on the computer, the scan may take quite a long time. In order not to monitor the long process, in the “Actions” menu you can select the “Treatment” and “Delete if treatment is impossible” checkboxes.
Please note that if unlicensed software is installed on the computer, the program can recognize them as a threat to the system, so it is recommended not to check the “Delete” box if there is unlicensed software on the PC. When all the settings are set, you can go to the “Automatic check” section and start the process. Upon completion of the scan, you will be able to view the monitoring results from the “Reports” section.