PLL chip number. Detailed instructions for overclocking the processor. How to find out the manufacturer of the motherboard on a laptop
SetFSB is a specialized utility for quickly and easily overclocking your CPU. Typically used to overclock laptops, but can also be useful for regular PCs, including those running on Xeon processors.
Using this utility, you can easily change the system bus frequency without rebooting the system. The program has a very simple and friendly interface, and overclocking is carried out using the slider movement. Despite its ease of use and ease of overclocking, this utility is not recommended for use by beginners.
Ignorance of the architecture and possible limits of your processor and motherboard can render both of them unusable.
How to use SetFSB?
Before starting the program, find out the PLL chip number of the computer you are overclocking. You can do this in three ways:
- looking under the PC case, find the PLL configuration chip and remember its number;
- using programs like Everest, Aida64 and the like;
- Search the Internet for information about the specific model and the chips installed there.
After running SetFSB, go to the Control tab. There, in the Clock Generator item, select the chip number of your computer. After selecting the PPL number, click on the Get FSB button. After this, the current processor bus parameters will appear on the program screen and the frequency change sliders will become active.

The SetFSB processor overclocking program increases CPU performance by changing the system bus parameters. By moving the central slider, you will adjust them. If you want to increase the adjustment range, check the box next to Ultra. Once all controls are set to the desired position, press the Set FSB button. We recommend raising these values by no more than 20 MHz at a time.

After saving the parameters, you need to test the system. If your computer/laptop freezes, you need to reboot the system and set the value to a few MHz lower. If the computer responded to the changes normally, then you can raise the indicators even higher and test again.
Overclocking Xeon e5 on Chinese socket 2011 motherboards
You can slightly overclock the Xeon e5 processors of the 1600 and even 2600 series (both v1 and v2), running on Chinese motherboards such as huanan x79, its clones and other similar Chinese motherboards.
Currently known boards that support overclocking via setFSB:
- Early revisions
- and earlier
FSB from 90 to 110 MHz are available without any modifications. As a rule, FSB overclocking is limited to 103~107MHz (which gives a 3-7% increase).
Overclocking is saved after rebooting or shutting down the computer (if there is a unit on duty), and is reset after the system unit is de-energized after a few tens of seconds.
That is, if during the process of overclocking, you install a piece that is not suitable for the processor or memory - just unplug the computer from the outlet and wait a little, after that everything will start at the default frequencies.

The SetFSB clocker does not support Chinese motherboards, so you won’t be able to use the sliders.

- Diagnosis tab, select clock generator - PLL diagnosis, click GetFsb and 9 bytes of configuration registers are read from the clocker. We are interested in byte No. 6, click on it with the mouse (red arrow 1), and its value in binary form will be loaded into field 2.
- The lowest 4 bits are responsible for FSB. We take their values at the top
table and edit them in field 2. For example, if we want 106.25, we change 00011000 to 00011101. - After this, press update (3), close all tasks and save the documents and click apply (4). After this, fsb will be set to the specified value.
There is one thing - the computer may freeze at the moment of changing fsb, then turn it off with the power button (holding it) and turn it on. The percent will work at the given fsb (if the memory and itself can do it) until the power is turned off.
Download
Official versions for Windows 7, 8, 10 and others. Portable version 173.133 includes an id generator (only for this version), which can be used to activate the program.
Overclocking a processor is not a difficult task, but it requires some knowledge and caution. A competent approach to this activity allows you to get a good increase in productivity, which is sometimes sorely lacking. In some cases, you can overclock the processor through the BIOS, but if this option is missing or you want to carry out manipulations directly from Windows, then it is better to use special software.
One of the simple and universal programs is SetFSB. It is good because it can be used to overclock an intel core 2 duo processor and similar older models, as well as various modern processors. The principle of operation of this program is simple - it increases the frequency of the system bus by influencing the PLL chip installed in the motherboard. Accordingly, all that is required of you is to know the brand of your board and check whether it is included in the list of supported ones.
First you need to find out the name of the motherboard. If you do not have such data, then use special software, for example, the CPU-Z program.
Once you have determined the brand of the board, go to. The design there, to put it mildly, is not the best, but all the necessary information is there. If the board is on the list of supported ones, then you can happily continue further.
Download Features
The latest versions of this program, unfortunately, are paid for the Russian-speaking population. You will need to deposit approximately $6 to receive your activation code.

There is an alternative - download the old version of the program, we recommend version 2.2.129.95. This can be done, for example, .
Installing the program and preparing for overclocking
The program works without installation. After launch, this window will appear in front of you.

To start overclocking, you first need to know your clock generator (PLL). Unfortunately, it is not so easy to recognize him. Computer owners can disassemble the system unit and find the necessary information manually. The data looks something like this:

Methods for software identification of a PLL chip
If you have a laptop or don’t want to disassemble your PC, then there are two more ways to find out your PLL.
1. Go in and look for your laptop in the table.
2. The SetFSB program will help you determine the PLL chip brand itself.
Let's look at the second method. Switch to the " Diagnosis", in the drop-down list " Clock Generator» select « PLL diagnosis", then click on the button " Get FSB».

Let's go down to the field " PLL Control Registers" and we see a table there. We look for column 07 (this is Vendor ID) and look at the value of the first line:

If the value is xE, then the PLL is from Realtek, for example, RTM520-39D;
if the value is x1, then PLL from IDT, for example, ICS952703BF;
if the value is x6 - then PLL from SILEGO, for example, SLG505YC56DT;
if the value is x8, then PLL from Silicon Labs, for example, CY28341OC-3.
x - any number.
Sometimes exceptions are possible, for example, for chips from Silicon Labs - in this case, the Vendor ID will be located not in the seventh byte (07), but in the sixth (06).
Checking protection against software overclocking
You can find out if there is hardware protection against software overclocking:

We look in the field “ PLL Control Registers» to column 09 and click on the value of the first row;
look in the field " Bin" and find the sixth bit in this number. Please note that the bit count must start from one! Therefore, if the first bit is zero, then the sixth bit will be the seventh digit;
if the sixth bit is 1, then to overclock via SetFSB you need a PLL hardware mod (TME-mod);
if the sixth bit is 0, then a hardware mod is not required.
Let's start overclocking
All work with the program will take place in the “ Control" In the field " Clock Generator" select your chip and then click on " Get FSB».
At the bottom of the window, on the right, you will see the current processor frequency.

We remind you that overclocking is carried out by increasing the system bus frequency. This happens every time you move the center slider to the right. We leave all other half-knowledges as is.
If you need to increase the range for adjustment, then check the box next to the " Ultra».

It is best to increase the frequency carefully, 10-15 MHz at a time.

After adjustments, press the “SetFSB” button.

If after this your PC freezes or turns off, then there are two reasons for this: 1) you specified the wrong PLL; 2) greatly increased the frequency. Well, if everything was done correctly, the processor frequency will increase.
What to do after overclocking?
We need to find out how stable the computer operates at the new frequency. This can be done, for example, in games or specialized programs for tests (Prime95 or others). Also monitor the temperature to avoid possible overheating when the processor is under load. In parallel with the tests, run a temperature monitor program (CPU-Z, HWMonitor or others). Tests are best completed in approximately 10-15 minutes. If everything works stably, then you can stay at the new frequency or continue to increase it, performing all the above actions in a new circle.
How to force the PC to start at a new frequency?
You should already know that the program works with the new frequency only until a reboot. Therefore, in order for the computer to always start at the new system bus frequency, it is necessary to put the program in startup. This is a must if you want to use an overclocked computer on a regular basis. However, in this case we are not talking about simply adding a program to the Startup folder. There is a way to do this - creating a bat script.
Opens " Notebook", where we will create the script. We write a line there, something like this:
C:\Desktop\SetFSB 2.2.129.95\setfsb.exe –w15 –s668 –cg
ATTENTION! DO NOT COPY THIS LINE! It should turn out different for you!
So, let's break it down:
C:\Desktop\SetFSB 2.2.129.95\setfsb.exe is the path to the utility itself. Your location and version of the program may vary!
-w15 - delay before starting the program (measured in seconds).
-s668 - overclocking setting. Your number will vary! To find it out, look at the green field in the Control tab of the program. There will be two numbers separated by a slash. Take the first number.
-cg is the model of your PLL. Your data may be different! You must enter the model of your PLL in square brackets as it is specified in SetFSB.
By the way, along with SetFSB itself you will find a text file setfsb.txt, where you can find other parameters and apply them if necessary.
Once the line has been created, save the file as .bat.

The last step is to add the baht to startup by moving the shortcut to the “” folder or by editing the registry (you will find this method on the Internet).
Hello.
What user doesn't want his laptop to run faster? There are no such people! Therefore, the topic of overclocking will always be relevant...
The processor is one of the most important parts of any computer, significantly affecting the speed of the device. Overclocking it will improve the performance of the laptop, sometimes quite significantly.
In this article I want to dwell on this topic, since it is very popular and quite a lot of questions are asked about it. The instructions will be quite universal (i.e. the brand of the laptop itself is not important: be it ASUS, DELL, ACER, etc.). So…
Attention! Overclocking can cause failure of your equipment (as well as refusal of warranty service for your equipment). Everything you do according to this article is done at your own peril and risk.
What utilities will be needed for work (minimum set):
- SetFSB (overclocking utility). You can download it, for example, from the softportal: http://www.softportal.com/software-10671-setfsb.html. The utility, by the way, is paid, but the demo version, available above at the link, is also suitable for testing;
- PRIME95 is one of the best utilities for testing processor performance. Detailed information about it (as well as links to download it) can be found in my article on PC diagnostics:
- CPU-Z is a utility for viewing PC characteristics, also available at the link above.
By the way, I also want to note that you can replace all the above utilities with analogues (of which there are plenty). But I will show my example with the help of them...
I have a lot of articles on my blog about optimizing and cleaning Windows from junk, setting optimal operating settings for maximum performance, etc. I recommend that you do the following:
- clean your laptop of excess “garbage”, the best utilities for this are given;
- further optimize your Windows - (you can also familiarize yourself with);
- check your computer for viruses, about the best antiviruses;
- If the brakes are related to games (usually because of them they are trying to overclock the processor), I recommend reading the article:
It’s just that many users start overclocking the processor, but the reason for the brakes is not due to the fact that the processor “can’t handle it,” but to the fact that Windows is simply not configured properly...
Overclocking a laptop processor using the SetFSB utility
In general, overclocking a laptop processor is not so simple and easy: because the performance gain will be small (but it will be :)), and you also often have to deal with overheating (and, God forbid, some laptop models get hot without overclocking...).
On the other hand, in this regard, the laptop is a “reasonably smart” device: all modern processors are protected by a two-level system. When heated to a critical point, the processor automatically begins to reduce operating frequency and voltage. If this does not help, then the laptop simply turns off (or freezes).
By the way, during this overclocking I will not touch on increasing the supply voltage.
1) Definition of PLL
Overclocking a laptop processor begins with the need to identify (find out) the PLL chip.
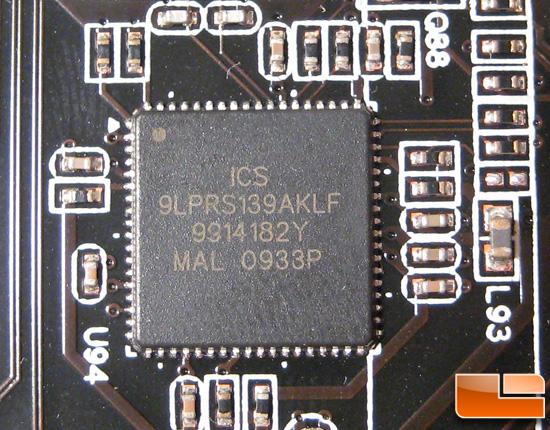
In short, this chip generates the frequency for various components of the laptop, ensuring synchronization. Different laptops (of the same manufacturer, same model range) may have different PLL chips. Such microcircuits are produced by companies: ICS, Realtek, Silego and others (an example of such a microcircuit is shown in the photo below).
PLL chip from ICS.
To determine the manufacturer of this chip, you can choose a couple of ways:
- use some search engine (Google, Yandex, etc.) and look for a PLL chip for your motherboard (many models have already been described and rewritten many times by other overclocking enthusiasts...);
- disassemble the laptop yourself and look at the microcircuit.
By the way, to find out the model of your motherboard, as well as the processor and other characteristics, I recommend using the CPU-Z utility (a screenshot of its operation is below, as well as a link to the utility).
One of the best utilities for determining the characteristics of the equipment installed in a computer. There are versions of the program that do not require installation. I recommend having such a utility “at hand”, sometimes it helps a lot.
CPU-Z main window.
2) Choosing a chip and increasing the frequency
Various frequencies will appear in the window (at the bottom, opposite Current CPU Frequency, the current frequency at which your processor is operating is shown).
To increase it, you need to check the box next to Ultra, and then move the slider to the right. By the way, please note that you need to move it by a very small division: 10-20 MHz! After this, for the settings to take effect, click the SetFSB button (picture below).
Move the slider to the right...
If everything was done correctly (the PLL was selected correctly, the manufacturer did not block the hardware from increasing the frequency, etc. nuances), then you will see the frequency (Current CPU Frequency) increase by a certain value. After this, the laptop needs to be tested.
By the way, if the laptop freezes, reboot it and check the PLL and other characteristics of the device. Surely you made a mistake somewhere...
3) Testing the overclocked processor
Usually, if there is some problem, then the processor will not be able to carry out calculations in this program for more than 5-10 minutes without errors (or overheating)! If you wish, you can leave work for 30-40 minutes. (but this is not particularly necessary).


temperature of laptop components -
If testing shows that the processor is working as expected, the frequency can be increased a few more points in SetFSB (second step, see above). Then test again. Thus, by experience, you will determine to what maximum frequency your processor can be overclocked. The average is around 5-15%.
That's all for me, happy overclocking :)
PLL of our motherboard. Click on the picture to enlarge.
PLL (Phase Locked Loop) is a chip on the motherboard that generates frequencies for various components. Many modern motherboards have at least four reference frequencies: FSB, memory, PCI Express bus and PCI bus; it is the PLL that generates these frequencies. In practice, on most motherboards, the FSB and memory frequencies are linked (using a factor that can be selected in the BIOS), while the PCI Express and PCI bus frequencies are fixed (100 MHz and 33 MHz, respectively). On some motherboards, like the one shown in the picture above, the PCI Express and PCI bus frequencies are also related.
Tip: PLL chips are usually produced by ICS. You only need to find a chip with that name to find out the PLL version.

SetFSB in progress. Click on the picture to enlarge.
Changing frequencies
Select the name of your PLL chip from the drop-down menu and click on "Get FSB". The program should find the current FSB frequency, after which it will allow you to change it simply by moving the slider.
It's important to remember two things. Firstly, do not get carried away with excessive frequency changes, otherwise it may harm your computer. Second, not all PLL chips provide the same frequency ranges; Some motherboards limit the available frequencies. Please also note that if you check the "Ultra" mode, you will have access to additional frequencies (depending on the PLL). Once you select a new frequency value, click on "Set FSB" to start using that value (and pray that nothing bad happens to your computer). If the system crashes, reboot it and try again. Here you don't adjust the voltage, so at least the hardware won't be harmed.
SetFSB is an essential overclocking utility that is updated frequently to support new versions of PLL chips. The latest version of this program can be downloaded.
Utilities for motherboards
If you are not interested in an application like SetFSB, then it will be useful for you to know that major motherboard manufacturers provide overclocking programs included with their boards.
Asus

Asus includes a fairly wide range of software in the package. Perhaps the most notable utility in the AI Suite is the AI Booster program. It allows you to overclock your system from Windows, like many other overclocking programs. It is worth noting that here you will not have to look for the type of PLL chip, since the AI Booster utility only works with Asus motherboards. In addition to adjusting the FSB frequency, it allows you to change the CPU voltage (VCore) and memory frequency. Therefore, despite the limited compatibility, in fact this program is much more functional compared to common universal utilities.

The EasyTune6 utility is much less attractive in appearance than the Asus program; in its ergonomics it resembles CPU-Z. However, EasyTune6 is a completely complete program that allows you to obtain information about your hardware, as well as overclock the processor and fine-tune the frequencies and voltages of components on the motherboard.
MSI

If Gigabyte's utility looks very modest, then MSI (like Asus) likes to dress up its product (in this case, even too much). The Dual Core Center utility, included with some MSI motherboards, is quite a flashy program with its own vision of beauty. However, like competing apps, Dual Core Center allows you to overclock the system and adjust voltages. In any case, it is a functional alternative to SetFSB.
Other manufacturers also include overclocking software with their high-end motherboards; we just stuck with the utilities from the largest vendors.
|
|||
|
| |||
During production, processor manufacturers always set the average frequency selected during testing. That is, you can slightly change the frequency and thereby increase processor performance by 15 percent.
There are a huge number of different programs that allow you to overclock your computer processor.
For overclocking we need:
- the computer itself;
- CPU Tweaker program;
- SetFSB program.
Overclocking instructions
So, before you begin the overclocking process, you need to install the SetFSB program. This program is considered the most secure and allows you to easily change the system bus frequency.
Next, run the program you installed by double-clicking on it with the left mouse button. Study the program thoroughly. As you can see, the program has a very simple and intuitive interface, and even novice users should not have any problems using it.
Go to the second tab, which is called “Control” and you will see the current frequency of the system bus of your processor and a little lower a slider that allows you to change its value.
On the third tab, called “Customize,” you can change additional system parameters.
Try experimenting with the program settings, only be careful when changing the processor bus frequency. The frequency needs to be increased a little bit at a time, for example increased by 50 MHz, immediately check the processor temperature and if everything is fine, then add 50 MHz and so on.
In order to configure the parameters of your processor directly from the operating system, install the CPU Tweaker program. This program allows you to change computer settings without increasing heat generation and energy consumption.
The main thing when overclocking and tuning is not to overdo it, so that later you don’t have to buy a new processor or computer.