Converting the speaker into a low-frequency one. Miscellaneous improvements to cheap acoustics using a specific example. There are usually two reasons
Do-it-yourself acoustics modification.
You have a pair of speakers on your hands, or maybe not a pair. Active or passive. Floor or shelf. It might even be a subwoofer and not speakers.

This article will help you learn about ways to improve the sound quality of your acoustics without extra costs. The most effective methods for improving acoustics will be described, which are easy to implement with your own hands. This can be called polishing what the manufacturer could not implement, due to the feasibility of production and its payback.
All instructions and tips from this article are suitable for any acoustics with a bass reflex, including subwoofers and floor-standing speakers. Many tips will also apply to other types of speaker systems.
So let's begin.
Upholstery of the body with sound-absorbing material and strengthening of the structure.
First, let's find out for what purposes this procedure is being performed.
Opening the columns.
Disassembling the column is very simple.

If this is an active speaker, then on the active speaker you need to unscrew the amplification unit from the back, which is screwed on with screws.
You need to remove the block very carefully, without sudden movements. If there are plugs that come unfastened, disconnect them and place the amplifier unit nearby without over-tightening the wires. On passive speakers, you just need to unscrew the screws on the midrange speaker and carefully remove it without damaging the wires.
*All these operations must be carried out carefully and without sudden movements, in order to avoid damage to wires and circuits.
Strengthening the body.
This modification is worth carrying out if you doubt the structural strength of your acoustics and there are no additional rigidity structures inside the case (reinforcing strips, “plugs” on the walls, ties between the walls). Almost always, speakers need additional strengthening.
For this procedure you will need small 1x1 - 1x2cm bars and rubber glue. We will glue the bars along the corners, on which there are no bars, which will strengthen the fit of the side walls to each other. We measure and cut, apply and estimate, spread plenty of glue on the beam and the place to which it will stick. We glue over all the corners where the manufacturer saved wood. Naturally, we use the beams as spacers, and not just glue.

It is also worth laying beams along long walls columns, if missing. As shown in the picture, or diagonally. The beams should fit snugly at the edges.
It is also advisable to make horizontal struts between the walls, this will significantly strengthen the structure. This is especially true for large speakers with long walls (for example Microlab Solo 7).
After this procedure, we get a stronger structure that creates less resonance of the walls, as well as less vibrations when micro-friction and walls touch each other.
To carry out this procedure, we will need double sided tape And sound-absorbing material.
For which goals it's being done.
All this action is carried out with the purpose reduce reflection of sound waves from an acoustic body with a bass reflex. If this is not done, then often, instead of bass, incomprehensible buzzing and whistling sounds will come out of it. Upholstery gives more smooth And balanced bass which is becoming more soft and better audible. It removes the buzzing, resonating sounds that arise in the acoustic body due to the collision of sound waves. This also allows you to slightly expand the lower range of reproduced frequencies.
As sound absorbers, the best materials are: padding polyester(can be found at any clothing market, or can be found in an old jacket :) felt, rolled wool or the most interesting material - cotton wool, sound-absorbing – type “ URSA”, besides, it is non-flammable. Just not insulating glass wool made from quartz sand, but homemade wool for installing partitions. If obtaining these materials is problematic, as a last resort you can use rolled foam, which you can get at any HozMage. But its use is still highly undesirable. Do not forget that padding polyester, felt, cotton wool must be fluffed before gluing.
To begin with, we take out the sound-absorbing material that the manufacturer put inside, if any.

What are we doing?
1) We glue with double-sided tape as much of the area inside the column as possible. Immediately peel off the protective paper.
2) We cut or stretch the sound-absorbing material so that the bare walls are completely covered, including (especially) the corners.
3) We line all the cavities with material so that the wooden walls are completely sealed. The thickness of the layer should be no more than 2 cm, otherwise it can significantly reduce the volume inside the case, which will not have the best effect on the depth of the bass component.
Warning.
In areas that get hot, it's best not to overdo it. This applies to places near the transformer and amplifier unit. It is better to leave an empty space of 1-2 cm between them and the sound-absorbing material. Therefore, the best material is non-flammable sound-absorbing wool like “URSA", which, for example, may remain after repairs. It can be used without restrictions.
You need to try to fix the material as thoroughly as possible. After all, you don’t want cotton wool or synthetic padding to jump around inside or, even worse, fly out of the bass reflex during large movements of air masses inside the housing :)
Modification of the bass reflex.
To reduce rattling and possible whistling from the bass reflex, it is worth doing 2 things.
1. Wrap the bass reflex with sound-absorbing material, like a “fur coat,” in one layer. Leave 1 cm of bare space at the end of the bass reflex. Secure the “fur coat” tightly with thin elastic bands, wrapping them around the bass reflex, as shown in the figure above.
2. Using wire cutters, cut off any protective grilles inside the bass reflex pipe evenly. There is no benefit from them, but there are a lot of unnecessary sounds and whistles. If there is a mesh glued to the end, then it is also better to remove it. This will allow air to flow more easily, which will increase the overall responsiveness of the speaker.
Installation of acoustics on spikes.
Try pressing the speaker for a while while playing music. You will hear that it will be out of tune and swallow a good half of the frequencies. This happens because the finger absorbs vibrations, preventing the speaker from releasing them into the air.
Speaker housing is a continuation of the speaker. When it comes into contact with the floor, table, shelf or other things, the speaker body transfers some of its vibrations to these objects, as in the example with a finger.
In order for the acoustics to efficiently transmit sound waves into the air without physically scattering them on the floor and objects with which it comes into contact creating distortions, spikes are used.
The spikes are attached as legs. To do this, 4 small holes (not through) are drilled on the bottom wall into which they are screwed. You can buy them in many consumer electronics stores that sell acoustics and accessories, or order them online. Under acoustics with spikes, there must be hard material– ceramic tiles, parquet or other. The main thing is that the legs have as little contact with it as possible and were not recessed.
The principle of action of the thorns is that they strongly reduce the contact area columns with the surface on which it stands. Thanks to this, the sound waves that are supplied to the body begin to sound, and not fade away on the floor, parquet or shelf. Distortion is reduced to a minimum, the bass component becomes more audible and much more detailed.
Important note.
Spikes make sense to use for acoustics with decent weight and a decent size. Spikes should be used primarily for floor-standing acoustics weighing more than 12 kg. Or for subwoofers weighing 5 kg or more. In smaller acoustics there will be an effect, but not as noticeable.
Replacing wires on the amplifier part of the acoustics. For active acoustics.
Often, the manufacturer saves on such things as the quality of wires from the crossover to the speaker and from the board to the crossover. The thickness, as well as the quality of the wire, directly affects the sound quality. The thicker the wire, the deeper the bass and the clearer the mids. This modification should primarily be carried out on subwoofers, due to the greater energy that flows through these same wires.
1.
We select a suitable replacement wire, naturally the highest quality copper that is available. Preferably not VVG (solid), since the signal changes when passing through such a wire. It is better to take a PVA (braided) core made of oxygen-free copper. Thicker is not always better, you need something in between, depending on the power of the acoustics.
2 . Unsolder and cut off the old wires. If there is a bracket at the other end, then, if possible, solder the wires to the terminals themselves on the board. If this is not possible, cut off the bracket at the root, remove the terminals, solder the wires to them and insert them back into the bracket. We also wrap the speaker and crossover terminals and solder them liberally. Soldering is a MUST!
3. We make sure the quality of the soldering.
It is also worth paying attention to connecting wire between the columns.

The manufacturer rarely slips in something sensible. The best option among the most affordable ones is braided wire with transparent insulation, which is supplied with, for example, SVEN Royal or Microlab SOLO 6 and higher.
A similar wire can also be purchased at electrical stores. This is like an inexpensive option for replacing the flimsy wires that come with the speakers. For floor-standing options, speaker wires with a thicker cross-section and higher quality, oxygen-free copper are best suited. These can be bought at any store that sells home theaters, or at the electronics market.
A few words about the wires from the sound source to the acoustics.
The wires that go from the sound source to the speakers (usually tulips) or receiver must be of good quality.
It is highly desirable that they be shielded from interference from power lines, cellular networks and radio. To do this, wire manufacturers wrap them in a layer of foil, or braid them with aluminum or copper thread. It is not difficult to distinguish them - they are much thicker than non-shielded ones. Also, high-quality wires should have gold-plated plugs for lower resistance and less signal loss on the plugs. You can buy such wires on the radio market or in stores that sell home theaters.
Note.
In order to have a noticeable effect from changing the wires, we recommend replacing them on acoustics with a price level 100$ and higher (for 2.0). Or, if the wire used by the manufacturer is of really poor quality.
Use surge protectors.
Good surge protectors that are equipped high frequency suppressors, they are quite good at cleaning up the so-called white noise and other interference caused by poor power supply and network interference.
Often, in built-in amplifier circuits, there is no high-quality noise suppression circuit, which leads to distortions, noise from speakers and different sounds when the refrigerator starts working or the neighbor’s electric stove starts igniting :)
Remember that cheap filters will not save you from interference. These are capable of protecting equipment from impulse currents that arise, for example, when lightning strikes the wiring, and nothing more.
The filters that we need must contain a suppressor (filter) of high-frequency interference. They are also useful for receivers and amplifiers, both for protection and for better noise immunity.
Companies make good filters ZiS Pilot(starting from series G.L.), APC.
If the speakers hum or there is strange sound coming from them.
There are usually two reasons:
- Poor quality signal source or cable.
- Poor quality input capacitors in the built-in amplifier part (if the speakers are active).
IN first case, you need to check the cable, look inserted Are there connectors? fully into the plug and check integrity cables Also need take away wires from others, especially cables supply network And radio, since they create magnetic fields around themselves.
In second case, you need to open the column with the amplifier part. It is usually heavier and has a heatsink.
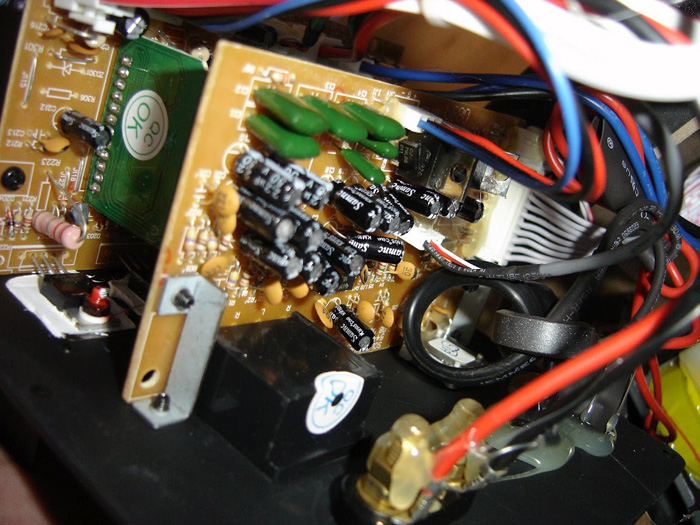
Next you need to find the capacitors of the power supply filtering circuit. Usually there are two of them and they are the largest. They should be removed and replaced with new, high-quality ones with a higher maximum voltage and capacity. It is also worth looking to see if others are swollen or leaking (brown or yellow dried liquid nearby). If yes, then replace it without hesitation.
You can also replace other large capacitors, since they do not stand out in terms of quality in multimedia acoustics.
Other useful tips for improving the sound quality of your acoustics, without any modifications.
Correct placement of acoustics.
To achieve the highest possible sound quality, the acoustic system needs arrange correctly around the room.
30% of success in achieving the correct sound picture depends on the correct placement of acoustics.
_________________________
1. Tweeters ( HF) - must be flush with the ear listener for better positioning in space.
2. Port the bass reflex should not be anything closed. The distance from a wall or other obstacle should be more than 15 cm so that low frequencies are not lost at the output and nothing prevents them from spreading throughout the room.
3. The front speakers should be positioned at 30 degrees, from the listener’s point of view and directed strictly at him.


Rear, on 30 degrees from the listener's side point (from 90 degrees) Only in this case the best depth of the sound picture is ensured.
4. Optimal distance, on which the speakers should stand from the listener - 2 meters For floor speakers and 1 meter For shelf.
5. Eliminate extraneous sound sources. This could be an open window, a quiet system unit, and so on. All these sounds interfere with the perception of sound and can even make a great sound illegible and poorly detailed.
Conclusion.
Let's repeat the steps again:
1. Strengthen the overall structure.
2. Upholster the body with sound-absorbing material inside.
3. Modify the bass reflex.
4. Install the acoustics on the spikes.
5. Replace the wires inside and outside with better ones. Connect through a good surge protector.
6. Correctly arrange the acoustics, eliminate noise sources.
7. Listen.
Most of these tips are suitable for both active and passive acoustics.
Get creative and be surprised how the sound changes for the better.
Happy modification!
I think there is no doubt that the best sound can only be obtained from full-size floorstanding three-way speakers. But there are often cases when there is simply no room for them. Small speakers, as a rule, will already be two-way. The requirements for them will be a little less, but the sound should still be good. This is the option we will discuss.

Acoustics 10MAS-1 from Estonia-006-stereo
The main distinguishing features were relatively modest size with increased bass response, as well as only two speakers (to save size).
Further - more, the size of the speakers became smaller, the sound - worse. Users were happy that they could be put into a niche in a furniture wall, placed on a cabinet under the ceiling or on the floor. This completely killed the sound, but few people cared, and the rattling of dishes in the cabinet with the speaker aroused delight and pride.
What are the shortcomings of a family of such models, of which dozens were produced? In my opinion, the root of all evil is dual-band and incorrect frequency division. I believe that speakers such as 10GD-30, 25GD-26, 6GD-6, 10GD-34, 15GD-14 and the like are fundamentally unable to sound well down to 5 kHz, which is the usual crossover frequency in two-way speakers with these speakers . By the way, you won’t hear a good word about the partners of these speakers - 3GD-31, 10GD-35 and the like, without design modifications and complex filters, they do not work the best.
It must be said that there were decent two-way speakers that could sound good up to 5 kHz, but they did not require small-sized enclosures, so they were not used.
Progress moved further along the road to absurdity, The speakers became smaller and smaller, and so did the speakers for them. Systems 15AC and 25AC were produced in large quantities, and there are still many of them on the secondary market at reasonable prices. It would be tempting to improve them with minimal rework and expense.
Acoustic systems 15AC-109
I think these columns are worthy of improvement. If their body is not damaged, then it looks good, the volume is satisfactorily sufficient for a standard speaker, there is FI.
Photo source: vega-brz.ru
The 15AS-109 is equipped with 15GD-14 (25GDN-3-4) and 10GDV-2-16. The section is at a frequency of 5 kHz and cannot be changed since operation of the 10GDV-2-16 below is impossible. Therefore, the sound is sluggish, gray, dull due to the indistinct reproduction of mid-frequencies (the most important for the overall perception of sound) frequencies. And this applies not only to this model, but also to all two-way speakers in which the previously mentioned woofers are installed.
The best Soviet designers knew this very well and, to modernize such two-way radios, they suggested that radio amateurs install full-fledged midrange speakers, such as 2GD-40. Alas, the insanity of miniaturization did not allow anything additional to be placed in tiny cases, especially in a box, because the volume was already insufficient.
External birdhouse towns were proposed, which sounded good, but achieving a cultural appearance was difficult. In addition, no matter what they say, the 2GD-40 and the like worked according to the data sheet up to 12.5 kHz, above that there is a break, and the directivity above is needle-shaped, i.e. you need a three-strip in a new housing and with new filters, from the old speakers there was only one woofer left.
The option is good and I made such a three-strip, basically only on available Soviet speakers, but that’s not what we’re talking about today.
Modification of speakers 25GDN-3-4
The 15AS-109 has 25GDN-3-4 speakers installed, these are good speakers, brothers of the 10GD-34, but much better than them due to the huge powerful magnet. As a result, they can work normally for a volume of 8...12 liters, provide output from 30...40 Hz with a decay of not 15 dB, like the S-90 and the like, but 3...6 dB. Of course, the volume of moving air and power are not comparable to the 75GDN.A common problem with most Soviet speakers with a rubber surround is its hardening, which causes an increase in the resonant frequency and quality factor, and this leads to a deterioration in quality. If initially (during manufacture) the suspensions were normal, you can try to revive them. If tight hangers have already been installed at the factory, only replacing them will help.
What can I advise from practice? Take cotton wool, good gasoline (“Galosh” or similar), cut a circle out of cardboard the size of the paper part of the diffuser and attach it so that less liquid gets on the paper. Next, moisten the cotton wool and generously moisten the rubber suspension from the front part.
Yes, gasoline evaporates quickly, but dry rubber greedily absorbs gasoline, changes before your eyes, and turns from dull to shiny. Of course, all work, especially with flammable liquids, requires appropriate safety measures.
So, we feed Razina from the front until she refuses to drink gasoline. Then we place the speaker with the magnet facing up and pour gasoline into the groove of the corrugation, wait until it is absorbed and evaporates. Immediately after complete evaporation, it is useful to warm up the dynamics for an hour or two with low frequencies at the resonant frequency (easily determined by eye), achieving maximum amplitude, but without knocking the sleeve on the magnetic system.
If the tires were really dry, they will change and the speaker parameters will noticeably improve. Of course, it is best to take measurements if possible. In my practice, there were both cases of a decrease in resonance by 20 Hz, and a minor effect of just a few Hertz.
The problem is that after a couple of days a partial rollback of the improved parameters occurs. To consolidate your achievements, you need to use a car drive belt restorer. It is sold in aerosol cans. I think they are all about the same, I bought "Belt Dressing & Conditioner" from Permatex.

We cover the corrugation with foam on both sides alternately 2-3 times (this is where you will need a cardboard circle, without it there will be spots and unsightly streaks on the diffuser) waiting for it to dry each time.
The effect of this treatment is long-lasting, clearly present for more than six months (in my experience). The rubber becomes completely different to the touch - soft and slightly sticky, and shiny to the eye. Warming up with maximum amplitude is also desirable.
The resonance decreased from 60...65 to 45...50 Hz, i.e. it became like the new speakers.
Replacing speakers 10GDV2-16
The 10GDV2-16 speaker fundamentally cannot operate from 2...3 kHz, so it is only a replacement. The main requirement is a low resonant frequency of 1...2 kHz without overshoot at resonance. I think 2GD-36 and 4GD-56 will do, but they are inconvenient to install, so I didn’t use them. I installed Philips AD0142 with a resonance of 1300 Hz, the result was not bad.
This is an intermediate option before setting up FI. I understand that few people have these Philips, and I didn’t want to put them here because there are good complete Philips subwoofers for them.
Chinese tweeters Alphard TW-302
For this budget project, I didn’t want to use tweeters whose cost per unit was higher than a pair of speakers, and the size also played an important role. That's why I bought these cheap (but not the cheapest) tweeters.

It was interesting to listen to these “silk” domes. The “silk” here is clearly synthetic, the reinforcement threads are sparse, but the material is very soft and elastic, sharply different from plastic membranes.
The case is plastic, but it’s bad - it gets scratched, there’s no rigidity.
The declared parameters of 8 Ohms and 95 dB turned out to be “Chinese” - the resistance is 4 Ohms (impedance over the entire frequency band, not just measured by a tester), and the sensitivity... I can’t measure it accurately, and it’s not necessary, according to my estimates, 88 dB. Is there a difference with 95 dB?..
However, the resonance is 900 Hz and 1200 Hz, the sound is not bad, the membranes can be easily replaced. In general, “third grade is not a waste.”
Modification of hull 15AS-109

I will not go into detail, since it has been described many times, but I will focus on the most important. This is a thorough sealing, filling all joints and cracks from the outside and inside. It is advisable to check using the LIMP program - the cracks are very clearly visible.
It is advisable to remove epoxy drips on the front panel with a chisel and smooth out any unevenness.
Install a spacer inside tightly between the front and rear panels. I placed a block with a cross section of 20x40 mm. Place the spacer between the holes for the speakers.
For the Alphard TW-302 tweeters we had to make an additional panel with a hole for the magnetic system, it’s inside. Screws are screwed into this panel through the holes in the tweeter, and it attracts the head to the front panel.
Faux suede pads are cut out for the speakers. I recommend replacing the screws with more modern ones.
Fill the holes for the speaker wires with glue, install spring clamps on the back; unfortunately, normal terminals with screw clamps could not be installed due to lack of space.
If desired, the outside of the body can be varnished or otherwise refined. Inside the housing, be sure to fill it tightly with fluffy padding polyester, but leave a passage between the hole of the FI pipe and the woofer.
Instead of a nasty standard plastic panel, I made a frame from a thin laminate and stretched canvas-type fabric over it. Attaching the frame to the body via Velcro is simple and does not require drilling holes. Due to my inexperience, I installed too long pieces of Velcro and removing the frame turned out to be oh so difficult!
Correct AC filters
We often see how home-made people think that filters are something of a tertiary importance; by audiophile standards, it is enough to install one capacitor and one coil at most.In my deep conviction, everything is quite the opposite - filters are the most important element of speakers, the wrong filters can ruin the sound of any speakers. First-order filters can work with well-matched pairs of speakers that have a natural roll-off at crossover frequencies without humps or spikes. In the vast majority of cases, it is difficult for us to find such pairs.
And I am also convinced that it is impossible to quickly and correctly debug filters without acoustic measurements.
The benefits of any calculators are amazing, since they use resistors as models, although speakers are complex electromechanical systems with resonances and other features.
The exception is LSP CAD and only if you feed it the results of microphone measurements.
It was possible to achieve a very simple filter circuit, with a minimum of standard ratings (there was special emphasis on this).
Capacitors K73-16, all parts are placed on the plywood of the old filter for convenience. The installation was done using an acoustic cable with a cross-section of 1.5 square.
This is what happened in LSP CAD

And here is the result of measurements with a microphone. Compare.


Here's the impedance graph, it doesn't drop below 4 ohms anywhere, so the speakers will work fine with any 4 ohm amplifier.

And here’s what LIMP showed in the box, where there seemed to be no obvious cracks...
Below 300 Hz in a normal room, due to reflections, measurements are difficult to make, so they are taken point-blank.

Point-blank measurement of the modified 25GDN-3-4 speaker, the FI port is plugged. It can be seen that at a level of -3 dB the lower frequency is 45 Hz. Find the frequency of -15 dB, as is usually measured for industrial speakers, using the graph yourself. After turning on and adjusting the FI, we managed to lower the frequency, but it is difficult to plot the measurements due to the distance of the FI hole from the speaker.
I repeat, despite the low reproduced frequency, you should not expect the same bass as from the S-90 due to the tiny size of the diffuser, but this is enough for tonal balance. From my point of view, tonal balance is extremely important.
Listening to the updated 15AC-109
The speakers were made back in the summer. Of course, they do not pretend to be “hiendas”. We compared it with my homemade three-way three-body version on 25GDN-3-4 with fashionable sequential filters, and with Tandberg 2510 (does anyone remember this company today - Hi-End of the 70s?).Naturally, they are inferior to both. Nevertheless, after the modification the speakers clearly became better. I am sure that they are better than any factory 15AC, S-20, S-30, all sorts of cubes, etc. The sound is clear, clean, compared to the three-way version there is a slight coloration, which is not surprising since the tweeter operates from about 2 .5 kHz, and below is a subwoofer.
A prerequisite is to work on a stand, at least on a stool. If the bass is recorded on the disc, it is also in the speaker; if there is no bass in the recording, then the speakers do not reproduce it. For normal volume levels in the room, up to 4 W per channel is sufficient. “Sibilants do not irritate.”
In general, the speakers play quite brightly, but not intrusively. The tonal balance is shifted slightly upward compared to the above speakers.
Their small size allows them to be placed even on a computer desk. The speakers are quite heavy, which is rather an advantage.
Total
To my surprise, the result was better than expected. Now all that remains is to hand the speakers over to the good hands of one of my friends for a new permanent residence permit.Thank you for your attention!
Reader vote

The article was approved by 124 readers.
To participate in the voting, register and log in to the site with your username and password.Due to the autumn-winter prostration, I had a sudden desire to wipe the dust behind the monitors of a spare computer and I found Chinese speakers Sven SPS-611 there. The main acoustics on which I listen to music are Canton Fonum 630 DC and several pairs of Wharfedale Diamonds of different series - accordingly, the maximum task was that I would not immediately want to throw out the Svens in a direct comparison with the shelf Wharfedales. Having spent the weekend, I achieved a pretty good result, so maybe someone will find this useful in order to occupy themselves with something relatively useful on the weekend. :) Replacing the speakers or any operations of significant complexity were not envisaged - the task was not to make good acoustics (on this basis, such a thing is simply unprofitable), but to fix the flaws of the Chinese design with as little labor as possible.
For a primer - the frequency response before and after the modification (the microphone is not calibrated, so above five kilohertz is not very accurate, but by ear the sweep cannot hear any special peaks and dips up to 12 kilohertz):
First, about what was done wrong in Svens. Firstly, there is no crossover (however, it would be naive to expect the presence of one in such cheap acoustics). In addition to problems with the frequency response, this leads to the fact that the tweeter works by sampling the midrange part of the range, which it does not reproduce without distortion and in which it has significant resonances. Secondly, the HF speaker in the Svens is a horror flying on the wings of DEMS. Thirdly, the case is very loud in the midrange spectrum, Fourthly, the bass reflex is tuned too high, so it only adds to the unevenness of the frequency response in the lower part of the spectrum.
1. Refinement of the body.
I use acoustics with an external amplifier, so I removed the transformer and amplifier board from one of the speakers as unnecessary. It is best to seal the resulting hole with some hard and fairly dull material, for example, a three-millimeter non-foil PCB. It is better to use epoxy, but I was too lazy to wait for it to harden and I used Titan construction adhesive - it did the job quite well. After hardening, a hole is drilled for the clamps in both columns, something like this:
It is advisable to lay a rubber band around the circumference under the terminal block so that the housing in this place is sealed. We also fill in one of the columns the holes from the screws that were used to secure the transformer. It is better to immediately replace the wires with copper of at least 0.75. Next, inside the body, it makes sense to put a spacer at least between the side walls (additionally, between the front and back, but not necessarily - they have a smaller area and they ring weaker); I used a rectangular aluminum profile, placing it with force into the spacer and fixing it with the same “Titanium”. You also need to glue one layer of cotton wool on the inner surfaces of the case (except for the front) (a regular large medical roll is enough for about four columns) with Moment glue so that they do not dangle. It would have been possible to use synthetic padding, but you had to look for it, and cotton wool is available in every pharmacy. :)
Next you need to remake the tweeter holder. In general, its design is to die for, because all the rules for placing HF heads in acoustics are violated. We remove the speaker from the holder and drill out all the insides with a drill bit with a diameter of 35 mm, then use a dremel or knife to cut the resulting tube to the plane of the body and chamfer the inner edges with sandpaper. It should look something like this:
You also need to lengthen the bass reflex tube with a tube glued together from several layers of thick paper, inside the additional tube should protrude from the Sven tube by about 4 cm - this will reduce its operating frequency by 10-15 Hz.
2. Refinement of the tweeter
This operation must be done with straight hands, so if you are not sure that you can do this without tearing the diffuser, it is better not to try. Gently moistening the edge of the plastic cap with acetone, but without pouring the entire speaker, you need to soften the glue that holds it and carefully separate it from the diffuser with angled tweezers:
The glue there is quite elastic, probably because of it the tweeter has a large roll-off after 10 kHz and terrible linearity in the rest of the range. After removing the cap, you need to clean off any remaining glue from it with acetone. Now we need to slightly increase the rigidity of the coil-cap connection; To do this, carefully coat the diffuser area from the coil to the place where the cap is glued with superglue. There is no need to apply a lot, as this will increase the weight of the moving system. Coating the entire speaker up to the corrugation should also not be done for the same reasons - linearity improves, but a significant blockage appears on top (I later tested this option on other speakers :)).
Carefully, trying to get exactly into the center of the diffuser, glue the cap back on. Next, we glue the tweeter to a pre-prepared plastic decorative plate using the same “Moment” along the entire diameter of the cardboard washer, making sure that the glue does not get on the diffuser and corrugation.
2. Refinement of the woofer
In order to smooth out the frequency response in the midbass range, the easiest way is to lower the resonant frequency of the moving system by increasing the mass. This will, of course, reduce the sensitivity of the speaker, but we are not portable equipment or a tube amplifier with limited output, so we will survive this. :) We will need a self-adhesive automotive mastic to reduce body resonances, based on bitumen. You need to cut a washer out of it with an outer diameter of approximately 54 mm and an inner diameter of approximately 34 mm, give it a cone-shaped shape with your hands (it is quite easily deformed, but it is advisable not to overdo it and tear it in some place) and glue it around the woofer cap. If you have accurate scales, you can weigh the resulting puck - it should be approximately 3.5-3.8 grams. It should look something like this:
Afterwards, it is advisable to trim the edges with a knife, without damaging the diffuser, and press (without excessive effort, but evenly) over the entire area of the washer so that it sticks well. What this modification gives is clearly visible from the following two frequency response curves:
4. Crossover
To be honest, what was calculated didn’t sound very good right away, as is often the case. The indicated ratings are the result of a fairly large number of experiments, and besides, the speakers in Svens can vary quite a lot from release to release, so it makes sense to try to adjust the crossover to a specific version of the speakers. An additional HF boost is needed to compensate for the tweeter's collapse. It is better to use film capacitors in the HF section; the woofer can be bypassed with a non-polar oxide. If the sound deteriorates if you connect a capacitor directly to the woofer, you can connect a 1-3 ohm resistor in series with it. The inductance is wound on a plastic frame for the armor core with an internal size of Ф22x16 with 0.75 wire, five layers.
You can mount the parts directly on the woofer’s magnetic system (a printed circuit board in our case is a clear aesthetic), gluing it with good double-sided tape (Tesa/3M) so that it does not rattle when the speakers are operating.
The condition on the outside is a solid 4, no one has tampered with the inside with crooked paws. There was only one minus - the bass driver from one speaker was killed, which was honestly reported to me, and I really didn’t like the fact that both woofers were painted silver (it’s good that the paint is not deep paint, i.e. the mass of the diffuser has not increased much).
For 1000 rub. I bought a set for creativity.
We will improve it.
Oh, I feel strong polemics between supporters of improvements to Soviet acoustics and supporters of burying it completely and without turning.
I immediately apologize for the quality of the photos, because at the time of revision, and even now I do not have a digital camera other than a phone.
Let's climb inside
After listening, I decided to disassemble each speaker to see if the insides matched the speakers' passports. As it turned out, the HF quality is 10GD-35, MF 15GD-11A, and LF 35GD (something) I don’t remember, but with a rubber suspension that hasn’t dried out.The first thing I did was rewind the woofer.
Restoring the speaker was no problem for me, since I did this very often in my youth for little money. Unfortunately, I didn’t have a mandrel of a suitable diameter, but I have a need for invention and I went to the nearest construction store with a caliper in my pocket. As a mandrel, I bought some kind of plumbing pipe for what seemed like 20 rubles. I sawed it lengthwise (this is necessary since after winding it would be practically impossible to remove the coil from the mandrel).
Let's add another 20 minutes for winding and centering and a day to dry the speaker. That's it, the speaker started playing without any extraneous sounds and as if untouched.
Let's start with the tweeters
After listening to the result and reading the great Internet, I began to think further about how to make the sound even better. Basically, all types of modifications come down to replacing the HF, replacing the midrange and damping the body.The highs really don't sound very good. There are unpleasant overtones in the high frequencies and a lack of ringing in the midrange. The HF section uses speakers with domes made of some kind of plastic/polyethylene. For comparison, I installed 10 W speakers with silk domes, the high-frequency sound became much more transparent and the overtones that simply grated the ear disappeared. As a result, these rootless speakers for about 500 rubles per pair remained in them. I bought them a long time ago and the markings on them are unreadable, and I don’t remember what was written on the price tag. You can also use 10GDV speakers with silk domes.
I note that I first made one speaker and compared the sound from the test discs with the sound of the original speaker. After listening, I decide to leave the rework or return everything back. Everything was done according to my favorite ear, which never seemed to let me down.
Refinement of the body
Next I decided to work on the low frequencies, i.e. modification of the body. Batting was bought for ridiculous money - 38 rubles per meter of length and 2-something meters wide. Having also looked at the manufactured filters, I heeded the advice to change all the wiring in the speakers.I removed all the speakers from the speakers. I took out the filter and switches. The wires can be safely cut since they will need to be replaced anyway.
Next, I cut out the required piece of batting, borrowed a furniture stapler from a friend, and began sheathing them inside in 2 layers.

We put the bass reflex pipe on the sealant and also cover it with batting. 
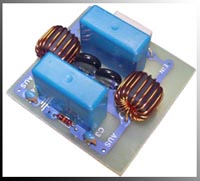
The next thing you need to do is modify the filter.
The filter circuit is simple
I turned off the switches completely, since they are completely unnecessary. We remove unnecessary elements from the filter board.
We replace all the thin conductors in the filter with normal copper wire.
Here is the filter before modification.
And this is a copper wire about 4 squares used for almost all connections
As a result, rebuilt with removed dividers and regulators 
Next we install it in the body and cover it with batting.
We also cover the entire midrange box from the outside with batting.
midrange link
In principle, after such modifications, the sound changed for the better, the bass became clearer, the upper frequencies became “more transparent” and “lighter”, but I still didn’t like the mids, the upper mids were not enough. There was not enough ringing in the vocals.After rummaging through my supplies I found two 4GD-8Es in excellent condition. I installed one speaker and spent a long time comparing the results. I liked the result. In one blues recording I heard brushes hitting the main drum. Before that I didn't distinguish them.
But these speakers did not last long in acoustics.
After listening to the modified speakers for a week, I came to the conclusion that the sound began to tire me.
Probably all this is caused by the fact that the 4GD-8E dynamic heads have a very high quality factor and, in a closed box, have a very jagged frequency response. Unfortunately, there is no normal microphone to take measurements. Yes, the midrange speakers were equipped with a foam pad covering the rear holes in the speakers. The midrange box itself is filled with fluffy “eye” cotton.
On the Internet they often wrote about 5GDSH-5-4 and 6-GDSH-5, about the fact that after installing the PAS they produce excellent midrange frequencies. Walking through neighboring radio stores, I bought a pair of 6-GDSH-5 4 Ohms for 110 rubles. As far as I understand, they are installed in household electronic equipment. I sealed the windows in the diffuser holder basket with thin batting and installed them instead of 15GD-11A, fortunately their installation dimensions are completely the same. There is another way to refine the midrange speakers - impregnating the suspension with mystical guerlain mixed with the blood of the orchestra conductor with acetone and applying a thin layer to the back side of the diffuser. But as far as I understand, this is quite rare and in construction stores they just shrug their shoulders. It would be worth taking for an experiment, because 110 rubles for a pair of new speakers is not a pity.
After all operations, we completely assemble the acoustics and enjoy the new sound. I tested the sound on Sukhoi’s homemade high-fidelity amplifier (I’m afraid that true Hi-Fi connoisseurs will spew rays of diarrhea in my direction). By the way, I also assembled the amplifier myself, with minor modifications to the power supply, and it has been playing for exactly more than a decade, but that’s how it works in the same form as an engineering sample. I connected it all to Sb Live! Playing flac of special discs such as audio doctor. And just wav and flac discs that are specifically recommended for testing the audio path.
Bottom line
Costs 1000 rub. the acoustics themselves500 RUR HF speakers
110 RUR Midrange speakers
RUB 150 batting, glue, staples, screws and other small items
Total 1760 rub.
What did we get?
Such nice acoustics
What follows is only my opinion and the opinion of my friends who have experienced it.
A friend who owns jbl floorstanding speakers, I don’t remember the model, but they cost about 20,000 for one and a Yamaha receiver, he definitely agreed that after the S90 modifications, his set is being replayed.
I'm completely satisfied with the sound. Walking around different salons with acoustics and listening to them, I understand that such sound is cheaper than 15,000 rubles. You can't buy one speaker.
PS Now they are playing together with Gumel's Simple amplifier and Sukhoi's BB pre-amplifier. Everything is connected to the same sound system SB Live! and works as a front to 4.0 sound for watching movies on a 37" LCD panel. There is more than enough realism in disaster films. I don’t even think about adding a subwoofer.
Improvement of dynamic heads
The most important part of the dynamic head of a loudspeaker is, as is known, the diffuser. It determines such parameters as the range of reproduced frequencies, unevenness of the frequency response, coefficients of nonlinear, intermodulation and so-called parametric distortions. These distortions are caused by the appearance in the emitted sound of components whose frequencies are an integer number of times less than the signal frequency (subharmonic oscillations). The timbre coloring of the reproduced signal also depends on its properties. At the same time, the diffusers of mass loudspeaker heads, made of cellulose pulp together with the upper suspension and collar (the flat part glued to the diffuser holder), are considered the simplest and most inexpensive elements of the heads, requiring the least labor costs in production. This approach leads to the fact that diffusers are often unable to perform their functions at the level of the requirements currently imposed on acoustic equipment. Thus, the problem of improving this element of the heads is now very relevant.
Before offering radio amateurs a way to improve diffusers, let us briefly consider the features of their operation. At lower frequencies the diffuser behaves like an oscillating piston. The frequency response of a head with an optimally designed diffuser has a smooth shape in this area. At medium frequencies, the rate of change in the phase of the signal in the voice coil exceeds the speed of propagation of mechanical excitation in the diffuser material. The latter can no longer be considered as an oscillating piston, since not all of its sections oscillate in phase with the signal supplied to the coil. However, the damping of vibrations in the diffuser material at these frequencies is not yet high enough and, upon reaching the diffuser holder, they are reflected from it and propagate in the opposite direction. Due to the interaction of direct and reflected vibrations, areas with intense antiphase radiation are formed on the diffuser - standing waves (this excitation mode is called partial). As a result, significant irregularities (peaks and dips) appear in the frequency response of the head, the range of which in a poorly designed diffuser reaches tens of decibels.
At higher frequencies, the attenuation of mechanical vibrations in the diffuser material increases, and due to the weakening of the component reflected from the diffuser holder, standing waves do not form on the diffuser. The unevenness of the frequency response in this part of the range is determined both by the properties of the diffuser material and by the shape of its generatrix.
Nonlinear distortions of heads at lower frequencies (in the region of the main resonance frequency) are, as is known, a consequence of the nonlinearity of the diffuser suspension and the unevenness of the magnetic field at the edges of the air gap in which the voice coil moves. At medium and high frequencies, the amplitude of the voice coil displacement is very small (tenths of a millimeter), and nonlinear distortions are caused by other reasons. One of them is Foucault currents that arise in the parts of the magnetic circuit (core and upper flange) during operation of the head, which, in turn, induce an EMF in the voice coil. To combat currents, Foucaults strive to reduce the electrical conductivity of the magnetic circuit parts adjacent to the voice coil.
The other two types of distortions, strictly speaking, cannot be called nonlinear, but with the existing method of measuring them, when only the harmonic voltage is taken into account, they are considered nonlinear. The first of them is associated with the excitation of the so-called “structural overtone” in the diffuser material. It arises due to insufficient damping of the material in response to mechanical excitation coming from the voice coil and gives the sound of the loudspeaker head a characteristic timbre coloring. The second type of distortion is caused by the formation on the surface of the diffuser of areas capable of emitting signals at their own frequencies in the presence of standing waves (their nature was discussed above).
The above analysis of the operating features of the diffuser shows that in order to improve the sound quality of loudspeaker heads, it is necessary to strive to reduce the intensity of vibrations reflected from the diffuser holder. For this purpose, diffusers of high-quality heads are usually made with a glued upper suspension made of a material with a high attenuation rate of mechanical vibrations. Such heads, however, are more expensive and low-tech to manufacture. At the same time, it is possible to improve the performance of the diffuser without using a glued suspension.
Improving loudspeaker heads Acoustics of the Moscow Electrotechnical Institute of Communications, under the leadership of Professor M.A. Sapozhkov, carried out work to improve the parameters of mass loudspeaker heads, as a result of which a way was found to increase the damping properties of their diffusers using vibration-absorbing mastics and coatings. In relation to heads, they must meet certain requirements: have good adhesion to the diffuser material, not change their properties (at least at room temperature) for a time comparable to the duration of operation of the head, and have a consistency at which the applied layer of mastic does not increase the resonance frequency heads due to reduced flexibility of the diffuser suspension.
The listed requirements are largely satisfied by the non-drying consistent mastic used in construction (TU400-1/413-78). It is a dough-like mass applied in a layer 4.5 mm thick and 200 mm wide on waxed paper and protected on the opposite side with a synthetic coating.
Before work, the mastic is diluted in gasoline to the consistency of sour cream. It is applied in the form of a ring strip with a width of 3...4 mm and a thickness of 0.5 (for heads up to 4 W with a light thin diffuser) to 1 mm (for more powerful emitters) on part of the upper corrugated suspension. For low-power heads with a suspension corrugated in the form of tangential strips, its peripheral half (adjacent to the collar) is covered with mastic. This can be done. for example, using a brush on the back of the diffuser through the windows of the diffuser holder.
When modifying powerful heads with a diffuser with a diameter of more than 200 mm, the mastic does not need to be dissolved. In this case, strips of the width indicated above are cut from the tape with scissors and glued (after removing the protective paper) into the first (from the voice coil) cavity of the corrugated suspension. After applying liquid mastic, the head must be kept in a ventilated area for an hour, remembering, of course. on compliance with fire safety rules.
The section of the upper suspension impregnated with mastic significantly changes its mechanical properties (losses due to viscous friction increase sharply), due to which the absorption of mechanical vibrations is enhanced and the damping properties of the diffuser are improved. Mechanical vibrations are absorbed twice; both in the forward direction (when propagating towards the diffuser holder), and in the reverse direction (from the diffuser holder). As a result, the possibility of formation of areas with intense antiphase radiation on the diffuser is eliminated. The consequence of improving the operating mode of the diffuser is not only a reduction in the unevenness of the frequency response of the loudspeaker head, but also a reduction in distortion caused by partial excitation.
The effectiveness of the proposed method for improving dynamic heads can be judged by the frequency response (Fig. 1-6), recorded in an anechoic sound-measuring chamber (the frequency response of the original heads is shown with a dashed line, modified ones are shown with a solid line; the acoustic design in all cases is a closed box filled with sound-absorbing material).
Analysis of the given characteristics shows that as a result of the modification, the frequency response of all heads has significantly improved: their unevenness has decreased, especially at mid-frequencies of the operating range, peaks and dips have disappeared or decreased. The 15GD-10 head stands somewhat apart: after modification, along with a decrease in the unevenness of the frequency response at medium frequencies, there is an increase in it at frequencies of 3...5 kHz. This is explained by the fact that the 15GD-10 head is equipped with a high-frequency emitter glued into the main diffuser, the oscillations of which in the specified frequency band interact with the oscillations of the main diffuser (optimized for an undamped diffuser, this emitter turned out to be not entirely suitable for the modified one).
In addition to measuring the frequency response, harmonic coefficients in the range of 250...10000 Hz were measured for the modified heads (ZGD-42, 4GD-53 and 1GD-50). At almost all frequencies, nonlinear distortions were significantly reduced.
An important advantage of the proposed method for improving the parameters of heads is maintaining their sensitivity, while the use of a glued suspension, reducing the radial rigidity of the moving system of the head, forces developers to increase the width of the working gap, as a result of which this characteristic worsens.
It should be emphasized that the above-mentioned improvement in frequency response and reduction in distortion was achieved by modifying ready-made heads with diffusers already optimized during development. If you cover the diffusers (or rather, their suspension) with mastic during the manufacturing process and only then optimize their parameters, then we can assume that the results will be even better. In combination with additional acoustic damping of mid-frequency drivers [L], the proposed method of modifying diffusers can significantly improve the sound quality of loudspeakers based on inexpensive mass-produced drivers.
LITERATURE: Popov P., Shorov V. Improving the sound quality of loudspeakers. - Radio, 1983, No. 6, p. 50-52.
V. SHOROV
RADIO No. 4, 1986″
What is Guerlain
Guerlain is a SEALING TAPE. It is used for sealing interpanel seams in panel buildings and similar places where sealing is needed. It is produced in the form of a “sausage” with a diameter of about 5-6 cm or in the form of rectangular pieces about 30 cm long and assembled in the manner of a machine gun belt. Packed in polyethylene, because... The mastic is terribly sticky and the only thing in the world that it doesn’t stick to is water. Colloquially called "Velcro". Guerlain deposits are found on construction sites, for example, where panel residential buildings are being built. Guerlain supplies usually run out pretty quickly. In addition, it can simply be locked in a container or warehouse, so you should take a good look and approach the worker who is involved in this work (sealing), because The guard doesn't always have the keys.
You should take guerlain in “sausage” - it is pure, because... Guerlain in the “machine gun belt” is produced with a mineral filler, which is not at all needed to impregnate the speakers. You can distinguish it by color - pure guerlain has a slightly (!) grayish yellow-white color with a slight creamy (or coffee?) tint and is terribly sticky. When heated, the sticky properties increase and guerlain becomes more plastic, and when heated strongly, it becomes fluid, but flows as if reluctantly. Guerlain with filler is noticeably darker and even has a brown color, it is not so sticky and the “grainy” structure is clearly visible. There is also white guerlain with white filler - again, it is given out by its “gritty” structure and slightly reduced stickiness. Pure guerlain is absolutely homogeneous and looks like some kind of candy mass or marshmallow.
Mastic dissolves in gasoline relatively slowly, so it should be thrown into gasoline in small pieces, the jar with this should be placed in a warm place and stirred regularly. Gasoline can be used for aviation or for lighters, but without any additives like tetraethyl lead, so that you don’t have to breathe in them in the future.
By the way, the device with which guerlain is stuffed into the cracks looks like some kind of machine gun, or, more precisely, a flamethrower with a wide barrel; in the top in the middle there is a hole into which the tape (or “sausage”) is tucked and works on the principle of an electric meat grinder. The remains of the tape are in the hands of the worker. Using knives, the entire polyethylene shell along with the contents is chopped into small pieces, mixed, the mass is heated under mechanical action and comes out through the barrel as ready for use as possible. A worker with this device, especially after a long drinking binge and without a hangover, really looks like a machine gunner from DOOM1&2 and it is dangerous to approach such a worker without a bottle. 😉
Finding it now is almost impossible. Builders sometimes didn’t hear the word “guerlain”; they were interested in it themselves. But it is possible that some of them still encountered this SEALING TAPE in their work in those distant times, but sometimes did not know what kind of material it was and what it was called... Ideal for impregnating paper corrugations of speakers. I myself am the owner of a small quantity of guerlain. I impregnated a number of pairs of speakers and was pleased with the results. Some have been working for more than 5 years. The material has not lost its properties. In general, I recommend it. The impregnation technique has been repeatedly described in Radio magazines from the 1980s. Only the corrugation of the speaker is impregnated with Guerlain, and only if it is made of paper or, in extreme cases, made of fabric, and in no case the diffuser itself, unlike Vorobyov’s chitin impregnation, with which the diffuser itself is impregnated to increase its mechanical strength. Without going into details, impregnating corrugations with guerlain makes the corrugation more elastic without reducing its strength. This will reduce the resonant frequency of the speaker and make a good decoupling between the diffuser and the basket, which will prevent the propagation of waves from the diffuser to the speaker basket...
***
N.B.
Most likely, the beige mass that came in 100x60x30mm briquettes has nothing to do with guerlain. This is the so-called cannon lard, used at that time in the automotive industry and car enthusiasts for anti-corrosion treatment of hidden cavities of the car body, on a par with MOVILE, which was popular at that time. By the way, it is ideal for applying to the surface of wheel arches before installing plastic fender liners. Less prone to leaching compared to liquid anti-corrosion materials. I myself used it to treat the body of my first car, proudly called Zhiguli.
It dissolves well in gasoline, kerosene, white spirit and other solvents. When frozen, the mass is solid, beige in color, and was previously produced in briquettes. Even now you can buy it at car markets.
The effect of treating corrugations with this mass, I think, will be similar to the effect of treating with castor oil or glycerin. But the latter should not be used categorically because the latter completely kill the corrugation and the paper begins to burst. Guerlain is a more homogeneous and elastic mass, not prone to drying out and losing its qualities. Cannon lard is still prone to drying out and hardening. So, I think it’s hardly worth using it for impregnating corrugations. If you still want to try, I think you should first try on another speaker, not your favorite one, of course.
***
Go to a hardware store and ask for weather stripping tape. There are tons of options. This is GUERLEN. I use SOUNDBAND tape both for damping the speaker baskets and for impregnating the corrugations. Dissolve in gasoline and white spirit, cutting into small pieces. Throw into the bottle along with the metal backing. The guerlain will dissolve and small pieces of the metal backing will settle to the bottom.

***
Everything is correct, just a few nuances need to be mentioned:
- dissolve only in Galosh gasoline, because White spirit dissolves paper fibers,
- it’s better to put it in a jar (transparent) in a water bath, then leave it for a day, use only the top transparent honey-like liquid,
- cover only the suspension - the corrugation, the diffuser in no case, (on the edge you can)
— you can buy polyisobutylene (high molecular weight) instead
***
You need to apply it while understanding what you want from the speaker. Maybe you don’t need to smear at all, but just soften the suspension, the washer, in order to lower the resonance and increase the movement of the diffuser (microdynamics). It depends on what kind of speaker you have and what you want to make of it. This is how Frez slides down. after impregnation. And the quality factor decreases at the resonance frequency. Which has a positive effect on the overall frequency response and nonlinear distortions.

Interesting notes on impregnating speakers with guerlain from the diyaudio.pp.ua forum
This is the kind of guerlain (sealed airtight) you can find today