Repairing headphones with bare hands, without a soldering iron! How to fix headphones from a phone
Any headphones, even quite expensive ones, are a very short-lived accessory. But if one earphone starts to malfunction, you accidentally break a wire or break off a plug, this is not yet a reason to throw the headset in the trash.
Diagnosis of the problem
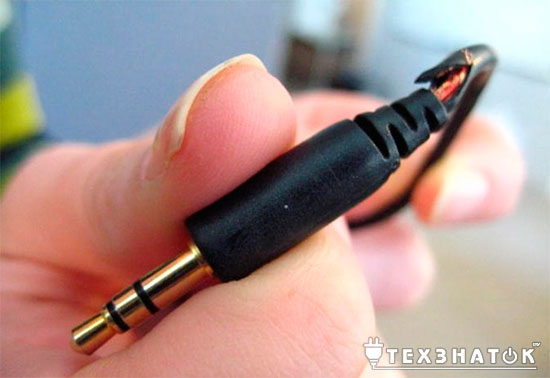
Before soldering the headphones, you need to figure out what is causing the problem. The most likely reason is mechanical thinning of the wires inside the cable. Typically, this is where they attach to the earphone or plug. In some cases, the cause may be rupture of the wiring as a result of severe pinching, impact, etc.
It is not difficult to determine which earphone wire is damaged - it is usually silent, or the sound comes from it with characteristic wheezing. For diagnostics, you can slightly shake the main cable. Look for faults gradually, from earphone to plug. The fracture site can be felt when the wire is bent 90 degrees around the thumb. If after such a diagnosis the sound is miraculously restored, then it is the plug that will have to be replaced.
The area of damage (if it is not clearly expressed) is detected with a 50% probability when disassembling the connection of the earphone to the wire and confidence in identifying the faulty channel.
What is needed for repair
Immediately before soldering headphone wires, check that you have the following tools and materials:
- solder;
- soldering device;
- rosin;
- technical knife;
- Aspirin (acetylsalicylic acid) tablets - even expired ones will do.
How to solder headphones correctly

Let's look at the first effective method:
- To be on the safe side, cut 1-3 cm more of the cable than the problem area includes.
- The desired channel is located by color. Common - blue or yellow, sometimes just copper, without insulation. The right channel is green, the left channel is red.
- Remove the insulation - more than 0.5 cm from the end of the cable. The polymer is easily and accurately removed with a construction knife. If it is varnished or made of paint, you will need a soldering iron. You can also carefully clean it with a knife.
- The next item is tinning the ends with solder. Heat up the soldering iron and take a small piece of solder with the tip of its tip.
- Place the ends of the wires on the rosin and spread the solder in an even layer over their entire surface. The wires are ready for soldering.
If you want to combine the procedure of removing varnish insulation and tinning, then you will need an aspirin tablet. I would like to warn you that such repairs should be carried out in a ventilated room, and try not to inhale smoke. Place the wire on the tablet, then use a soldering iron with a thick drop of rosin. This combination completely removes the varnish coating.
Second soldering method
The second method, which tells you how to solder headphones by tinning the wires with sandpaper:
- The sandpaper grains should not be particularly coarse. You will need a small piece of the material itself.
- Apply a little rosin to the material, then place the wiring on it.
- Warm it up properly with a soldering iron and pull it out. The varnish on the wire will begin to soften.
- Repeat the pulling procedure until the insulation is completely scraped off.
- After repairs, insulate the area with heat shrink or electrical tape.
Some people remove the insulation using a lighter, then remove carbon deposits with alcohol and flux.
Plug repair
We've figured out how to solder bitten wires from headphones. The soldering of the plug is carried out according to a similar scheme, which has its own characteristics.
First, check out the connection diagram for regular headphones.

How to solder a headphone plug:
- Cut off the non-functional plug and carry out the same actions with the wiring as described above. It is important to expose their minimal areas (2-3 mm), since contact during operation can lead to a short circuit.
- Insert the new plug through the headphone base housing.
- The connecting areas on the plug should be slightly scratched for easier soldering. At the cable connection points they should also be tinned.
- First, the ground (copper wire) is connected, then the left (white) and right (red) channels.
- Protect the area with duct tape. To prevent the soldering from being accidentally broken, tie a knot in the wiring in the immediate vicinity of the insulated area.
- Cover the area with the body.
And this circuit will be useful for those who repair headphones equipped with a microphone (headset).

How to solder headphones with a microphone? Using the same algorithm, only you will have to connect four wires to the plug instead of three.
Unsatisfactory result of plug repair
If during testing you notice that the speaker of one of the headphones continues to be silent, the cause of the problem may be as follows:
- connections are poorly soldered;
- there is a problem with the headphone speaker - there is a high probability of a wire break directly near it;
- The problem is in the cable body.
If the first problem occurs, the soldering process will have to be repeated; if the last problem occurs, refer to the instructions at the beginning of the article (for repairing broken wires). How to solder headphones with the second problem:
- Cut the wire near the non-working earphone.
- Disassemble the earphone - the self-locking design allows you to do this easily.
- Clean and tin the wiring.
- Solder the headphone wires to the wires of the cable body, test, and assemble to their original form.

If you have a soldering iron and basic skills in working with it, the procedure for repairing headphones is quite clear and simple. Diagnosing the problem is also easy. The main reason is mechanical damage to the wires in the cable body or at the connection points with the headphones and plug. We will be glad if this article helped you get your headset back into working order.
When using headphones, each of us has probably come to a point when they start to work worse or don’t work at all. It also happens that one of the headphones works and the other does not.
The most common cause of such breakdowns is a break in the wire at the entry point of the wire plug, since this is where it most often bends, which leads to its rupture.
Please note: The mechanical strength of copper wires is quite high, but not durable.
Preparation for soldering
 For soldering we need:
- soldering iron;
- solder;
- flux;
- wire stripper;
- pre-purchased plug.
It is necessary to prepare the workplace so that there is nothing unnecessary on the table and does not distract from the process. The work order is as follows:
- We install the soldering iron so that it does not touch anything with its tip, and plug it into the network.
- We cut the old plug at a distance of 15-30mm in order to get rid of the problem section of the wire.


Let's start soldering

The most critical stage when repairing headphones is this one, since the operation of the headphones, as well as the number of times they need to be remade in the future, depends on it.
- We pass the wire through the plug casing.
- Next, we pass the wire through the spring.
- We service the stripped wires individually. To do this, you will need to coat it with flux, and then put a little tin on the soldering iron tip and cover the wires with tin.
- We service the plug contacts in the same way as the previous point.
- Solder the wires to the contacts. We recommend starting with the common channel first, and then the left and right. Proceed as shown in the picture.

- Then we clamp the cable with a clamp, this will keep the wire from breaking longer and prevent it from moving at the soldering points.
- Next we isolate the contacts. If you have a thermal sleeve, then it should be put on after the spring. If it is not there, then we insulate it with electrical tape so that the channels do not short-circuit to the housing.
- We tie a small knot on the wire as close to the contacts as possible so that the wire does not pull out from under the plug, of course, if this knot will fit into the plug. If not, don't, because you won't close it.
- Close the plug.
- We check the serviceability of the headphones: insert them into the player and use them for good measure.
Repair with old plug
 Such repairs are complicated by the fact that not every plug is removable, as a result of which you will have to use a little imagination to repair it, which would not be required again.
In this case, you need to strip the old plug down to the contacts. These contacts are tinned and prepared for soldering. After this, you need to think about protecting these very contacts from mechanical stress. In this case, the solution is limited only by your imagination.
Headphone owners often encounter situations where the sound becomes poor quality or disappears altogether. Music can only play in one earphone. It’s a shame when an expensive gadget breaks down due to minor damage, although it’s also a shame to immediately throw away inexpensive headphones. No model is insured against breakdown; it all depends on the intensity of use and the care of the user.
You shouldn’t immediately run to the store for new headphones, especially since no one knows how much safety margin they have and whether they will break in the near future. It is suggested that you try to repair your favorite audio output devices with your own hands.
Finding the reason
The most vulnerable spot on headphones is the wire near the plug. It is most exposed to mechanical stress during use, for example, when putting the phone in a pocket or when frequently pulling the jack out of the phone by the cord. You can turn on the music and move the wire by bending it near the connector. Where the music appears a little, there is a break point. At this point you need to cut the wire and solder the plug to the headphones, as will be described below.
How does a three-pin jack work?
Before you start repairing, you need to know the structure of the plug. There are two types: 2.5 mm and 3.5 mm. In most cases, 3.5 mm is used, but both types break equally. Jacks are also divided into three-pin - for sound output - and four-pin - for sound output and for using a microphone. It is proposed to consider the three-pin in more detail. How to solder a plug to the headphones and 3 wires is shown in the diagram below.

- Left speaker.
- Right speaker.
- Common wire.
Three wires extend from the speakers, which are connected to the places indicated in the diagram. Typically the green wire comes from the left ear, the red wire from the right ear, and the gold or blue wire the common one. Thus, the diagram shows how to solder the plug to the headphones.
How does a four-pin jack work?
If the headphones have a microphone, then there are four wires in the wire and a four-pin jack will be required. A diagram showing how to solder the headphone plug and 4 wires is shown below.

- Left speaker.
- Right speaker.
- Microphone.
- Common wire.
Four wires come from the speakers and microphone, which are connected to the places indicated in the diagram. Typically, the green wire comes from the left ear, the red wire from the right ear, the white wire from the microphone, and the gold or blue wire from the common wire.
Tools and materials

In order to make repairs, you will need some tools that need to be prepared in advance:
- Soldering iron with soldering platform, as well as tin and rosin.
- A sharp knife, maybe a stationery knife.
- Heat shrink tube.
- Vise.
- Lighter or matches.
- Glue.
Sequence of repair actions
Now you can get started:
- You need to cut off the jack from the wire just above the break point.
- Carefully, so as not to damage the wiring, strip about 2 cm of the cable with a sharp knife, freeing three or four wires. They can be lightly scorched with a lighter to remove the varnish layer. This will make soldering easier. It is also possible to remove the insulation from the wires using a soldering iron, simultaneously tinning them one at a time. If used, you need to cut the required length and install it on the wire before soldering begins.
- Use a utility knife to remove all the insulation from the jack, freeing up the soldering areas so that you can see how to solder the plug to the headphones. If you wish, you can purchase a new connector.
- Solder the wires according to the diagram and pinout colors. To make soldering convenient, you can clamp the jack in a vice. The ends of the cable must be tinned, as already mentioned in the second paragraph. This will make the job easier. There is no need to overheat the connector so as not to melt the plastic inserts, that is, you need to solder as quickly and confidently as possible.
- After soldering, you should plug the connector into the user device, turn on the music and check that the connection is correct. If there is no sound, then some kind of error has crept in. There is nothing wrong with this, you need to remember how it was connected so as not to repeat the mistake. Next, you should unsolder and swap several wires and check again. Do this until sound appears. If the sound appears in only one ear, you need to check which one - the right or left. Depending on this, the wire from the speaker, in which there is no sound, should be swapped with the common wire or with the wire from the microphone. You can solder one wire, the one that comes from the sounding speaker, and apply the rest and check for sound. As soon as the sound appears, then solder it. But if you do everything according to the diagram given above, with the help of which it becomes clear how to solder the plug to the headphones the first time, then you won’t have to redo it.
Contact insulation
After you have correctly soldered the headphone plug and checked the sound in both speakers again (if there is a microphone, check the microphone’s operation), you can proceed to the final stage of the repair - insulating the contacts.

First you need to strengthen the cable near the plug - glue the nylon fibers from the wire to the jack. Next you need to cover the exposed contacts. You can use heat shrink tubing, which is placed on the wire before soldering. This tube is moved to the soldering areas and heated with fire using a lighter. Under the influence of high temperature, the tube is compressed and tightly covered with insulation. Excess tubes can be removed with a utility knife, and you can also use several tubes, putting them on top of each other. The name of the handset speaks for itself. It is possible to cover the contacts with insulating tape, having previously secured the cable at the soldering site with a pair of matches.
Now that the question of how to solder a plug to headphones with a microphone has been considered, that is, soldering a four-pin jack to a four-wire cable, the question remains of how to check the operation of the microphone. To do this, you need to connect the headphones to your computer, open the “Windows Sound Settings” section and enable the “Record” option. Modern headphone models do not require the installation of special drivers; the standard ones included in the operating system are enough for them. This method allows you to check the functionality of the microphone after soldering the plug to the headphones. All that remains is to enjoy the result of your labors.
The headset jack differs from the headphone jack in that it has an additional fourth contact, so things are a little more interesting with them. And the reason for this is the presence of a microphone, which elevates the headphones to the rank of a headset. Usually the main problem when trying to repair a headset jack is determining which wire should be soldered where. This is understandable, most often the problem is that there are 4 contacts on the connector and 5 wires. And even if there are 4, then who goes where...?
So, let's go fix the headset jack)
First, let's look at the headset jack itself. It's called 4-pin Jack 3.5mm, but it somehow doesn’t make any difference to the weather. So, it has 4 contacts, and each contact has its own purpose. There are two standards for pin layout:
In this piece of art I tried to depict the purpose of the pins. M- and M+ are microphone contacts. The other three are the headphone contacts already familiar to you: G - ground, R - right, L - left. The colors used to paint the contacts are not random, these are standard colors, which are most often used by manufacturers to distinguish wires.
Now the first option has almost completely died out. And this is not due to the fact that the second traffic lights on the contacts turn out to be more correct and not even with the Rastafarian tricolor, but with problems of compatibility with 3-pin connectors of laptops, players... I think everyone has come across headphones that play normally from a laptop only when they are not inserted all the way. This is the first option.
But let's return to the colors of the headset wiring. In order not to be unfounded, here is a cut cable from a Beats Tour headset. Classic wire color scheme:

But alas, everything is not always so good and the manufacturer does not always make our life so easy. It is not possible to consider absolutely all color scheme options. And it doesn’t make sense, it’s better to understand how to determine which wiring is responsible for what in any circuit. This is what we will do :)
Five wires per four pins of the headset jack
You got your hands on the headphones, cut off the connector, removed the braiding from the wire, and there it was:
Three adequate wiring and one, as they say now, with special features. And if you remove the insulation from it, it will look like this:
So we got 5 wires... :cry:
How to determine the purpose of headset wires
So, the easiest option, especially when you have nothing at hand except a knife and a soldering iron, is to open the headphone remote control

On this side of the board, at the bottom you can see a soldered red-yellow wire, and next to it is the letter G, which as we know is Ground. Turning the board over:

And we see that the blue wire is R, i.e. Right is right, but red is M or microphone. Is this M+ or M- you ask. If it is just M, then M+ is implied, because M- always goes to the ground. And if there is both + and -, then know the minus is still on the ground)
Cool! But among these wires there are no two that go together. Okay, you can take the earphone apart too:-P ( )

Yeah, here they are))) But here it’s worth warning you. Often there is a discrepancy between the colors of the wires in the wire before and after the fork. Those. It reaches the remote control the same way as on the connector, but further on, other colors can go to the second earphone.
In general, in this case it was possible to do without opening the earphone, because It is logical that among the colors that have already been decided on there is no left channel. Well, the yellow (golden) leash is always earth. So we solder (from the word solder, and not what you thought) together the yellow and yellow-red wires and voila we have four wires of classic colors :-)

Electrical methods for determining headset wiring
Unfortunately, it’s not always possible to easily open the control panel and earphone just like that. In such cases, you should use a multimeter.

We set the mode as in the picture and poke one probe into the yellow wire, the second probe into the rest. The vast majority of headphones have an impedance of either 16 or 32 ohms. These are standards. In practice, exactly 16 or 32 is rare, usually within +- 3 Ohms, but there are also 10, 24, and 54 Ohms.
The main thing is that the speakers have the same resistance among themselves. So let's say the speakers have a resistance of 32 ohms each. If we grab the ground and one of the channels with the probes of the multimeter, it will show us 32 Ohms. But if one probe is for one channel, and the second for another channel, then it will show the total resistance (in our case 64 ohms), i.e. The speakers in this case are connected in series. If you could not find both speakers, then the wire is broken somewhere further.
Don't have a multimeter? No problem :-P Let's use a battery. We will need a 1.5 volt tablet. It is better not to use other types of batteries, because... You may burn the speaker coil or damage the cone. I do not recommend keeping the headphones in your ear while identifying channels. It farts very quietly) it’s better to just hang it on your ears, but you can also put it on the table.
The cheeks in the earphone will sound not at the moment when you hold the battery, but when you touch and release it. And you shouldn't hold it for more than a second. It should be light touches.
With these simple methods you can quickly determine which of the wirings is responsible for what. Now I’ll show you a few common options.
Other examples of headset jack wiring
Here, without looking or checking, you can solder two gold wires together

It's just that each channel has its own wire for ground. From an audiophile point of view, this option is more correct than one ground wire and contributes to a wider stereo base.

In general, it turns out that the whole problem of the headset comes down to determining where the ground is, which needs to be twisted to get 4 wires.

I repeat once again - the earth is always yellow. Also, mixtures of yellow with other colors are usually also earth.

Headset wires with screen
It also happens that the ground is used as a screen. Those. Either all the wires or just the microphone wire are wrapped in it. This is done to protect against external interference.


Microphone shielding is much more common. It looks like this:

As you can see, the yellow wire is abnormally thick. Let's unwind it:

Hidden underneath is a blue microphone wire.
In general, the essence of shielding is to protect against interference so that external fields do not create interference on the microphone wire, which will be transmitted to your interlocutor. This is necessary because The signal level from the microphone is low and the level of interference may be equal to or greater than the useful signal.

Well, okay, the screen is back on the ground, and with it the yellow-striped-red wire. We twist and solder:

Instead of a conclusion
In conclusion, I would like to note that all this is quite simple, even if it seems complicated. You just need experience and the understanding that comes with experience. Anyway)) so if you want to be able to repair headphones, do it, don’t be afraid) New ones are still more expensive to buy, but maybe it will work out :-P
P.S. When determining, it is advisable to immediately, after stripping the braid, tin the ends of the wires. If you use a multimeter or a battery, you basically can’t do without it. And in any case, then solder to the connector)
Are your favorite headphones out of order? If you have a little free time and a desire to save money on buying a new headset, you can repair the headphones yourself. Moreover, the breakdown is often not serious enough to immediately go to the store.
As a rule, if you have the slightest idea about working with a soldering iron, solder, wire cutters and glue, then everything should work out.
If you still have the instructions for your headphones, read them before starting work. It may indicate the sequence of actions in case of a malfunction similar to yours.
- cable break;
- plug malfunction;
- problems with the microphone;
- speaker failure;
- breakdowns associated with the volume control;
- malfunction of headphone arms;
- problems with the microphone mounts (boom).
Broken wires
This is probably the most common headphone failure. To repair them, we will need the following tools:
- soldering iron with solder;
- sharp knife and wire cutters;
- heat-resistant glue and tubes;
- high strength threads.
First you need to determine exactly where the cable broke. After all, it often happens that the upper rubber ball does not have any visual evidence of rupture. To search, you may have to connect the headphones to your phone or computer, and then carefully bend the wire until sound appears.
Having determined the place where the cable broke, cut it at a distance of two to three centimeters on each side of the likely problem point. Now you need to remove the insulating layer and “tin” the wires.
Use any of the available fluxes to prepare the cable surface for soldering. Place it on a wooden board, press it down with a heated soldering iron and make movements like when cleaning a wire from varnish, for example.
After tinning, put heat-resistant tubes on the electrical cable and solder, paying attention to the colors of the wires. Now, to improve the connection, fold them in a Z shape and secure with threads.
If desired, you can decorate the cable using heat-resistant glue. It must be applied carefully with a soldering iron. This will prevent the threads from unwinding and will make the junction aesthetically attractive.
 Problems with the plug may be due to careless use of equipment
 Plug faults
In most cases, you will have to first disassemble the plug and then reassemble it. Its problems can be divided into two groups: mechanical and non-mechanical, associated with a cable break directly at the bend near the plug.
The disassembly process is similar for almost all headphones and will involve carefully cutting the plastic along the part in order to get to the wires.
If the last link of the plug breaks and it remains in the sound supply device, remove the remaining part of the part with tweezers or an awl and go to the store for a new plug, because it is no longer possible to repair it.
When turning the first link of the part around its body, you will notice that the sound becomes as if it was coming from under water, and the volume has decreased. You can repair the plug if you solder the contacts between the link and the petal so that they do not move relative to each other.
If the cable breaks at the base of the part, you will need to cut this wire 2-3 cm above the point of breakage and solder it back, taking into account the color scheme of the electrical cords included in the plug. If it is difficult to determine exactly which wire to solder where, use an ammeter to measure the resistance between the cords.
Microphone problems
As a rule, electret capsule microphones with amplifiers are installed in headsets. This means that during repairs you need to carefully monitor the polarity, you cannot clean their holes mechanically and do not allow a long-term increase in temperature. The latter means that you need to solder quickly, but at the same time very carefully.
To ensure the highest quality soldering process, use organic flux. And you can check whether the microphone is working without special equipment if you replace it with another one or connect it to another device that probably works.
Otherwise, you will need an oscilloscope, an active working speaker system, or a good knowledge of electrophysics to assemble an inverting amplifier circuit yourself.
Speaker failure
The speaker winding burns out if the power supplied to it is exceeded. The severity of the breakdown is determined using an ammeter or multimeter. The resistance of the windings of working speakers will be almost the same (plus or minus about 10%) and varies in the range of 16–100 ohms.
 Wheezing in headphones is usually caused by problems with the membrane or winding
 If the speaker produces sound, but wheezing is mixed in with it, this indicates a problem with the winding or membrane. The winding becomes unstuck from the membrane due to a strong impact, displacement of the magnet, or exceeding the maximum permissible power. It happens that the coil moves away from the membrane due to mechanical damage.
For repairs you will need superglue, a toothpick (sharp match) and accuracy. Be careful, because after gluing it takes time for the parts to take the correct position.
Problems with the volume control
The main reason for the failure of the volume control is the accumulation of a large amount of dust on the resistive layer, which leads to poor contact with the slider, which is activated by the control. The malfunction manifests itself as a crackling sound or a complete loss of signal in the headset.
To eliminate damage, you need to apply graphite lubricant or technical petroleum jelly to the surface of the resistive layer.
Repairing volume control adjustment (video)
Malfunctions of the headphone arms or microphone boom
A broken headphone arm is fairly easy to repair using a thin piece of metal, small screws, epoxy glue and a drill.
In the case of repairing a microphone boom, you need to understand that it is difficult to recreate the full functionality, but fixing it in a stationary position will not be difficult. You will need a wire with a diameter of 0.7–0.8 mm, a drill and heat-resistant glue. Please note that when gluing, you can wet your hands with water, and then you will be able to give the new part the desired shape.
Since the store sells a huge number of headphones from various manufacturers, you may encounter breakdowns not described above. The main thing is not to panic, but to think about what you can do with your own hands in this situation.