Screenshot of the current window hot keys. How to take a screenshot using standard Windows tools. How to take a screenshot in video player
If you urgently need to show something to your interlocutor or save something, the user may not know how to take a screenshot on a computer. It's time to learn this!
Why take a screenshot
Read also: How to set a password for a Windows folder? | 7 Best Encryption Methods and Programs | 2019

It often happens that a screenshot is simply necessary.
For example, if you need to show your screen to your interlocutor or send this data somewhere, if you need to save something that cannot be saved by clicking the right mouse button, or if you just want to catch a good moment in a video.
And these are just some of the reasons to use such a useful function on your personal computer or laptop.
For example, you find yourself in a not very pleasant situation, say, when using a virtual wallet.
And in order to prove to the administration that you are right, you will have to provide them with evidence. And here, well, you just can’t do without a screenshot.
Or you have to contact the support service of your hardware or software with a problem.
Again, it’s impossible to explain in words, so what remains to be done? Of course, take the opportunity to show off your screen.
It even happens that you want to capture messages as memories, and “Ctrl+C” alone is clearly not enough.
There are many little things that would seem easy to leave as an image on your personal computer or laptop, but doing this without taking a screenshot is simply physically impossible.
In fact, the ability to take screenshots can be useful at any time, and therefore it is important to know how to properly take a screenshot of your screen or a selected window, or maybe just some part of it. Yes, you can even select one phrase or picture.
Well, doing this is actually quite simple, and in order to take a screenshot, you need to put in a minimum of effort. It's very simple, done in a few clicks, and even a child can do it.
Print screen using a button
Read also: [Instructions] How to reinstall Windows (7/8/10) on a computer or laptop | 2019

To begin with, the print screen is the same, only with different letters. The name, by the way, comes from the first method of creating screenshots - the PrintScreen button.
This button may also sometimes be called PrtScr, and is usually located on the right side. Its location depends on the type.
So, this button is the fastest and easiest way to take a screenshot of your screen in a matter of seconds.
You just need to press it to save the screen image to the clipboard. That is, so that you can insert it literally anywhere.
Nothing extra, just one button, and then you can edit the screenshot in any image editor.
You can do this using Paint, Paint.net, GIMP, or any other editor you have.
It's important to remember that a screenshot taken using the PrintScreen button captures the entire screen, and if you send a screenshot to someone, that person will see all your browser tabs, running programs, absolutely everything. Therefore, editing the print screen can be very important if you do not want others to see more than necessary.
How to take a screenshot on a laptop
Read also:

As with any keyboard, the PrintScreen button on a laptop does not go away. It is in its place, which depends on the type of keyboard, and still performs functions.
But it happens that the user presses the button again and again, but nothing happens. So what then? Can't you take a screenshot on a laptop?
Not at all! This simply means that in addition to the key already known to the user, if you have a laptop, you need to use . And it looks like Fn+PrintScreen.
The button is labeled “Fn”, and it is located at the bottom left, not far from the space bar.
It's so easy and simple, just two buttons. Well, the screen, again, will be saved for further editing.
And if you are sure that you did everything correctly, and the screenshot still turned out, then it’s time to edit it. How to do this correctly?
How to edit a print screen
Read also: Windows Task Scheduler - how to configure and what can be disabled without damaging the system?

The easiest way is to call the Paint program and cut off everything unnecessary with its help.
As you know, this is the simplest “drawing tool”, and it’s just as easy to use it to adjust the size of a screenshot.
All you need is:
- Open the Start menu, you can do this using the “Win” key or by opening the menu on the left;
- Select the folder called “Standard”;
- Run the program from there
- By pressing Ctrl+V you can paste the screenshot into a new canvas.
- Then you need to select the “Select” tool, with which you mark the desired area, and “Crop”.
- All that remains is to save the image.
And the screenshot is ready!
Nothing complicated at all, just a few clicks and you can send it anywhere.
In the same way, you can edit with any available program that you have at hand. Using the “paste” keyboard shortcut, the resulting screen can be placed in absolutely any application.
What if, say, there’s something wrong with the print screen button? Or is it just that nothing is clear here? What to do in this case?
Printscreen using Scissors
Read also: [Instructions] How to connect a printer to a computer on Windows 10 and Mac OS

In Windows 7, the PrintScreen button can be omitted altogether. Instead, there is a very handy tool called "Scissors".
It is designed to create a screen without further processing, that is, you can make a print screen of absolutely any size and anywhere on the screen.
It's easy to find and use, and it only takes a few steps:
- Still the same “Start”, then in “Standard” you need to find a program called “Scissors”.
- It opens instantly, all you have to do is click on the tab called “Create” and select the size and shape of the field, that is, the future print screen.
- Then all that remains is to click on the “Save” button, or add an inscription to the print screen using the “Marker” tool.
Actually, nothing complicated, right?
Indeed, both ways to make a print screen are very easy and affordable.
True, in different versions of the operating system It’s not always possible to make screenshots the same way.
Printscreen on Windows 10
Read also: TOP 5 Ways to take a screenshot on a computer running Windows 10

There are many more ways to create and save a screenshot in the top ten.
Firstly, in some cases, screenshots are saved automatically, in a folder specially designated for this. By the way, it is located on the local disk.
Well, secondly, there are more built-in tools that allow you to take a screenshot without any problems.
And not only a screenshot, but even video recording without additional programs, all this is provided in the operating system.
There are several tricks with the PrintScreen key. When you click on it, a screenshot (of the desktop, running programs, etc.) will automatically be transferred to the clipboard, from where it can be pasted into a document or any graphic editor.
If you press the key combination Alt+PrintScreen, you can make a print screen of only the working window.
For example, an open folder, browser, or any in windowed or even full-screen mode. For everything to work out as it should, you must first make this window active, that is, click on it.
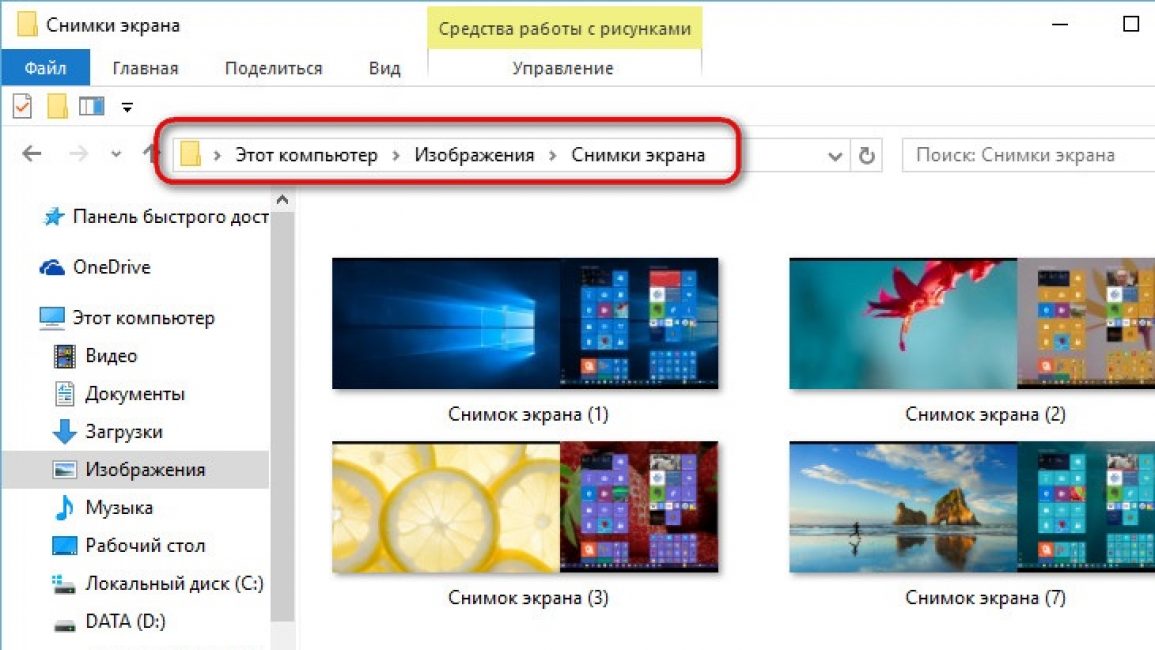
And finally, with the Win+PrintScreen key combination, screenshots will be saved automatically.
That is, they will immediately appear in the system. When you click on these buttons, the princescreen will not move to the clipboard, but will appear as an image in a standard folder called "Screenshots" and is located in the folder "Images".
But these are only keyboard shortcuts, what about other methods?
Are there other possibilities?
CreatorsUpdate: Game Bar and Scissors
Read also: TOP 4 Easy ways to change any file extension in Windows 7/10
The Windows 10 operating system, like its previous versions, is equipped with a tool called "Scissors". Yes, yes, exactly, in addition to key combinations, there are many built-in ways to take a screenshot.
This is a standard program, so finding it is very, very easy. You can find it through “All Programs” or simply type the name in the search bar and then launch the program.
In principle, the algorithm of actions does not change; it is very easy to make a print screen using this program.
As mentioned above, you just need to select the area and shape of the desired screenshot, mark this place on the screen, cut it out, add a signature if desired, and save it. Ready!
By the way, you can choose any folder for saving, and the “top ten” now has a delay function, that is, the program can count the required amount of time before taking a screenshot.
Another innovation was the CreatorsUpdate system, that is, improved and expanded key combinations and minor improvements to the operating system. One of these combinations can be used to make a screenshot, and this is Win+Shift+S.
Often the user gets lost when searching for a key called “Win”.
In fact, this is just a button with which you can go to the desktop or launch “Start”, and there is a flag on it.
And finally, the game bar. This is another way to take a screenshot on Windows 10 without using any third-party programs or applications.
Game Bar is a pre-installed program that is very easy to launch, especially when using various applications.
Initially, it was created for recording video from open applications and programs, but with its help you can also capture a print screen.
To do this, just first open any program you need for the print screen, and then press the key combination Win + G.
Print screen of Ubuntu Linux desktop
Many people probably already know how different these operating systems are from each other.
And if in Windows making a screenshot is as easy as shelling pears, in the case of Linux you may have to try more than one method until the right one works.
The thing is that not in all versions of this operating system the already well-known PrintScreen button works as it should.
And sometimes it doesn’t work at all, and even the usual key combinations for the same “windows” simply don’t work.
But it’s still worth trying this key, because sometimes when you press it, the system even automatically suggests saving a screenshot. That is, it opens a window for selecting a save folder.
In the same way, you can try the key combination Alt+PrintScreen, which will allow you to take a screenshot of the active window, or Shift+PrintScreen, to pre-select the area of your future print screen.
Sometimes it works, sometimes it doesn't, but either way, it's worth a try. Here you don’t even need to use third-party editors or a clipboard, the system will save everything for you.
But what if the button and key combination don't get a response? In this case, you should use the built-in utility Gnome Screenshot.
It is located in the folder "Accessories", and is called by double-clicking the left one.
With this program, you can pre-select the size and area of the future screen, turn the pointer on or off, or even activate a delay to prepare the perfect print screen.
All this is very easy and convenient, and will not take much time or effort.
True, using the printer screen button is not always convenient, or the user may simply not have the opportunity to do it.
And the same “Scissors” or “Gnome Screenshot” may not be at hand, not to mention the ability to remember key combinations.
Then third-party programs will become very useful, which you can use, and which are not inferior to the ease of working with the PrintScreen button.
Print screen on a computer without a button
Read also: [Instructions] How to reset Windows 10 to factory settings: All methods | 2019
It would seem that making screenshots using a button is the easiest way. So I took it, clicked it, clicked it again, pasted it, edited it... But it also happens that you can’t do this.
Therefore, various programs and applications will come to the rescue.
With their help, you can take a screenshot in a few clicks, save it in a predefined folder or select a location, immediately edit it or select a print screen area.
Most programs are free and take up very little space, are easy to install and are as easy to use as a button, and their choice is very, very large.
You can download a program that combines the functions of a photo and video editor; you can find an application from the manufacturer or from a developer who has included functions not only for creating a print screen, but also for recording video.
It all depends on the user, and, of course, on the choice of programs that are best suited for creating a screenshot.
The list of such most suitable programs includes Snagit, Greenshot, Snippy, Jing and others, which allow even the most inexperienced user to intuitively understand the work and easily make a screenshot.
You can find them using a search engine; there are different versions and versions of programs on the Internet. But how to use such programs correctly?
Unfortunately, I couldn't find a solution without P/Invoke at all. You must find the required process (usually you already have one, since you are monitoring it), its window (for example, you can poll the MainWindowHandle of the Process class), and take its coordinates on the screen from this window. To do this, you will have to call the WinAPI function GetWindowRect:
Using System.Drawing; static extern bool GetWindowRect(IntPtr hwnd, out RECT lpRect); public struct RECT ( public int Left, Top, Right, Bottom; )
You can copy a piece of screen using the Graphics.CopyFromScreen function, which is available in WinForms. If you do not have a WinForms application, you will have to include System.Drawing.dll .
We get this code:
Var process = Process.GetProcessesByName(process name here).FirstOrDefault(); // don't forget to check errors: what if you didn't find any processes? GetWindowRect(process.MainWindowHandle, out var rect); using (var image = new Bitmap(rect.Right - rect.Left, rect.Bottom - rect.Top)) ( using (var graphics = Graphics.FromImage(image)) graphics.CopyFromScreen(rect.Left, rect.Top, 0, 0, image.Size); // here you have an image, you can, for example, save it image.Save(imagePath, System.Drawing.Imaging.ImageFormat.Png);
I got this screenshot of the Visual Studio window:
Disadvantages of the method:
- the window must be in the foreground, otherwise you will get overlapped parts
- there may be problems with the Aero interface (a solution that can deal with this problem, but I have not tested)
Update:
I found a solution that bypasses the first problem, that is, it can take a picture of a window that is not in the foreground. To do this, we must use another WinAPI function PrintWindow. Here's the improved code:
Using System.Drawing; using System.Drawing.Imaging; static extern bool GetWindowRect(IntPtr hwnd, out RECT lpRect); static extern bool PrintWindow(IntPtr hWnd, IntPtr hdcBlt, int nFlags); public struct RECT ( public int Left, Top, Right, Bottom; ) var process = Process.GetProcessesByName(process name here).FirstOrDefault(); // don't forget to check errors: what if you didn't find any processes? var hwnd = process.MainWindowHandle; GetWindowRect(hwnd, out var rect); using (var image = new Bitmap(rect.Right - rect.Left, rect.Bottom - rect.Top)) ( using (var graphics = Graphics.FromImage(image)) ( var hdcBitmap = graphics.GetHdc(); PrintWindow( hwnd, hdcBitmap, 0); graphics.ReleaseHdc(hdcBitmap); // here you have a picture, you can, for example, save it image.Save(imagePath, ImageFormat.Png);
When creating abstracts or reports, you need to copy a screenshot into the document. This procedure of photographing the screen is called Print Screen. . Every computer user who constantly deals with the preparation of any documents should know how to make a print screen. This process is very simple and fast.
How to make a screen print
To take a picture of the screen, you only need to perform one simple step. This will be pressing a button on the keyboard called “Print Screen”.

After pressing the button, the image is copied to the clipboard. At this time, no visible changes occur in the operation of the computer: new windows do not appear, notifications are not displayed. From there you can paste your image into any program that supports processing of graphic information. There are many programs that specialize in creating and editing print screens. These include HyperSnap And WinSnap.
But most often Microsoft Word, Rhotoshop or regular Paint.
How to make a print screen of a page
If you want to take a picture of not everything that is visible on the monitor, but only one open window, then you can do this using a key combination. To do this, hold down the key Alt, we do Print Screen active window on the monitor. This function is very effective when you need to insert into a document only a certain part of the monitor's working space. The combination will save time on editing pictures.
How to Insert Print Screen into a Microsoft Word Document
If you want to insert a print screen into a Word document, you can simply press the key combination “Ctrl” + “Alt”. Before inserting a picture, you must specify its location by placing the cursor on it. You can also insert a graphic object by using the context menu. To do this, right-click on the place where the print screen will be inserted and select the “insert” function.

In the case when you need to change it before inserting a screenshot into a document, first insert it into any graphic editor and perform any operations on it.
How to insert a print screen in Paint
Program Paint is present in any operating system as a standard graphic editor. Using this application, you can save Print Screen as an image to your computer. To insert a screen photo into Paint, you need to carry out a number of simple steps:

How to work with Print Screen in Photoshop
- Open Adobe Photoshop and create a new document in it by executing the File and New commands.
- Now we take a screenshot of the active window, which will be on the clipboard.
- Using the Edit-Paste command, we paste the image from RAM into the Adobe Photoshop working window.
- Having completed all the necessary actions with the graphic object, we save it in any format to the computer’s memory.
You can also watch a video on the topic:
From time to time, each of us has the desire to save an image from the computer screen. For example, you saw a beautiful picture and wanted to send it to someone via Skype. But the site owners have installed copy protection.
In this case, the picture cannot be saved using standard methods, but you can take a screenshot of the screen on a computer or laptop. There may be another situation. Sometimes we need to save not a picture, but a video fragment, a game episode or text as an image. You can do all this using a screenshot. It's as simple as that, just follow the instructions below.
How to take a screenshot.
In the first case, you do not need to download anything additional to your computer, but it will take more time to take a screenshot. In the second, you will have to install additional software, but you can take a screenshot much faster.
Printscreen (prt scr key) using standard Windows 10 tools.
You can take a screenshot using the built-in functions of older versions of Windows in two steps:
- Save to clipboard;
- Editing or further saving in a folder using any graphic editor.
In Windows 8 and 10, the process has been significantly improved; the picture can be saved using hot keys without an editor by pressing Win + PrtScr. The screen should blink, and the saved screenshot will appear in the Username-Pictures-Screenshots or Users-Username-Pictures-Screenshots folder.
Printscreen button on the keyboard, how to use it.
The main and mandatory standard tool for work is the Print Screen button. It may be called PrtSc, PrtScr or PrntScrn. These are all generally accepted abbreviations, so keyboard manufacturers are free to use any abbreviation they wish.
The Print Screen button functions as a “photo camera”, that is, it takes a screenshot (display, desktop) and saves it to the clipboard. It works in Windows OS as follows:
- On most computers, you can simply press the Print Screen button to capture the entire screen;
- on some laptops you need to use the Fn + PrtScn key combination to take a picture;
- to save only the active window, and not the entire screen, you need to press Alt + PrtScn (or Fn + Alt + PrtScn);
- Windows 8 and 10 owners can immediately take a screenshot and save it in “Screenshots” using the Win + PrtScn hotkeys.
How to save or edit a screen image (screenshot).
After you pressed the Print Screen button, the photo appeared on the clipboard. Now you can work with it further. Open any graphics editor (Paint, Paint.NET, Adobe Photoshop, etc.).
- in Paint and Paint.NET, click the “Edit” button in the top panel, then select “Paste” from the drop-down menu - the saved image from the clipboard will appear on the screen;
- in Adobe Photoshop, click “File” in the top panel, then select “New” from the drop-down menu, then “Editing” (in the panel) and “Paste” from the drop-down menu.
In Paint, you can also first create a file of the desired size, and then insert an image into it.
Now you can start editing the image or simply save it to a folder using the “File” button and the “Save” function or hotkeys.
Free programs for creating screenshots.
Nowadays there are various free programs (from third-party developers) that can be used to quickly take a screenshot on a computer or laptop. The main ones:
There are other programs with similar functionality. Try different methods to test the software to choose the most convenient program for taking a screenshot.
How to take a screenshot (photo of the screen) on a phone, iPhone smartphone:
How to take a screenshot on Samsung Galaxy and other phones, smartphones and tablets running Android OS:
A screenshot is a very popular action on a computer that almost every person uses. What is he? Just an image that appears before the user on the monitor screen.
Sometimes the question arises of how to take a screenshot of the Windows 7 screen, because there are many situations in which a person may need a screenshot of this operating system.
Screenshot of the active window
When might you need a screenshot of your Windows 7 desktop? Let's say you are performing some operations on a computer. And suddenly you see a very strange error in which nothing is really clear. This problem requires an immediate solution, consultation on a specialized portal. In this case, describing the problem in your own words will not be very effective.
To quickly show an experienced computer user what's bothering you, you need to use a screenshot. You just need to take a photo of your mistake and post it along with a message to the forum.
In addition, a screenshot of a computer screen running on Windows 7 may be needed to create various tutorials and instructions. All pictures for any manuals are made using screenshots. Because it is sometimes better for the user to perceive textual information mixed with graphic information. In general, it is now clear why a screenshot may be needed. Now let's start studying.
A screenshot of the active Windows 7 window can be obtained using special programs and familiar operating system tools. The easiest way to proceed is the second way.
To take a screenshot or a screenshot of the active window in Windows 7, do this:
Open the screen to see what you want to photograph. After that, in order to get a screenshot, press the button on your keyboard - Prt Scr (Print Screen). To take a photo of a separate active window, rather than the entire screen, press the keyboard shortcut - Alt + Prt Scr.
In the program, at the top of the screen in the “Main” section, select the “Insert” button.
Now you see the image in the central part of the program window.
Let's proceed directly to saving the screenshot. In the main menu (at the top of the page) you need to select “Save as”. There we indicate the file type, then the location where the file will be saved. Don't forget to specify a name (by default the file is called Unnamed and the "Save" button).
That's it, now you are familiar with the instructions for taking screenshots in the operating system.