Android service menu. Engineering menu of Huawei smartphones
The Recovery menu is a special service mode of the Android mobile system. Available on all smartphones and tablets. Used to launch if the user wants to quickly clear all information on the device, restore factory settings, change the firmware, and also in some other situations.
If the Recovery on the device has never been changed, it is called STOCK. If this menu has been stitched, then it is already called CUSTOM.
Among custom recovery, CWM and TWRP are considered the most popular due to their functionality.
To enter the recovery menu on a switched off device, use a special combination of pressing HOME, POWER, VOLUME+ and VOLUME-. In this case, you need to use different of these buttons on different devices.
Below in the article you can find a method for your device. By the way, there are special programs for launching this menu. We will look at one of the most convenient ones called Quick Boot here.
A universal way to enter recovery on Android
Nowadays, the same key combination is suitable for many models from different manufacturers. Therefore, it makes sense to consider this method first. Perhaps it can be called a universal method.
The procedure is as follows:
- Turn off your Android smartphone or tablet.
- Press the power button and then briefly press the volume up control.
- The device will go into Recovery.
- With the device turned on, press the on/off button for a few seconds.
- A menu with some parameters will appear on the screen, where there may be a button “Go to recovery” or something like that.
If on your Android these key combinations do not lead to the desired result, then see below all the possible combinations specifically for each popular line of devices. For all other devices, one of the universal options described above is suitable.
Recovery on Samsung
If you have a device from the popular Galaxy line from Samsung Electronics, then one of the following methods will suit you. Keep in mind that all key combinations apply when the smartphone or tablet is turned off.
Methods:
Recovery on Sony Xperia
If you are the owner of a Sony Xperia line device, then turn off the device, and then turn it on and When the indicator lights up or the SONY logo appears on the screen, hold down the volume down or up key. On some other models, clicking on the logo works.
This option is also possible: turn off the device, hold down the power button and wait for a few vibrations, then release the ON/OFF button and quickly press “Volume +”.
Recovery on HTC
First of all, the user needs to switch to Bootloader mode. In most cases, this requires removing and installing the battery again:


Recovery on Nexus
With the device turned off, hold down the following key combination: volume down and on/off (power).

Now find the Recovery option and go to it by pressing the Power button.

Enter recovery using the Quick Boot application
There are also special programs that help you switch to Recovery with one touch of your finger. The procedure in this case is not at all complicated. Just open the Play Store, search for the application and install it. I decided to introduce you to one of the most convenient ones called Quick Boot.
After installation and launch, select Recovery from the program menu.

The device will successfully reboot into Recovery mode, and you will be able to continue working with those partitions that you need, depending on the task at hand. For example, if you need to restore all factory settings on your device, you will work with the Wipe data (Factory reset) section, to update the firmware use the Apply update from section, etc.
How to work in the recovery menu
Navigation here is done by pressing the side volume up and down keys. To confirm the selected option, briefly press the on/off button.
Advice: if you are not sure of your actions, it is better not to experiment in this menu, as the consequences will be irreversible. Android mobile devices, unlike PCs, will not issue warnings about possible problems.
What's in the Recovery menu
This menu contains the following sections:
- Reboot system. When you click on this item, Android will reboot in normal mode. In case you just went into Recovery out of curiosity, use this command to exit.
- Apply update from . This section is used to update installed firmware from an existing distribution, install patches, etc. In this section, you can select the type of update from the following list:
1) Internal storage - from an existing option, including from system memory, file storage, memory card;
2) External storage - from some external device;
3) Cache - from the internal system cache. - Backup/Restore. Each device stores a backup image of the system. When you click on this item, recovery from this image will be started. That is, the system will be completely updated to the state it was in after purchase.
- Wipe cache partition. The contents of the system cache will be completely deleted.
- Wipe data|Factory reset . Selecting this item will allow you to reset all settings made by the user during the entire period of operation. The device will completely return to its factory preset settings. Please note that during the reset process, all information entered and saved by the user will be lost. Including all files, folders, music, videos, etc. However, the performance of the tablet usually increases by an order of magnitude after resetting the settings.
Access to the engineering menu of your Android smartphone provides additional control options for the gadget.
In addition, this is a real opportunity to change "unchangeable settings", enable functions that are blocked but designed by the developer, and really improve (or ruin if ineptly interfered with) your gadget.
Engineering menu - what is it?
The engineering menu and hidden settings were present in the very first phones!
This gave and continues to give developers the opportunity to customize and test gadgets in the most unusual modes.
True, most are designed for smartphones and tablets based on the MediaTek processor.
Do not forget that if applications do not work correctly, you can create problems that are much greater than the problem of getting into the engineering menu, so be careful.
In addition, it is not a fact that the first application you choose will work correctly on your smartphone.
So you'll likely have to download and install several options before you find the one that works for you.
What parameters are available for configuration in the engineering menu
Of course, different smartphones may have different design schematics and menu functions.
Therefore, when you get to this function, you may find slightly different options and menu items on different phones.
Therefore, for example, a device based on Qualcomm Snapdragon will have rather meager capabilities and everything will be limited to just viewing various parameters and testing them.
At the same time, smartphones based on MediaTek will have much wider capabilities.
However, remember that these settings are hidden by the developer for a reason.
When changing them, you must be aware of what you are doing, otherwise it may end badly for your gadget.
Important! Make it a rule to never change settings that you do not know the meaning of or are not sure how it will affect the operation of the device. Otherwise, you risk ruining your mood for a long time.
Information you can get from the menu
Basic data available on any type of smartphone:
Phone IMEI– personal identification (unique) number of the device.
Phone number– sometimes not specified;
Net– your operator;
Roaming– are you in roaming?
Network information– whether you are being contacted and whether the network is turned on;
Call forwarding– is it currently in use;
Network type, network index;
Signal volume.
Your location coordinates.
There is also a section “about the battery”, it will contain the following data:
1 State– whether the battery is currently charging or not.
2 Charge level– in percentage charge/discharge ratio.
4 Battery Type– production technology
5 Time elapsed since last charge.
In addition to this information, the engineering menu may contain much more various useful data, depending on the type of menu provided by the developers.
Testing a smartphone using Engineering Mode capabilities
It often happens that despite all the correct visible settings, the phone does not function correctly.
The speed of processes does not correspond to the stated parameters, the amount of RAM used is less than it should be, failures in the operation or installation of valid applications are detected, as well as a lack of proper functions.
And the standard user menu does not provide any way to detect the cause of such problems.
The engineering menu just makes it possible to conduct in-depth testing of the system and the device itself for hidden malfunctions or incorrectly set parameters.
The following modes are available:
1 General (Automatic Test)– this test will test every parameter of the smartphone;
2 Report– a full test report is displayed;
3 Testing of all functional modules, processor, memory cards and SIM cards, vibration, speakers, microphone, connectors - literally everything the phone is loaded with can be checked for adequate operation.
4 Screen tests– parameters such as brightness, clarity, sensitivity, response speed, compliance with visualization and touchscreen;
5 Testing work gyroscope, cameras, accelerometer, flash, and much more.
This is what testing mode looks like.
To open it, you need to go to the appropriate section (most often “Testing” or something like that).

This is only a small part of what the engineering menu can provide for testing, and as you would expect, different phones will have different tools for testing and the items of the tested objects will differ.
However, the benefits of such opportunities cannot be overestimated.
Such testing can help you understand whether changing settings will help solve a particular problem, or needed.
Or maybe the problem is at the level of a physical breakdown, and it makes sense, for example, to replace a part.
A similar test would also be useful when purchasing a used device.
Thus, you can immediately detect modules that are not working or have errors and understand whether the gadget is worth buying or not.
Let's look at examples of using the mode.
Why you need to root an Android device and what opportunities it provides is known to a fairly large number of users, which cannot be said about the hidden advanced menu of hardware settings, also called the engineering menu. Few people know about these settings, and even fewer mobile device owners know how to use them. What is the Android engineering menu and why is it needed?
The Android engineering menu is nothing more than a special subroutine designed for testing by developers of the operating system and device sensors. The interface of this program is represented by a set of options that allow you to change the hardware configuration of your mobile device. With its help, you can get comprehensive information about the hardware of the gadget, test the processor, RAM and physical flash memory, wireless connection modes, configure the parameters of the camera, display, microphone, speakers and much more.
Entering the engineering menu
All this, of course, is good, but how do you go to the engineering menu if there is no corresponding option in the Android interface? The advanced hardware settings menu is entered using a special code entered in the phone number dialing line. The menu should open immediately after entering the last character of the combination, but in some cases you may need to press the call button.
There is nothing complicated in the procedure itself, however, it should be taken into account that different models of mobile gadgets have their own codes. Below we have provided a list of codes for the most popular manufacturers.
Engineering menu codes in Android are universal, however, their correct operation on phones with “left” firmware is not guaranteed. You can also use special programs to access Android hardware settings, for example, "MTK Engineering Menu" or "Mobileuncle MTK Tools".

Such applications are especially useful on tablets whose firmware does not provide a dialer. The interface and set of available options in these programs are somewhat different, however, understanding them will not be difficult.
Whatever method you use, you need to exercise maximum caution when working with the engineering menu. Before starting work, it is strongly recommended that you write down all the initial parameter values so that you can restore the settings. It is unacceptable to experiment with the engineering menu just to find out what comes out of it, as you can render your device unusable!
To obtain a list of engineering codes for a specific phone model, you can use a special application Secret Codes, available on Google Play. On some mobile device models, full access to the engineering menu may require superuser rights (root).
What you can change using the menu
You know how to get to the engineering menu, now let's find out what settings can be made using it. The possibilities are more than wide. The menu subroutine supports changing the speaker volume level and microphone sensitivity, built-in camera settings, audio parameters, GPS, Bluetooth and Wi-Fi modules, and turning off unused frequencies to save battery power. You can also test key components of your device and external memory card, configure I/O operations, determine the exact temperature of the processor and battery, and the level of harmful electromagnetic radiation.
Another useful function is to gain access to recovery mode - an analogue of BIOS on computers, which in turn contains a whole set of settings. Recovery mode features include resetting the device to factory settings, updating the firmware, creating a backup copy of the operating system, gaining root access, and deleting sensitive user data. It is not possible to list all the engineering menu options in one article; the more sensors and components there are in a phone or tablet, the more extensive it will be.
Increasing phone volume through the engineering menu
Now let’s demonstrate how to work with hardware settings using the example of one of the most popular operations and learn how to increase the volume on Android through the engineering menu. So, go to the menu using Mobileuncle MTK Tools or by entering the “magic” code, then find and open the Audio subsection. If you entered the menu through the Mobileuncle Tools program, this subsection will be located in the senior section Engineer Mode, in other cases it is usually located on the Hardware Testing tab.

In the Audio subsection you will have the following options:
- Normal Mode – normal mode that works when a headset is not connected to the device.
- Headset Mode – headset mode that turns on when headphones or speakers are connected to the smartphone.
- LoudSpeaker Mode – loudspeaker mode. Activated when the speakerphone is turned on, provided that a headset is not connected to the device.
- Headset_LoudSpeaker Mode – loudspeaker mode with a connected headset. The same as the previous one, but with headphones or speakers connected.
- Speech Enhancement - this mode is activated when talking on the phone without using the speakerphone.

There may be other settings in the section, for example, Debug Info and Speech Logger, but it is better not to touch them. Select the mode for which you want to change the volume level (let it be Normal Mode), select Type in the list that opens and indicate for which function we will change the volume. The following functions may be available:
- Ring – adjust the volume for incoming calls;
- Media – adjust the speaker volume when playing multimedia;
- Sip – sound settings for Internet calls;
- Sph – sound settings of the conversational speaker;
- Sph2 – sound settings of the second speaker (the option may not be available);
- Mic – change the microphone sensitivity;
- FMR – FM radio volume settings;
- Sid – it is better not to touch this parameter, otherwise problems with the interlocutor’s voice may occur.
Having selected a function, scroll through the current list, set the desired Value (from 0 to 255) and click to apply the new Set settings.

To change the volume level, you can also use preset templates - the Level option. Most phones have seven levels, from 0 to 6. It is advisable not to touch the Max Vol setting, just as you should not set the Value values too high, otherwise the sound in the speakers will begin to wheeze. Other modes in the Audio subsection are configured in a similar way.
Some smartphone and tablet models require a reboot for the new settings to take effect.
Reset settings
And the last thing we’ll look at today is resetting the engineering menu parameters to factory values. It may be needed if, after making changes, the device begins to work incorrectly. There are several reset methods. If the system boots normally, go to the settings and open the “Backup and Reset” subsection.


You can also reset the engineering menu by entering a special service code in the dialer. Usually it is *2767*3855#, *#*#7780#*#* or *#*#7378423#*#*, but your phone model may require a different code.
Another option is to use the recovery mode mentioned above. To get into it, use one of these combinations:
- Power button + volume down.
- Power button + volume up.
- Power button + Home button + Volume down/up.
- Power button + volume up + volume down.
In the list of options that opens, select “wipe data/factory reset” → “Yes – delete all user data” → “reboot system now”. The device will reboot and the settings will be reset.


There is another way to reset the engineering menu settings, but it requires superuser rights. Using any file manager that supports root rights, go to the root directory of the system, and then delete all or part of the contents of the folder data/nvram/apcfg/aprdcl and reboot.

Files in a folder aprdcl they are responsible for the engineering menu settings. It is not necessary to delete all files at once. If you mess up, say, your audio settings, all you need to do to restore the original settings is delete files that have an audio string element in their names. And one more thing. Regardless of the reset method, always make a backup of your personal data and applications, as they may all be lost.
Every Android device has a specific mode called Android Recovery. It is used to restore the correct operation of the phone. In it, you can reset all the settings of your smartphone back to the factory or originally installed ones. In addition, this mode is used to flash the phone's firmware and obtain Root rights. You will learn further in this article how to enter the recovery menu on Android.
The methods for getting into recovery depend on the brand and specific model of your phone. First of all, it is advisable for you to rummage through the instructions or search for information about the exact model of your phone on the Internet. Here we will indicate several relatively standard ways to open the recovery menu for different devices. But first you need to do something else.
The first thing is reinsurance. Making a backup
Backup - from the English "back up" - is the common name for the process of backing up data on your phone. Why do this? If something goes wrong and your data disappears, you can still restore it. What could go wrong? Sometimes flashing a phone or opening access to root rights, instead of improving the functioning of the system, on the contrary, “breaks” it. Therefore, if you are interested in how to enter the recovery menu on Android in order to upgrade it in the future, make a backup first.
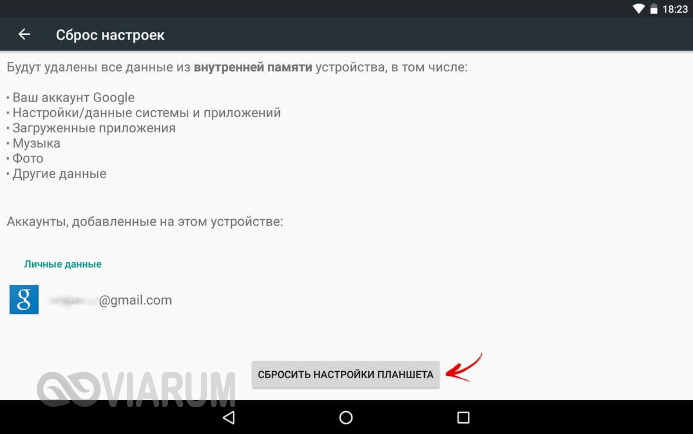
Most often, this option is hidden in the "General Settings" section. You will most likely see the message "Backup and reset". As you can see, if the phone is working properly, it is not necessary to go to the recovery menu to reset the settings. You can do this during normal operation.

How to enter the recovery menu on Android: basic button combinations
If you need recovery mode because your phone refuses to behave well, then, naturally, we will no longer be able to reset the state through “Settings” to restore the system. Usually, in order to get into recovery, the volume buttons and the power button are used.

The combination depends on the model and brand of your phone. Most likely, you will need to press the following at the same time:
- "Volume Up" and "Power";
- "Volume Down" and "Power";
- "Home" (button at the bottom of the screen) and "Power";
- both volume buttons, “Power” and “Home” (obviously, the creators of Samsung assume very virtuoso finger skills from the owners of their devices).
What is Android Recovery?
After you have entered recovery, most likely you will see the picture shown in the photo.

This is an example of a standard recovery menu preinstalled on the device. Depending on the model, Android version and brand of your smartphone, it may look different. You will navigate through this list using the volume keys, and use the power button as a confirmation button. This list contains the following functions:
Custom recovery menus
If you downloaded a special recovery menu to your phone, then it, unlike the preinstalled or “native” one, will be called custom. The main reason for the existence of alternative recovery menus is the more advanced functionality of custom versions and various additional features, for example, installing unofficial firmware.
The most popular custom menus are Clockwordmod Recovery and Team Win Recovery Project. If the first one is similar in control to a regular recovery menu - using the volume and power buttons, then when the second one is running, the touchscreen remains active. As in the main mode, you control the process by touching the buttons on the screen (see photo below). This is certainly convenient if the screen works without errors. If the “glitch”, because of which you need to go into recovery, is in the screen, difficulties will arise.

USB debugging: how to enter the recovery menu on Android from a computer?
In order for you to be able to enter the recovery menu of your phone from your PC, first take the time to find and download a special program to your computer that makes this possible. But even before that, look for the “USB Debugging” option in the settings of your device - you will find it in the section for developers. Then download AdbRun on your PC. And from there, knowing the commands for the console, you can control some functions of the recovery menu.
Now, if suddenly the recovery menu on Android does not open in the usual way on the phone itself, you can connect the device to the computer using a USB cable and control it from there.
Leaving gracefully: how to leave the menu
If you entered this mode out of curiosity, and now you are worried about how to exit the recovery menu on Android without it leading to irreversible changes to your data, let us dispel your worries.
Most often, exiting is much easier to do than entering the menu. In most well-known recovery menus, this item will even be the first in the list - Reboot System Now. Even if you can’t do this, you can cheat and do what all users usually do first of all if the phone “glitches”: reboot using the power button, remove and reinsert the battery, or in the end just leave the phone to discharge - later it will turn on again in normal operation.
Using the engineering menu, the user can carry out advanced configuration of the device. This feature is little known, so you should look at all the ways to access it.
The ability to open the engineering menu is not available on all devices. On some of them it is absent altogether or replaced by a developer mode. There are several ways to access the features you need.
Method 1: Entering the code
First of all, you should consider devices that have this function. To access it, you must enter a special code (depending on the manufacturer).
Attention! This method is not suitable for most tablets due to the lack of a dialing function.To use the feature, open the number entry app and find the code for your device from the list:
- Samsung – *#*#4636#*#*, *#*#8255#*#*, *#*#197328640#*#*
- HTC – *#*#3424#*#*, *#*#4636#*#*, *#*#8255#*#*
- Sony – *#*#7378423#*#*, *#*#3646633#*#*, *#*#3649547#*#*
- Huawei – *#*#2846579#*#*, *#*#2846579159#*#*
- MTK – *#*#54298#*#*, *#*#3646633#*#*
- Fly, Alcatel, Texet – *#*#3646633#*#*
- Philips - *#*#3338613#*#*, *#*#13411#*#*
- ZTE, Motorola - *#*#4636#*#*
- Prestigio - *#*#3646633#*#*
- LG - 3845#*855#
- Devices with MediaTek processor - *#*#54298#*#*, *#*#3646633#*#*
- Acer - *#*#2237332846633#*#*

This list does not represent all devices available on the market. If your smartphone is not there, consider the following methods.
Method 2: Specialized programs
This option is most relevant for tablets because it does not require entering a code. Can also be used for smartphones if entering the code does not produce results.
To use this method, the user will need to open " Play Market" and in the search window enter the query " Engineering menu" Based on the results, select one of the presented applications.

An overview of several of them is presented below:
The application is designed to launch the engineering menu on devices with a MediaTek (MTK) processor. Available features include managing advanced settings of the processor and the Android system itself. You can use the program if it is not possible to enter the code every time you open this menu. In other situations, it is better to opt for a special code, since the program can put extra load on the device and slow down its operation.

The program is suitable for most devices with Android OS. However, instead of the standard engineering menu, the user will have access to advanced settings and codes for already installed applications. This can be a good alternative to engineering mode, since the chance of harming the device is much lower. The program can also be installed on devices for which standard codes for opening the engineering menu are not suitable.

When working with any of these applications, you should be as careful as possible, since careless actions can harm the device and turn it into a “brick.” Before installing a program that is not listed, read the comments for it to avoid possible problems.
Method 3: Developer Mode
On a large number of devices, instead of the engineering menu, you can use the developer mode. The latter also has a set of advanced features, but they differ from those offered in engineering mode. This is due to the fact that when working with the engineering mode, there is a high risk of problems with the device, especially for inexperienced users. In developer mode this risk is minimized.
To activate this mode, do the following:
1. Open the device settings through the top menu or application icon.

2. Scroll down the menu, find the section " About the phone" and run it.

3. You will be presented with the basic data of the device. Scroll down to " Build number».

4. Click on it several times (5-7 taps, depending on the device) until a notification appears saying that you have become a developer.
5. After this, return to the settings menu. A new item will appear in it: “ For developers", which you need to open.

6. Make sure it is turned on (there is a corresponding switch at the top). After this, you can start working with the available functions.

The developer menu includes a large number of available functions, which include creating backups and the ability to debug via USB. Many of them can be useful, however, before using one of them, make sure that it is necessary.