TP link router quality. How to set up a TP-Link router. Instructions using the example of the WR841 N modification. Connecting a TP-Link home router
Over the past few years, many decent devices have appeared on the computer market at very low prices. Most of them are positioned as honest, high quality Chinese brands with markets all over the world. This article is about one of such devices. Wireless router TP-Link TL-WR841N with huge functionality and high performance. The device description is accompanied by a review, quick setup instructions and includes reviews from owners and system administrators.
Greeted by clothes
A very attractive bright green box will easily attract the attention of the buyer. An image of the assembled device and a brief image will quickly help you make the right choice. The TP-Link TL package includes everything you need to fully configure and operate the device. In addition to the access point, there is a power supply, a patch cord, two amplifying antennas, a disk with documentation and instructions.
The first acquaintance with the access point will bring only pleasant impressions to any owner. The affordable price of about 1000 rubles for the TP-Link TL-WR841N router provides the buyer with a powerful Wi-Fi device made of very high quality plastic, with an excellent design and a sophisticated cooling system. As it turned out, the entire building is dotted with ventilation windows on all sides. Apparently, the Chinese took into account the experience of their old devices, which froze during operation due to overheating.

Performance characteristics
The TP-Link TL-WR841N wireless router operates at a frequency of 2.4 GHz in 802.11b/g/n class networks. The control system operates on an Atheros AP81 core with 400 MHz and has a built-in memory of 32 MB. The device has a built-in switch with four ports, operating in 100-megabit networks, and one WAN port for connecting an incoming Internet channel. In addition, the wireless router understands WPS technology, which allows you to connect devices via Wi-Fi without prior settings and authorization. And if we consider the wireless capabilities, the manufacturer stated according to the 802.11n standard - 300 megabits per second with support for two spatial streams (MIMO 2x2). Types of connection to the provider are fully present for all technologies in the post-Soviet space: static and dynamic IP, PPPoE and PPTP/L2TP with Dual Access support, manual entry of the MAC address, including cloning. IPTV, which is gaining momentum in Russia, is also supported.
Preliminary router settings
The instructions supplied with the TP-Link TL-WR841N describe in great detail the procedure for setting up and connecting a Wi-Fi access point. But still, many owners, judging by their reviews, claim that before activating the device, it is necessary to perform a forced reset to factory settings. To do this, you need to press and hold the RESET button located on the back panel of the router with a sharp object like an awl for ten seconds. Naturally, at the time of reset, the access point must be connected to power and at least one indicator must be lit. An effective reset will result in a change in the light indication on the device's control panel.

Preliminary settings for a computer or laptop
Setting up a TP-Link router is possible only if the computer is ready to automatically receive the required IP address provided by the wireless device. Therefore, if your Windows system is configured via DHCP, then you should skip this item. The rest will have to make minor adjustments. To do this, find “Network Management” and select “Change adapter settings”. Click the alternative mouse button on the active adapter and select “Properties”. In the window that appears, find the line “TCT/IPv4”, place the cursor on it and select “Properties”. If the lines of the window that opens contain numbers, you need to copy them all in order onto a sheet of paper, including the names of the lines. Then select the option opposite the fields “... automatically”. Save and exit settings.
Communication between two devices
According to the instructions supplied with the TP-Link TL-WR841N router, setup is carried out in the following steps:
- The router must be turned on and the computer must be in working condition.
- The provider cable must be connected to the “Internet” socket located on the back panel of the device. If the provider does not require additional settings, the second indicator on the right will light up on the control panel, indicating the availability of the Internet.
- The patch cord is inserted at one end into the computer's network adapter, and at the other end into any LAN port of the router. A green light will appear on the device's control panel indicating connection, and a network connection message will appear on the computer. If the provider does not limit Internet access with settings, then it will immediately become available on the user’s computer.

First step in setup
Having opened any browser on your computer, you need to enter the IP of the router without quotes “192.168.0.1” in the address bar. If the browser gives an error, you need to enter another address without quotes “192.168.1.1”. There is confusion in the addresses due to different firmware. Setting up a TP-Link router begins with the appearance of the authorization menu, in which you must enter a password and login. Oddly enough, they are identical - “admin”. The result of correct data entry will be the opening of the wireless access point management menu. Not only system administrators, but also many users recommend going to the “Utilities / System Tools” - “Password” menu, located on the left panel of the control window, and changing the authorization data. Entering “admin” in the first two lines, enter a new login in the third, and a new password in the fourth and fifth. It is recommended to use English letters for input. Digital input is not prohibited.
Specifying provider settings
If the Internet appeared on your computer when you connected the router, then you can skip this point, otherwise the provider provides services using its own protocol, which means fine-tuning the TP-Link router is required. To do this, you need to go to the “Quick Setup” section and, following the data requests, enter the information previously recorded on the sheet. In addition to this data, you need to specify the type of connection, which only the administrator of the company providing Internet services can tell you. Very often, when drawing up an agreement with a provider, the document is supplied with information on connecting to the service. Also, all users should visit the official website of their provider and look at the “Equipment Setup” section. Many suppliers offer ready-made firmware for download with specified settings for different routers. Perhaps the provider will have firmware for the TP-Link TL-WR841N. In any case, if there are any difficulties with the setup, it is better to contact a specialist. Nobody forbids you to play with the settings yourself, because you can always reset the router to factory settings.

Alternative router management
Many users will like the ability to manage a wireless access point using a special Easy Setup Assistant shell, which can be downloaded from the manufacturer’s official website. To configure the TP-Link TL-WR841N router, you will need a driver for Windows, which is also offered for download. It wouldn’t hurt to check out the availability of latest firmware for the device that you can install. And for the firmware you also need step-by-step instructions, which are also available on the official website.
Reading customer reviews about the TP-Link TL-WR841N, you can find a lot of negativity towards the developer for alternative control of the router using an assistant. Compared to the web interface, which allows quick access to any setting, the shell has limited capabilities in the form of an assistant and does not allow the user to enter their own data. And the assistant only works under Windows, which limits its capabilities.
Wi-Fi setup
Setting up a wireless network in the TP-Link TL-WR841N router is a pleasure. The menu is so convenient and informative that the user should not have any problems:
- The SSID field prompts you to enter the name of the network in Latin letters, which will be detected when searching for Wi-Fi.
- In the “Channel” field you should leave “auto”, the mode should be “11 bgn mixed”, and the maximum transmission speed can be set to maximum.
- It is better to set the authorization method to universal - “WPA-PSK/WPA2-PSK”, and set the encryption to “AES”. This choice will allow you to set a password consisting of numbers and letters of unfixed length (from 8 to 64 characters).

In addition to the standard wireless network settings and LAN ports, the TP-Link TL-WR841N router boasts a lot of useful functions that will be of interest to advanced users.
- The demilitarized zone “DMZ” allows not only to prohibit access from the Internet to servers located on the user’s local network, but also to restrict the child’s computer, which is what many parents constantly use.
- A very simple IPTV setup will allow you to create a connection in a few minutes and enjoy watching high-quality movies transmitted through the provider’s network.
- There is a menu for setting up WPS. You can set a simple password, not the same as for Wi-Fi, and give it to friends who want to use the Internet service while visiting. Naturally, to connect you need to press the “WPS” button.
- When setting up Wi-Fi, you can determine the priority of streaming video “WMM”, which will allow you to allocate channel resources to watch a movie if it is busy with a torrent, for example.

In conclusion
For the most part, customer reviews about the TP-Link TL-WR841N are positive. They note a large set of functions, which very often remains untapped. Users did not ignore the reliable and well-ventilated design, the presence of a signal amplifier in the form of antennas, ease of control and ease of configuration. Disadvantages include failures when downloading torrents. disappears for a few seconds, and then smoothly rises. Many users recommend setting the software download speed limit to half, and the problem will be solved forever. In general, it’s simply impossible to ask for more from the TP-Link TL-WR841N router for 1000 rubles.
– favorites among devices that provide Wi-Fi. They are given the championship cup for their laconic design and wide range of actions. It won’t be difficult to find a model in the collection that matches its design and characteristics, but to understand the router settings, you’ll have to work a little.
To help beginners, the article offers brief instructions on how to connect a router to a PC and start using the Internet, which is not limited by wires. The guide consists of 5 stages of quick activation, upon completion of which you will be able to catch wi-fi anywhere in the apartment.
Determining the IP Address
The first step is to search for network settings for authorization. There are only three types of them:
- Dynamic (Dynamic IP);
- Static (Static IP).
- Access via PPPoE protocol.
And now about how to get them. For example, a user with Windows 10, to which the provider’s cable is connected. Internet is active. In this case, to find out the operator’s address, a person needs to go through the following route:
- At the beginning, click on “Start” - “Settings”;
- then find the inscription “Home page”;
- In the suggested options, activate the “Network Control Center”.
Now the “Change adapter parameter” field.

A column with the word “Internet” will appear on the screen. Click on “Properties”, and after that, in the list of “IP version 4 TCP/IPv4”, another click on the field of the same name.

The above maneuvers were carried out in order to find out the type of connection to the operator (see where the default icon is). If it is located in the “Obtain an IP address automatically” area, then synchronization is carried out through Dynamic IP. In this case, you can activate all the settings in an instant, without wasting time and effort. The process is carried out regardless of user actions.
When the “Use the following IP address” field is active in the window and the numbers in the cells are indicated, this indicates the use of Static IP. In this case, the received data should be written down on a piece of paper, because they will be useful for subsequent actions with a router like.

Why was all this necessary? From this stage, the upcoming TP-Link WI-FI router settings will depend on the received IP address and differ in their set of procedures. But more on this later.
Installing and regulating device activity
It's time to connect your purchase to your laptop or use Wi-Fi. In the process you need:
- provider cable (by this time it should already provide Internet access to the house);
- patch cord (power cord);
- actually, a computer;
- router of the selected model.
At the next stage, these elements must be assembled into a single structure. There are several connectors on the back of the router. Most often there are 4-5 of them, and TP-Link painted these ports in different colors. It is important to remember that the blue Wan connector is used only for the Internet cable (there is only one), and the rest are used for synchronization with a PC.
You may be interested in the following information:
The connection process consists of 4 stages:
- We remove the provider patch cord from the laptop.
- We move it to the Wan connector.
- We fix the selected router to the laptop with a power cord.
- We connect the power supply of the device to an outlet.
All that's left to do is to configure the network reception correctly.

On the back of the router (for example), its basic data and factory settings are indicated. From this information, you need to select the site address and enter it into the search box of your browser. A window immediately opens with fields for login and password, which are written in the documentation or on the same sticker.

After this, the user has access to tools for changing the functionality of the device. It's worth starting with the local network. Select the “Quick Settings” section, in which you need to fill in all the fields: come up with a security password, name of the wireless network, determine the number of channels, signal reception time, etc.

Only after completing these steps can you proceed to activating free use of the Internet. To do this, open the “Network” and “WAN” tab. The first thing that appears at the top of the window is the connection type. This is the same IP address that has already been determined using the instructions in the previous section. Depending on it, the further process has three different options.

It is worth noting that the web interfaces of all TP-Link models are similar to each other (and this is no exception). It is not difficult to understand the key points. Here are the basic information you need to know to fill out each of them:
|
Connection type |
Setup information |
|---|---|
| Dynamic IP | The setup occurs automatically, without any user input. |
| Static IP | In this case you will need: |
| IP Address; | |
| Subnet Mask; | |
| Default Gateway; | |
| Primary DNS (Preferred DNS server); | |
| Secondary DNS (Alternative DNS server). | |
| PPPoE | It is enough to know the username and password. |
Dynamic IP – setting up a network automatically
If the operator provides the user with Internet communication services through a dynamic address, the entire activation process takes a matter of seconds.
To establish a connection you need:
- find the Dynamic IP item in the WAN list;
- save changes;
- go to the System Tools – Reboot section;
- restart the device.
Now all the settings have taken effect and you can safely use the World Wide Web.

Static IP – we use the provider’s data
If the connection to the operator is made using a static IP, first select the desired address option in the WAN line. A window will appear on the screen where you need to enter your provider data. If they are already written out on a piece of paper in advance, then there should be no problems here. The information is registered - click on the “Save” field. Next, similar to the previous option, you need to restart the router.

PPPoE – remember login and password
Having selected this type of connection from the proposed menu, you need to fill in several data:
- Subscriber name and password, which is specified in the agreement with the provider.
- Operating mode, that is, determine the exact hours or around the clock.
After that, click the “Connect” button. In just a few seconds the device will be ready for use. You can make sure that the router is active at the bottom of the section. There should be the word "Connected".

Router security: quick setup
In order not to distribute free Wi-Fi to all your neighbors, it is better to immediately protect it. The most secure encoding is WPA-PSK/WP2-PSK.
Activating it is very simple:
- section “Access Control” or “Security Setting”;
- mark next to the column with the desired name.
A prerequisite for a secure line is the presence of a cipher. You need to invent it, add it to the line and, preferably, remember or write it down. The cipher must contain at least 8 characters. It is better to use Latin letters mixed with numbers. When finished, be sure to restart the router. This way, all changes made will remain in the system.

Internet connection to the device
The final part of setting up a TP-Link router is to enable the laptop to receive a signal from the router. On the bar at the bottom of the screen, you need to find and select the network activation icon by clicking the model name from the proposed list. To activate it, you need to enter the password you created earlier. Now left-click on the “Enable” or “Save” button. To test the operation of the device, go online to any of the sites.
After that, you can synchronize any devices that support the Internet with Wi-Fi: set-top box, other gadgets.
How to recover a lost password?
It happens that after some time the password to access the router settings is forgotten. If this happens, it doesn't matter.
There are several solutions to the problem:
- You can restore all original settings using the Reset button on the device panel.
- Log into the web service from any connected device and see your forgotten password.
- Try standard login details admin/admin. Perhaps they haven't changed.
If you choose the first option, you will have to go through all the installation steps again

Brief summary
At the end of the instructions for connecting a TP-Link router, all that remains is to consider a few mistakes that beginners make when connecting a device:
- before starting the activation process, the Wi-Fi button located on the back of the case was not pressed;
- the username matches the name of the router model, which is why it is lost in the list;
- operator parameters are incorrectly specified;
- The wrong connector is selected for connecting the patch cord.
Everything is simple, nothing fancy. If you look closely, connecting a TP-Link router will take no more than 5-7 minutes. It is important to take your time and follow the instructions carefully.
Hello dear friends. Nowadays, unlimited Internet will not surprise anyone, as well as its high speed. People are massively buying tablets, laptops and smartphones that have a built-in Wi-Fi module that allows them to use wireless Internet throughout the home. And some people just want to get rid of wires throughout the apartment. In both cases, Wi-Fi routers came to the rescue, making it easy to distribute the Internet throughout the house. We'll talk about this further.
Of course, I decided a little late to get a Wi-Fi router. So again, an article from my own experience. I will write about that today how to connect and configure Wi-Fi router TP-Link TL-WR841N (this is the router I bought for myself). Also set a password for the Wi-Fi network so that the neighbors don’t steal the Internet :).
Before I move on to writing the instructions, I’ll draw your attention to a question that probably worries a lot of people who have thought about installing a Wi-Fi router. This is about the harmfulness of Wi-Fi, I wrote an article about it, you can read it. And one more thing, you ask (what is there to ask, if you are reading this article, you have probably already bought a router) why did I choose the TP-Link TL-WR841N router? According to my observations, this is the best option for this price; I paid 300 UAH for it. (1200 rubles). This is not an expensive router that can provide a full-fledged Wi-Fi network for the home.
I’ve already written a lot of unnecessary text, but I only promised instructions with pictures :)
1. You brought the router home or to the office, it doesn’t matter, we open the box and find there a lot of pieces of paper, a disk with instructions and a wizard for setting up the router. Also included, of course, is the router itself, if not, then you were deceived :), a network cable to connect it to the computer and a power supply, that’s all.
That's all, our router is connected. Let's now move on to the setup.
Setting up the TP-Link TL-WR841N router
Before you start setting up, I recommend doing .
To configure the router, open any browser and write 192.168.0.1 in the address bar, usually 192.168.1.1 goes through, but I was able to access the settings only through 192.168.0.1. Only after configuring the firmware update do I get access to the settings via 192.168.1.1.
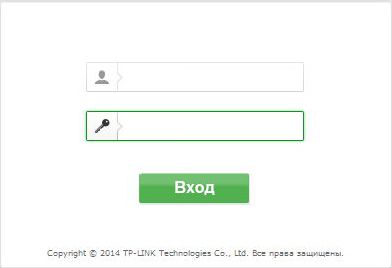
A window will appear in which you need to enter your login and password to access the router settings. By default, the login is admin and the password is admin.
If the router does not accept the password and login by default, then see the article for possible solutions to this problem.
We get to the settings page.
Let's first update the firmware on our TP-Link TL-WR841N. To do this, you first need to download it from the website tp-linkru.com. We find it for our model and download the latest version. Unzip the firmware file to your computer and return to configuration.
Go to the “System Tools” menu and select “Firmware Upgrade”. Then click “Browse”, select the file we downloaded and click “Upgrade”. We are waiting for the router to update the firmware and reboot.
More detailed instructions for updating the firmware on the router -
Let's continue with the setup. Let's change the login and password to enter the router settings. Go to the “System Tools” tab, and then “Password”. fill in all fields and click “Save”.
Go to “Network” and “WAN”. Here you need to select the network type. If you don’t know what to install, call and ask your provider. You can also look at a detailed article on setting up a router to work with your provider -
Setting up a Wi-Fi network on TP-Link TL-WR841N
Go to the “Wireless” tab and configure the following parameters. In the “Wireless Network Name” field, enter the name of your Wi-Fi network. Below you can select the region where you live.
Don’t forget to click “Save” and go to the “Wireless Security” tab. This is the most important page, where we will configure the security settings of our Wi-Fi network.
For more information about setting a password for a wireless network, see
We set everything up as I have in the screenshot above. In the PSK Password field, create and enter a password that will be used to connect to your Wi-Fi network.
We save our settings with the “Save” button. The setup is complete, let's now reboot our router. To do this, go to the “System Tools” tab, and then “Reboot”. Click on the “Reboot” button and confirm the reboot.
That's all, we have just installed and configured a Wi-Fi router. As you can see, there is nothing complicated here and you can do without calling a specialist. If you have any questions, ask them in the comments. Good luck friends!
Before we start setting up the router, let's check the local network connection settings. To do this:
Windows 7
Click on " Start", "Control Panel".
Then click on " View network status and tasks".


Local network connectionProperty".

Then select from the list " Internet Protocol Version 4 (TCP/IPv4)" and press " Property".

" and "", then press the " button Ok".

Windows 10
Click on " Start", "Options".

Then click on " Network and Internet".


In the window that opens we see " Ethernet". Right-click on it and select " Property".

Then select from the list " IP version 4 (TCP/IPv4)" and press " Property".

In the window that opens, you need to check the box " Obtain an IP address automatically" And " Obtain DNS server address automatically", then press the button " Ok".

Connecting the TP-Link TL-WR841N router to a computer
The next step is to connect the router TP-Link TL-WR841N to your Laptop or Personal Computer (PC). To do this, you need to connect the cable that your provider provided to you to the blue port of the router (that is, this is the cable that goes to your apartment, house, office, etc. from outside), and the cable that came with router, one end into one of the four ports, which are marked in yellow on the router, and connect the other end to your laptop or PC. And yes, don't forget to connect the power cable.

Authorization of the TP-Link TL-WR841N router
So, we have connected the router, now you need to access its web interface through any browser (be it Google Chrome, Mozilla Firefox, Internet Explorer, etc.). To do this, open the browser and enter the router address in the address bar: 192.168.0.1 and press the button " Enter" on your keyboard (in older models of this router this address may be: 192.168.1.1 ).
- Username - admin
- Password - admin
So, enter the data and press " Entrance"

Setting up the Tp-Link TL-WR841N router
And finally we got to the router’s Web interface and now you need to configure the equipment. First of all, let's secure the wireless network by setting a password for wi-fi. Then you will need to find out what type of connection is used to access the Internet, is it PPTP, L2TP or PPPOE. You can find out by calling your provider (this is the organization with which you entered into an agreement to provide Internet services). So, let's start setting up the router.
Setting a password for wi-fi
I bring to your attention Video instructions for setting a password for wi-fi on a router Tp-Link TL-WR841N
Let's also take a written and illustrative look at setting up a Wi-Fi password on a router Tp-Link TL-WR841N.
On the Web interface, select the "tab" in the menu Wireless mode"and we get into" Wireless Settings". Here it is necessary in the column " Wireless Network Name:"Come up with and indicate a name for your wireless network; this name will then light up when you connect to the network. Then select " Region:" - Russia. After that, click " Save".

Next, go to the menu in the "tab" Wireless Security". Here we will set up a password for the wireless network invented above, for this we select the encryption type " WPA/WPA2-Personal(Recommended)" and then below in the field " PSK Password"we come up with and enter a password. Then click " Save".

After we pressed " Save"A message will appear above this button indicating that the settings have been saved and now we need to reboot the router. This is what we do by clicking on the button" click here"by sending the router to reboot. After the reboot, the name of your wireless network will appear in the network settings of your computer.
Setting up PPTP
PPTP on the router Tp-Link TL-WR841N using the Tp-Link TL-WR1043ND router as an example.
Let's also write and illustrate PPTP on the router Tp-Link TL-WR841N.
Net", then " WAN".
IN " WAN connection type:"choose" PPTP/PPTP RussiaUsername:") and password (in the line " Password:IP Address/Server Name:
Connect automatically NOT Connect on demand
Save".

Setting up PPTP with a static IP address
Let's look at the connection setup PPTP with static IP address on the router Tp-Link TL-WR841N.
So go to the menu in the tab " Net", then " WAN".
IN " WAN connection type:"choose" PPTP/PPTP Russia", below you will be asked to indicate your username (in the line " Username:") and password (in the line " Password:").
Static IP addressIP Address/Server Name:"), IP address (in the line " IP address:"), subnet mask (in line " Subnet mask:"), default gateway (in line " Main gateway:") and DNS (in the line " DNS:"). All of the above data is provided to you by the provider (the organization that provided you with the Internet).
All this data is usually specified in the contract with the provider. If for some reason you could not find them, you need to call your provider's hotline and find out how you can get them.
After you have entered all the necessary data, check the box next to " Connect automatically" (This setting will keep your Internet connection permanently, so if you have NOT For an unlimited tariff, I recommend checking the box next to " Connect on demand", that is, the Internet is connected only when you start using it).
After all manipulations with the settings, press the button " Save".

L2TP setup
Let's look at the connection setup L2TP on the router Tp-Link TL-WR841N.
So go to the menu in the tab " Net", then " WAN".
IN " WAN connection type:"choose" L2T/L2T Russia", below you will be asked to indicate your username (in the line " Username:") and password (in the line " Password:"). You will also need to specify the server IP address (in the line " IP Address/Server Name:"). All of the above data is provided to you by the provider (the organization that provided you with the Internet).
All this data is usually specified in the contract with the provider. If for some reason you could not find them, you need to call your provider's hotline and find out how you can get them.
After you have entered all the necessary data, check the box next to " Connect automatically" (This setting will keep your Internet connection permanently, so if you have NOT For an unlimited tariff, I recommend checking the box next to " Connect on demand", that is, the Internet is connected only when you start using it).
After all manipulations with the settings, press the button " Save".

Setting up L2TP with a static IP address
Let's look at the connection setup L2TP with static IP address on the router Tp-Link TL-WR841N.
Typically, a static IP address is provided to legal entities, or as an additional service to the basic tariff to individuals.
So go to the menu in the tab " Net", then " WAN".
IN " WAN connection type:"choose" L2T/L2T Russia", below you will be asked to indicate your username (in the line " Username:") and password (in the line " Password:").
Since the connection uses a static IP address, you check the box next to " Static IP address", then indicate the server IP address (in the line " IP Address/Server Name:"), IP address (in the line " IP address:"), subnet mask (in line " Subnet mask:"), default gateway (in line " Main gateway:") and DNS (in the line " DNS:"). All of the above data is provided to you by the provider (the organization that provided you with the Internet).
All this data is usually specified in the contract with the provider. If for some reason you could not find them, you need to call your provider's hotline and find out how you can get them.
After you have entered all the necessary data, check the box next to " Connect automatically" (This setting will keep your Internet connection permanently, so if you have NOT For an unlimited tariff, I recommend checking the box next to " Connect on demand", that is, the Internet is connected only when you start using it).
After all manipulations with the settings, press the button " Save".

Setting up PPPOE
I bring to your attention Video instructions for setting up the connection type PPPOE on the router Tp-Link TL-WR841N using the Tp-Link TL-WR1043ND router as an example.
PPPOE on the router Tp-Link TL-WR841N.
So go to the menu in the tab " Net", then " WAN".
IN " WAN connection type:"choose" PPPoE/PPPoE Russia", below you will be asked to indicate your username (in the line " Username:"), password (in line " Password:Confirm password:"). All of the above data is provided to you by the provider (the organization that provided you with the Internet).
All this data is usually specified in the contract with the provider. If for some reason you could not find them, you need to call your provider's hotline and find out how you can get them.
After you have entered all the necessary data, check the box next to " Dynamic IP address" And " Connect automatically" (This setting will keep your Internet connection permanently, so if you have NOT For an unlimited tariff, I recommend checking the box next to " Connect on demandConnect according to schedule
After all manipulations with the settings, press the button " Save".

Setting up PPPOE with a static IP address
Let's look at the connection setup PPPOE with static IP address on the router Tp-Link TL-WR841N.
Typically, a static IP address is provided to legal entities, or as an additional service to the basic tariff to individuals.
So go to the menu in the tab " Net", then " WAN".
IN " WAN connection type:"choose" PPPoE/PPPoE Russia", below you will be asked to indicate your username (in the line " Username:"), password (in line " Password:") and password confirmation (in the line " Confirm password:"). Since the connection uses a static IP address, you check the box next to " Static IP address", then indicate the IP address (in the line " IP address:"), subnet mask (in line " Subnet mask:").
All of the above data is provided to you by the provider (the organization that provided you with the Internet).
All this data is usually specified in the contract with the provider. If for some reason you could not find them, you need to call your provider's hotline and find out how you can get them.
After you have entered all the necessary data, check the box next to " Connect automatically" (This setting will keep your Internet connection permanently, so if you have NOT For an unlimited tariff, I recommend checking the box next to " Connect on demand", that is, the Internet is connected only when you start using it, or " Connect according to schedule", that is, the Internet works at a certain time specified by you).
After all manipulations with the settings, press the button " Save".

Changing the web interface password
I bring to your attention Video instructions for changing the password on the router web interface Tp-Link TL-WR841N using the Tp-Link TL-WR1043ND router as an example.
Resetting the web interface password
If you set a password for the web interface of the router and forgot it, I suggest you watch the Video instructions for resetting the web interface password on the router Tp-Link TL-WR841N using the Tp-Link TL-WR1043ND router as an example.
Firmware update
I bring to your attention Video instructions for updating the firmware on the router Tp-Link TL-WR841N using the Tp-Link TL-WR1043ND router as an example.
Connecting a computer to wi-fi
After connecting and setting up the router, you need to connect the computer to a wireless network (wi-fi), let's consider connecting to wi-fi in two operating systems, Windows 7 and Windows 10:
Windows 7
Video instructions

Sultan

Connect automatically" and press
"Connection".


Windows 10
Video instructions
In the lower right corner of the desktop, find the wireless network (wi-fi) icon and click on it with the left mouse button.

A window pops up with a list of available wireless networks. Select a wireless network, in my case it is the network " Sultanova"(You select the network whose name was given at ).

After selecting the network, check the box next to " Connect automatically" and click " Connect".


We wait perhaps a couple of seconds and you are connected to your wireless network.

If the power of the router is not enough for stable Wi-Fi coverage of an apartment, home or office, there is a need for additional devices. There are three ways to strengthen the weak signal of the main router: install an additional antenna, a repeater, or another router. Each method has its own advantages and disadvantages; let’s take a closer look at the third option.
How to set up a router
To configure the router, connect a computer or other device with a web browser installed to it:
- You can connect your computer with a cable by connecting the PC’s network card to a free LAN port of the router;
- You can connect to the router via a wireless Wi-Fi network using a laptop, tablet or smartphone.
By default, the wireless network is assigned a name (SSID) identical to the name of the router model, and access to the distributed Wi-Fi network is not protected by a password.
After establishing a connection with the router, open a web browser on your computer or connected wireless device and type the router’s IP address in the address bar. For example, for a TP-LINK router the address will be as follows: http://192.168.0.1
Entering the router's IP address in the browser's address bar will open access to the control panelThe illustrations are taken from the settings of the TP-LINK TL-WR 1045 router; for other manufacturers, the control panel looks different, but the general principles, abbreviations and terms will be the same.
The correct IP address, login and password required to log into the control panel are indicated on the plate attached to the bottom of the router.
 The IP address, login and password of the control panel are indicated on the nameplate on the bottom of the router
 The login and password indicated on the sign apply only to the control panel, but not to the wireless network distributed by the router. After entering your login and password, the main screen will appear, displaying information about the status of the device and providing access to menu items for setting modes.
Do not change the factory settings of the router unless necessary. After making changes to the router settings, reboot the device.
Video: setting up a Wi-Fi router
Two ways to connect routers
Routers are connected to one local network either by cable or wirelessly. It is recommended to use devices from the same manufacturer.
Cable connection
A twisted pair cable (UTP cable) is laid between the main and additional routers. In the main router, the cable is connected to the LAN socket, and in the additional router - to the WAN socket (this socket is highlighted in color and is sometimes called Internet). With this connection, the additional router will be a network device for the main one, and the main router will act as a provider for the additional one, distributing the Internet and providing a dynamic IP address.
Before installing an additional router, consider how the cable will be laid and carefully measure the length of the future cable channel. When purchasing a cable, buy one meter longer than the measured cable duct, and ask the seller to immediately crimp the ends of the cable into the connectors. If the cable channel runs outside the premises and is exposed to natural influences, then purchase a cable with a reinforced sheath.
Advantages of the method:
- reliability and stability of the cable connection;
- easy setup of both routers;
- The installation location of the additional router is not limited by the wireless coverage area of the main router.
Disadvantages of the method:
- the need to purchase and lay cables;
- When moving the router, the cable will have to be moved to a new location.
Configuring routers when connected by cable
If the main router is already configured to work with the provider and there are no complaints about the work, then you do not need to change anything in the settings.
Make sure that the DHCP function in the main router is enabled to automatically distribute IP addresses on the local network. The start and end IP addresses do not need to be changed.
Setting up an additional router
It is recommended to immediately reset any changes made to the router settings to those preset by the manufacturer. To do this, turn on the router, find the Reset button on the rear panel, press and hold it pressed for 5-7 seconds. To protect against accidental reset of settings, the button is hidden inside the case and can be pressed through the hole using a needle or an unbent paper clip.
 An example of the location of the reset button on the back panel of the router: the button is hidden inside, only the hole for pressing is visible
 In the additional router, two settings are checked and set:

 Making changes to the additional router’s own IP address allows you to avoid conflicts between identical addresses on the same network
After changing the router's IP address, to re-access the control panel, enter the new address in the browser address bar.
There is a cable connection option in which the cable is connected to the LAN port of an additional router. This option requires complex setup and does not provide any advantages over a WAN port connection.
Wi-Fi connection
Advantages of the method:
- does not require physical connection of routers with a cable;
- allows you to easily move an additional router if necessary.
Disadvantages of the method:
- relative complexity of setup;
- slowdown in wireless network speed.
 The main router receives the Internet from the provider and distributes it via the wireless network LAN1; the additional router receives the Internet wirelessly from the main router and distributes it via the LAN2 wireless network
Configuring routers when connecting via Wi-Fi
When two routers are connected on a local network via a wireless channel, a “bridge” connection is used, in English Wireless Distribution System (WDS), designed specifically to expand the Wi-Fi coverage area.
Understanding Bridged Connectivity (WDS)
When installing this type of connection, the main router operates in standard mode, and the additional one acts as a Wi-Fi amplifier, receiving and distributing the signal further.
To connect routers in bridge mode, you need to establish a permanent (fixed) communication channel between them and specify the physical addresses of the connected devices in the settings. To set up a “bridge”, both routers are turned on, the main router is configured in advance for the provider, receives and distributes the Internet, and the settings of the additional router are pre-set to factory settings by pressing the Reset button.
Configuring the main router for WDS mode
We change the automatic broadcast channel selection mode to a fixed channel mode (for example, to the 11th channel).
Setting a fixed channel number prevents the router from automatically scanning the airwaves and selecting the least loaded channel. Therefore, if other wireless networks are operating nearby, you may have to manually experimentally select the least loaded channel or use a special program to search for a free channel. The channel number must be changed simultaneously on both routers - the main and additional ones.
Setting up an additional router for WDS mode

On the main page of the router control panel, the line “WDS Status” should display “working”. This means that the additional router has connected to the main router and is distributing the Internet.
Video: how to make a Wi-Fi network between routers (WDS)
Creating a complex network requires knowledge and experience. If you are confident in your abilities, use our instructions. If you doubt your abilities, it is better to ask for help.