Remote access to a computer without installing a program. TeamViewer - remote computer control
Remote computer control programs allow you to remotely control another computer over the Internet or on a local network. This is convenient when you need to help a less experienced user, for example, a relative or friend who is not well versed in a computer, do something on it without leaving your comfortable chair and without wasting your nerves and time on telephone conversations. Such programs are also convenient to use for remote work, for example, from home to connect to the office and vice versa - to access your home PC, for system administration of an entire fleet of computers and servers.
Let's conduct a comparative analysis of remote control programs and highlight their advantages and disadvantages.
TeamViewer
One of the most popular programs for remote access, it can be quickly downloaded and installed or launched immediately, without installation, even a not very experienced user can handle it. When launched, the program displays a window with an ID and password to access this computer, and TeamViewer also allows you to connect to another computer by specifying its ID and password.Advantages:
The program has several main modes of operation: remote control, file transfer, chat, demonstration of your desktop. The program allows you to set up 24/7 access to your computer, which will be convenient for system administration. The speed of operation is quite decent, there are versions for all mobile platforms, for various operating systems, which is very pleasing. A simple and completely understandable interface plus a number of additional utilities to expand the functionality of the program will be useful for remote support services.
Flaws:
Although the program is free, it is only for non-commercial use, and when working with it for more than 5 minutes, a number of difficulties arise, for example, TV can block a remote connection session, recognizing it as commercial use. For round-the-clock remote access or administration of several computers or a computer network, you will have to pay for additional program modules. The cost of the program is high.
Result:
This program is ideal for a one-time remote connection or for using it for short periods of time. Convenient to use from mobile platforms, but not to administer a large number of computers. You will have to pay extra for additional modules.
LiteManager
A simple, but quite powerful program in terms of capabilities, consists of two parts, the first is Server, which needs to be installed or launched on a remote computer, and Viewer, which allows you to control another computer. To operate the program requires a little more skills and experience from the manager, although working with the server is even simpler than in TeamViewer, the server can be installed once and no further actions are required from the user, the ID will always be constant, you can even set it yourself manually, which very convenient for memorization. The LiteManager Free version is free for personal and commercial use.
Advantages:
In addition to the main remote access modes: remote control, file transfer, chat, task manager, registry editor, the program also has unique functions, for example: inventory, screen recording, remote installation. The program is free for use on up to 30 computers, it can be used for round-the-clock access without any additional modules. There are no restrictions on operating time. It is possible to configure your own server ID to set up a corporate help desk. The program does not have any restrictions on operating time or blocking.
Flaws:
There is not enough client for mobile platforms or other systems, there is a limit of 30 computers in the free version, to administer more you need to purchase a license. Some specific operating modes are only available in the Pro version.
Result:
The Litemanager program is suitable for providing remote support, for administering several dozen computers absolutely free, for setting up your own remote support service. The cost of the program is the lowest in its segment and the license is not limited in time.
Ammy admin
The program is basically similar to TeamViewer, but a simpler option. There are only basic operating modes - viewing and control, file transfer, chat. The program can run without installation and is free for non-commercial use.
Advantages:
A simple and lightweight program, you can work both on the Internet and on a local network, has minimal settings and does not require any special skills. Compared to TeamViewer, the licensing policy is more lenient.
Flaws:
Minimum functions for remote management, it will be difficult to administer a large fleet of computers, with long-term use, more than 15 hours per month, the work session may be limited or blocked, paid for commercial use,
Result:
This program is more suitable for a one-time connection to a computer and not very complex manipulations, for example, to assist an inexperienced user in setting up a computer.
RAdmin
One of the first remote control programs and well-known in its circle, I could not help but mention it, more intended for system administration, the main emphasis is on security. The program consists of two: server and client components. Requires installation, it will not be easy for an inexperienced user to figure it out, the program is designed mainly to work using an IP address, which is not entirely convenient for providing technical support. Internet support. The program is paid, but has a free trial period.
Advantages:
The program has high operating speed, especially in a good network, thanks to the video driver for capturing the desktop, increased reliability and security. Intel AMT technology is built-in, which allows you to connect to the BIOS of a remote computer and configure it. Only the basic operating modes are implemented: remote control, file transfer, chat, etc.
Flaws:
There is almost no way to work without an IP address, i.e. connect by ID. There is no client for mobile systems. There is no free version, only a 30-day trial period. To work with the program, you need the skills of an experienced user. When connecting a video, the driver may disable the Aero graphical shell, sometimes the screen flickers.
Result:
The program is more suitable for system administrators for administering computers and servers on a local network. To work over the Internet, you may have to set up a VPN tunnel.
Hello to all site readers! Please advise program for remote computer control. I want to control a computer at work from home or control a home computer from work. Sometimes you also want to help friends solve computer problems remotely, for example, without leaving home, install an anti-virus program for a friend (who lives on the other side of town), set up Skype, remove a virus, and so on. It is desirable that the program be free, and you do not need to register anywhere, that is, download it, launch it and work. Sergey.
Program for remote computer control
Hello friends! Without a doubt, such programs are free, and TeamViewer, today’s article is about the latter, it is free for personal use, works without installation, can be carried on a flash drive, and you can register if you wish, now see for yourself.I'll give you two instructions.
1) How to use TeamViewer quickly and without registration.
2) In the second part of the article, we will look at what registration in the TeamViewer program will give us. Registration in the program will help us connect to a remote computer from anywhere and we won’t even need a partner.
The TeamViewer program is so easy to use that all my friends, even those who are very far from computer matters, also got used to using it. When, for example, something is not working correctly in their operating system, they immediately launch the “little blue program with arrows” and call me. They say, come on, help, your program has already been launched, ID is such and such, password is such and such.
There was such an interesting incident in my life. One of my friends asked me to install several free programs on his laptop with Windows 7, he himself was in another country at that time, with the help programs for remote computer control TeamViewer's plan has come true. Any experienced user can give you hundreds of similar cases when, using TeamViewer, he helped his friends fix some problem in the operating system. Now it’s your turn to get acquainted with this program, if you are not already familiar.
Go to the program website http://www.teamviewer.com/ru and click “Free full version”

The program installer is downloaded to our computer,
Let's launch it. Check the box “Run only” and “Personal/non-commercial use”. Accept - run.

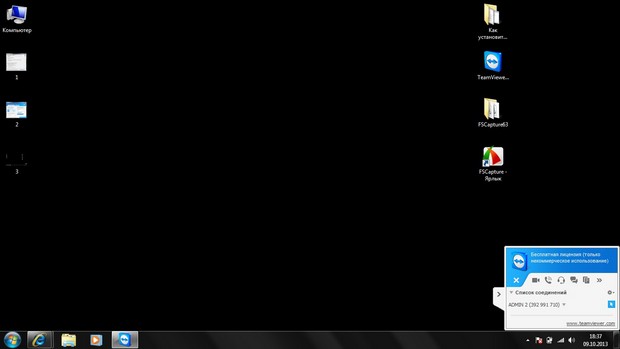
Pay attention to the main program window. TeamViewer has assigned an ID and password to our computer. If you tell them to your partner, he can easily connect to your computer.

How will he do this? Yes, very simple! On the remote computer you need to do the same thing, namely, launch the TeamViewer program and check the “Launch only” and Personal/non-commercial use checkboxes. Accept - run.

On the remote computer, the TeamViewer program will start in exactly the same way with its own ID number and password.
Then your partner will enter your identification number ID - 394032155 and click on the Connect to partner button,

The Password field will immediately appear. Your partner enters the password 2917 and clicks Login.

That's all, your partner has connected to your computer and sees your desktop, he can work in the same way as at his desktop. In exactly the same way, you can get onto your partner’s computer. Enter his ID and password in the program and help your friend remotely.
What does registration in the TeamViewer program give and how to set up uncontrolled access
If you register for TeamViewer, you will have a much better experience using the program. You will have your own account (permanent ID and password) and with it you can very easily set up permanent access to the computers you need. For example, from your home you can log into your work computer, and from your work computer to your home computer; for this you just need the computer to be turned on. There is no need to specifically launch TeamViewer on a remote computer; after installing the program, the TeamViewer service will constantly run in the operating system.
We install the TeamViewer program, for example, on a home desktop computer. Let's launch the installer. During installation, select "Install so you can manage this computer remotely" and "personal/non-commercial use." Check "Show Advanced Settings". Accept - next.

Ready.

The one I installed (a great program, I recommend it) signaled that the TeamViewer service had entered autoload.

Set up uncontrolled access.

Enter the invented Computer Name (account) and password. Next.

Create a TeamViewer account for free. Enter your name, email and password. Next.

Ready.

We go to our mailbox, find a letter from TeamViewer and confirm our account, click on the link.

Now, when you start the TeamViewer program, this computer will have a permanent ID and password for the account.

Let's say this is our home computer. You can connect to it like this. On any other computer (for example, we have a laptop and it’s at work), launch TeamViewer, and simply check the “Run only” and Personal/non-commercial use checkboxes. Accept - complete. Enter the ID code. As you can see, the program keeps a log, so we simply select our account and click “Connect to a partner”,

Enter the account password

And we can control our home computer.
In the same way, you can control your work computer from home.
Ever since my work as a laboratory assistant in an information center, I have understood one important truth: “the less you work, the better you work.” Any human activity can be improved and even the most hated work can be made enjoyable. Imagine for a moment that you have one computer lab at your disposal. Its maintenance takes relatively little time. All problems that arise can be resolved on the spot simply by going to the appropriate computer.
But one fine day, the staff of equipment increases sharply from the usual fifteen PCs in your classroom to hundreds of computers scattered across several buildings. And now every new owner of a miracle box under his desk calls with the question “how to align a table in Excel?” After talking with such an individual for a couple of minutes and realizing that you need to help, you trudge up the stairs to the poor fellow’s office. Most likely, at first there will be not only a sign on the monitor screen that has moved down, but also a kilo of gingerbread cookies with an invigorating mug of tea. But soon even gingerbread will not be able to sweeten the constant running around, and the calls will cause an involuntary sigh. In such a situation, there are only two options. Find someone who will run for you or come up with a way to combat the blatant computer illiteracy of your employees while remaining within the walls of your office.
Download Radmin Server and Viewer
Remote Administrator is one of the programs for remote PC administration. Such software works on the client-server technology that is already familiar to us. The product is made in Russia and is distributed free of charge. That is, we have the opportunity to download a full version without limited functionality, which will work for 30 days. Then you should purchase it. You can also use torrents. In their open spaces you will definitely come across a repack from Alker; it works as stably as the licensed version. I’ll probably use the official trial version for this material.
Step 1. First, go to the website and click the big green button “Download 30-day trial version.”

Step 2. Then on the page that opens, click “Download Server+Viewer” in one archive.

Step 3. After the download is complete, we will unpack the installation files from the archive into a separate folder for convenience.

Installing and configuring Radmin Server
First, let's deal with the server part of the program. It is its installation on client PCs that allows us to manage them remotely.
Step 1. On the computer that we are going to manage, run the file rserv35ru.msi and in the first installation window click “Next”.

Step 2. We carefully read the license agreement, accept it and click “Next”.

Step 3. And finally the treasured “Install” button. Click on it and wait for the installation process to complete. During this process, the screen may blink periodically. Don't be alarmed, this is normal, drivers for video capture are just being installed.

Step 4. After the installation is complete, we will not uncheck the “Configure user access rights” checkbox. Click “Finish” and go directly to setting up the program.

Step 5. In the new window, select “Launch mode” and set the value to “Automatic”. This is necessary so that the program starts itself when the operating system is turned on.

Step 6. Then go to “Settings” and in the first tab “General Settings” do not change anything. We just remember the port that is set by default by the program. We'll need it soon.

Step 7 In the “Miscellaneous” tab, check the “Load Mirror Driver at startup” checkbox. This is necessary so that the screen of the remote computer does not blink every time we connect and the user does not know about our presence. A very useful function for those who like to observe employees and do not want unnecessary suspicion on their part.

Step 8 We're done with the settings. Now let's move on to changing access rights. To do this, click “Access Rights” in the main menu and repeat the command in the window that opens.

Step 9 Until users are created, you cannot connect to this computer. In order to create users, click “Add” and enter the name under which we will log into the computer. As an example, I will create a user "admin".

Step 10 Now we need to give our user certain rights. And since this is an admin, we will give him full access to the remote computer. Click “OK” in this and the next window.

Step 11 If you purchased the program from the developers or downloaded it from a torrent, then it will have another interesting feature. Namely, the “Advanced” button, which allows you to configure hiding the tray icon. When there is no tray icon, the user may not even know that this product is installed on the computer.

Step 12 This was the last step in setting up Radmin Server. Now we will restart the computer for our settings to take effect. After the reboot, go to “START-Control Panel-Network and Sharing Center-Change adapter settings” and right-click on the adapter with which the network connection is made. In the drop-down list, click on the “Status” item.

Step 13 In the next window, click “Information” and look at the IP address of the computer. It will be useful for us to log into this PC using Radmin. But only if this IP is permanently assigned to this computer, otherwise it is better to look at the DNS name.

Step 14 To view the computer name, go to “Start” and right-click on the “Computer” shortcut. In the window that opens, in the “Full name” line we see the name of our PC.

Great. Let's once again recall the information that we will soon need:
- Port for connecting to a remote computer: 4899
- Computer IP address: 192.168.0.51
- DNS computer name: win7
All of your data, except the port, will be different from mine. We have finished manipulating the remote machine. Let's start setting up the client part of the program (Radmin Viewer).
If Radmin Server must be installed on remote computers to which you are going to connect, then Radmin Viewer, on the contrary, is installed on your computer. It allows you to connect to all computers on your network on which the program server module is installed and configured. Let's not waste time. Let's start the installation.
class="eliadunit">
Step 1. On the administrator’s computer from which connections will be made, run the rview35ru.msi file and click “Next” in the first installation window.

Step 2. We accept the license agreement and click “Next”. In the next window, select “install the application for all users of this computer.”

Step 3. Click “Install” and wait for the installation of Radmin Viewer to complete.

Step 4. Fine. Now we need to make sure that our computer is on the same subnet as the remote PC. To do this, go to the already familiar path “START-Control Panel-Network and Sharing Center-Change adapter settings” and right-click on the adapter. In the drop-down list, click on “Status-Information” and look at the IP. The third digit between our computer and the remote computer must match; this is the subnet number. If everything is correct, then we move on.

Connection in “Management” mode
In this mode, all your mouse and keyboard manipulations are transferred to the remote computer. You get the opportunity to remotely control your desktop as if it were right in front of you.
Step 1. Go to “Start” and launch “Radmin Viewer 3”. In the main program window, click “Connection-Connect with...”.

Step 2. In the “IP address or DNS name” line, enter the IP address of the remote computer (in my case 192.168.0.51) and click “OK” and try to connect to the computer in the “Management” mode.

Step 3. In the window that appears, enter the username and password (those that were set on the remote station). And holding our breath, click on “OK”.

Step 4. The next moment we gain access to the desktop of the remote computer. We can perform any actions on it using the mouse and keyboard.

Connection in "View" mode
In this mode, you can observe all user actions, but do not interfere with the work process. Personally, I often use this mode. He has proven himself excellent in the educational process. When students work on their computers, they often have various questions. In order not to run to each of them, I simply open five Radmin windows on my laptop at the same time and, moving between them, give advice on completing the task.
Step 1. In the main window of the program, click on the already favorite “Connection-Connect with...” tab.

Step 2. Enter your usual username and password combination.

Step 3. And we see the screen of the remote computer. But we remember that this mode allows us only to look, but not to touch.

Connection in “File Transfer” mode
This mode is convenient because by connecting to a remote computer you have the opportunity to download any file from it or transfer your own. In this case, the user will not even feel any manipulation on your part. Another interesting feature is that files can be downloaded from any folders, not just from public ones. After all, we get access to all PC drives (except network drives, unfortunately).

Creating an Address Book
The Radmin address book allows us to save the computers to which we connect in a convenient format. Connections can be distributed into convenient folders based on the structural divisions of the organization. We will not dwell on the address book in more detail. Let me just say that after you have created all the necessary connections and distributed them in the folder tree (on the left in the main Radmin Viewer window). We need to export our settings to a separate file, which we can open on any computer with Radmin Viewer.
Step 1. Click “Service-Export Address Book...”.

Step 2.Set the file name and select its location.

Step 3. We transfer the file to a USB flash drive and launch Radmin Viewer on another computer. Open “Service-Import Address Book...”.
Step 4. We select the address book and after a second we see that all our previously created computers have loaded. By the way, one more trick, if you click on the icon of the same name “Scanning servers in the current folder” (or the F5 hotkey), then on those PCs that are currently turned on, a check mark will appear indicating that the connection is ready.

Fly in the ointment
Of the shortcomings noticed during the operation of this product, only three main ones can be identified. Although they are rather not shortcomings, but rather wishes to the developers to improve the program:
- When connected, the Aero style is reset to classic, which immediately tells an experienced user that someone is watching him (this can be solved by forcing the use of the classic Windows theme);
- There is no way to block the keyboard and mouse on a remote computer (and sometimes you really want to catch a student or employee doing something curious);
- Unfortunately, the program is only available for Windows.

Let's summarize. Radmin is great for remotely managing computers. The program is successfully used both to help employees and to modernize the educational process. It is also very convenient to administer the server. After all, if a remote access program is installed on the server, then there is no need for a regular monitor. Within the framework of this article, it was originally planned to talk about how to configure Radmin to connect over the Internet. Namely, do this by forwarding ports on the router. But then it was decided to make a separate material on this topic. So wait, friends.
For those who are interested in improving their professional qualifications, I recommend taking a free online test on the developers’ website. This will allow you to receive a certificate as a specialist in working with the Radmin software product, which can be printed and hung in a beautiful frame above your desk.

Denis Kurets was with you and the release of the information technology blog. Subscribe to updates. Write your comments and wishes. And may your path of knowledge be fast and successful!
class="eliadunit">Simultaneous work on several computers, of which only one is in front of you, and the rest are even on the other side of the Earth, is not fantastic. To have this wonderful opportunity, all you need is Internet access and a remote control program on each machine.
Remote control programs are bridges that connect the PC or mobile gadget in front of you with various computer devices around the world. Of course, if you have a key, that is, a password that allows remote connection with them.
The possibilities of programs of this kind are very wide. This includes accessing the contents of disks, launching installed applications, changing system settings, and viewing user actions... In short, they allow you to do almost everything on a remote PC that you can do on a local one. Today's article is an overview of six free programs for remote control of a Windows-based computer (and not only), one of which is included with the operating system itself.
If you need to establish a connection between two computers or a PC and a mobile device, one of which (remote) is running Windows, and the second is running Windows, iOS, Android or Mac OS X, sometimes you can do without third-party programs (if the connection involves Windows computers only). The Remote Desktop system application is present in all editions of Windows, starting with XP. It is not necessary that both machines have the same version of the OS; you can easily establish a connection, for example, between Windows 10 and Windows 7.
The Microsoft Remote Desktop app for Android and Apple is available for free download on Google Play and the App Store.
What else is needed to create a connection:
- Remote access permission - configured on the computer that you are going to manage externally.
- An account with a password on the remote computer. To solve administrative tasks (installing and uninstalling programs, changing system settings, etc.) you need an account with administrator rights.
- Connecting both machines to the Internet or being on the same local network.
- On the receiving side, TCP port 3389 is open (used by Remote Desktop by default).
How to enable permission
This and further instructions are shown using Windows 10 as an example.
- Right-click on the “This PC” icon on the desktop. Let's open "Properties".

- While in the “System” window, click “Remote access settings” in the transition panel. In the “Remote Desktop” section of the window, check the “Allow...” checkbox (it’s better to leave the “Allow authenticated connections only” checkbox). Next, click “Select Users”.

- To add a user who will be allowed to connect to you remotely, click “Add”. In the “Enter names” field, enter the name of his account on this computer (don’t forget, it must have a password!), click “Check names” and OK.

This completes the setup.
How to configure connection settings
We perform the following steps on the computer from which we will make the remote connection.
- Click on the search icon in the taskbar and start typing the word “remote”. Select “Remote Desktop Connection” from the found one.

- By default, the application window opens minimized, with only fields for entering the computer name and user data. To access all settings, click the “Show options” arrow. At the bottom of the first tab - “General”, there is a button for saving connection settings to a file. This is useful when you use different settings to connect to different machines.

- The next tab, “Screen,” allows you to change the image properties of the remote computer’s screen on your monitor. In particular, increase and decrease the resolution, use multiple monitors, change the color depth.

- Next, we’ll configure “Local Resources” - sound from a remote computer, conditions for using keyboard shortcuts, access to a remote printer and clipboard.

- The parameters of the “Interaction” tab affect the connection speed and the quality of displaying the image from the remote machine on your monitor.

- The “Advanced” tab allows you to define actions to take if authentication of a remote PC fails, as well as set connection parameters when connecting through a gateway.

- To start a remote access session, click “Connect.” In the next window, enter the password.

Once the connection is established, the current user's computer session will be terminated and control will pass to you. The user of the remote PC will not be able to see his desktop, since a screensaver will appear on the screen instead.
By following these instructions, you will easily connect to a computer that is on the same network as yours. If the devices are connected to different networks, you will have to make several additional settings.
How to connect to a remote computer via the Internet
There are 2 ways to set up a Windows Remote Desktop connection over the Internet - by creating a VPN channel so that the devices see each other as if they were on the same local network, and by forwarding port 3389 to the local network and changing the dynamic (variable) IP addresses of the remote machine to permanent (static).
There are plenty of ways to create VPN channels, but describing them all will take quite a lot of space (besides, a lot of information about this can easily be found on the Internet). Therefore, let’s look at one of the simplest ones as an example – using Windows’ own tools.
How to create a VPN channel in Windows
On the remote machine that will be the server:

After this, the “Incoming connections” component will appear in the network connections folder, which will be the VPN server. To prevent the connection from being blocked by the firewall, do not forget to open TCP port 1723 on the device. And if the server is assigned a local IP address (starting with 10, 172.16 or 192.168), the port will have to be redirected to the external network. How to do this, read below.
On the client computer (Windows 10), setting up the connection is even easier. Launch the “Settings” utility, go to the “Networks and Internet” -> “VPN” section. Click "Add VPN connection". 
In the parameters window, specify:
- Service provider - Windows.
- Connection name – any.
- Server name or address – IP or domain name of the server that you created before.
- VPN type – detect automatically or PPTP.
- Login data type – login and password (one of the accounts to which you have given access permission). In order not to enter this data every time you connect, write it in the appropriate fields below and check the “Remember” checkbox.
 Port forwarding on the router and obtaining a static IP
Port redirection (forwarding) is performed differently on different devices (routers), but the general principle is the same everywhere. Let's look at how this is done using the example of a typical TP-Link home router.
Let’s open the “Forwarding” and “Virtual Servers” sections in the router’s admin panel. In the right half of the window, click the “Add” button. 
In the “Add or edit entry” window, enter the following settings:
- Service port: 3389 (or 1723 if you are setting up a VPN).
- The internal port is the same.
- IP address: computer address (look in the connection properties) or domain name.
- Protocol: TCP or all.
- Standard service port: you can not specify it or select it from the PDP list, and for VPN – PPTP.
How to make a changeable IP address permanent
The standard package of Internet service providers for home subscribers, as a rule, only includes a dynamic IP address, which is constantly changing. And assigning a permanent IP to a user usually costs him a lot of money. So that you do not have to incur extra costs, there are DDNS (dynamic DNS) services, the task of which is to assign a permanent domain name to a device (computer) with a changing network address.
Many DDNS services provide their services for free, but there are also those who charge a small subscription fee for this.
Below is a short list of free DDNS, whose capabilities are more than enough for our task.
The rules for using these services, if they differ, are insignificant: first we register an account, then we confirm the email address, and finally we register the domain name of your device and activate it. After this, your home computer will have its own name on the Internet, for example, 111pc.ddns.net. This name should be specified in the connection settings instead of the IP or local network name. 
By the way, some routers only support a small group of DDNS providers, for example, only the oldest and most famous DynDNS (now paid) and No IP. And others, such as Asus, have their own DDNS service. Installing alternative firmware DD-WRT on the router helps remove restrictions.
Pros and cons of using Windows Remote Desktop
The main advantage of the proprietary Windows tool over third-party developments is the absence of intermediary servers during the connection, which means a reduced risk of data leakage. In addition, this tool has a lot of flexible settings and, with a skillful approach, can become an “impregnable fortress” and a “space rocket.”
Other advantages of the Windows desktop are that there is no need to download anything, there are no restrictions on session duration, the number of connections, and it is free.
Disadvantages: difficulty in setting up for access via the Internet, vulnerability to Pass the Hash attacks.
TeamViewer
Before you start using the service, you will have to register a Google account (Android device users already have one) or log in using it in the Google Chrome browser.
The main window of the Chrome Desktop includes 2 sections:
- Remote support. This contains options for managing a one-time connection to another PC and providing access to yours.
- My computers. This section contains machines with which you have previously established a connection and you can quickly connect to them using a given PIN code.

During the first communication session using the Chrome Desktop, an additional component (host) will be installed on the remote computer, which will take 2-3 minutes. When everything is ready, a secret code will appear on the screen. After entering it in the appropriate field, click “Connection”.
As with TeamViewer, the user of the remote machine will be able to see all your actions on the screen. So for covert surveillance, for example, of a child, these programs are not suitable.

is a very simple and equally reliable utility designed for remote control of computers running Windows and Linux. Its main advantages are ease of use, reliability, high connection speed and the fact that it does not require installation. The disadvantages are the lack of mobile versions (it will not be possible to establish a connection via Android and iOS using this program) and the fact that many antiviruses consider it malicious and try to remove it. Fortunately, the latter is easy to prevent by adding the utility to the exceptions.
Ammyy Admin supports 2 methods of establishing communication - by ID number and by IP address. The second one works only over the local network.

The utility window is divided into 2 halves - “Client”, where the computer identification data and password are located, and “Operator” - with fields for entering this data. The connection button is also located here.
The contact book and program settings, which are quite simple, are hidden in the “Ammyy” menu.
- another compact portable Windows program, externally similar to the previous one, but with a more interesting set of functions. Supports 2 connection methods - by ID and IP, and 3 modes - full control, file manager (file transfer) and only viewing the screen of a remote PC.
It also allows you to define several levels of access rights:
- Remote operator use of keyboard and mouse.
- Clipboard synchronization.
- Changing access rights by an administrator, etc.
The “View Only” mode can be used to covertly monitor the actions of users of remote machines (children, workers), which is not available in similar products.

In the main AeroAdmin window there is a button to open an email chat (located next to the “Stop” button). Chat is designed to quickly send an email to the operator, for example, asking for help. This function is unique, since analogous programs only have a regular chat for text messaging. And it starts working only after the connection is established.
Unfortunately, the AeroAdmin contact book does not become available immediately. It requires separate activation - via Facebook. And only members of this social network can use it, since in order to receive an activation code, developers request a link to their personal page. It turns out that those who liked the program cannot do without registering on Facebook.
Another feature of AeroAdmin is that it can be used for free even for commercial purposes, if you do not need additional features (continuous connection, multiple parallel sessions, etc.), available only in paid versions.
is the last utility in today’s review for remotely connecting to a Windows PC from another computer or mobile device. Can be used without installation or with it. 
Like its predecessors, it has a number of unique functions:
- The highest speed of image transfer from a remote machine.
- The fastest file sharing, even with low Internet speeds.
- Supports simultaneous connection of multiple remote users. The ability to collaborate on one project (each user has their own cursor).
Plus, like other programs in this class, AnyDesk provides the operator with full access to the functions of the remote machine, connects very simply (using ID and password) and reliably protects the transmitted data.
Instructions
First, activate the necessary operating system settings on the computer to which you will connect. In Windows XP, to do this, open the “Start” menu and right-click on the “My Computer” icon. Select Properties. All described operations must be performed using an administrator account.
Open the "Remote Use" tab. Enable the "Allow remote access to this" feature. computer" To do this, check the box next to the item of the same name.
Now create a list of accounts through which remote users can access this computer. Click the Select Users button. Go to "Add".
Enter the names of the accounts that will be able to use remote access to computer. Please remember that these accounts must be present on the operating system you are using. Create new accounts if they do not exist.
To set up a connection to computer in Windows Seven, use the “Remote Access” item located in the “System” menu. It can be accessed through the control panel.
Connect to your computer. In Windows XP, open the Start menu and navigate to the list of utilities located in the Accessories directory. Click on the icon with the title “Remote Desktop Connection”.
Enter the IP address of the desired computer. If your PC accesses the Internet through a VPN connection, enter the external IP address. Click the "Connect" button. Wait for the username and password entry menu to appear. Fill out the available forms and click “Next”.
When using Windows Seven, you can send an invitation to a specific user in advance. Use this feature if you want to connect to your PC without using an existing account.
Sources:
- how to remotely access a computer
- St dvr 1604 how to set up remote access
Probably everyone who has ever had to travel across the whole city just to press a few keys on a computer (in order to help an inexperienced user or start a long process) thought about how convenient it would be to set up remote access - the ability to control a computer via the Internet like this as if he were nearby.
Fortunately, this is not difficult, both with the help of a variety of specialized programs (for example, the popular RAdmin), and with the help of built-in Windows tools that have appeared in desktop versions since XP.
Let's look at setting up a remote worker step by step
- First of all, Remote Desk needs to be enabled as this feature is disabled by default for security reasons. To do this, you must log in with administrator rights.
- Right-click on the “My” icon and select “Properties” from the context menu. In Windows XP, you need to go to the “Remote Use” tab, and in Windows 7, click the “Remote Access Settings” link on the left side of the window that opens.
- Select the "Allow remote access to this" option.
- Only those users who have permission to do so can access the remote desktop. In order to grant a user permission to connect to a remote desktop, you must click the “Select Users” button in the same settings window. A list of users who have access will open; initially there will be no entries in it. Click Add, which will open a window where you can select or enter remote desktop usernames.
- Remaining remote access to