Login to the corporate system. Microsoft outlook mail login. Creating a mailbox in Outlook. Checking service status
Back in 1997, Microsoft launched the free email service MSN Hotmail, which allowed users not only to communicate via messages, but also to access various company services. There is no doubt that “MSN Hotmail” has attracted a huge number of users and within 15 years has become the leader in the number of registered users. How to create an email account in MSN Hotmail?
How to log in to hotmail.com
First, we need to go to the official website of the service, which contains a link Login to mail.
We click on it and a page appears in front of us on which we are asked to enter our information to log into your account.

A logical question arises here - why are we talking about the “MSN Hotmail” service, which includes the domain name @hotmail.com, and Outlook is listed on the page?
The fact is that this email service is a new version of MSN Hotmail, launched by Microsoft in 2013.
It is worth noting that users who have an email address that contains the @hotmail.com domain are automatically moved to the new service, so feel free to enter your data and continue working with mail in Outlook.
For those who do not have an account with Microsoft, and therefore a mailbox in this service, we suggest registering right now, since the whole process takes just a few minutes. So let's begin.

As you have already noticed, the @outlook.com domain is not the only possible option for registration; fortunately, the service is able to support other addresses. So, fill out all the fields, enter the captcha and click on the Create account button.
When entering a password for your account, you should take into account the fact that you need to use not only numbers but also upper and lower case letters of the English alphabet.

In this way, the service minimizes the risk of your account being hacked by third-party users. As you noticed, not all sections can be filled out; for example, I did without a postal code and entering a phone number.

However, it is worth considering that in this case you need to fill out lines for alternative data, such as the address of another mailbox and date of birth. Belonging to a particular country also does not matter.
After we clicked Create an account a window of our mail service appears in front of us.

Now we save in a separate file the login and password for logging into the account, which opens up for us the possibilities of not only the Outlook service, but is also useful for activating some functions of a smartphone and laptop that work with Microsoft applications.
The most common among them is Outlook.
The mentioned manager became so widespread thanks to the components that are part of the Microsoft Office office suite.
It is an effective and easy to use email account manager. Its use significantly improves the convenience of working with emails.
Using Outlook significantly increases the efficiency of working with email correspondence:
- All mailboxes are viewable and editable in one program;
- Dynamic updating allows you not to miss an important email;
- Sorting by priority and other parameters organizes a large volume of incoming messages;
- The ability to send messages using the program client makes correspondence more efficient;
- Backing up received and sent messages eliminates the consequences of force majeure.
And this is only a small part of the useful features of the program. If you need to effectively manage large volumes of email, then installation is inevitable.
Operating system compatibility
Since 1997, many versions of the program have been released. The following table will help you correctly determine the compatibility of the program version and operating system:
| Mail client version | Windows version |
||||||
| 95 | 98 | Me | Xp | Vista | 7 | 8 | |
| + | + | + | - | - | - | - | |
| + | + | + | + | - | - | - | |
| Outlook 2000 (9) | - | + | + | + | + | - | - |
| Outlook 2002 (10, XP) | - | - | + | + | + | + | - |
| Office Outlook 2003 | - | - | + | + | + | + | - |
| Office Outlook 2007 | - | - | - | + | + | + | + |
| Office Outlook 2010 | - | - | - | - | + | + | + |
| Office Outlook 2013 | - | - | - | - | - | + | + |
There are also several versions of the program for Mac OS. Versions from 2000 to 2010 in MS Office: mac is replaced by the Entourage program. Outlook was returned to the eleventh version of Office for Mac OS.
Setting up the Outlook Express email client

Advice: If the program is already installed and you need to add another mailbox, then the steps are as follows: go to the “File” menu, in the upper left corner of the screen, select “Information” in the drop-down menu, then click on “Add account”.

Simply filling out this form is not enough for the service to work properly.
Therefore, you need to check the checkbox next to “Manually configure server settings or additional server types,” as shown in the illustration above.
The next window offers three options for connecting a new service:

You can correctly connect existing e-mail addresses only using the first “Internet E-mail”.
It is selected by default, so all that remains is to click on the “Next” button.
In the form that opens after this, the main part of attaching the first or additional
After you have selected the mail settings item, you will see a connection window. Here you need to correctly enter the email address you are using and the password for the mailbox. You can enter any name in the “Your name” field; in the future it will be used to sign the letter. In this window, you can connect an account to absolutely any email service, for example, Google or. To connect a mailbox, you must first register on the website of your postal service, for example, for Gmail, register a Google account.
In some versions of Outlook, you will have access to a link to register a mailbox account from Outlook.
The “Manual configuration or additional server types” section is also available. By selecting this item, you can manually enter the types (POP3 or IMAP) and specify the addresses of the incoming and outgoing mail servers, as well as configure the ports for accessing them. This item should be selected when setting up corporate mail or mail registered on separate servers with different types of encryption.
When registering a mailbox, problems may arise with Outlook connecting to an encrypted server; this can happen if the server does not use encrypted connections, in which case the program will automatically switch to using an open connection. When such a notification appears, click “Next” again so that the program switches to a different type of connection to the server.
We recommend using email services that provide a secure connection to the email server. By using this type of connection, you can be sure that no one will intercept your letter on the way to the server.
After completing the settings, you can immediately start working with mail; the program interface will open in front of you, in which you will immediately see all your incoming letters. For more fine-tuning read
Mail settings in Outlook
Now we will look at the instructions, which will describe how to connect an additional box through the program settings.
To enter the mail settings menu, you need to open the “File” menu, which is located in the upper left corner of the program window.
After opening the "File" menu, you need to go to the "Information" section. Having opened this menu, you need to left-click on the “Account Settings” section and select the same section again in the drop-down menu.
After you have selected the “Account Settings” item, a window will open in front of you in which, to create an additional mailbox, you need to go to the “Email” tab, and then select the “Create” button.
If you need to change the settings of a previously registered mail, to do this, select the desired mailbox from the list and click “Change”.
After clicking on the “Create” button, a registration window will open; further steps will be exactly the same as described above.
The "Default" button will help you determine the main mailbox. By marking the desired mailbox with this button, you will set this mailbox as the standard one for writing and sending letters.
In order to delete a mailbox registered in the program, you need to select the one you want and click the “Delete” button. After this action, the mailbox will be removed from the Outlook client, but not from the servers of your mail service, so you can connect it again in the future.
When you delete a mailbox from the Outlook email list, a mailbox file remains in which all letters are saved, so to completely delete all information from your computer, you need to go to the “Data Files” tab and delete the desired file from there.
Interface
The interface of the Outlook email client is quite simple and intuitive; it is also similar to the interfaces of the bazaar versions of email clients. Now we will describe the main components of the interface and its capabilities.
Let's start with the panel on the left side of the window. At the bottom there are 4 icons that will open “Mail”, “Calendar”, “Contacts” and “Notes”. The main section is mail; when you select the next section, its interface will open.
Above are lists of the main sections with separated folders for ease of working with mail. The first list is “Favorites”, in it you can view the common mail folder for all connected mailboxes. This list can be collapsed if necessary.
Below the Favorites list is a list of Outlook Data Files folders. Initially, all folders contained in it should be empty. Messages from all connected mailboxes will be duplicated there, but only fresh ones: those messages that were in the mailbox before it was registered by the system in Outlook will not be included in this list. If you want to move old messages to this list, you can do this manually.
Below there will be sections with incoming and outgoing mail folders for all other connected email accounts. All sent and received messages will be stored in Outlook data files.
When you select one of the folders from the left panel, the entire contents of this folder will be displayed to the right of it, namely the list of messages. The dimensions of such panels can be changed; to do this, it is enough to move the cursor over the border and, holding the left mouse button, move it to the desired distance.
When you select a letter from the central panel, you can display its contents in the panel on the right. Here you will see full details as well as the body of the email. 
In order for you to be able to read all incoming messages from all mailboxes at once, you should place all folders with incoming messages in the “Favorites” list. This way you won’t have to view each inbox separately for each mailbox; all letters will arrive in one folder. To do this, you need to right-click on the desired folder and select “Show in favorites” from the drop-down menu.
If you need to duplicate all old messages located in different folders of different mailboxes in order to read all these messages in one big list. To do this, you need to select the folder from which you want to duplicate messages, then select any message or press the Ctrl+A key combination to select all messages. After selecting the required letters, right-click on any of the selected ones and in the drop-down menu click on the “Move” item, then “Copy to folder...”. After these steps, a window will open in which you need to select the folder corresponding to the type of messages and click OK.
Basic Outlook tools and features
In this section, we will examine in detail the main functions of the Outlook email client for which it was designed.
Creating and sending letters
In order to send a letter, you must click the “Create message” button, which is located in the upper left corner of the window in the “Home” tab. Do not forget that letters will be sent on behalf of the mailbox that is selected by default in the account settings.
In the window that opens for creating a letter, everything is quite simple, fill out the fields and write the desired letter. To attach files, you can either drag x into this window or use the “Attach File” button 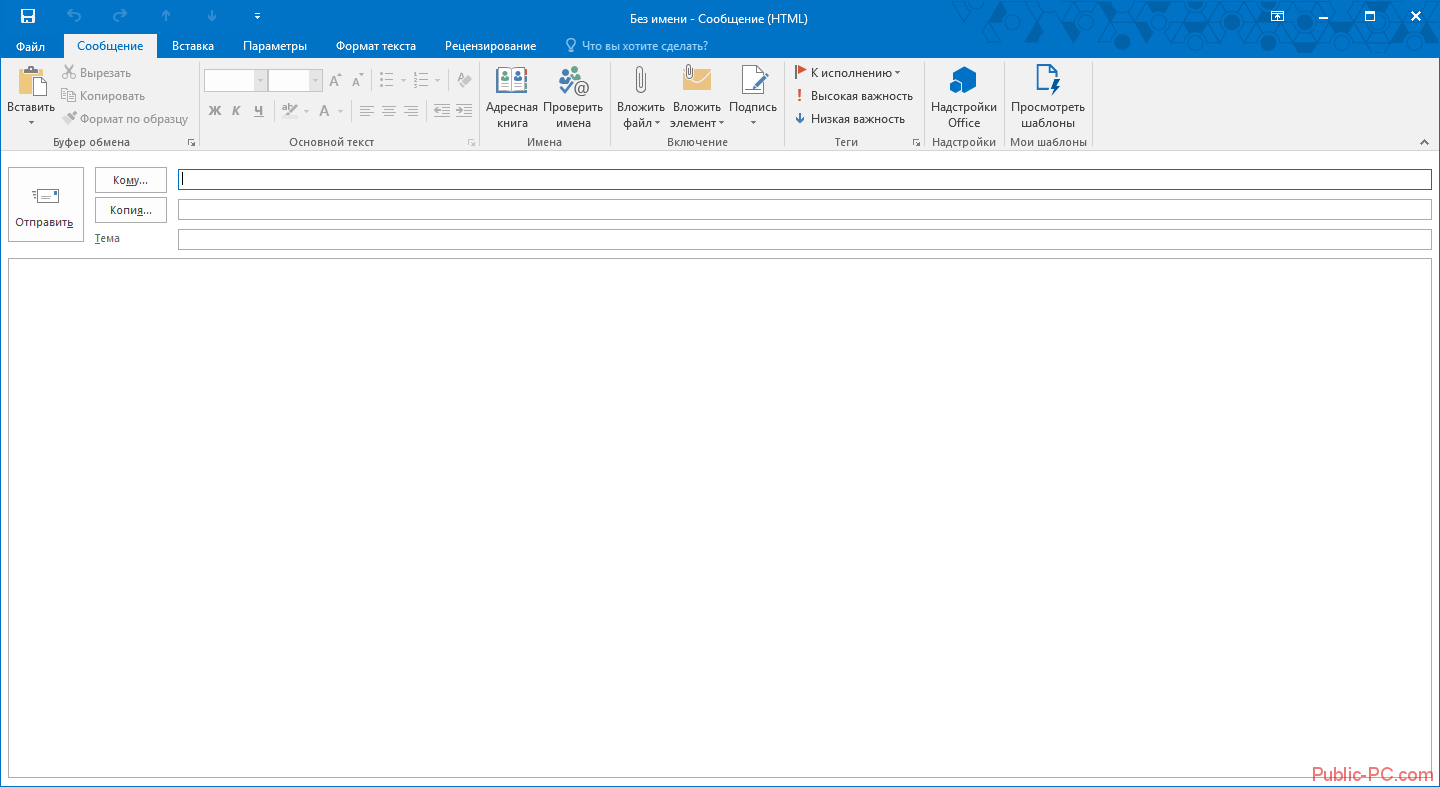
Deleting and restoring emails
Messages are deleted equally for all mailbox folders. To delete a letter, right-click on it and select “Delete” in the drop-down menu, or you can select the desired letter and click the Delete button.
All such messages will not be deleted immediately; they will first be placed in the “Deleted Items” folder and then, after a period of time, they will be permanently deleted. This is done to ensure that you do not accidentally lose important information.
To recover a previously deleted email, do the following: click on the “Deleted Items” folder and the email you want to recover, right-click on it and select “Move” and “Another folder...” in the drop-down menu. After this, a window will open with a list of folders, select the one you need and click “OK”. After that, look for your recovered email in the selected folder.
Error when deleting a message
If an error occurs during deletion, you should take some steps. First you need to clean out the “Deleted Items” folder, right-click on it and select “Empty Deleted Items”. When emptying this folder, a window will appear with two deletion options, you need to perform each option in turn.
If after the above steps the error does not disappear and the letter still cannot be deleted, then right-click on the problematic message and select “Move”, then “Another folder...”. In the window that opens with a list of folders, select any from the list and click “OK”. After this, restart the program and try again to delete this message, which is now located in a new folder.
Mail update
In order to update your mailbox and receive or send letters, open the “Sending and Receiving” tab, then click on the “Send and receive mail - all folders” button. After this, the program will connect to the servers to receive incoming letters and send outgoing ones. If you need to update only one mailbox, to do this, select the desired mailbox and in the same tab click the “Update folder” button.
Additional features
The Outlook mail client provides maximum opportunities for convenient work with a large number of mailboxes. One of the necessary functions is to create your own folder hierarchy for your mailbox; you can add your own folders and send letters to them for convenient sorting. This function is not present in all similar programs.
Creating folders
To create a folder, right-click on the mailbox in which you want to create an additional folder, then in the drop-down list, select “Create a folder...”, after which your folder will appear in the hierarchy, then you will need to enter a name for it. To change the order of folders, you just need to left-click on the desired folder and drag it to the desired location.
Creating tasks
The task creation function is also very useful. You can create a task in the task list, set due dates, importance and reminder. You will then be able to stay on top of important tasks and complete them on time.
To create a task, open the task tab; to do this, click on the icon of this function located in the lower left corner. After this, a window will open; to create a task, right-click on the empty area and click “Create task” in the drop-down menu.
When creating a task, a window will open in which you can set parameters, due dates, etc. Once created, this task will be displayed both in the task list and in the calendar.
Create a meeting
Using this feature, you can schedule a meeting of employees by notifying them by mail. If everyone who receives this notification uses the Outlook email client, they will be able to automatically mark the date of the meeting in their calendar.
To create a meeting, you need to go to the “Calendar” section, which is located in the lower left corner and select “Create a meeting” in the top menu, after which a window will open in which you can create a list of meeting participants, set a time limit and date for the meeting. After creating a meeting, click the “Send” button, and everyone who was on the mailing list will receive your email with information about the meeting
Conclusion
The article described only the most basic functions of the Outlook email client. This program has a fairly large number of functions and tools, and can be a good alternative to web versions of email clients.
It is worth noting a very convenient and intuitive interface, which is very important when working with a large number of mailboxes.
The security of working in Microsoft Outlook versions 2003 and 2007 can only be guaranteed if it is installed on a computer running Windows XP SP3, Vista, 7, 8, 10. If the operating system version is lower Windows XP SP3, then it is not safe to use it. We recommend installing a newer version of your email client, such as Microsoft Outlook 2010, 2013, or 2016.
Configure via IMAP protocol
via IMAP protocol:

- Email address - the full name of your mailbox.
- Account type - IMAP;
- Incoming mail server - imap.mail.ru;
- User - the name of your mailbox in full format [email protected] ;

9. Go to the “Outgoing Mail Server” tab and check the box next to “SMTP server requires authentication”. Check the “Same as server for incoming mail” box.

10. To better protect the data you send and receive using your email program, you must enable encryption. To do this, go to the “Advanced” tab and select “SSL” in the drop-down lists opposite “IMAP server” and “SMTP server”.

Check that the IMAP server port is 993 and the SMTP server port is 465.
11. After all additional settings have been made, click “OK”.
13. To make the list of folders in the mail program similar to the list of folders in your mailbox, right-click on the name of the newly created account and select “Update folder list”. 
14. Now you need to specify the folder in which all letters sent from the mail program will be saved. To do this, go to “Tools” - “Account Settings...”, as in step 1, select the newly created account and click “Change”. In the window that appears, click “Other Settings” and go to the “Folders” tab. Check the box next to “Select an existing folder” and select the “Sent Items” folder in the proposed list, click “OK” - the account is configured.

Configure by protocol POP3
To configure the Microsoft Outlook 2003/2007 email program via POP3 protocol:
1. In the top panel, in the “Tools” menu, select “Account Settings...”;
2. In the window that appears, click “Create...”;
3. Check the box next to “Exchange Server, POP3, IMAP or HTML” and click “Next”;
4. In the window that appears, check the box next to “Manually configure server settings or additional server types” and click “Next”;
5. Check the box next to “Internet Email” and click “Next”;
6. In the “User Information” section, provide the following information:
- Enter a name - the name that will appear in the "From:" field for all messages sent;
- Email address - the name of your mailbox.
In the "Server Information" section, provide the following information:
- Account type - POP3;
- Incoming mail server - pop.mail.ru;
- Outgoing mail server (SMTP) - smtp.mail.ru.
In the “Login” section, enter the following information:
- User - the full name of your mailbox in the format [email protected] ;
- Password—the current password for your mailbox.
7. Check the box next to “Remember password” if you want the mail program to remember the password for your mailbox and not ask for it every time you try to download mail.

8. Click the “Other settings...” button;
9. Go to the “Outgoing Mail Server” tab and check the box next to “SMTP server requires authentication”. Check the “Same as incoming mail server” checkbox.
10. To better protect the data you send and receive using your email program, you can enable encryption. To do this, go to the “Advanced” tab and check the box next to “Require an encrypted connection (SSL)”, and select “SSL” in the “Use the following encrypted connection type” drop-down list.

Check that the POP3 server port is 995 and the SMTP server port is 465.
11. If you want to leave messages downloaded by the mail program on the server, then check the box next to “Leave copies of messages on the server.”
12. After all additional settings have been made, click “OK”.
Change SSL settings
Please note: Microsoft Outlook versions 2003 and 2007 can only be used securely if it is installed on a computer runningWindows XP SP3, Vista, 7, 8, 10. If the operating system version is lower than Windows XP SP3, then it is not safe to use it. We recommend installing a newer version of your email client, such as Microsoft Outlook 2010, 2013, or 2016.
To configure your Microsort Outlook 2003/2007 email program using the secure SSL protocol:

If the above settings are already installed in your email program, then no changes need to be made.
If you have problems setting up your email program, use our
Hello, site readers!
I already wrote once that I prefer to use Windows Live services for email correspondence and working with documents and files. In my humble opinion, this cloud service is the best of everything currently offered on the market.
Read this and you will understand that its possibilities are really very extensive. And most importantly, they are free :-)
So this is what I wanted to tell and show today. Yesterday I went into my mail settings in this service and saw a new menu item:

Without thinking twice, I clicked and... ended up in a completely new version of Windows Live mailer called Outlook.com
But first, a cheerful suggestion popped up to try the new mail:

I, of course, agreed (we’ll go back later, if anything)
Outlook.Com interface and settings
Absolutely new and very ascetic appearance. This is what immediately catches your eye. It is quite obvious that it is intended not only for ordinary computers, but also for tablets and smartphones.
It's called Metro-Style
Everything loads very quickly. But there were some troubles - read below. It is clear that the shortcomings will soon be eliminated, but still. Maybe we were in a hurry?
Friends, I specifically created a new mailbox for screenshots for this article. I won’t show you my real account, of course :-)

If you don’t like the default color, you can set your own color scheme in the interface settings.
I love orange color.

By clicking the “Other mail settings” menu item, you will see a standard set of settings as for many other similar mail services. (eg gmail.com)
Nothing special, except for one point. It's called “Creating an alias for OUTLOOK”
I really, really liked this setting. It allows you to create multiple email addresses within one Windows Live account (however, it was also in the old live.ru interface)

Click on the line “Creating an alias for Outlook”
They ask you to enter a password - enter it!

It was immediately suggested to create a folder for this mailbox (convenient, but I chose to land these letters in the “Inbox”)

It's really very convenient. You can use one mailbox name for personal purposes, and another name, for example, for communicating with clients.
When you write a letter, you just need to choose the desired pseudonym and don’t bother with a bunch of accounts on different services.

Integration with social media networks
Naturally, MicroSoft is integrating its email with popular social networks with all the might of hell.
For example, if you follow the path: Profile Name – Edit Profile(see below),

then you can quickly connect to well-known social networks. But Russian social networks are not there yet, unfortunately.

Friends, there are many settings there and they are all intuitive. I will not write a huge manual on this topic, because it is unrealistic and pointless. I can only say one thing - the new email service from Microsoft is very flexible.
And there are just a lot of opportunities there. For example, 7 GB for storing files in the SkyDrive service. Works very correctly with my tablet and Android smartphone.
Well, okay, we persuaded you :-) I’ll show you a couple more screenshots :-)

If you click on this inconspicuous icon, which is highlighted in a red circle, you will see a quick access panel to:
— Access to the calendar
— Access to SkyDrive is my favorite feature in Windows Liv. Very convenient and strongly recommend.

Let me go over these points very briefly:
Calendar

A very convenient calendar, not overloaded with unnecessary functions. It even shows the weather :-) Just don’t forget to indicate your city first.
You can set up event reminders by email and recurring events. For example, renewing a domain for 100 years in advance :-)
People

Everything is clear here - we communicate with friends. Directly from here you can connect to your other accounts.
SkyDrive
Again, my favorite feature in WL.

Very convenient to store files. Please note that you can create documents here.
By the way, I often use this opportunity. The fact is that when I create, for example, an Excel table here, I am sure that it will open on a regular computer without distortion. I had problems with Google Docs a couple of times and eventually I gave up on it. (From Google)
— MS Word – text documents
— MS Excel — tables
— MS Power Point – presentations. As soon as I remember how many presentations I drew, being a marketer, I don’t come here :-)
— MS OneNote – notes (can be synchronized with the desktop version of OneNote)
What else is good?
And a lot of things! After all, here I am reviewing the web version. And there are also Windows Live applications for a regular computer. And there are already available:
- parental control function
— Working with video
— Working with photos
— Free antivirus
In short, you get a whole package of programs and services for everyday work.
What are the disadvantages of Outlook.Com?
- This is still a beta version. She glitches. For example, a couple of times my navigation buttons disappeared and I had to log in from the browser address bar.
— Let's face it, the settings are very, very cleverly hidden. That is, you can set it up without problems, but you won’t find them right away.
— Periodically throws it into the old Hotmail interface
— Sometimes you can get lost and it’s not always clear how to return to the main page of the service.
— Problems with Opera. Obviously, not everything will work correctly in all browsers. Everything works fine in Internet Explorer.
I didn't like it! How to return back to the previous Hotmail interface?
To be honest, I played around a little and... returned to the old version. I am working “blindly” in it, and am not yet ready to tolerate the shortcomings listed above.
When they finish it, I’ll move on completely. If you remember how the first version of this service was launched (2008?), it took almost two years to perfect it.
Here's how to switch back - just select "Switch to Hotmail":

What's next?
- They promise to eliminate all the shortcomings
— They will add the ability to call on Skype. Let me remind you that Microsoft bought Skype
— The calendar will be finalized
— Even closer integration with other MS products (Office, XBOX, Windows, WindowsPhone)
— All users will be transferred to the new version. But it won't be soon.
Conclusion:
I liked it!
It is obvious that a GIANT job has been done. But you need to understand that if you expect the same functionality as Outlook from the MS Office office suite, then you will be disappointed. These are completely different products.
A little more jigsaw work and the product will be perfect. Well, in the meantime, in anticipation of eliminating the shortcomings, I’m sitting on old stuff :-)
Let's say thank you to Brian Hall - Lead Product Manager
