How to reinstall Windows 10. How to reinstall Windows: step-by-step instructions
So, a number of questions arise when the system starts to slow down or freeze. Common reasons behavior like this:
- Irrational installation of a huge number of programs.
- Lack of regular registry cleaning.
- Action of malicious software.
- Installing an operating system on hardware with unsatisfactory parameters.
This state of affairs can be corrected. If everything is very neglected, and there is neither the strength, nor time, nor desire to clear away the great amount of information junk, then a reorganization will help Windows installation 10. Such a reinstallation is no different from reinstalling Windows 8. You should not be afraid of problems that arise, since it is possible to reinstall Windows 10 even on a running system. You can also cope with the situation if operating system refuses to load.
Preparation
First you need to create a bootable USB card or installation disk. This is done quite simply. We need to download from the Internet special program, which creates bootable media. So for USB creation- This Rufus program. And for DVDs– ImgBurn. It is also important to download installation image operating systems. It's easy to find on the official website. Next in Rufus, if we create a USB, we simply select virtual image installation disk, which was previously downloaded online. This is an item called ISO Image. And in the Device item, select the media on which recording will be carried out. Click Start and wait for the end of recording to USB.
And to create a physical installation disk, the ImgBurn program is suitable. Here we just follow simple tips. Select in the Source item the virtual image of the installation Windows disk 10, and in the Destination item select the one physical disk The DVD we are going to burn to.

Click on the picture where the disk depicted on paper turns into a disk that exists on its own, and wait for the recording to finish. All, preliminary work completed, you can now safely insert a USB card or DVD disc into the computer and reinstall.
While the system is working
So, if you want to do the reinstallation as quickly as possible, then we start doing it right in the operating mode:
- Click on Start and select the Settings menu.

- Next, click on Update and Security.

- Then select the Recovery and Start button.

- Many people are afraid that personal files will be deleted from their computer. In fact, it is possible to leave them unchanged. If you click Save my files in the next menu, everything will remain as it is. If you want to put an end to this terrible mess on your computer once and for all, you can click Delete everything. The system will show you which programs should be removed. After that, click on the Next and Reset button.
The computer will begin to restart and return to a clean and updated system state. In most cases, everything will go without force majeure, but if an error occurs, you can try reinstalling without any Windows boot 10, which will be described below.
Reinstall without downloading
So, if certain problems arise and Windows 10 simply won’t boot, then you should try another method. We take and boot from the installation media. To do this, go to the BIOS and set the priority there to boot from USB or DVD. Exit to this mode it is possible at system startup, manufacturers indicate during boot which button needs to be pressed for everything to work. You can select the boot priority in the Boot section.

Then the following menu will open, in which you need to select Diagnostics, then open the item Return the computer to initial state and click Delete All.
- Hello site! Such a question. A year ago, a friend installed Windows 7 for me and I don’t even know whether it’s licensed or not. If I update my Win 7 to the final Windows 10, and then want to reinstall Windows 10 again completely, so that there is no trace left of Windows 7, then what key will I need to enter when reinstalling Win 10, because I don’t have any key for the seven. And do you think that when you reinstall, automatic activation will occur, and if it doesn’t, what keys will need to be entered?
- Hello, question, I updated my Windows 8.1 to Windows 10 and only after the update I realized that most of the programs are absolutely unnecessary for me. Due to old unnecessary software, Windows 8.1 was slow, and now Windows 10 is slow (and some programs won’t start). How can I do a clean reinstall of Win 10, keeping only my personal files? Or do I need to install Windows 10 again?
How to perform a clean reinstallation of Windows 10 after upgrading from Windows 7, 8.1
Hello friends! A year ago, one of my friends also installed the “unknown” Windows 7 and he asked me to update it to Windows 10, and then do a clean reinstallation of Win 10, let’s see what happens.
Without a doubt, a newly installed operating system is much more stable and faster than one that has been running for several years. With all the garbage from previous operating systems (cluttered registry, irregularities in system files, many necessary programs etc) will move to the new Win 10! But it’s one thing when all this rubbish works fine and you’re happy with everything, but it’s another thing when everything slows down and freezes! But it is not at all necessary to reinstall Windows 10; just do a clean reinstallation of the operating system.
A clean reinstallation of Windows 10 can be done in two cases: directly in a running operating system, and also if Win 10 does not boot.
Reinstallation can be done while saving files in user profiles (documents, photos, music, downloads), or without.
- Note: You can also perform a clean reinstallation of Windows 10 according to our article.
I don’t like to write superficial articles, so I’ve described everything in detail for you below.
How will we reinstall
Since many laptops do not have a disk drive, you will most likely create an installation flash drive.
So, we have created a flash drive, connect it to our laptop or computer and begin the reinstallation.
Reinstalling Windows 10 directly in a running operating system
Start->Options
Update and Security

Recovery
Begin

Choose the option to save files, and your data in user folders will not be deleted.
If you want to completely clean hard drive from the previous operating system, select "Remove everything".

A list of programs to be removed will be indicated.


The computer reboots

The process of returning the computer to its original state begins

Note: Friends, if on at this stage the computer will immediately reboot into the operating system with the error “Problem when returning the PC to its original state,” which means proceed to the second part of the article “Reinstalling Windows 10 if the operating system does not boot,” this method will definitely work.

In most cases, everything will be fine and the reinstallation process will continue.
Login to your account

Boots into a clean Windows 10 with no applications installed.

Reinstalling Windows 10 if the operating system does not boot
Every Windows user At least once I was faced with the need to reinstall the system on my computer. There are different reasons: critical failure system files, PC infection with viruses, reduced performance, switching to a new OS version, and so on. But in any case, it is important to carefully prepare for the reinstallation process and decide on the method of its implementation.
Preparatory stage
If you decide to install a “clean” Windows, then first of all you need to create bootable media, from which the OS will be installed. You also need to save important user data first, since the reinstallation process will format the disk and delete all existing files.
Creating bootable Windows media
This step is necessary if you do not have a licensed Windows installation disc. In addition, not all modern PCs have a CD/DVD drive; in this case, you must first create a bootable USB drive. To do this, you will need to follow several steps.
- Go to the official Microsoft website and download special utility called Media Creation Tool. By clicking on the round icons with pluses inside, you can get additional information By downloading Windows and creating bootable media
- Launch the Media Creation Tool and, after accepting the license agreement, select “Create installation media for another computer.”
 Using this utility, you can also, if necessary, update an already installed system
 - In the settings window that appears, check the box next to “Use recommended settings.”
 Select recommended (default) Windows boot options or set them manually
 - The program will offer two options for creating bootable media: burning to a USB flash drive or burning a bootable CD image as an ISO file. We choose the first option.
 Before clicking Next, be sure to connect the USB device to your computer
 - Wait for the Windows 10 system boot process and bootable media creation to finish, after which you can exit Media programs Creation Tool.
 The bootable media recording process time depends on the speed of the PC and the speed of the Internet connection
 - Ready. You can begin installing Windows using a bootable USB media.
Video: How to create a bootable USB drive with Windows 10 operating system
Saving data before installing Windows
- documents, photo and video materials from the “My Documents”, “Video” and “Images” folders;
- bookmarks of Internet browsers, which are stored on disk in the following path: “C:\Users\User_Name\AppData\Browser Name” (it is better to save the entire folder);
- files downloaded from the Internet (sometimes these files remain in the “Downloads” folder);
- saves for video games (located in the path “C:\Users\User_Name\Documents”).
The easiest way is to copy all the data to another hard drive. If you only have one hard drive, you can save the files to a USB flash drive, CD or DVD, or to cloud storage(for example, on Yandex.Disk).
Options for reinstalling Windows 10
So, the preparatory stage has been completed, now you can proceed directly to installing Windows 10. The choice of installation method depends on several factors: whether your current system is in a working or non-working state, and whether you want to keep the current license and the files on the disk. Let's consider the possible options.
Reinstalling Windows 10 from the desktop
This is the easiest way to reinstall the system, in which you can start the installation immediately after loading the OS, directly from the desktop. To do this, you will need to insert a bootable USB drive and wait for it to autostart, and then run step-by-step installation"clean" version of Windows 10.
- After selecting the language and keyboard layout of the OS to be installed, click on the “Install” button.
 Using bootable media, you can also restore existing Windows system
 - Next you will be prompted to activate the installed Windows version and accept license agreement Microsoft.
 If you do not have an activation key, you can skip this step and activate Windows later, within 30 days after installation
 - The installer will then ask you to choose how to install the system. There are two options:

- After selecting the installation method, the installer will ask you to indicate the location where the OS will be installed.
 Section "Disk" system reserved» is created automatically and is required to create backup copies installation files Windows
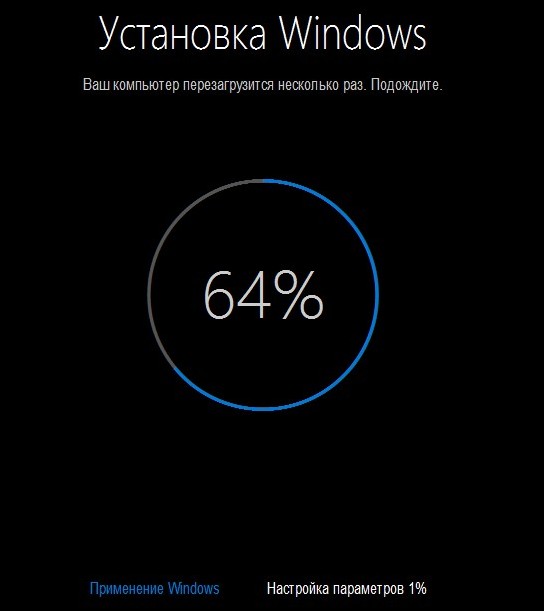
 - After clicking the “Next” button, the multi-step process of installing Windows 10 will begin.
 The update installation process can only be started when there is an Internet connection.
 - Upon completion of the installation, the user will see a standard set of system settings (account, launch options, etc.), which can be changed if desired.
 For optimal performance installed system, it is enough to use standard parameters
 - After completing the setup procedure installed system Windows is ready to use.
 If the Windows installation did not complete automatic update system components, including drivers, then upon first boot all standard components (sound, network, etc.) will be marked on the taskbar with a “cross” icon
The author of this article, based on personal experience, wants to warn you that when you select the “Update” installation type, the installer will save not only files and settings, but also a folder with the old version of Windows, which will “lie as a dead weight” on your hard drive, taking up an impressive amount of space. Therefore, if you want to save the data, but at the same time conduct complete replacement system, it is better to make a copy of all necessary files to spare media (as described in the “preparatory stage”). In addition, you can use alternative option installing Windows by performing not an installation, but a system recovery. This method will save all settings and files, but will “roll back” the OS to original condition, while removing all third-party applications.
To perform a system restore, you must:
- Open the Windows Control Panel and select the Recovery section.
 The Recovery settings window can also be opened using search bar Windows
 - In the window that opens, click on the “Start” button in the “Return the computer to its original state” option.
 If you previously had previous version Windows, then during the recovery process you can return to it
 - Next, the system will offer a choice of two options for starting the recovery. You need to select “Keep my files”.
 If you select "Delete everything" you will be prompted full rollback systems with the removal of not only applications, but also all data
 - After the restoration process is completed, there will be automatic reboot PC.
Video: How to return your PC to its original state using the Restore function
Reinstalling Windows 10 through BIOS settings
It may happen that your system has stopped booting and you cannot reinstall it from the desktop. In this case, installation of the system is possible only through BIOS settings(a set of built-in firmware in any PC). Such an installation can be divided into two stages: connecting bootable media through the BIOS and the OS installation process itself. To connect bootable media, you must:
- Insert the bootable USB drive into the USB connector. After starting the PC, press the appropriate key to enter the BIOS settings (usually information about which key to press to enter the BIOS settings is displayed at the bottom of the screen).
 The BIOS settings key depends on the PC motherboard model
 - In the BIOS settings window that appears, select the Boot category.
 Navigation through the BIOS settings menu is carried out using the arrow keys.
 - On the menu hard drives (Hard Disk Drives) select the line 1st Drive, press Enter and in the appeared context menu choose USB device. Then press the F10 key to save the settings and restart the PC.
 If the boot device is not a USB drive, but a CD or DVD, then you need to prioritize the corresponding drive
 - When the computer boots, a message like: Press any key to boot from USB will appear. Press Enter.
- It will begin standard process Windows installations.
 The process of installing WIndows through the BIOS settings is no different from installing the system from the desktop
If, after installing Windows, when the system boots, the message Press any key to boot from USB appears again, then you need to go back to the BIOS settings and set the hard drive with the installed system in the Boot/1st Device section.
IN lately The author of this article has more than once heard complaints that some users cannot enter the BIOS settings: the required key is not displayed on the PC start screen. The whole point is that in the latest models motherboards Increasingly, custom BIOS startup settings are being used. Therefore, in order to open the PC hardware settings without interference, you need to know the motherboard model.
Table: list of hotkeys for launching BIOS settings for different motherboard models
| Motherboard brand/model | Hotkeys for launching BIOS settings |
| ABIT | Delete |
| Acer (Aspire, Altos, Extensa, Ferrari, Power, Veriton, TravelMate) | F2/Delete |
| Acer (older models) | F1 / Ctrl + Alt + Esc |
| ASRock | F2/Delete |
| Asus | Delete |
| Biostar | Delete |
| Chaintech | Delete |
| Compaq (Deskpro, Portable, Presario, Prolinea, Systempro) | F10 |
| Compaq (older models) | F1/F2/F10/Delete |
| Dell (Dimension, Inspiron, Latitude, OptiPlex, Precision, Vostro, XPS) | F2 |
| Dell (older or different models) | Ctrl + Alt + Enter / Fn + Esc / Fn + F1 / Delete / Reset twice |
| ESC | Del/F1 |
| eMachines (eMonster, eTower, eOne, S-Series, T-Series) | Tab/Delete |
| eMachines (older models) | F2 |
| Foxconn | Delete |
| Fujitsu | F2 |
| Gigabyte | Delete |
| HP (Alternative, Tablet PC) | Esc / F2 / F10 / F12 |
| HP (OmniBook, Pavilion, Tablet, TouchSmart, Vectra) | F1 |
| Intel | F2 |
| Lenovo (3000 Series, IdeaPad, ThinkCentre, ThinkPad, ThinkStation) | F1/F2 |
| Lenovo (older models) | Ctrl + Alt + F3 / Ctrl + Alt + Ins / Fn + F1 |
| MSI | Delete |
| Pegatron | F2/F10/Delete |
| Samsung | F2 |
| Sony | F1/F2/F3 |
| Toshiba | F1/Esc |
Video: How to install Windows 10 using an external boot device
How to keep your activation license after reinstalling Windows 10
Microsoft Corporation in latest version I made sure that my OS ensured that after reinstalling the system, the license would be activated automatically. To do this, the user needs to link their system license to a Microsoft account. To do this, follow these steps:
- Open the Start menu and click on the Settings tab.
 You can also open the Settings settings by pressing the hot keys WIN+I
 - Going to the "Update and Security" section, select the "Activation" setting. Then click on the “Add account” line.
 By clicking the "Learn More" link, you can get Microsoft help on activating Windows
 - By filling out the user registration form and activating your account via email, you will link Windows license to the created Microsoft records.
 After clicking the “Next” button you will be prompted email You will receive an email notifying you that your Microsoft account has been activated.
 - After reinstalling Windows 10, log into your Microsoft account and your OS will be activated automatically (this will also be written in the “Activation” settings).
 After creating a Microsoft account and logging into it, an entry will appear in the OS activation field stating that Windows is activated
Reinstalling Windows is usually planned in advance, but sometimes an unexpected set of circumstances leads to it. In any case, before you begin reinstallation, you should carefully prepare for it. Connect boot media and backup hardware to copy and save user data from system disk. Even if reinstalling Windows is caused by a critical failure, due to which the computer stops booting, you can get out of this situation using the BIOS hardware settings.
Many people who have encountered problems with their computer are wondering how to reinstall Windows 10. Sometimes it is not necessary to reinstall the system at all, but rather restore it to an earlier save point or original state. If you wondering On how to reinstall Windows 10 from scratch, it will be useful for you to read the information below.
The reasons that the system began to slow down and freeze may be different. For example:
- virus software;
- a large number of programs;
- lack of registry and system cleaning;
- The disk is too fragmented.
Is it possible to solve these problems without uninstalling the operating system? This is possible; in such cases, a simple system restore (rollback) can help. If you have problems installing a program, or you have a virus that you cannot remove, you just need to restore the system to the last save point.
It is possible that you noticed some system freezes at one point or another, then you can reset it to its original state. In this case, all programs and files are deleted.
Therefore, do not forget to throw off all important information on removable media or another disk partition.
System rollback
Go to the Start menu, find Settings. Select Update & Security. Go to the "Recovery" section.
Decide what you want to do (reset your computer or roll back to an earlier build) and click Start. It is important to remember that any reset deletes files that were created after the save point. You will be prompted to select them to save before the reset begins. After you save the files you need and roll back the Windows 10 operating system, do not forget to check them for viruses before downloading them back to your PC.
This option is suitable for those who want to install the system again. First, you should transfer all important information to another disk partition, or better yet, to external media. This is necessary because reinstallation involves formatting the system hard section disk (complete erasure of data).
You will need:
- distribution with Win 10;
- external media for creating a boot disk (flash or optical drive minimum 4 GB);
- drivers;
Installing Windows 10, like Windows 8, is not particularly difficult. If you have Windows 10 installed, proceed to the next step. If not, you need to download it from the official website or find someone else's assembly. The danger may be that if the assembly is untested, you may introduce viruses to your computer. So if you're not chasing beautiful design, it is better to download the distribution from the official website.
To do this, go to the Microsoft website. Download MediaCreationTool.exe. The “ten” is downloaded using this program. After launch, you must accept the license agreement.
Since your goal is not an update, but a reinstallation, then select the second option.
Select the desired language, which Windows you need to download (in our case, the tenth), and the bit depth.
If you don't know which bit depth is best to choose, just look at how many are installed RAM. If 3 GB or less, then a 32-bit system is suitable. If 4 GB or more, then 64-bit.
Next, you need to choose to download the ISO file or directly install it on a USB flash drive. If you have a flash drive, connect it to your computer. If you want to burn it to disk, then download the ISO image. The procedure time will directly depend on the speed of your Internet connection. The higher the speed, the faster the download will occur.
Burning an image to disk
To burn the image to a DVD, use any convenient program. Here are a few of them:
- Nero Burning Room;
- BurnAware Free;
- DAEMON Tools Lite.
Let's look at the recording process using ImgBurn as an example. The program is distributed free of charge. After launching ImgBurn, a window will appear in which you need to select in the Source section Win image 10. And in the Destination section there is a DVD disc.
Click on the picture where there is an arrow from a disk on paper to another disk. This will start the burning process.
Before reinstalling Windows, make sure you have the drivers available. At a minimum you need to have a driver for network card and Wi-Fi. Otherwise, it may happen that you will not be able to go online and download everything you need. And although on Windows, as a rule, there are already universal drivers, it’s better not to take risks and play it safe. If you don't have drivers, download them from the official website. In the case of installation on a laptop, to search for drivers, it is enough to know its brand and model. For a desktop PC, you may need a program to view information about the computer's hardware and software configuration. For example, AIDA or Everest.
Now insert the USB stick or DVD into your computer, restart it and enter the BIOS. Here you need to select a value so that the selected media is loaded first.
Typically, to enter the BIOS you need to press F2 or Delete on the initial screen. If you want to reinstall Windows 10 on a laptop and you don’t know how to enter the BIOS, read the instructions for the device. On different laptops this is done in different ways.
Go to the Boot section and select Boot Settings. There you will see the device startup priority. How to change the order is usually indicated on the right side of the screen. These can be arrows, “+” and “-” or Enter. Save your changes when you exit.
If Windows 10 is installed from a DVD, the screen will display the message “Press any key to boot from CD or DVD”, and while the dots are running, you need to press any key. Clean reinstallation Windows 10 takes approximately 1 hour (depending on the power of the computer). If from a USB drive, the installer window will appear immediately. Choose desired language and click the “Next” button.

Accept the license agreement and select “Custom: Windows installation only.”
Now important point: choice system partition disk and its formatting. Please remember that this procedure completely erases the data from this volume.
After selecting a volume, everything goes to automatic mode. File copying will begin. As a result, the computer will reboot. Next comes the preparation and configuration of the components. After some time, a window will appear in which you will need to enter the key again. Click "Do it later."
Select Use standard settings.
You will be prompted to create an account with Microsoft. Click "Skip this step."
Enter your username and, if necessary, password for account. After this you will be taken to the desktop. That's all the instructions on how to reinstall Windows 10. When the system is reinstalled, all that remains is to fill it necessary programs and start using it.
Sooner or later, the Windows operating system has to be reinstalled. Even if you use a reliable antivirus and monitor what you run on your computer, reinstalling Windows is still inevitable. In this article we will talk about the process of reinstalling Windows 10.
The entire process of reinstalling Windows 10 can be divided into several stages:
- creating a boot disk (if you don’t have one);
- booting your computer from a Windows 10 disk;
- the process of reinstalling Windows itself.
Creating a boot disk to reinstall Windows 10
In order to reinstall Windows 10, you need boot disk with this operating system. If you already have such a disk, then you can skip this step.
So, in order to prepare a boot disk you need two things:
- Windows 10 disk image in ISO format;
- program for burning disk images;

Once you are in the BIOS settings, you need to go to BOOT section(Loading).

And then go to the subsection responsible for the loading order. This section is usually called " Boot Device Priority".

Next, you will see a list of three or more items: 1st Boot Device, 2nd Boot Device, 3rd Boot Device, and so on. Opposite each item it will be indicated which device is being loaded at this stage.

We want it to boot from disk first. Therefore, here you need to open the 1st Boot Device item and change its value to CDROM.

After this, you can save the settings and exit the BIOS. In most cases, this can be done by pressing the F10 key.

We press any key and wait until the installer appears on the screen, with which we can start.
Reinstalling Windows 10
The next stage is the reinstallation of Windows 10 itself. After booting from the disk, a window with a choice of regional settings should appear on the screen. Here you need to specify the operating system language that you want to receive after reinstallation, as well as the time format and keyboard layout. After selecting these options, click on the “Next” button.


The next step is to select the installation method: or full installation. If you are reinstalling Windows 10 from scratch, then you need to choose the second option. If you update more than old version Windows before Windows 10, then select the first option accordingly.

Next, a window will open in front of you with a list of sections of your hard drive. If you are reinstalling, you should already have at least two partitions. Select the one on which the operating system is installed and click on the “Format” button.

After formatting, click on the “Next” button. In this case, when you click on the “Next” button, the section that we just formatted should be highlighted.

Next, a window will appear informing you that files are being copied. Wait a moment while the installer copies the files and restarts your computer. After the reboot, the message “Press any key to boot from CD or DVD” will appear on the screen again, but in this case you do not need to press anything. Just wait until the computer boots itself.
After the computer boots, the initial setup window will appear on the screen. Here you can select “Use express settings” and “Customize”. If you use the “Use express settings” option, the system will apply standard settings and will not ask unnecessary questions. If you select “Customize”, you can configure everything manually. We will select "Use express settings" because this option suitable for most users.

After clicking on the “Use express settings” button, you will see a form for entering your login and password for your Microsoft account. Since you are reinstalling Windows 10, you should already have this account. Enter your username and password and click on the “Next” button. If you don’t have an account, you can register one. To do this, click on the “Create a new account” link.

After entering your username and password, you will be asked to protect your account. You can skip this step by clicking on the “I can’t do this right now” link.


And after a few minutes a worker will open in front of you Windows table 10.

That's it, reinstalling Windows 10 is complete. You can begin installing the necessary programs and configuring the system.