Changing the cursor in Windows. How to change the mouse cursor in Windows
Some users are not satisfied standard cursor mouse available in Windows 10.
Some say that it is too small, others that it is too simple and gets lost in the landscape, others want it animated or in a different color.
If you want to change the mouse cursor in Windows 10, read this guide.
Then you will learn how you can change the size and color of the cursor using the standard options offered by the operating system.
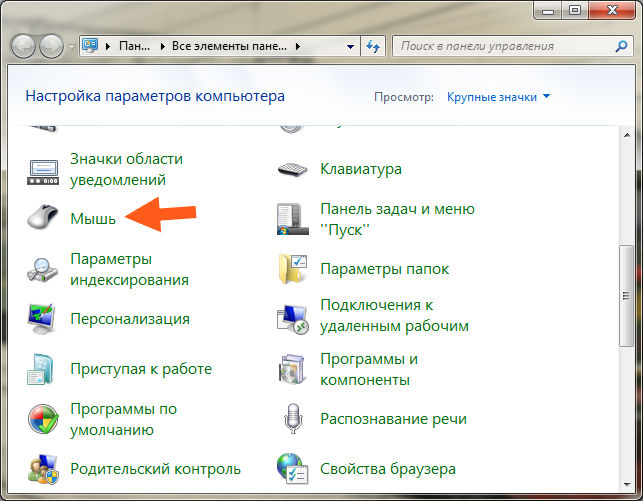
Change mouse cursor size and color in Control Panel
One way to configure this is to use . In the control panel, select the "accessibility" section.
There, find the line “change mouse settings” and click on it to open a window where you can configure it.

A window named “Make your mouse easier to use” will open. There you will find a list of options to configure.

You can choose one of three different colors and three various sizes for each color.
The third choice changes the effect - the pointer changes depending on the color the cursor is on.
After selection optimal parameters that you want to use, click OK to apply the changes.
Change mouse cursor size and color in application settings
The second method is especially suitable for devices with touch screens using system settings Windows 10 OS.
Most quick way To open the settings, press the “Windows + I” keys.
Once the app opens, click on the “accessibility” section.

In the left column, click on the mouse. On the right side you will see three sections: changing size, changing color and changing mouse from keyboard.
The first two allow you to change the size and color using one of three options for each section.

Choose which ones you want. After making changes, close the settings application and the changes will be activated immediately, without having to click on the “Save” button.
A pointer is one of the worker's things windows table 10, which requires you to constantly keep your eyes on it.
For this reason, it is a good idea to change it so that it is clearly visible on the screen.
As you can see in this article, this process is very easy to do in Windows 10 - using the old classic Control Panel or the new built-in tools. Good luck.
Category: Uncategorized Hello everyone. Well, what problem do we have today? And today the problem is this: a small cursor, what to do with it and can it be enlarged. And here I have good news, because you can increase it! And this can be done both in Windows 7 and in Windows 10, all the steps are almost the same.
By the way, do you want a joke? I see basically well, but I still set myself a big cursor. Why? It’s more convenient for me, I don’t know whether it seems to me or not, but it seems like this way I can press something faster, well, my reaction is faster or something, I can’t explain, but the fact remains that it’s more convenient for me when the cursor is large. Moreover, unlike Windows XP, in new Windows, including Windows 7, the cursor has been made more beautiful, so to speak, more pleasing to the eye
I apologize, I’ve gone a little off topic for today, but I’m already turning the conversation back to the right topic! So, how to make the cursor bigger in Windows 7? Press the Win + R buttons and write the following command there:

The Control Panel will open, there will be a bunch of icons, here you need to find an icon such as Mouse, here it is:
Click on it once with the mouse and then a small window with mouse settings will open. Here you need to go to the Pointers tab, this tab:

Now look, there is a menu there, above which it also says Scheme, see? This menu needs to be opened and there will be a choice of cursor size. Once again, I will write it so that you can understand. It's on the menu Windows styles Aero, there are three of them (well, I personally have them), and they all differ only in size:

So that the cursor is largest size, then you need to select a huge one from the menu:

Then you click OK and that’s it, your cursor should already be HUGE. But in fact, it’s not that huge, just a large cursor, and as I already wrote, it seems to me that this one is more convenient. In general, try it, I think you will like it
In today's article we will talk about the aesthetic side of Windows 10, namely how to change the mouse cursor. By the way, there is a funny “linguistic incident” - on the one hand, the word “cursor” means a “blinking dash” in the console command line, and the usual “arrow” is called a “mouse pointer”, on the other hand, the image files of the “mouse arrow” are physically located in the “C:\Windows\Cursors” folder. If you open this folder using Explorer, you will see that it contains two types of files. “Static” cursor images (such as a standard white arrow) have a *.cur extension, animated mouse pointers (like the “spinning circle” that appears when the computer is performing a resource-intensive task or a program is frozen) have a *.ani extension.
Initially, the operating system offers a number of preset cursor design options. You can select one of them like this:

Third party cursors
On the Internet you can find a selection of ready-made cursor designs. Then apply the downloaded cursor files for specific actions using “Browse”
Creating your own static cursors
Those aesthetes who are categorically not satisfied with the options proposed by Microsoft designers can create their own cursors and integrate them in the manner described above into one of the schemes. True, for this you will have to use tools from third-party developers (“built-in” in Windows graphic Paint editor does not allow you to create an image with transparent background, and there is no converter that converts *.png images into *.cur mouse pointer files by default in the system at all. To create a simple static pointer, do the following:
- Download the archive with the installer for the free graphics editor Paint.Net, unpack it to your desktop and run it;

- The installation process depends on whether you have other graphic editors. If there are none, just choose the express option.

- After launching the editor, open the “Image” menu and change the image size (select, for example, the 100 x 100 pixels option);


- In the Layers toolbar, click on the plus sign and add new layer. Then select the “Background” layer and delete it by clicking on the “cross”;


- Using the toolbar at the top left, draw an image of a cursor;

- Click on the “File” menu at the top and save the results to a PNG file with an arbitrary name;

- The easiest way to do the "png > cur" conversion is to use an online converter. Go to the converter web page and drag and drop your artwork onto it;

- In the drop-down list, select the cur extension as the output format and click the “Convert” button;

- After some waiting, click the “Download” button and save the cursor file (for me the conversion took about 5 minutes, but you don’t have to wait since the service can send the finished file to you in Dropbox, Google Drive or by email);

- Open Explorer and move the saved file to the “C:\Windows\Cursors” folder;

- Go back to the first part of this article and integrate the index you just created into one of the standard themes.


If you need a slow replacement and you have no idea how to change the mouse cursor on Windows 7, then in this review everything will be simple and clear. Let's go!
Step 1
Let's start with the banality! Go to “Start” and click “Control Panel” - in the usual and cynical way.
Step 2
Step 3
On the “devices and printers” cutting board, you need to finely chop the “mouse” column.
Step 4
That's it, we found ourselves in muscle properties. We need to go to the “pointers” tab and select the appropriate scheme for the cursors. Afterwards, click “ok”. It is advisable to check the bottom two boxes - “turn on shadows” and “use themes”.
Adding new cursors
Stage 1
If your cursors are stingy, ordinary and simple, then you need to download the archive of brand new gadgets. What website would you recommend?
http://7themes.su/stuff/kursory_windows/7
— click and select the pointers, and then select “direct link”. The race began.
Stage 2
Cursors are provided in Zip format To extract them, we first need to install winrar.
Stage 3
After opening the file, click “extract” - create a folder on the desktop - shove all the downloaded cursors there.
Stage 4
Now, we go again to the “pointers” section and select one of the downloaded cursor types.
Step by Step Actions: “review” - go to the desktop - open the folder with the cursors that we downloaded to the desktop - select the cursor. Don't forget to click "OK" for the changes to take effect.
Consequently, you can put together a variety of cursors to create an individual scheme or simply use a thematic set. The choice is yours!
Additional mouse features
1. Finally, you can consider all the mouse properties. For example, in the “mouse buttons” section, you have the right to swap buttons. Now the right one will be responsible for opening files and shortcuts, and the left one for properties. A relevant approach for left-handed people.
2. If you click on a shortcut or other file slowly and as a result, it sometimes does not open. Move the slider to the left corner.
3. Here’s another “Sticky” excellent property, you don’t have to hold it when dragging a file left button, that is, hold it a little and let go - the file will now be in your power without unnecessary pressure.
Speed features
1) In the pointer parameters section, you should look at the “move” tab. This way you can control the speed of the mouse - I recommend setting it to the maximum value.
2) You should look a little lower and see the “visibility” section - check the box and now the mouse will double, triple and even quadruple when moving. Fun feature!
3) Hide the pointer - when you type, the cursor disappears and does not bother you. Convenient, I wouldn't change a thing.
4) Indicate the location of the pointer by clicking CTRL key, you can find your cursor if it suddenly slips out of sight. This is a kind of identification mark in the virtual world.
Spinning ball
And the last aspect that is worth paying attention to is the “wheel”. By selecting the “one screen” function, the wheel will scroll extremely powerfully, that is, you will immediately get to the end of the page. If you are not satisfied with the scrolling speed, make the number higher or lower, depending on your preferences.
Windows operating system. You can, of course, replace your desktop wallpaper or set a different one background picture, but this will actually change little. Replacing the cursor will be much more interesting, because the standard pointers built into the operating system are quite boring and monotonous. Moreover, for this it is not necessary to install various programs to change appearance systems. All you need to do is download the archive, unpack it, and apply the downloaded package in the settings. Nothing complicated at all. Fortunately, there are a huge number of modified cursors for every taste and color, which can be downloaded from the Internet and installed on your computer or laptop.
In this article, we invite you to take a detailed look at how to change the cursor in the operating room. Windows system. We will also provide instructions on how to change its size in Dota 2 and learn how to hide it in game Dark Souls.
How to diversify the display of the mouse pointer - in our new article
Replacing the system cursor
To begin with, it is worth mentioning that cursors can be animated or static. Animated ones are distributed as files with the .ani extension, while static ones have the .cur extension. Each individual arrow is separate file. That is, you can change a whole package of cursors, installing, for example, the one from Lololoshka, and all the arrows in the system will change, or you can replace them individually, combining several packages. You can download them as an archive with a special installer file, thanks to which you can integrate them into the system with two mouse clicks.
Now consider two replacement options: replacing all cursors or each one individually. Required files And software for each of the options are absolutely the same, only the procedure is different.

Option 1: Replacing all cursors at once
The easiest and fastest way to change the design of your Windows. Just a couple of seconds, and your system will sparkle with new colors.

Option 2: Replacing cursors individually
A more painstaking option that allows you to create your own diagrams and change only those items that are necessary. To do this, follow these steps:
- Download the archive you like with cursors, unpack it to a convenient place on your computer.
- Select all the files in the folder and copy them to C:\Windows\Cursors.
- Go to Control Panel - Mouse - Pointers, where in the Settings window you can see the current cursor settings.
- Select the item you need, for example, “Main mode” or “Graphic selection”, after which the “Browse” button is activated.
- Click on it and select the desired cursor in the folder that opens; Confirm your choice by clicking the “Open” button.
- Change the items that are most interesting to you.
- If you want to save the current settings scheme, click the "Save As" button, enter the name of your scheme. You can also simply click Apply - OK.
- Enjoy the new cursors.
Removing the cursor in the game Dark Souls
Dark Souls is one of the popular and most advanced RPG games. It is played by a huge number of players from all over the world. The game attracts with its thoughtful game world and process, but from time to time it can encounter very annoying bugs. One of these bugs is the white mouse cursor in the middle of the screen, which is impossible to get rid of using standard methods. Almost every Dark Souls player sooner or later thinks about whether it is possible to remove it without a trace, so that it does not interfere. To do this, several patches are distributed on the Internet, with which you can configure the game so that the cursor is not displayed. What needs to be done for this?
- Download two archives with files for correction. You can download them on our website or search the Internet yourself.
- Unpack both archives, then go to the folder where the Dark Souls game is installed and find the Data subfolder in it, where you need to copy the contents of both archives.
- Next, you need to find the DSfix.ini configuration file in the same folder and open it using Notepad.
- Find the Window & Mouse Cursor Options section, find the disableCursor line in it and change the value 0 to 1.
- Launch the game and make sure the cursor is hidden.

Making the cursor smaller in Dota 2
Dota 2 is another incredible popular game with millions of fans around the world. After one of the game updates, the cursor became about 4 times larger than it was before. This is due to the fact that in the update the developers set the arrow scale value to approximately 400% to make it convenient to play on a 4K resolution monitor, and since a relatively small number of users have such displays, the cursor looks huge on a regular screen. Is it possible to somehow fix this bug and reduce its size?
To do this you need:
- Launch Steam, select the Dota 2 game, right-click on the name, select Properties - Set launch options.
- In the line that opens, enter the following command:
Cursor_scale_percent 100
then click OK and start the game.
- The arrow will return to its previous appearance.
Conclusion
After reading this article, you now know exactly how to change the cursor in operating system Windows, how to reduce it in Dota 2 and how to remove it in the game Dark Souls. You can make sure that there are absolutely no difficulties in all these operations and making a cursor like Lololoshka’s or in any other style will take literally a couple of minutes.
We hope everything works out for you. We also invite you to leave comments with feedback.
Attached files:
- Archive for Dark Souls No. 1 (https://yadi.sk/d/iU5hwbQizKBLV).
- Archive for Dark Souls No. 2 (https://yadi.sk/d/OQpMXI2b33vYei).