Connecting the hard drive to the motherboard. Connecting a SATA hard drive to an old motherboard
Not long ago I decided to get hard drive, since Windows 7 takes a lot for backup.
Plus, I still save a lot of things on the computer, buy various training courses, and all this also weighs a lot.
From the entire assortment was chosen sata hard WD drive, an example of which we will look at later connecting hard disk, as well as its formatting.
What is the difficulty of connecting?
Many people have a desire to be scared because they have already made mistakes before, remembering which we evaluate how well we cope with current tasks.
However, if you remember, we had cases when everything worked out, and we will focus on them.
In terms of connection technology hard drive, we will consider two options - connecting via an adapter and using a cable.
Since there are no jumpers, the pairing process itself will consist of connecting the data cable and the power cable.
Then we will need to format hard drive so that it becomes visible in windows.
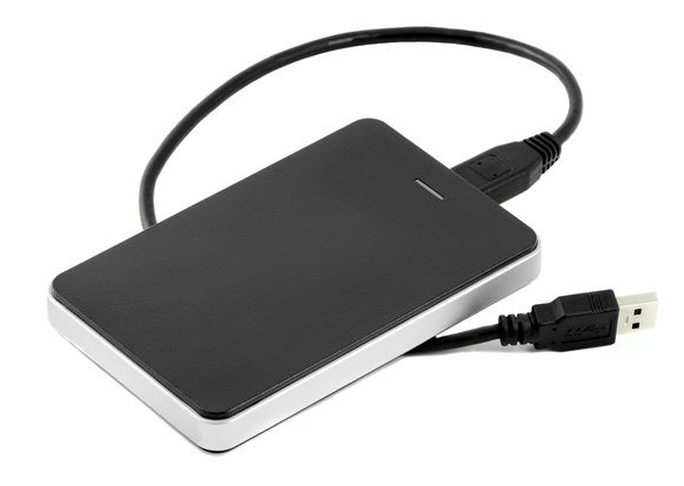
Connecting an external hard drive
Reasons for mounting a hard drive in an external enclosure:
— if you only need file storage;
— the power supply is low-power, and the hard drive also requires power.
4. Connect the hard drive to the computer to load Windows and format it using the Disk Management utility.
5. Boot the computer, go to “control panel” / “System and Security” / “Administration” / “Computer Management” and select “Disk Management” from the menu.
6. Selecting new hard disk in the list, create one again logical drive and format everything to NTFS.

*click on the picture to view the full image.
(Figure 4)
If your external hard The disk is not detected, format it as described above or in another way.
7. Turn off the computer, take out the hard drive and assemble it in the external case.
Drivers for the case external HDD You don't need to install it if you don't have Windows 98.
8. Connect to the computer and check operation.
After reading the article, you have enough information to decide which sata HDD connection method you choose, external or internal connection.
You can also choose the case external hard a drive with or without a fan, although usually the choice is determined by the intensity and duration of use of the external hard drive and, of course, the amount available.
Comments (49)
- Yuri 18.04.2011
- admin 18.04.2011
- Alexander 08.05.2011
- admin 01.08.2011
- Artem 23.08.2011
- admin 23.08.2011
- Dmitry 09.09.2011
- VICTOR 21.09.2011
- admin 21.09.2011
- Alexander 25.09.2011
- admin 25.09.2011
- Mary 14.10.2011
- admin 14.10.2011
- Zakhar 16.10.2011
- admin 16.10.2011
- Bonk 27.10.2011
- admin 27.10.2011
- Ruslan 07.11.2011
- Alexander 21.11.2011
- admin 21.11.2011
- DEN 15.01.2012
- admin 15.01.2012
- Paul 29.01.2012
- Vosaduli 03.02.2012
- admin 03.02.2012
- Shtoot 16.02.2012
The other day they brought me a problematic PC, suffering from brakes, freezes and other glitches. Its far from young motherboard has only an IDE interface, so the new terabyte SATA-HDD was connected using a specially purchased SATA PCI controller (on a VIA VT6421 chip). The Windows system event log was full of messages about disk operation errors, which apparently was the cause of the problems.
HDD check (SMART, surface, file system), replacing the SATA cable did not correct the situation. With the old IDE disk, the computer used to work stably, the BIOS was in motherboard the latter was sewn up, so suspicion fell on the operation of the SATA controller. Moreover, in the magazine Windows errors his name sometimes also “blushed.” But experiments with the controller did not bring much success - neither updating the drivers nor moving it to another PCI slot helped. True, the hard drive seemed to behave better when connected to another SATA port of the controller, but even here another “ambush” awaited - with a DVD drive connected through the second SATA port, the controller for some reason stubbornly refused to boot the system from the HDD. In general, either the controller itself was very crooked, or it was simply not “friendly” with this motherboard or hard drive. By the way, reviews about controllers on these chips on the Internet are not flattering -
The solution was to replace the controller with a similar one, and preferably on a different chip, so as not to encounter the same problems. This is, of course, if you do not resort to a radical and troublesome method - replacing the motherboard. In our stores, among the inexpensive options, they mainly offered products based on the same VT6421... And then I saw this thing on sale - costing only about 400 rubles, I became interested and decided to try it. As a result, the SATA HDD connected to the IDE connector through this “cunning piece of hardware” was seen by the BIOS as if it were an IDE drive and started working without any errors. The HDD activity LED on the system unit happily began to fulfill its duties, from which it had previously been relieved by the “good” PCI controller. I left the DVD drive connected as it was, via the SATA controller on the VIA chip, because... There were no problems reading or writing CDs.
The converter is quite compact, receives energy through the FDD power connector (an additional adapter is included in the kit), has a data transfer indicator, and does not require any drivers. In addition, due to its bidirectionality, it also allows you to use an IDE drive via a SATA interface. In the case when you need to connect one device and there is no need for RAID arrays, this is a pretty good economical alternative to PCI controllers.
The ability to connect additional hard drives will be very useful to you if there is a lack of free disk space on already installed ones. You can connect the HDD to a personal computer:
- Installed in system unit using standard SATA connectors on the motherboard.
- Installed into the system unit using the SAS RAID controller connectors.
- Using a USB-SATA adapter.
This is interesting! PredecessorSATA was the interfaceATA (another name isIDE). The difference lies in the method of data transmission - serial transmissionSATA, parallelATA. It is generally accepted that serial transfer is faster, however, for the average user the difference is invisible.
SATA
Step 1. Remove the case cover of your system unit.
Step 2. Attach the data cable to the connector on the motherboard.
Note! The connector number is not important. Definition boot hard disk operation occurs according to the software installed on it.

Step 3. Connect the data cable to the connector on the hard drive.

Step 4. Connect the power cable to the hard drive connector.

Important! When connecting the cable, the computer's power must be turned off. When connecting a cable with voltage applied to it, there is a high risk of damage to the hard drive controller, or the controllerSATA motherboard! In the event that your power supply has power connectors only for hard drivesIDE, use a special adapter.

Step 5. Secure the hard drive to the case with screws.

Important! Make sure that the cables do not come into contact with the cooler blades of the system unit.
If you are using a 2.5-inch drive, use special slides to secure the hard drive more tightly inside the system unit.

Connecting the hard drive inside the case to the connectorsSAS
These connectors are backward compatible, that is, SATA can be connected to SAS, but SAS cannot be connected to SATA.
Step 1. Install the hard drive into a special structure (sled) of the appropriate size.
Note! The designs are designed for certain form factors, that is, inserting a 2.5-inch drive into the controller cage of 3.5-inch hard drives will not work.

Step 2. Insert the slide into the controller basket and push until the slide handle locks in the desired position.

Important! Don't forget to check the cable connectionRAID to the motherboard and change your controller settings.

Connecting a 3.5-inch hard drive using an external power adapter
Step 1. Attach the adapter to the hard drive.

Step 2. Connect the adapter and the desired port on your computer using a USB cable.

Step 3. Connect the power cable to the adapter.

Step 4. Apply power to the adapter by switching the toggle switch to the working position.

Step 5. If necessary, install drivers for the connected equipment.
Connecting a 2.5" hard drive using a 3.5" adapter
2.5" drives are commonly used in laptops. The connectors are no different from the connectors for 3.5 drives, but the laptop hard drive is attached to the case using a special basket (sled).

Step 1. Remove the slides or other structures from your hard drive.

Step 2. Follow the instructions for connecting a 3.5 hard drive using an adapter.
Connecting a 2.5-inch hard drive using the appropriate adapter
When using a special adapter for 2.5 hard drives, you do not need to remove the slide. As a rule, such adapters do not have external power and receive voltage from the computer’s USB port.

Step 1. Connect the adapter to the hard drive.

Step 2. Connect both ends of the USB adapter cable to the computer ports.
Important! Two ends of the cable are needed because one of them transmits information, and the other carries power to the adapter.
Video - How to connect a hard drive
Conclusion
We looked at three different ways connecting hard drives with SATA connectors to a personal computer. Each of them requires purchase additional equipment, at least - trains. If you decide to use a SATA drive as an external one (connected via a USB adapter), it is recommended to purchase a reliable protective case for the drive. When working with the device, the cover should be removed to avoid overheating. Some hard parameters disks working with different technologies, are presented in the summary table.
| Name | Data transfer rate, Mb/s | Number of devices per port |
|---|---|---|
| IDE (ATA) | 133,5 | 2 |
| SATA R.1 | 150 | 1 |
| SATA R.2 | 300 | Up to 15 |
| SATA R.3 | 600 | Up to 16 |
| SAS R.150 | 150 | Up to 4 |
| SAS R.300 | 300 | Up to 4 |
| SAS R.600 | 600 | Up to 4 |
Connecting a hard drive to a laptop or computer is not a very difficult task, however, those who have never encountered it may not know how it is done. In this article, I will try to consider all possible options for connecting a hard drive - both mounting inside a laptop or computer, and options for external connection in order to overwrite the necessary files.
Connecting to a computer (inside the system unit)
Due to its shape, the SATA cable is more resistant to multiple connections. The SATA power cord is also designed to accommodate multiple connections. The SATA power connector supplies 3 supply voltages: +12 V, +5 V and +3.3 V; however modern devices can operate without voltage +3.3 V, which makes it possible to use a passive adapter from a standard connector power supply IDE to SATA. A number of SATA devices come with two power connectors: SATA and Molex.
The SATA standard abandoned the traditional PATA connection of two devices per cable; Each device is assigned a separate cable, which eliminates the problem of the impossibility of simultaneous operation of devices located on the same cable (and the resulting delays), reduces possible problems during assembly (there is no problem of conflict between Slave/Master devices for SATA), and eliminates the possibility of errors when using non-terminated PATA- loops.
The SATA standard supports the command queuing function (NCQ, starting with SATA Revision 2.x).
The SATA standard does not provide for hot swapping of the active device (used Operating System) (up to SATA Revision 3.x), additionally connected drives must be disconnected gradually - power, cable, and connected in the reverse order - cable, power.
SATA connectors
SATA devices use two connectors: 7-pin (data bus connection) and 15-pin (power connection). The SATA standard provides the ability to use a standard 4-pin Molex connector instead of a 15-pin power connector. Using both types of power connectors at the same time may damage the device.
The SATA interface has two data transfer channels, from controller to device and from device to controller. LVDS technology is used for signal transmission; the wires of each pair are shielded twisted pairs.
There is also a 13-pin combined SATA connector used in servers, mobile and portable devices for slim CD/DVD drives. Devices are connected using SATA cable Slimline ALL-in-One Cable. It consists of a combined connector of a 7-pin connector for connecting the data bus and a 6-pin connector for connecting power to the device. In addition, to connect to these devices, servers use a special adapter.
Using http://ru.wikipedia.org/wiki/SATA
The most interesting comments on the colors of the SATA power connector cable:
RU2012:"Adapters are available to convert a 4-pin Molex connector to a SATA power connector. However, since 4-pin Molex connectors do not provide 3.3 V, these adapters only provide 5 V and 12 V power and leave the 3.3 V lines disabled. This does not allow the use of such adapters with drives that require 3.3 V power - orange wire.
Understanding this, manufacturers hard drives have largely left support for the 3.3V orange power cable option in their storage devices - power lines are not used in most devices.
HOWEVER, WITHOUT 3.3V POWER (orange wire), the SATA DEVICE MAY NOT BE ABLE TO HOT PLUG THE DISK..." - http://en.wikipedia.org/wiki/Serial_ATA
Have questions - ask- we will help as best we can (for comments to work, you need to have a Java script enabled in your browser):
To comment, just ask a question in the window below, then click “Post as” - enter your email and Name, and click “Post comment”.
The system unit case has compartments for devices (usually they are located in the front part of the case). The upper compartments of the case are usually designed for installing optical drives CD/DVD, Blu-Ray. And the lower compartments shown in the photo are designed for installing hard drives.
We select any of the available compartments and place the hard drive there. It is necessary to position it so that the connectors (see image) of the drive face inside the case.

Then, we take the hard drive and insert it along the guides that prevent it from falling down.

All. The disk is inserted, now it needs to be secured with screws. As you can see, the case has corresponding mounting holes.

It is necessary to ensure that the threaded holes on the disk match the holes on the body. Now we will tighten the screws in them.

It is desirable that there are four screws, two on one side and two on the other. Having screwed the hard drive on one side, unfold the case and screw the other side.

We have secured the hard drive. Check that it does not wobble; if the disk moves, tighten the screws more tightly.

The hard drive installation is complete and you can now connect it to the motherboard. First of all, it should be taken into account that hard drives different generations have different connectors, different cables (“cables”) for connection.
We will look at connecting a hard drive with the most common IDE interfaces(obsolete, but still used) and SATA.
Connecting a hard drive with a SATA interface
Connecting a hard drive to a laptop or computer is not a very difficult task, however, those who have never encountered it may not know how it is done. In this article I will try...
Modern technologies are developing more and more every year. The time has long come when one hard drive in a computer is not enough. A huge number of people connect a second HDD to a personal computer. The connection procedure is nothing fancy and even a beginner can figure it out. Let's look at everything more carefully and in detail.
Connecting a second HDD to a laptop or Personal Computer
There are two options for adding an additional hard drive:
- To the PC system unit. This method Great for standard desktop computers;
- Adding in the form of an external drive. This is very easy way, which is suitable for all devices.
Method 1: Adding to the system unit
The process of adding additional media to the system unit can be divided into several small stages. Let's look at each of them in more detail.
Type Definition
At the very first stage, you need to decide on the type of interface with which the hard drive interacts. It is worth noting that important fact that the predominant number of computers have SATA interface, therefore, it is advisable that second hard the disk was of a similar type. The motherboard may not have an IDE bus because it is considered very old, which may cause some problems when installing older hard drives.
The best way to determine the standard is to carefully consider the contacts.
Example of a SATA connector

Example of an IDE connector

Adding a second SATA drive to the system unit
Addition additional disk- the simplest process that occurs as follows:

Boot priority for SATA drives
By default, there are four holes on the motherboard for adding SATA drives. It is worth understanding that their numbering starts from zero. Namely, the priority of the hard drive directly depends on the connector number. To set the priority yourself, you must use the BIOS. Each specific type of BIOS has its own special controls, as well as a special interface.
In the most early version you need to go to the menu " Advanced BIOS Features" and start working with items such as "First/Second Boot Device" IN modern versions the path looks like this: “Boot/Boot Sequence – 1st/2nd Boot Priority”.
Adding an additional IDE drive
There are also cases when you need to connect an old IDE drive. Step by step instructions The process looks like this:

Connecting the second IDE to the first SATA
If necessary this procedure, then you will need an appropriate IDE-SATA adapter. An example of an adapter can be seen below:

Step by step instructions:
- First you need to put the jumper in the Master position.
- The IDE plug is connected to the hard drive.
- Take a red SATA cable and connect one side to the motherboard and the other to the adapter.
- The power cable is connected to the power supply and adapter.
About possible display problems
Sometimes it happens that after an additional hard drive has been connected, the system cannot recognize it. Don't panic, because most likely you did everything right. Just for proper operation the second hard drive needs to be initialized.
Method 2: Connecting an external hard drive
Connecting an external HDD is convenient if the stored files are needed not only at home, but also outside of it. In addition, this method is the only correct one for laptop owners, since they simply do not have a special additional connector for a new hard drive.
In fact, everything is easy here, because the external hard drive is connected via USB, just like any other devices (mouse, keyboard, flash drive, webcam and much, much more).
Hard drives that are installed in the system unit can also be connected via a USB connector. Here you will need an external hard drive enclosure or a special adapter. The bottom line is this: the required voltage is supplied to the HDD through the adapter, and communication with Personal Computer happens via USB. Different hard drives have their own wires, so you should always pay special attention to the standard that specifies the dimensions.