LED lighting for the kitchen: secrets of choosing a strip and installation nuances. LED strip lighting: advantages, choice of equipment, installation rules
Lighting effects have long been successfully used by designers as decorative element or to highlight different functional areas. But not each of us is so friendly with electricians that we can install lighting fixtures as we wish. But with the advent of LED strips, it is quite possible to arrange additional light sources and various interior “chips” with your own hands, not only in living rooms, but also in the kitchen. Therefore, we suggest you learn everything about LED ceiling lighting with tape: how to install, choose the right components and use it for the original design of the room.
To illuminate a suspended ceiling, there are several types of lighting - from various “spot” devices to a system with conductive tracks on which diodes are mounted. The latter option is interesting because it does not require special skills for installation, consumes a minimum of electricity and can be used to illuminate any interior element. Agree, such a solution deserves attention, so we will consider it in more detail.
Lighting effects can become an interesting accent for the kitchen interior:


Interesting! LED backlighting is considered the most profitable in terms of savings, because 1 diode will cost only 0.65 kW/h for 12 hours of uninterrupted operation.
Types of LED backlight
For decorative lighting in a store, you may be offered dense “rulers” on a hard substrate or duralights - cords with a 360-degree glow angle. But it is boards on a flexible basis, which we are accustomed to calling LED strips, that are most widely used.

Boards with diodes are produced wound on round bobbins, this protects the system from creases and other damage
LEDs can be used as a main or additional light source or simply for decorative purposes. Therefore, choose the option that is most suitable for your interior and ceiling configuration.
- General illumination - implies complete replacement traditional LED lamps. To do this, several powerful tapes are installed around the perimeter and behind the stretch ceiling film. True, this option is rare, since the purchase large quantity Diodes will have to cost an impressive amount.
- Highlighting contours - conductive paths with diodes installed behind the cornices or in specially equipped niches along the perimeter of the ceiling create muted diffused lighting and visually increase the height of the room.
- Shaped lighting - the glow of LEDs can highlight a certain area, highlight various protrusions or recesses in suspended structures.

Flexible tapes can take on even the most intricate and curved shapes
Note! LEDs can be used not only for ceilings, but also when decorating work aprons, floor podiums, window and door openings. Ribbons effectively emphasize the contours of furniture and appliances; they make it easy to emphasize paintings, beautiful dishes and other accessories.
LED decor options for the kitchen:


Starry sky backlight
Speaking about original lighting solutions, of course, we cannot even mention the hit of recent years - lighting with the romantic name “starry sky”. True, this type of decor is easiest to arrange for suspended ceilings. The principle of operation is quite simple: behind the canvas or film, LEDs of various diameters and radiation strengths are placed, which create an effect reminiscent of the twinkling of stars.
To arrange such lighting, individual LEDs of various powers and sizes are selected, which need to be soldered into a network, and then glued to the base ceiling with construction silicone. This is the most difficult stage, since, in addition to maintaining polarity, it is important to enclose each terminal in a cambric - an insulating tube that will protect your “sky” from short circuits. For more realistic effect Several miniature light bulbs can be brought out by making neat punctures in the film.
Then a power supply is selected and installed, the power of which is calculated according to the number of crystals (100 pieces will require 10 W). It is also worth purchasing a controller-interrupter for each section of 5-10 diodes. With it, the “stars” will be able not only to shine, but also to blink.

Choosing a stretch ceiling film with a space-themed image will increase the realism of the “star” effect
Note! If you wish, you can install a “starry sky” in a plasterboard ceiling. But to do this you will have to cut a niche in it or drill holes according to the size and number of light spots.
How to choose and install LED strip
Manufacturers present us with so many LED solutions that it’s easy for a person far from electricians to get confused. But since it depends on the purchase correct installation LED backlighting and its operation, let’s try to sort out the most important technical nuances in order.
Types of LED strips
All systems with LEDs can be classified according to several parameters: type of mounting, number of diodes, color, power. What exactly to pay attention to depends on the design idea that you want to realize with the help of lighting effects.
For example, for decorative lighting the most important parameter is the color shade of the glow. And according to this characteristic, ribbons are divided into single-color and multi-color. The first ones, when turned on, emit light of only one tone. And it doesn’t have to be traditional white, it can also be red, green, yellow, purple or bright light green. Among the non-standard options, it is worth noting tapes with ultraviolet or infrared glow.

You can choose the backlight shade to suit any interior
Despite the wide assortment, the choice of lighting gamut should be approached with caution - psychologists assure that prolonged exposure to color has an impact on the psyche. Thus, “calm” tones that can be safely used both in the kitchen and in living rooms include all shades of green and turquoise, as well as yellow and orange colors. Red, pink and burgundy lighting should be left for the bedroom. But bright blue lights are alarming; a person subconsciously tenses up and feels uncomfortable. The combination of dark blue and yellow is generally not recommended for impressionable people - such lighting has a depressing effect and can cause a nervous breakdown.
Please note that even the classic white can have different shades and emit a glow of warm or cold light. These “temperature” nuances are important when creating an organic interior; they can be determined by studying the documentation. So, a backlight with an indicator of 3000-3500K will emit warm light, 5500-6000K – neutral, 6500-7000K – cold.
Important! For open installation, you should pay attention to the color of the base so that the tape does not stand out from the general background. In addition to the standard white, you can find a gray, brown or transparent backing.
Multicolor RGB systems can change shades one by one or glow with all the colors of the rainbow at the same time. But they cost an order of magnitude more than their monochromatic counterparts and only work in conjunction with a transformer and a controller that sets the color switching mode.

One of the most important parameters from a technical point of view - the power of LEDs and the density of their placement. The most popular are LED strips with 60 and 120 diodes per 1 m, but there are other options - 30, 72, 90, 240, and the bulbs can be arranged linearly or in several rows.

Types of LED systems by LED density
Important! The smaller the gap between the diodes, the brighter the backlight and the greater the energy consumption. For decorative purposes, 30-60 diodes/meter is sufficient, but if you plan to replace the main light source, you should choose a strip with 120-240 light bulbs.
Inspection and purchase of tape and components
To determine which material is suitable for implementing your ideas, study the symbols on the board. Standard strips for household lighting have the abbreviation SMD (short for SurfaceMountedDevice - “surface mounted device”). The numbers indicate the dimensions of each LED. For example, SMD 3528 means that the parameters of 1 diode are 3.5 by 2.8 mm.
Note! The most common are 3 types of LEDs: small - 3020, medium - 3528 and large 5050.
The intensity of the glow directly depends on the size of the diodes and the density of their placement on 1 m of strip. We dealt with density above, and now we’ll tell you how to find out the power of the system, because the choice of power source depends on this.

Backlight power consumption at different LED placement frequencies
To calculate the required footage, arm yourself with a tape measure and measure the perimeter of the illuminated area. Multiply the resulting figure by the power of the meter of the selected type of tape and get the value that you should focus on when purchasing a power supply (transformer), and for multi-color products, a controller. These components can be rated for 5, 12 and 24V, but if you do not plan to replace the main lighting, 12V devices are sufficient.
Important! The total power consumption of the backlight should be no more than 80% of the rated power of the transformer.
LED strips have different protection classes. This indicator affects their ability to withstand moisture, dust and other negative influences. external factors. To determine it, you need to look for an abbreviation on the packaging with the letters IP (stands for IngressProtectionRating).
- IP 20 – intended for indoor use and not sealed.
- IP 65 – suitable for lighting areas in contact with water: work apron, sink, aquariums, etc. This material can be used not only for interior work, but also outdoors.
- IP 68 - fully insulated systems that are even approved for use in water.
The presence of protection can be determined even by visual inspection - ribbons that are not afraid of a humid environment will be filled with a thin layer of transparent silicone.
Important! To illuminate ceilings (including in the kitchen), you can use a regular board designed for open mounting. The fact is that the silicone layer not only dims the light intensity, but also leads to heating of the substrate and surfaces in contact with it. Therefore, you should not use protection where it is not needed.
DIY LED lighting installation
To install the lighting on the kitchen ceiling yourself, it is important to know that according to the type of fastening, all strips are divided into:
- Self-adhesive (most common) - mounted on a sticky backing that is equally suitable for wood, plastic or glass. The disadvantage is that the glue may come off over time due to humidity or several re-gluings.
- With fastenings - fixed using special brackets-clamps on any material. Such installation will be more reliable, but will take much more time and effort than adhesive-based tape.
Important! Tapes are available in 5-meter rolls, but most sellers offer retail sales and pieces of the required length. The places for divisions are most often indicated by the image of scissors; you need to cut strictly along the dotted lines so as not to damage the chain.

On some tapes, cut locations may only be indicated by a vertical line
At self-installation Consider another important feature for any LED products - thermal conductivity. The fact is that manufacturers have still not been able to achieve one hundred percent efficiency from miniature crystals, so part of the energy is dissipated in the form of heat, which heats the surfaces in contact with the tape. And since in the kitchen high temperatures- a common thing, for powerful or frequently located LEDs it is worth considering insulation, for example, attaching a substrate to a thin aluminum profile. But if we are talking only about decorative lighting, you can do without it.
To assemble the track necessary to illuminate the selected area, the cut points must be secured using a connector or a regular soldering iron. Please note that the temperature of the device should not be higher than 260 degrees, and the exposure time should be a maximum of 10 seconds.

Single-color track connection diagram
The connection is carried out according to this principle:
- In single-color boards, the plus and minus contacts are soldered together.
- In multi-color RGB, 4 wires are combined with contacts of the same name on the block, focusing on the markings (R - red, G - green, B - blue, fourth - 12 or 24 V).
- The transformer power cord is connected to contacts N and L.
- In RGB strips, a controller is additionally connected to the power supply. It is important here not to confuse the positive and negative terminals, otherwise the device will fail.

Ready-made kit for connecting color lighting
Important! Maximum length circuit designed for one transformer - 15 meters or 3 standard reels. If your area is larger, you will have to use another power supply.
Depending on the type of finish of the kitchen ceiling, there are various installation options strip lighting. The easiest way to hide the decor is in suspended plasterboard structures, but even if your kitchen has a smooth, single-level ceiling, you can create lighting effects using a regular cornice.
Installing tape in the baseboard on the ceiling
This installation method is applicable even if the kitchen renovation is long overdue. It does not require any special alterations, the main thing is to buy a beautiful ceiling cornice that matches the overall interior design, and glue it to “liquid nails” at a distance of 80-120 mm from the ceiling. In order for the structure to come out smooth and look impressive, you should first make markings for the level.
Important! When choosing a cornice, pay attention to its thickness - through thin walls the tape can shine so brightly that the baseboard itself will shine.
When the baseboard is installed and the glue has set, we proceed in stages:
- We clean the surface of the cornice from dust and degrease.
- Remove the adhesive backing from the back of the tape.
- We mount the LEDs on the wall or on the side of the cornice. True, many experts do not trust factory-made “self-adhesives” and recommend additionally securing the structure with silicone glue or double-sided tape.
- We connect the power supply (and for multi-color RGB - also the controller), observing the polarity.
- We check the voltage in the board itself and all components - they must match. Now you can connect the power supply to a 220 W network.

Step-by-step installation of lighting in the ceiling plinth
Installation in plasterboard cornice
It is best to install lighting in suspended ceilings during their construction. For this, a standard design made of metal profiles and plasterboard sheets is used, which provides an open or closed niche for a line of LEDs.
You will need the following tools and materials:
- Drywall and self-tapping screws.
- Metal profiles CD and UD.
- Dowels and screws.
- Hacksaw and hand scissors for metal.
- Drill, screwdriver.
- Level, measuring tape.
- Pencils or markers.
- LED strip with accessories.
The operating algorithm is as follows:
- A drawing of the future box is created, according to which the markings are made.
- The frame is being erected. To do this, load-bearing UD profiles are screwed to the walls using screws and dowels, and CD elements are, in turn, attached to them. The recommended step is 50 cm. Then, sections 10-15 cm high are installed perpendicular to the ceiling and connected to the profile on the ceiling so that a niche is formed.

Note! The structure may consist of one or several levels. In any case, it is important to maintain a gap of at least 10 cm for the passage of light from the diodes.
- The finished frame is sheathed with plasterboard sheets laid end to end. A niche is left at the ends of the structure to accommodate light diode strip. The outer perimeter must be covered with a side to disguise the constituent elements of the backlight.

Installation of plasterboard cornice for hidden lighting

The correct choice of the height of the protective edge will help you create a bright or subdued strip of light.
Important! Don't forget to include space in the design for power supplies and a controller.
- The seams are masked with putty, and after complete drying, with primer and painting.
- Now it's time to install the backlight. The tape must be attached to an adhesive base directly to the drywall (additionally, you can use clamps or an aluminum profile). The light from the diodes should be directed from bottom to top. Then you can connect the system to the current conductors, remembering to observe the polarity.

Connection diagrams with one and several transformers
Video: installing LED strip
To clearly demonstrate the work of installing the backlight, we suggest studying a small video selection of training materials:
- How to connect an LED strip - important nuances, which will help you correctly mount the backlight circuit.
- How to make a plasterboard cornice for hidden lighting - one of the options for arranging a U-shaped box for an LED strip.
As you can see, you can handle the installation of LED backlighting yourself. Therefore, the main task is to choose the right length of material, transformer and controller, taking into account the configuration of the kitchen ceiling and the expected decorative effect. But if you doubt your abilities or the correctness of the calculations made, it is better to entrust the purchase of components and installation of the lighting to a qualified electrician.
Today, home lighting using LED lighting is very popular. This backlight can be installed in different ways. Some do it themselves, and some hire specialists. LED backlighting is quite easy to install, but you still need to know a couple of nuances. The first thing you need to know is how to choose the right LED strip from all the variety on the market.
1) Selecting the installation location for the LED strip.
First of all, it is necessary to determine where such a lighting strip will be installed in the room. An open LED strip would be optimal for lighting the ceiling, kitchen, hallway and corridor. In the bathroom, only sealed LED strip can be used; it is also recommended for lighting tables, staircases and floors. This is explained by the fact that when cleaning, moisture may enter it, and its inevitable damage may occur.
The brightness of LED strips depends on the type of LED used in it. Common LEDs are SMD3528 and SMD5060 (also called SMD5050). The latter have b O larger size – 5.0x5.5 mm – their arrangement includes 3 LED crystals and has a O brighter than the first ones.
The brightness level of an LED strip also depends on the number of diodes located on it. There are standard, double and double-row LED strip densities.
With this arrangement, the number of SMD3528 LEDs on the strip will be 60, 120 and 240 per 1 m, respectively. With SMD5060 LEDs - 30, 60 and 120 pieces per 1 m.
|
Power consumption at 1m, W |
Power consumption per coil, W |
LED type and marking |
Number of LEDs per 1m |
Number of LEDs per coil |
Multicolor (RGB) |
| SMD3528 | |||||
| SMD5060 |
possible |
||||
| SMD3528 2x | |||||
| SMD5060 2x |
possible |
||||
| SMD3528 2x2 | |||||
| SMD5060 2x2 |
possible |
It must be said that the light flux of 1 W of LEDs is equal to 100 Lm. That is, LED strips with a power of up to 1 W per 1 m are optimally suited for illumination. With a power above 10 W, they can be used as the main light source or for illuminating surfaces that have a dark color and low reflectivity.
3) Colors of LED strips and connection types.
You need to choose which color is more preferable - white or any other, depending on your desire and preference. The same white light is distinguished by shades (differing in color temperature): cold (10000K-6500K), normal (6500K-5500K), daylight (4500K-4000K) and warm (3500K-2700K) glow.
A colored LED strip is ideal for decorative lighting. Such tapes come in monochrome (one color) and multicolor (RGB). Multi-color LED strips use only large LEDs SMD type 5060.
To connect a single-color LED strip, you only need a power supply. In order to adjust the degree of illumination of the LED strip, it is necessary additional device, called a dimmer. Connecting multicolor LED strips is more complex. To control the degree of illumination and color, a device called an RGB controller is used.
The choice of power supply is made depending on the required power supply for the LEDs (12, 24 and 36 V), their power and length.
To determine power required block power supplies multiply the length of the tape that is connected to the power supply by a rated power of 1 m, plus a power reserve is added to this (up to 25%). Without a power reserve, the power supply may fail early.
For example, (5 m x 7.2 W) x 1.25 = 45 W. Select the nearest large 65 W.
Choosing LED strip for rooms
Naturally, the lighting of different rooms in the house has different purposes. So, there is decorative lighting in the rooms, and practical lighting in the hallway and kitchen.
A common option for using an LED strip for a room is the eaves, stained glass option for illuminating walls, floors, niches or curtains. Due to the fact that such rooms have normal humidity, the tape may not be waterproof. This lighting option is purely decorative, which means that you can use any LED strips of the required color and brightness. The greatest visual effect is provided by the use of RGB type tapes, complete with a controller.
Choosing LED strip for the kitchen
There are a lot of options for using such lighting for the kitchen. Here it can be used as a decorative component and have a purely practical purpose. In addition to the usual use mentioned above, it is possible to use furniture elements, table tops, etc. as lighting.
An original option would be to use such strips to highlight different parts of the cabinet. Especially cabinets that stand on the floor and have legs. An LED strip in such cases can be attached to the bottom of the panel to illuminate the floor. For such purposes, sealed tape is used, due to the possibility of water entering when cleaning the kitchen.
To illuminate cabinets from above, it is possible to use an open LED strip, which is explained by its mounting in the upper part, where exposure to moisture is practically impossible.
Practical and functional LED lighting
It is possible to provide lighting not only under and above the cabinet, but also directly inside it. This lighting itself is very beautiful and functional. This connection is made in different options: can be turned on together with the main lighting of the kitchen area or separately, using special sensors. Such sensors can respond to opening a cabinet, touching it, or even contactless activation (when a person’s hand simply moves next to the cabinet), which is especially convenient when cooking with wet hands.
When placing the LED strip at the bottom of hanging cabinets, very practical and effective lighting of the working area is created. Which is especially important when cooking. After all, often the light from the main lighting is behind your back and cannot illuminate the entire work process. This LED lighting must be positioned so that the backlight goes directly down onto the table or slightly at an angle, but in no case into the eyes.
Lighting options
- The sealed type LED strip can be glued to the bottom of the wall cabinet.
- Use of ready-made LED BAR lamps. They are installed using adhesive tape with a double adhesive base or conventional clip-on pendants. These lamps have a switch touch type they can be easily combined into a lighting system. The lamps have a matte or transparent plastic screen. Matte is more preferable because it is not as irritating to the eyes as transparent.
- You can assemble this lamp yourself. All that is needed for this is an LED strip and an aluminum profile. There is a wide variety of profile designs and screens for them on sale.
A strip with LEDs that produce white light is suitable as table lighting in the kitchen. It should be borne in mind that products will look more natural in daylight white light, and warm lighting will make them even more attractive. Cold white light will make them less appetizing.
Choosing an LED strip for the bathroom
As mentioned above, in the bathroom you only need to use a sealed LED strip. In most cases, this tape is used to illuminate walls and ceilings. Options are possible in which, for example, illumination of a mirror or niche is performed. Such lighting can be used to illuminate the contour of a mirror or the space in front of it. In this case, the illumination of the contour of the mirror from which part of the reflective layer has been removed will look especially colorful.
Choosing an LED strip for a children's room
When choosing external design In a child's room, parents in most cases want to create a cozy, joyful and warm atmosphere. And the choice of lighting plays an important role. The optimal lighting for such conditions will be a combination of brightness and softness of lighting, which will create additional psychological comfort for the child’s eyes.
When choosing LED technologies in this case, it is necessary to focus on strips that provide lighting in a warm and moderate tone. In this case, a dimmer can be used to control the degree of illumination. For such cases, there are classic models with a mechanical regulator that are mounted on the wall or more modern dimmers with an electronic control system and remote controls.
LEDs of various colors will bring special joy to your child. If you choose RGB LED strips, the children's lighting will become a real work of art. Experimenting with the remote controller of such a tape will allow you to create all sorts of color combinations, turning your baby’s room into a unique fairy-tale world. At the same time, the presence of white LEDs will allow the lighting to be used for its main purpose.
Monochrome LEDs can be used as lighting for furniture and interior elements.
Corridor and hallway lighting
It is indisputable that the corridor, lobby, flight of stairs, hallway are those parts of the house or apartment that do not require constant bright lighting. But a person has to go through these zones very often, moving between rooms. A particular inconvenience in such cases is the dark space along the route. But this is easy to fix. To prevent light from constantly burning and darkness in such parts of human habitation, it is necessary to use economical LED strips. This lighting is the most economical compared to incandescent lamps.
By placing moderately bright LED strips around the perimeter or along such an area, you can create uniform illumination of the entire space. And for even greater savings, you can use a dimmer. This will reduce the glow of the LED strip to a minimum, which will provide ideal night lighting for the apartment.
Lighting bedrooms with LED strips.
In such rooms LED technology can be used for additional or main lighting. To create a cozy atmosphere, RGB LED strips are often used to illuminate the ceiling, cornices, mirrors, wall decorations, niches with flowers, etc. In this case, the choice of color here is dictated only by a person’s taste. If desired, the furniture can be illuminated in an original way, which will add an atmosphere of sophistication to the bedroom.
A chandelier can be used for the main lighting of the bedroom, but it is also possible to use super-bright LED strips. Modern LEDs can provide any comfortable lighting; this only requires the use of additional devices - dimmers and RGB controllers. This will allow everyone to customize the lighting to their liking.
Living room lighting using LED strips.
The living room is the heart of any apartment - this is the place where the whole family gathers to relax, where relatives and guests are received.
Therefore, the design of such a room must be approached with special care. Often the living room is the most spacious room in the apartment, which is why all the different ideas when decorating the interior are embodied here. Including lighting.
The right choice for lighting such a room is LED strips. They will ensure the creation of a powerful flow of natural white lighting and additional lighting, which can be hidden along the eaves of the room or on the ceiling. A particularly good idea for interior design using such lighting. If the living room is a place of constant holidays and celebrations where many people gather, it is imperative to install RGB LED strips. They will provide any necessary atmosphere for a feast or party. The owner will be able to play the role of a light DJ using an RGB controller, and the use of dimmers will allow him to adjust the brightness of the lighting to create the necessary comfort.
During renovations, special attention is paid to lighting, which, as you know, sets the basic atmosphere for each room. Together with rapid development energy saving technologies The use of diode lamps is increasing, making it possible to significantly reduce electricity consumption. A combination of practicality and attractive design LED strips are different. They are attached directly to the ceiling and create even, soft lighting.
What are the devices
LED strips are flexible boards made in the form of strips and equipped with LEDs. The latter are located at an equal distance from each other.


In addition to the luminous elements, there are resistors on the tape that protect the entire system from high voltage and limiting the flow of current.

Table. Types of LED strips.
| Characteristic | Varieties |
|---|---|
| Diode type | 1. SMD 3028. 2. SMD 5050. The diameter affects the coverage area. |
| Fixation method | 1. Self-adhesive with a reliable adhesive layer. 2. Attached with plastic brackets. |
| Tightness | 1. Without sealant, used in ordinary rooms. 2. Medium protection from water, can be used next to the sink or in the bathroom. 3. Sealed, able to function under water. |
| LED color | 1. White tape. 2. RGB. |


Product benefits
The main advantages of LED strips include:
- saving electricity;
- uniform and directional lighting;
- service life reaching 10 years;
- the ability to choose different colors;
- in multi-color ribbons - stable color throughout the entire service life;
- flexibility, allowing you to give the tape any shape;
- environmental friendliness and fire safety due to the absence of mercury and low heating;
- possibility of adjusting the length of the tape;
- no influence on TV signals due to the absence of interference.

Due to these qualities, diode strip is often used not only for additional lighting, but also as the main light source. At the same time, the energy consumption of 10 meters of such a strip will be even less than that of an incandescent lamp that is familiar to many.

Selection of tape by diode type
The most common diodes for such tapes are SMD 3028 and SMD 5050. They are mounted directly on the surface of the tape and vary in size, as indicated by the numbers in the name. In terms of brightness, small SMD 3028 diodes are not inferior to large ones, but due to their small sizes they can illuminate a smaller ceiling area. Therefore, to create a brighter backlight, you should choose SMD 5050.
As for the color parameter, it is worth paying attention to the crystals used in LEDs.

On at the moment 4 options available:
- yellow;
- red;
- blue;
- green.
White crystals are not currently produced. Instead, the design uses a blue element that emits ultraviolet light. Since the diode is coated with a phosphor that glows when exposed to such rays, the output is white light.

But similar solution issue negatively affects the quality of the tape. It is the most short-lived due to the rapid burnout of the phosphor. The result is not only a decrease in the brightness of the tape, but also the appearance of a blue glow.
The classic RGB combination, in turn, allows you to get more than just one of the three colors offered. As is known from optics, white color is obtained by mixing all three colors. In combination with the stable operation of crystals that do not require additional coatings, this significantly increases the service life of the product. Usually such tapes come complete with the remote control. remote control, which is used to adjust the lighting. This provides additional opportunities for experimentation.
Tips for choosing LED strip for different rooms
Depending on where the ceiling lighting is planned to be installed, the type of product and its placement are selected. The brightness changes due to variations in the number of diodes within one meter of tape. The more lighting elements, the brighter and more expensive it is.


In the corridor
Since this area does not require stable bright lighting, purchasing a strip with SDM 5050 or higher diodes will be impractical. Mostly corridors and walk-through areas need additional light at night. Using incandescent lamps will lead to high energy costs, and darkness is not the best good decision. The best option will be the installation of low power LED strips. Their light will not irritate the eyes at night, and using a dimmer you can change the brightness, which will also have a positive effect on the family budget.


In the bathroom
Since this is a room with high humidity, it is necessary to use a sealed structure. This will prevent electrical problems if water gets in. The brightness of the lighting is selected according to the wishes of the home owners, because for a small space the tape is suitable both as additional lighting and as the main light source.

In the bedroom
Most people who want to purchase LED strips install them in the bedroom to add comfort and a more relaxing environment. IN in this case options with RGB crystals are suitable, giving more room for imagination, working in certain parts of the spectrum and providing finer tuning when using a dimmer.

In the nursery
It will be a great joy for your child to select interesting color combinations with their parents and adjust the lighting to suit their mood. For this reason, it is worth paying attention to diode strips with advanced capabilities. These are models with RGB + W diodes.
The advanced functionality mode allows you to configure both pure white light for main time and different shades of the spectrum for games. IN this option It would also be appropriate to use dimmers. Then a low voltage will allow you to minimize the glow of the diodes and use the backlight as a night light.

In the living room
This place performs key functions in almost any home. All relatives gather here, holidays are held and guests are received. Therefore, it is important to choose not only the optimal interior design, but also to take a responsible approach to the installation of lighting. Massive chandeliers with incandescent lamps have long given way to diode systems. The latter allow you to implement a larger number of design ideas. For example, creating a multi-level ceiling with internal lighting.

This idea will appeal not only to guests, but also to members of the household. For supporters of natural white lighting, monochrome ribbons are suitable, and to create a festive atmosphere the best solution will be RGB strips, the variety of colors and customization options of which will be an excellent addition to the fun.
In the kitchen
Here, in most cases, tapes are used not only for decorative, but also for practical purposes. In addition to the ceiling, they can be glued to the upper edges of wall cabinets, which will add something unusual to the kitchen interior. You can increase functionality using sensors - they are convenient to use when you need to turn on the light, but your hands are full. When using the tape over the work surface, this solution is especially convenient if your hands get dirty while cooking.

Video - RGB LED strip
DIY installation
Since adhesive-based tapes are in greatest demand, let’s consider this method of creating LED lighting.
To work you will need:
- LED strip purchased with a small margin for safety;
- scissors for cutting the required length of the product;
- heat shrink tube or electrical tape;
- soldering iron with solder and rosin or LED connectors;
- wires for connecting tapes.

Additionally, you may need ceiling skirting boards and a level for marking the ceiling. The best option is a ceiling plinth glued to the wall. Using a level, you will need to mark the walls to obtain horizontal lines along which the part will be glued.
Installation of tape, completely ready for installation
Step 1. Measure the heights in different corners of the room and find the smaller value from which the markings will go.
Step 2. Using a level, mark horizontal lines for installing the baseboard. At its lowest point it should be 5 cm from the ceiling. This way the light will freely penetrate into the upper area of the room.

Step 3. If you have the necessary wiring, install the baseboard using adhesive known as “liquid nails.”

Step 4. Degrease the surface on which the LED strip will be installed. It is also necessary to get rid of crumbling coatings. To increase the reliability of fastening, glue the installation site with strong double-sided tape.
Step 5. Separate the adhesive layer from the diode tape and glue it parallel to the ceiling or at an angle to it to create the desired lighting.

Connecting to the power supply using wires
Most in a simple way is to use an LED connector. In this case, the contact end of the tape is applied to the connector contacts, after which the cover is closed. But this option is more expensive and less reliable, like soldering.


Steps to connect power using soldering.
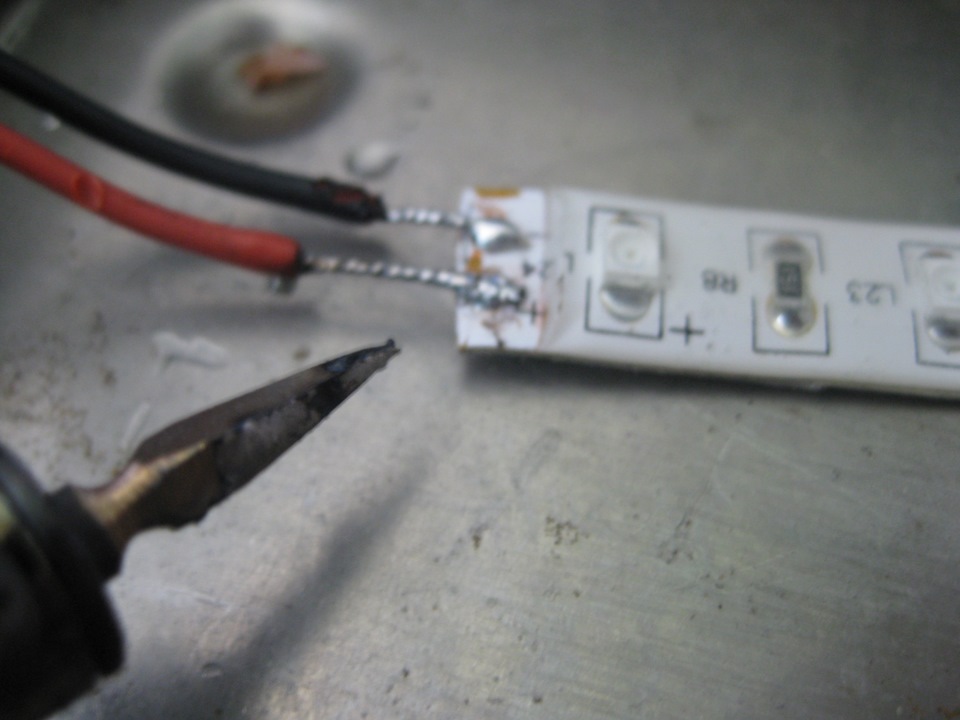
Step 1. Tin the contact pads on the tape and cover them with solder.

Step 2. Strip approximately 8 mm of wires from insulation, tin them, provide them with solder and cut them to a length of 3 mm.
Step 3. Place the wires on the pads and use a soldering iron tip and solder to perform soldering.

Solder on different pads should not be connected to avoid short circuit on the wires.

Step 4. Despite the low voltage, it is better to insulate the soldering area using heat-shrink tubing or regular electrical tape.


Cutting and fastening the tape
To cut the tape you should use special markings applied to the surface of the product. The standard pitch through which pads are repeated is 3 diodes. Typically, the location for the cut is indicated by a line or a pictogram in the form of scissors.

The tape is connected in one of three ways:
- LED connector;
- soldering with wires;
- soldering without wires.
Regardless of the chosen method, you must follow the rule - do not connect the tape in length exceeding 5 meters. This value allows all diodes to burn evenly without losing brightness, which will suffer when going beyond 5 m.


The first method, as mentioned, is simple but expensive, so let's turn our attention to soldering.
Soldering with wires.
Step 1. Tin the stripped ends of the wire. Cover with solder.
Step 2. Coat the contact pads at the end of the tape with solder.
Step 3. Solder the ends of the wire and the end of the tape so that the solder from different pads does not connect.

Step 4. Repeat with the end of the other ribbon.
This method is convenient when you need to install the tape at an angle. It is prohibited to bend the tape itself at a right angle for fastening. The use of soldering the ends using copper wire of a suitable diameter solves this problem.

Another option is to use a corner connector

Backlight power supply from mains
After installing the tape in place, it is connected to pulse block power supply, reducing the voltage from 220 volts to the optimal value for the functioning of the structure. The operation of the tape itself is supported by a voltage of 12 or 24 volts. When installing the product, it should be taken into account that the power consumption of the LEDs should not exceed the power of the power supply. Otherwise it will happen automatic shutdown in accordance with the protection system. This characteristic selected based on the length of the installed tape. The size of the power supply also plays an important role. The smaller it is, the easier it will be to hide it. Therefore, it is better to think over the connection diagram in advance.
A special controller is used to operate the multicolor ribbon. Upon completion of installation, it is advisable to hide it along with the power supply. The result of the work will be functional lighting and an aesthetic appearance of the furnished room.

As practice shows, the popularity of LED strips is only increasing over time. This is explained by the ease of use of the structures in everyday life and when working with room design. Well-chosen lighting will not only provide visibility in your home. Using a custom setting, you can achieve the desired emotional effect by changing several lighting parameters, which cannot be noted with classic chandeliers with incandescent lamps. Economic benefits are also a plus. Purchasing a diode strip will save you from high energy bills and the need to replace lighting for the next 10-20 years (depending on the type of product).
Video - DIY LED lighting
LED lighting for the interiors of apartments and houses is gaining increasing popularity. There are different ways to approach issues related to lighting. Some prefer to turn to specialists for the selection of suitable equipment and its installation. Others decide to show their creativity and do it themselves. Due to the relative ease of installing LED backlighting, this is quite possible, but to achieve the desired result, you need to take into account some features. The first question that arises is how to choose a strip that suits your desires among the large number of varieties of LED strips? We will talk about this in this article.
1) Installation location of the LED strip.
First you need to decide on the room where the LED strip will be installed. An open LED strip is suitable for LED lighting of ceilings in rooms, kitchens, hallways and corridors. To illuminate bathrooms, due to high humidity, only sealed LED strip is used. To illuminate the working surface of tables in the kitchen, as well as when installing an LED strip at a small height from the floor, for example, illuminating stair steps, floor lighting, it is also recommended to use a sealed LED strip, because During wet cleaning, water may get on it or it may be damaged mechanically. We will talk further about the selection of LED strips for specific rooms.
2) Type, brightness and power of LED strip.
The next step is to select the LED strip according to the required brightness. One of the factors affecting the brightness of the strip is the type of LEDs. The most common LED strips are SMD3528 and SMD5060 (sometimes also called SMD5050). LEDs of the first type have a body size of 3.5x2.8 mm and contain one semiconductor crystal. LEDs of the second type have larger size– 5.0x5.5 mm - and contain three crystals in one housing. Accordingly, SMD5060 LEDs are almost three times brighter than SMD3528 diodes. Also, the brightness of an LED strip depends on the density of the LEDs on it. There are standard density LED strips, double density (2x) and double row double density LED strips (2x2). For tapes with SMD LEDs 3528 is respectively 60, 120 and 240 LEDs per meter. For strips with SMD5060 LEDs - 30, 60 and 120 LEDs per meter. The table below shows the most common tapes in order of increasing power and, accordingly, brightness.
| Power consumption at 1m, W | Power consumption per coil | LED type and marking | Number of LEDs per 1m | Number of LEDs per coil | Multicolor (RGB) |
| 4,8 | 24 | SMD3528 | 60 | 300 | No |
| 7,2 | 36 | SMD5060 | 30 | 150 | possible |
| 9,6 | 48 | SMD3528 2x | 120 | 600 | No |
| 14,4 | 72 | SMD5060 2x | 60 | 300 | possible |
| 19,6 | 98 | SMD3528 2x2 | 240 | 1200 | No |
| 28,8 | 144 | SMD5060 2x2 | 120 | 600 | possible |
It is also worth noting that the luminous flux of 1 W of LEDs is approximately equal to 100 Lm, i.e. LED strips with a power of up to 10 W per meter are well suited for lighting. And LED strips with a power of more than 10 W per meter are already suitable as the main light or for illuminating dark surfaces with low reflectivity.
3) Color of the LED strip, type of its connection.
We decide on the color of the backlight - do we want the backlight to be white or one constant color of the glow. Or do we want to change the color of the backlight depending on our current desires and preferences?
If we need white backlighting, then we also need to decide which one. The fact is that white light can be of different shades (with different so-called color temperatures of the glow): cold white (10000K-6500K), white (6500K-5500K), daylight white (4500K-4000K) and warm white (3500K- 2700K).
For decorative lighting, a colored LED strip is more suitable; it can be monochrome (one color) or multicolor (RGB). Note that the RGB LED strip can only be equipped with large SMD 5060 LEDs.
To connect a single-color LED strip, you only need a power supply and the strip itself. If you want to adjust the brightness of the light, you will need another additional device - a dimmer for the LED strip. To connect a multicolor LED RGB strip you will need not only a power supply and a strip, but also an RGB controller that controls the color and brightness of the RGB strip.
The power supply must be selected in accordance with the supply voltage of the LED strip (12V, 24V, 36V), its power and length.
To calculate required power power supply, you need to multiply the length of the tape connected to the unit by its power consumption per meter and add a power reserve (10-25%). The reserve is necessary for reliable operation of the system. For example, (10m x 7.2W) x 1.25 = 90W. Since there is no power supply for the LED strip with a power of exactly 90 W, a unit with a higher (but by no means less) power of -100 W is suitable.
How to choose an LED strip for a room.
Typically, LED lighting in different rooms in an apartment or house has different purposes, for example, room lighting is mainly decorative, and kitchen lighting is practical.
The most common option for using LED strip in a room is curtain or stained glass ceiling lighting, lighting of walls, floors, niches or curtains. Such rooms have normal humidity, so LED strip without moisture protection is used here. The purpose of such lighting is most often decorative, so almost any type of LED strip can be used and the choice depends only on the required brightness and color. Backlighting using an RGB LED strip and an RGB controller will look impressive.
How to choose an LED strip for the kitchen.
The use of LED lighting in the kitchen is quite widespread. It is not only decorative, but also practical. In addition to all the applications in ordinary rooms, which we wrote about above, lighting of cabinets and kitchen worktops is used. An interesting and unusual option for using LED strip in the kitchen is LED lighting of the lower (floor lighting) and upper parts of the cabinets. Base cabinets are typically mounted on legs, which are then covered with a panel or left open. An LED strip is attached to the bottom of the cabinet and illuminates the floor. For such lighting you need to use a sealed LED strip, because... Water may get on it, for example, during cleaning.
To illuminate the top of the cabinets, you can use an open LED strip, because... it is attached to top part wall cabinets and is practically not exposed to external influences.
Well, now let's talk about practical and functional LED lighting. You can highlight not only the space above and below the cabinets, but also inside them, which is not only beautiful, but also functional. An LED strip for illuminating cabinets from the inside can be connected so that it turns on along with the main kitchen lighting, or it can be used together with special sensors. There are several types of sensors, including sensors that respond to opening a cabinet door, to touch, and even contactless ones - to turn the light on or off, you just need to move your hand next to them, which is very convenient if your hands are wet or dirty.
Even more practical is illumination of the work surface. Usually, when cooking, the light source is behind your back, so the work surface is closed from light, so LED lighting of the kitchen work surface will come in very handy. It is installed under wall cabinets. It is important to position the LED strip so that the light falls straight down, or at an angle and does not hit the eyes directly.
There are several ways to organize work surface illumination:
1) Sealed LED strip, which is simply glued to the bottom of the wall cabinet.
2) Ready-made LED. They are simply mounted using clips or double-sided tape, have a touch switch and are easily joined together to form a chain of lamps. There is an LED line inside the lamp; the top is covered with a plastic screen, which can be matte or transparent. We recommend choosing matte screen, because with it, the LEDs are not so visible, the light is more diffused and will not irritate the retina.
3) Assembling an LED lamp with your own hands. To do this you will need an LED strip (or LED strips) and. Our catalog contains a wide selection of aluminum profiles of different shapes and screens for them.
A white LED strip is used to illuminate the work surface. But it is worth considering that products look as natural as possible when illuminated with daylight white light, and when illuminated with warm white light they look even fresher and better than they are. Cold white food looks less appetizing.
How to choose LED strip for the bathroom.
Due to high humidity and the risk of water ingress in the bathroom, sealed LED strip is usually used.
LED lighting in the bathroom is most often used to illuminate the ceiling and walls. But there are other options, for example, lighting niches and mirrors. Mirror lighting can be either background lighting (a backlit glow behind the mirror) or illuminating the space in front of the mirror. In the second case, the illumination made behind the mirror, on which the amalgam layer (reflective surface) has been partially removed, looks impressive.
How to choose LEDs for a nursery.
When choosing a design for a children's room, parents usually strive to create an environment that will bring an atmosphere of joy, warmth and comfort into the child's world. In this case, much attention should be paid to the lighting of the nursery. For a child's room, bright, but soft light, psychologically comfortable and at the same time not harmful to the baby’s eyes. And if you have chosen LED technologies for lighting your apartment, pay attention to white LED strips in warm and moderate tones. To adjust the brightness of the glow, you can use a dimmer control electrical power. There are devices of both the classic model (a mechanical regulator built into the wall in a standard switch size) and modern dimmers that have electronic system controls and remote controls.
Colored LEDs can be a special joy for your baby. If instead of conventional white LEDs you use multicolor RGB+W LED strips as the main lighting, the possibilities for decorative lighting of the room will be truly limitless. By experimenting with the RGB controller, you and your child can create a variety of color combinations, turning the room into a children's fairy tale. And white LEDs, also present in the LED strip, will help you use it for its main purpose. Also in the design of children's rooms, monochrome color LEDs are widely used, which can be used to illuminate furniture and interior elements.
LED strips for corridors and walk-through areas.
Places in the house such as corridors, hallways, and staircases do not need constant bright lighting. After all, people are not in these places all the time. However, often residents of a house or apartment have to cross such zones in order to get to a particular room, kitchen or bathroom. And it’s quite inconvenient if an unlit corridor awaits you every time on your way. What to do in such cases? Some prefer to keep lights on in walk-through areas around the clock, while others usually leave these areas dark.
However, the best solution to this problem is to use energy-saving LED technology. LED strips are the most economical light sources; they consume several times less electricity than conventional incandescent lamps. Place a moderately bright LED strip along the corridor or along the perimeter of a walk-through room, creating uniform illumination of the entire area. And to save more more electricity, use a dimmer. This device will help reduce brightness LED lamps up to a barely noticeable glow, which may be suitable for night lighting in an apartment.
Bedroom lighting with LED strips.
When lighting a bedroom, LED strips can be used both as additional lighting and as main lighting. To create a cozy atmosphere, many use colored LEDs as wall lighting, backlighting for mirrors and wall decorations, as well as for lighting the ceiling area hidden under eaves or using multi-level ceiling architecture. You can choose a variety of colors for lighting, limited only by matters of taste - modern LED technologies today make it possible to produce light sources operating in almost any spectrum. Using LEDs you can also create original furniture lighting or built-in cabinet lighting.
You can use a chandelier as the main lighting in the bedroom. However, why not use super-bright LED strips for this purpose? Today, LEDs are capable of creating comfortable, natural light for a bedroom with flexible settings. These are both white and multi-color LED strips LED RGB strips. Using dimmers and advanced RGB controllers, you can control the lights in your bedroom as you wish.
LED technology for the living room.
The living room is the heart of your apartment, the place where the family relaxes, relatives and guests gather. That is why many approach the design of their living room especially carefully. As a rule, this is the most spacious room in the house, so a variety of interior design ideas find room here. This also applies to the issue of lighting.
If you decide to use LEDs for lighting your living room, know: you made the right choice! With their help you can create a powerful flow of natural white light, and fancy lighting hidden deep in a multi-level ceiling or under a system of cornices. It would also be a good idea to design interior lighting using LED strips. And if you use the living room as a room for family celebrations, you should think about purchasing multi-color LED strips for this room, which, if desired, can easily create a party atmosphere in the living room, being under the control of the owner, which he does using an RGB controller. For white LED strips, you can also use dimmers so that you can control the brightness of the light, choosing your comfort zone yourself.
Correct lighting in the kitchen is the key to the comfort of the housewife and the excellent mood of her household and guests. Today, thanks to development modern technologies, the lighting market is simply overflowing with all sorts of new products and know-how in this area. LED strips rightfully occupy the leading place among all others.
What is LED
An LED is a semiconductor that emits light as it passes through it. electrical energy. The chemical composition of an LED determines its brightness. Therefore, depending on the components, such lamps have different lighting intensities. The second name for LED strips is LED strip.
Advantages of LED strips
The variety, attractiveness and versatility of these lamps has made them so popular among designers. This type lighting is universal and suitable for any room and any interior. LED strips are used to decorate and illuminate living rooms, bedrooms, kitchens, bathrooms, restaurants and offices.
Here is a list of their main positive qualities:
- Does not require additional time to warm up.
- They shine quite brightly.
- Resistant to damage.
- Will last at least 15 years.
- They have a rich palette of colors.
- They are inexpensive.
- Not demanding on external conditions.
- Safe.
- Have wide angle radiation.
How and where you can use LED strip in the kitchen
LED strips are particularly widely used in kitchen interiors. It can be used both as a lighting device and simply as decoration.
Here are some of the most popular ways to use it:
- Suspended ceiling lighting
- Kitchen top lighting
- Illumination of the lower part of the kitchen furniture - creating the “effect of floating above the ground”
- Illumination of the working wall (apron)
- Illumination of paintings, photo frames, clocks or other decorative items
- Interior lighting for cabinets, drawers and shelves
Classification of LED strips
The most popular type of LED strips are SMD LEDs. They are easy to install and have a long service life.
There is the following classification of SMD tapes:
- Based on the number of crystals, tapes are divided into one-, two-, three- and four-crystal. This indicator determines the variety of colors - the more crystals, the more colors can be present on the tape.
- The type of glow led to the existence of monochrome and full-color LEDs.
- If we take the sizes of LEDs, then their indicators range from 1.06x0.8mm to 5.0x5.0mm.
- Based on the frequency of LED placement, strips with 30pcs/m, 60pcs/m, 120pcs/m and 240pcs/m are distinguished. The denser the bulbs are, the brighter the light will be.
- Depending on the moisture protection indicator, the following tapes are distinguished:
- IP 20 - with low moisture protection (not for the kitchen)
- IP 65 - medium (suitable for kitchens)
- IP 68 - with high level(can be used in the bathroom or swimming pool).
How to choose the right LED strip for the kitchen
The exact choice of LED strip for kitchen lighting will directly depend on the purpose and location of the strip. That is, first you need to decide what the LEDs will be used for and in what part of the room they will be located.
LED strips are not connected directly - a transformer is required.
As for the colors of the LEDs, the choice is always up to the owner of the kitchen. In principle, it will also determine the required amount of light in the interior. There are only a few recommendations to help avoid mistakes and unforeseen situations.
To illuminate kitchen cabinets and drawers from the inside, you can use an open LED strip with the desired brightness and color. Special sensors are used to trigger the LEDs. Such sensors can be connected to the main light source in the kitchen, or triggered by movement and opening of cabinets. Everything will depend on the wishes and fantasies of the customer. There are sensors that even react to movement nearby their location. This is very convenient if your hands are dirty or wet.

To illuminate the lower part of the kitchen unit, it is necessary to take into account the fact that during cooking or during cleaning there is a possibility of moisture getting on the device. Therefore, in this case it is recommended to use tapes with a higher level of moisture protection - IP65 or IP68.

To illuminate the upper part of the set, you can take IP20, since water ingress is not typical for this part of the kitchen.

When choosing an LED strip to illuminate the kitchen work surface, you should consider several options for mounting it:
- You can use a sealed LED strip, which is equipped with a special adhesive layer for easy gluing to the surface.
- You can purchase ready-made BAR lamps. Such lamps consist of an LED line and a plastic screen. They are attached to the surface using special clips or double-sided tape. BAR luminaires are controlled via a touch switch.
- You can make your own LED lamp using tape and an aluminum profile.
As a rule, to illuminate the apron, three-crystal SMD50x50 tapes with an average level of moisture protection are used, which allows providing a sufficient amount of light. The preferred color is white or warm white. The latter, by the way, gives the appearance of food additional freshness.
The lighting of glass aprons looks very impressive.

To illuminate interior decorative elements, it will be enough to purchase a single-chip SMD35x28 strip.

When choosing LED strips for the ceiling, it is worth considering whether this lighting will be primary or additional. Depending on its purpose, the required brightness is selected. If this is just a decorative element, then SMD35x28 will do just fine.

LED strips are sold in rolls of 5 meters. Included with the tape, you need to select a power supply and fasteners.
In order to select a suitable transformer, its power and size should be taken into account. The following formula will help you calculate the transformer power required for a particular tape:
We multiply the power of the tape by the length of the tape. We multiply the resulting number by a factor of 1.25 and obtain the required power of the power supply.
Here, perhaps, are all the most important tips for choosing an LED strip for kitchen lighting.