Firmware for Samsung Galaxy series phone. How to flash a phone using odin3 (guide)
Odin will become quite useful tool, which will allow product owners trademark Samsung to flash its devices. Next will be given detailed instructions via firmware via Odin. It is worth noting that the program was developed by professionals, so you don’t have to worry about the quality of the final result. Firmware via Odin is very simple and does not require users to have deep knowledge in certain aspects of Android devices.
Similar about Odin
The application was developed for Windows OS. After downloading the program, you get the opportunity to flash your Samsung phone or tablet. Koreans once used the utility only as professional software, implementing updates for their devices. Luckily, its files were leaked onto the Internet, allowing every Samsung fan to use it. You can download the application on many fan sites dedicated to the Korean manufacturer or Android devices in general. have long ceased to be dangerous for your devices. However, not all users dare to take such radical measures, getting rid of stock ones and going free of pirated programs. It is worth noting that updating Samsung firmware via Odin will open up new capabilities of your device that are not available in stock solutions.
This is where a dilemma arises, because many people establish a certain identity that looks like this: flashing = big risk = loss of warranty on the device. But all these are just myths based on long-standing stereotypes. Nowadays there is simply an insane number of owners of Samsung devices in the world, so a measure was taken to create software that would be suitable only for these devices and only in quality form. It was Odin that became such an application, “flying in” from the world of Scandinavian mythology. And here you can be 100% sure that you will definitely not harm your phone or tablet by using this program.

Program versions
In order for the firmware to be successfully installed via Odin, there are a number of different versions of the program, each of which is designed for a particular Samsung device. The main file extensions include the following: .bin, .tar and .md5. By the way, the most stable versions are 1.85, 3.07 and 3.10.6. Next, we will indicate how the Samsung firmware should be installed through Odin, and also tell you about the main options of the program.
Program options
So that you don’t get lost in the Odin program, let’s take a brief tour of the main options:
- Auto Reboot - if this option is checked, your device will automatically reboot after successful completion of the firmware;
- Re-Partition - allows you to redistribute the file system according to factory presets (RFS);
- F. Reset Time - function allows you to reset the counter of previous firmware;
- PIT - if the Re-Partition function was checked in the second one, you will need to specify the path to the .pit file, which will make it possible to redistribute the device’s file system;
- CSC - designed to open a file that contains data specific to certain countries and operators;
- PDA - the option is necessary to select the necessary files with firmware;
- Phone - allows you to select the modem file that is needed for the firmware process.
You need to be extremely careful when using the Odin program. This is especially true for the Re-Partition function, because if you do not have a .pit file, then it is better not to check the box next to this option. Finally, it is worth remembering that the software is intended only for Samsung devices. Flashing other brands of phones via Odin can lead to unpleasant consequences. As alternatives, you can use FlashTools or KDZ Updater.
Preparing for the firmware process
In order for Samsung firmware via Odin to be successful, you need to complete several preparatory steps. The algorithm of actions will be as follows:
- First of all, you need to download and install USB drivers for your device. If desired, you can use Samsung Kies, during installation of which the drivers will be installed automatically.
- Then you need to make sure that the device has backups important files, which will be lost after the firmware. It is advisable to create backups on an external memory card or computer.
- Next, we charge the phone/tablet to 100% (or at least 80%), so that the power does not go out during the firmware process.
- In the settings, enable the option “ USB Debugging", which is available in the "For Developers" section. Make sure that the Samsung Keis application is not running. Otherwise, disable it through Device Manager.

It is worth noting that when installing official firmware via Odin, the chance of damaging the device is extremely low. Of course, if you follow all the instructions. Nevertheless, all actions are performed at your own peril and risk, so if you are not sure of the final result, it is better to take your device to a service center. Next, let's move on to the firmware process itself.
Firmware process
As an example, we will describe how firmware should be installed via Odin. The algorithm is as follows:
- First of all, download official firmware for your device to your computer.
- Next, enable download mode on the device. As a rule, in Samsung devices it is launched by pressing the following key combination: Power (Turn on/off the device) + Volume Down (volume down key). Then confirm the action by pressing the Volume Up button. Be sure to press the keys at the same time.
- Next, launch the Odin program on the PC and make sure that the Auto Reboot and Reset Time options are checked. This is extremely important.
- We connect the phone or tablet to the PC using a USB cable. After detecting your device, the program will change the color of one of the ID:COM windows.
- Next, press the PDA button located in the Odin program interface and select the .tar or .md5 file.
- Click on START, after which the firmware process starts. Disconnecting your device from the PC during installation is strictly prohibited.
- As soon as your device successfully completes the firmware process, the automatic reboot. At this stage, you can remove the cable from the PC and start using the device. As you can see, everything is very simple.
This instruction for flashing firmware via Odin is the most common. If you adhere to all points, success awaits you!

Creating Root access to Samsung Galaxy Note 2 phones
If you need to open the “superuser” mode, then the Odin and SF-Autoroot programs can help with this. So, we follow this algorithm of actions:
- Download SF-Autoroot for a certain model phone, which can be found in the settings menu item "About phone". The files themselves can be easily found on the Internet. If you cannot find a file for a particular model, it is better to leave everything in stock mode, because other actions can harm the device.
- Download Odin and install USB drivers for your phone.
- Turn off Galaxy Note 2 and put it into download mode. It turns on by simultaneously pressing 3 buttons: Volume Down + Home + Power. Then, to confirm the actions, press Volume Up and connect the device to the PC.
- In Odin, click on the PDA button, where we select the required file with the extension tar.md5. Then check the boxes next to the Auto Reboot and F. Reset Time options. Make sure that no other functions are checked.
- Click "Start" and wait for the installation to complete.

As you can see, flashing firmware via Odin is not the only advantage of this program. If you do everything wisely and according to the instructions, the application will be an excellent help for owners of Samsung devices.
Despite high level reliability of Android devices produced by one of the leaders in the global smartphone market and tablet computers– Samsung – users are often puzzled by the possibility or necessity of flashing the device’s firmware. For Android devices manufactured by Samsung the best solution when manipulating software and restoring it, the program is .
It doesn’t matter for what purpose the Android firmware procedure is carried out. Samsung device. Having resorted to using the powerful and functional Odin software, it turns out that working with a smartphone or tablet is not as difficult as it might seem at first glance. Let's go through the installation procedure step by step various types firmware and their components.
Important! The Odin application can damage the device if the user performs incorrect actions! The user performs all actions in the program at his own peril and risk. The site administration and the author of the article are not responsible for possible negative consequences of following the instructions below!
To ensure interaction between Odin and the device, you will need to install drivers. Fortunately, Samsung has taken care of its users and the installation process usually does not cause any problems. The only inconvenience is the fact that the drivers are included in the delivery package of Samsung proprietary software for maintenance mobile devices– Kies (for older models) or Smart Switch(for new models). It should be noted that when flashing firmware via Odin with Kies simultaneously installed on the system, various failures and critical errors may occur. Therefore, after installation Kies drivers needs to be removed.


Step 2: Put your device into download mode
The Odin program is able to interact with a Samsung device only if the latter is in a special Download mode.


Step 3: Firmware
Using the Odin program, you can install single- and multi-file firmware (service), as well as individual software components.
Installing single-file firmware
- Download the ODIN program and firmware. Unpack everything into a separate folder on drive C.
- Launch Odin as Administrator. The program does not require installation, so to launch it you need to right-click on the file Odin3.exe in the folder containing the application. Then select the item from the drop-down menu "Run as Administrator".
- We charge the device’s battery to at least 60% and switch it to "Download" and connect to the USB port located on the back panel of the PC, i.e. directly to motherboard. When connected, Odin should identify the device, as evidenced by the field being filled in blue "ID:COM", displaying the port number in the same field, as well as the inscription "Added!!" in the log field (tab "Log").
- To add a single-file firmware image to Odin, click the button "AP"(in versions One up to 3.09 – button "PDA")
- We indicate to the program the path to the file.
- After pressing the button "Open" in the Explorer window, Odin will begin reconciling the MD5 amount of the proposed file. Upon completion of the hash check, the name of the image file is displayed in the field "AP (PDA)". Go to the tab "Options".
- When using single-file firmware in the tab "Options" All checkboxes must be unchecked except "F. Reset Time" And "Auto Reboot".
- Having determined the necessary parameters, press the button "Start".
- The process of writing information to the device memory sections will begin, accompanied by the display of the names of the device memory sections being written in the upper right corner of the window and the completion of the progress bar located above the field "ID:COM". Also in the process, the log field is filled with inscriptions about the ongoing procedures.
- Upon completion of the process, the inscription is displayed in the square in the upper left corner of the program on a green background "PASS". This indicates the successful completion of the firmware. You can disconnect the device from the computer's USB port and start it by long pressing the power button. When installing a single-file firmware, user data, unless explicitly specified in the Odin settings, is in most cases not affected.

Necessarily! If installed, remove Samsung Kies! We follow the path: "Control Panel" — "Programs and Features" — "Delete".


Installing multi-file (service) firmware
When restoring a Samsung device after serious failures, installing modified software, and in some other cases, the so-called multi-file firmware will be required. In reality, this is a service solution, but the described method is widely used by ordinary users.
Multi-file firmware is called because it is a collection of several image files, and, in some cases, a PIT file.

Firmware with PIT file
The PIT file and its addition to ODIN are tools used to re-partition the device's memory into sections. This method carrying out the device recovery process can be used in conjunction with both single-file and multi-file firmware.
Using a PIT file when flashing is permissible only in extreme cases, for example, if there are serious problems with the performance of the device.


Installation of individual software components
In addition to installing the entire firmware, Odin makes it possible to write individual components to the device software platform– kernel, modem, recovery, etc.
For example, let's look at installing custom recovery via ODIN.

It should be noted that the above methods of working with Odin are applicable for most Samsung devices. At the same time, apply for the role absolutely universal instructions they cannot due to the presence of a wide variety of firmware, large model range devices and slight differences in the list of options used in specific application cases.
Today we will talk about firmware Samsung phone by example Galaxy models S i9003. For correct operation It is necessary that the drivers for the phone are installed. If you already have the Kies program, then most likely you already have everything you need. I really don’t recommend flashing via Kies, because it often freezes halfway, or simply doesn’t see the smartphone, like mine. Samsung took care of us and released additional program, which is called by the name of the mythical god Odin. At the time of writing, the program version is 1.83. Install additional drivers (you can download everything below) that will help the program work with the phone in firmware mode.
I warn you, I am not responsible for all manipulations with the phone that you will do after reading this article. I have flashed it using this method several times without any problems or errors. But if flashing the phone does not help with your problems, under no circumstances tell the service center about it.
There are two types of firmware: 1 file and 5 files. They differ from each other in that 1 file updates current firmware without affecting your saved information, the 5-file one overwrites all the contents of the phone except external card memory.
Firmware process with 1 file:
1. The phone must be turned off! We connect the phone to the computer via a USB cable.
2. Launch the Odin program.
3. Make sure that the phone is connected, in the picture it is indicated on the top left should be yellow, and in the message window it says “added” (added)

4. Click on the PDA button on the right and select the previously downloaded firmware file, if it is in the archive, unpack it (the extension should be .md5, .tar or smd).
5. Enter it into the firmware state by pressing the volume down + home button + power buttons in sequence, and hold it until the Android picture with a shovel appears.
6. If everything is in order, press the start button in the ODIN program.
7. The firmware will last about 5 minutes and upon completion, the message PASS should appear in the program in the very top window! The device will reboot itself and only when fully loaded, you can disconnect the cable.

Firmware process with 5 files:
1. We carry out all operations as in the previous description until the 3rd step.
2. Unpack the archive with the firmware files into a separate folder.
3. Add files to the appropriate windows:
PIT- latona_20110114.pit(with pit extension)
PDA- I9003XXKC1-REV08-PDA-low-CL964212.tar.md5(name must contain PDA or CODE)
PHONE - MODEM_I9003XXKC1_REV_00_CL964949.tar.md5(the file contains the word MODEM)
CSC - CSC - GT-I9003-CSC-SERKC1.tar.md5(in the CSC file name)
BOOTLOADER - APBOOT_I9003XXKPU_CL984714_REV08_user_low_ship.tar.md5(the file name contains APBOOT)
These files may be completely different in content, but the indicated signs are required.
4. Check the Re-partition box
5. Press start and wait for the PASS message and a successful reboot.
USB driver:
Program for Odin firmware v1.83:
Latest firmware for i9003: XXLE4 (Android v2.3.6 from 05.12) |
Before performing various actions on your device, we recommend reading this article in full.
Phones Samsung Galaxy are gaining well-deserved popularity. This is not surprising: at a fairly low price, the device has decent characteristics and is one of the most convenient models. However, Samsung Galaxy also sometimes requires flashing to install or a newer version of the operating system Android systems, or ensuring the launch of a specific application.
What do we need?
1. Samsung Galaxy phone.
2. Cord for connecting the phone to the computer.
3. Personal computer.
4. Drivers for connecting your phone to your computer.
5. Operating room Windows system 7 or Windows XP.
6. Odin multidownloader program.
Instructions
1. First, you need to make sure that (“Downloads”) is working on your phone. To do this, just hold down three buttons: main (Home), inclusion (Power) And button « minus sound" Should appear on any Samsung Galaxy phone model triangle with a robot image (Android logo) with a shovel.
Check the phone for serviceability of this mode even before purchasing directly in the store. There is a possibility that the boot mode was locked at the factory. If you have not yet purchased a phone, it is better to choose another model. If the device is already yours, you will have to study the information of many specialized forums in search of a way to unlock the “Downloading” mode. 
2. Next you need install on computer program Odin multidownloader. This application designed for use in service centers, so you can use it to flash up to 8 phones at the same time. Of course, this feature is not important to us, but even with one device the program works much better than many similar applications.
Odin multidownloader has quite a few versions. In fact, any will do (the article describes working with version 1.3), the other versions work almost identically. 
3. Now you should take care of connecting the phone to the PC. If you have Windows 7, there shouldn't be any problems: drivers will installed automatically(Odin program must be closed when connecting the phone for the first time).
The phone must be in “Downloading” mode when connected to the PC. Not worth it connect through various hubs or splitters— connect the device directly to the USB port on the motherboard.
If your PC is running on Windows XP, you will need to install the program KIES. After completing all operations, make sure that the computer and the Odin program recognize your phone.
4. So, now you can start downloading the firmware onto the device. The phone is connected in the following sequence:
- first the KIES program is launched, then the Odin program;
- “Downloading” mode starts on the phone;
- the phone is connected to the USB port of the computer (the device should be displayed in the first slot of the Odin program).
Typically the firmware consists of four files(the name displays the name data):
- PDA (main file);
- PHONE (is responsible for working with the network);
- C.S.C. (settings file);
- PIT (file storing service information).
In the Odin program window there are corresponding buttons with which you need to specify the path to these files. 

5. Now you can safely press the button Start. The first window will display the firmware installation process. When it is finished, the field should light up green with the inscription PASS. Telephone automatically will reboot and will start working on the new firmware. 
At the request of some readers, I finally decided to write an instructional article on firmware for SAMSUNG I9000 Galaxy S (hereinafter simply SGS). Reasons:
- Yesterday's flagship still looks quite an attractive purchase today, especially against the backdrop of the ever-decreasing cost of the gadget. Powerful iron, great screen, good build, attractive appearance(I agree in advance, it’s an amateur, but I’m satisfied with all the other advantages, so I’ll ask in advance without discussing appearance in the comments, that’s not what the article is about). As we see, SAMSUNG also does not discount this device, has released several modifications of it and continues to develop the SGS line.
- The manufacturer, as always, is in no hurry with official firmware updates through the standard KIES channel, however, on thematic sites you can always find the latest versions of factory firmware, received there from insiders. In addition, delays official updates related to regional aspects. In fact, no one can prohibit you from using any new firmware for another region, Russian and Ukrainian, from experience, are present everywhere, you will not notice the difference with the “localized” version.
- I can say that SGS is one of the most interesting phones for geeks, because has a very powerful community on the xda-developers website and on other sites on the Internet, which is constantly developing improvements, fixes, software, hacks, visual themes and, of course, the firmware itself (hereinafter referred to as ROM) for this device. At the moment, you can count about a hundred firmware in Android versions 2.1-2.3 for every taste. More details about developments for SGS on the xda forum here: http://forum.xda-developers.com/forumdisplay.php?f=656 and on the Internet. The topic of custom software is especially relevant against the backdrop of problems with factory firmware (memory management, slow file system, music playback artifacts, etc.). In addition to fixing factory errors, custom ROMs often offer additional functionality and a host of improvements.
In principle, instructions for SGS firmware are found quite often on the Internet, but mostly they are all on English, which creates certain difficulties for users from the former CIS. I hope that this instruction will really help those who do not know English well.
In this article we will look at the main fundamental points that you need to understand when you are flashing a phone. I will not be tied to any specific ROM, because... they all have a different installation sequence, usually described in the xda forum topic header, where you will also find links to necessary files. If you understand the theory, you can flash any firmware and install any update.
Preparing the phone for firmware.
The first thing you need to check is whether your phone has a three-button boot mode. If you are just getting ready to buy, it is best to do this right in the store. With the device turned off, press the volume down, home (center button) and power buttons in sequence. Hold until the phone turns on. You should see something like this:

If you see it, then everything is OK, if not, then the boot mode is blocked at the factory (this also happens). If you already own an SGS and it doesn’t work, don’t despair, the three-button mode can somehow be unlocked, how to do this - look at the xda forum in the corresponding topic (I didn’t go into too much detail - I was lucky and everything works for me). If you have not yet made a purchase, it is better to look for another copy. In the absence of a three-button mode, you will only be able to receive updates through KIES, which is absolutely unacceptable for a geek! To exit download mode, just remove the battery, nothing bad will happen.
Download the ODIN Multidownloader software on your Windows computer. This program has many versions, I use Odin 1.3 and it has never let me down. The program consists of one file, starts from a folder and does not require installation on a PC. This is what it looks like when launched:

Since the program is intended for use in service centers, you can flash up to 8 phones at a time. You see at the top eight slots with indicators for connecting phones to virtual COM ports(that's why multidownloader). You most likely won’t need this, so the main thing is the first slot, which will display all the stages of connecting and downloading the firmware to the phone, then keep an eye on it as you work.
Have you looked at the program? Now close it! The next step is to connect your PC to your phone in download mode. Usually, to do this in Windows 7, it is enough to simply connect the SGS with the download mode enabled to the PC. Important Note: Use for of this connection USB port on the motherboard. Perhaps everything will work through the front panel and all sorts of splitters/hubs, but I don’t recommend it. From experience there can be problems. Make your first connection without running ODIN. The system will see the hardware and install drivers. If something goes wrong (especially on XP), install the KIES package and the device drivers will be loaded onto the computer. After installing the drivers, check if the ODIN program sees your phone. TURN OFF KIES!!! Launch ODIN, enter SGS into boot state, connect to PC. If the connection is successful, you will see a yellow indicator in the first slot. Congratulations, everything is ready to upload the software to your SGS!
Phone firmware. ODIN program options.
What can you do with the ODIN bootloader? You can upload any ROM, factory or custom, with complete repartitioning file system or without it, do it root phone, flash a new kernel into the existing firmware. Often, the firmware update procedure via ODIN is included as one of the stages of a more complex phone software update. Attention here! Further, when working with ODIN, always adhere to the following sequence:
- Turn off KIES if it is running.
- Launch ODIN and configure it for firmware (we consider the options and options below).
- Launch download mode on SGS.
- Connect the SGS to the PC and make sure that the device is initialized by the ODIN bootloader using the indicator in the first slot.
- Last parameter check, countdown, START!
The main files for SGS firmware are supplied as tar or MD5 archives. Actually, you need to indicate them in the appropriate fields of the Files (Download) section.
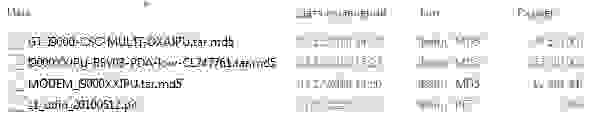
Let's first consider the simplest example - uploading factory firmware. Often this procedure is necessary, including before flashing a custom ROM, to prepare the file system. Typically, the firmware is supplied in the form of three files, the purpose of which is reflected in the name itself - PDA(or CODE – main firmware file), PHONE(or MODEM - the telephone part of the firmware responsible for working with the network) and C.S.C.– regional settings file. Also, when flashing stock ROM, you must have PIT file. I won’t tell you exactly what it is :-) But it’s needed! Apparently it stores service information necessary for the bootloader to flash ROM into the phone. Currently there are two such files for SGS: s1_odin_20100803.pit And s1_odin_20100512.pit. These files are usually loaded with ODIN or supplied with ROM files. The firmware description always indicates which PIT file should be used in specific case. Here is an example of factory firmware delivery:
Next, as you can see, everything is simple, we substitute these files into the appropriate fields of the multiloader. This is what you should get after setting up ODIN and connecting your phone in download mode, i.e. just before pressing the START button:

click on the picture to enlarge...
After this, you can press the Start button and the phone’s firmware will begin. All stages will be displayed in the Message window. After successful completion of the firmware, the indicator in the slot at the top will glow green and display the inscription PASS. If an error occurs, it will appear in red.
On at this stage, let’s immediately discuss the Option block, namely the first two checkboxes (I won’t say exactly what the third one means, it’s on all the time). First Re-Partition– allows you to repartition the file system from scratch, i.e. will completely erase the phone's memory and re-partition the partitions according to the data in the PIT file. Usually, when flashing a factory ROM, this checkbox is checked to avoid file system errors in the future. You will still lose all user data if full firmware discussed above, so it should be noted. Next point Auto Reboot– when the firmware is completed, the phone will automatically reboot. Again, it should be checked when flashing the factory ROM.
In addition to loading the full ROM, using ODIN you can upload modified kernels that are used for getting root, replacing standard recovery (Samsung 2e and 3e) with ClockworkMod Recovery or SpeedmodKernel Recovery. We will talk about what recovery is and what its functions are later. Now you should understand that using ODIN, you can also upload not three but only one update file in TAR format, which is inserted into the PDA field of the multi-booter. With this type of firmware, you do not need a PIT file and you do not use it. Also, depending on the sequence described in the installation instructions for a specific ROM, you can/should clear the Re-Partition and Auto Reboot checkboxes. Why is this being done? Usually, before installing any custom firmware, you need to flash the factory firmware first. When you further flash only the update, you naturally do not need to repartition the partitions, because their integrity must be preserved. You may not need Auto Reboot when, after updating via ODIN, you need to not reboot the system but immediately go into recovery mode to complete the subsequent steps of the installation instructions. In this case, you simply remove the battery after finishing the firmware, insert it back and load the recovery mode.
Firmware and phone update via Recovery mode.
Here we come to the description of the recovery mode. What is it? This is the phone's service menu, called up in a way similar to calling the download mode, but in this case the volume button is pressed up. So, with the device turned off, press the volume up button, home, power on, hold until the phone screen activates, release. On short time The splash screen will appear, after which you should see a text menu, usually on a black background, in green, red or yellow letters (it all depends on the current type of recovery). Navigating through the menu occurs using the volume keys (up and down), selecting a specific item using the power button, returning to the previous menu - usually the last text submenu.
Using recovery, you can flash and update your phone with files in zip format. In this case, you do not need a PC. The main thing is to upload the update files to the internal card of the device in advance.
The simplest recovery is native Samsung versions 2e and 3e; these types of recovery come with factory ROMs. There are a minimum of points, one of them is “apply update.zip” i.e. The update file should be located in the root of the internal memory card (not sd) and be called update.zip. The update file must be signed and is intended specifically for flashing firmware through this type of recovery. This firmware version is mainly used to obtain root rights on a phone with factory ROM and is used very rarely (possibly as an alternative to flashing the kernel with root via ODIN).
A more advanced type of recovery comes with custom firmware– this is ClockworkMod Recovery (on the forums it is called CWM). There are more items and expanded functionality. At CWM help you can install any firmware or update file in zip format, which can be called anything and located on internal map memory anywhere. Select “install zip” from sdcard” then the item “choose zip from sdcard”, in the primitive file manager that appears, find the update file and apply it.

In addition to the update functions, depending on the version and modification of CWM, the following actions are possible using the recovery menu and submenu: complete cleaning phone, clearing cache, backup and data recovery, clearing the battery log, managing partitions of system and internal user memory, partitioning the sd card and preparing it for apps2sd, creating a swap partition on sd, applying lagfixes and converting the file system to ext, enabling additional functions, for example, notification with backlit keys and much more.

One of the most common modifications of CWM for SGS is SpeedModKernel Recovery (SMK), which offers this expanded functionality compared to standard CWM; there are more points specific to SGS.
Example - the easiest way to install a custom ROM for SGS:
Many custom ROMs for SGS require SMK on the phone to carry out the installation procedure. This can be done directly on the factory firmware; you don’t need to get root, etc. first. – this is a misconception. The easiest way to obtain SMK one-time for subsequent update through this type of recovery is to flash the tar file with the SpeedModKernel kernel using ODIN (insert the file in the PDA field) with Re-Partition and Auto reboot unchecked. After flashing the kernel, you remove the battery from the phone, insert it, call the recovery mode and install any update, for example a custom ROM ( zip file, naturally should already be on your phone).
Some custom ROMs, such as CyanogenMod, require a more complex installation procedure that involves multiple steps of flashing the firmware via ODIN and SMK. Strictly follow the instructions from the developer and you will succeed! You are not the first, you are not the last! If you consider yourself a real geek, then you simply must master these simple procedures.
ATTENTION!!! The author is not responsible for the consequences of your actions with the phone after reading this article. It's not my fault if you turn your SGS into a brick! Official guarantee disappears on the phone after independent firmware. However, if something happens, with the help of the knowledge gained here, you can always flash original firmware into your phone before going to the SC. If the phone is completely dead, no one will be able to determine what firmware is in it :-) make a face with a shovel and take it to the service center with the words: it’s broken... In any case, I repeat: only you are responsible for all your actions and their consequences! In fact, not everything is so scary and any incidents with tragic endings happen very rarely.
Happy firmware!
If you find an error, please highlight a piece of text and click Ctrl+Enter.