How to make a beautiful menu on VK. How to create a VKontakte group menu: technical stage. Closed and open menu
So, to create an open menu, we need an image that will play the role of an open menu. The images that we added in the article about creating a graphic menu will not work, since you need an image of the expanded menu, and not each item individually. In addition, you can use absolutely any image that will indicate that it hides the group menu. For example, an image with the caption: “Group Menu.” Or something like that.
After we have selected the image that we will use. Moreover, the image size can be almost any, which can be uploaded to a photo album. (UPD: This is not entirely accurate information. You can read more precisely about the sizes in the comment below. To do this, just click on the link: /otkrytoe-menyu-gruppy-vkontakte/#comment-7633)
Let's go to the VKontakte group. And right-click to open the menu, if it has already been created, in a new tab.

After this, on the menu page, you need to click on the “Edit” link.

But you don't need to change the code. Just click on the “Return to page” link. This is necessary to receive a link to the menu page.

Now that we're back on the menu page. IN address bar we will see a link to this page, without various additions to the address. In other words, a clean link. That's what we need.
We leave this page open and return to the VKontakte group. Here we need to create a record to which we add an image that will play the role of an open . To do this, select “attach photo” below. And select an image either from the album or upload it from your computer.

Once an image is added to a post, we don't publish it yet.
And we return to the menu page and copy the address of the VKontakte group menu page from the address bar. And paste the copied menu address into the entry that we have not saved yet. The end result should look something like this:

After we added the link, the name of the page and its address appeared below. Once the page appears at the bottom, we can remove the link that we just inserted into the post. After that, click on the “Submit” button. Thus, we published our post on the group wall.

Now click on the news date.


After that, close the entry and update the VKontakte group page. Now at the very top, if everything is done correctly, you will have a menu image that plays the role of an open VKontakte menu. At the same time, the links in the menu are inactive. And one link to this entry is active.

Now, when the user is in our group, he will see an imitation of the menu. And after clicking on open menu VKontakte group, it will appear in the menu itself, which will function as it should.
Unfortunately, I don’t know any other ways to make an open contact menu. But still, this option is much better than just a link to open the full menu.
I hope this article will help you figure out how to make an open VKontakte menu. And that's all for me.
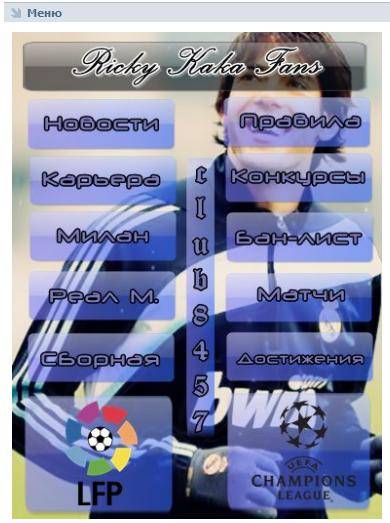
You can see what the open group menu looks like in my group.
The goal of the creator of a group on social media. networks to attract more visitors. It is important that the guest wants to join, sign, read information, leave a comment or order a product. The need for the final result differs from the direction of activity.
The first seconds of stay form further actions guest. This is why the interface plays a big role.
Factors that leave a guest:
- avatar;
- description;
- Name;
- beautiful and practical menu;
- colorfulness;
- content.
It’s easy to create a practical menu that motivates more than just action. But first you need to figure out what it should be.
What should the menu be like?
Using a well-designed menu, the visitor can easily navigate through it and quickly get answers to their questions. Navigation also allows you to create the right impression of the project.
Three main goals of groups:
- sales;
- increase in traffic;
- increase in active visitors.
For sales, group navigation replaces in-store display.

The most important buttons should be here:
- catalog;
- price;
- delivery;
- promotional offers;
- reviews.
To increase traffic, the emphasis is on the content and flavor of the site or blog.

An approximate set of buttons:
- interesting articles;
- useful information;
- subscribe;
- reviews.
To increase the activity of participants, you should stimulate them with promotions, surveys and interesting and unusual content.
We offer the following buttons:
- subscribe to news;
- ask an interesting thematic question;
- stock;
- questionnaire;
- vote.
Let's look at how to create a menu for a group in contact, that's all technical points that require minimal knowledge graphic editor and basics of working with VKontakte.
We create in stages
Creating navigation is an interesting, complex and lengthy process. But the result is worth it.
The whole process is divided into 2 stages:
- working with photoshop;
- technical addition.
video: menu for public
Working with Photoshop
Before you begin, you need to visually visualize the design or general view, as well as its components. No special knowledge is required, just follow the steps of the instructions.
Algorithm of actions:


This is done using the Rectangular Marquee tool:

Working with graphics:

It should look something like this:
Save the rectangle located on the right as a separate image, setting the size to 200x500 pixels. This is a ready-made avatar, uploaded through the “Upload photo” button in the VK group.

The second picture still needs to be divided by the number of points. This is done in order to assign a link to each button.
First you need to make the markup:

Create fragments:

Saving images:

How to clean your computer from unnecessary programs? Instructions here.
Technical part
Finished images must be transferred to the group. By following the steps below, this task can be easily completed.
Important! Uploading a menu differs from usually uploading photos or pictures.
Everything in order:

Now the most important thing is why all this was done. Add menu functionality. A separate image must be assigned its own link.
- find the required entry;
- left-click on it;
- copy the URL in the address bar.
- go to the source where you need to transfer the visitor;
- copy the required address.

Save the changes using the corresponding button at the bottom of the window.
Attention! Changes may not be reflected immediately. It is recommended to log out to your main profile and then log back into the group.
How to create a menu in a VKontakte group wiki markup
Wiki markup is special language, used to design web pages in groups social network.

This tool allows you to create:
- effects;
- unusual menus;
- signs;
- navigation elements;
- format text.
In a word, this markup allows you to create a mini VKontakte website. This is very convenient, especially for sales and recruiting subscribers.
This design intuitively forces the visitor to stay and click on the button. That is, it delays and stimulates action - and this is exactly what is needed.
Visually, such a system is very similar to HTML layout. But it does not require long training and a special mindset.
Video: menu with search by category
Nuances of creation
Actually, what was done above (dividing and loading the image) are already markup elements. This is the advantage of this tool. Automatic transformation into tags when simply loading images.
However, it is important to know the individual tags that help you do more more features and beauty. For example, when we fill individual parts of the image, white stripes may form between them. You can remove them by simply adding the noborder tag.
Like this: []
The main tags are presented in the table below:

Working with pictures
[] .
Where options is replaced with:
- noborder- removing the frame around the image;
- nopadding- removing spaces between images;
- plain- insert a link to the image. Designed as text, without graphics;
- nolink- removing the link to the picture;
- box- opening an image in a window;
- NNNxYYYpx or NNNpx- sets the photo size in pixels.
Creating a table
Regardless of what kind of menu (text or graphic) you create, you are unlikely to do without inserting a table. Otherwise, you can just paste the text into the news field and not format it, wasting so much time.
A table is created using a special set of characters, where each of them is responsible for a specific part of the table:

If you are actively promoting your group and want to make it more popular, then you probably know that a beautifully designed group is a very important aspect of the development of your brand, but before you think about designing a VKontakte public page, you should think about the purpose of your VK group!
As a rule, SMM specialist After completing the creation of the group, VK begins filling it. It is content that can retain people in a group. But you just need to do it efficiently and competently! After the group contains: descriptions, wall posts, albums with photos and videos, audio recordings, you should begin implementing a functional menu. And let the menu at the beginning of the journey not be super beautiful, as we are used to seeing at the beginning of work, but rather simple. First of all, the usefulness of the existing content is important!
In this article you will find information on how to create a VK group menu yourself! Therefore, if you are puzzled by the question: how to make a VKontakte group menu, this review is for you!
Quick navigation:
What is a group menu
The menu can be considered a list of all available public functions. Through the menu you can set everything important elements in one neat and beautiful list, set an individual icon or image for a specific link, send notifications to visitors about planned changes quickly and easily. The menu can display the following elements: all kinds of links to third-party sites, discussion bubbles, music, albums and other subsections within the VK site, images and the usual structure of your public. Based on the instructions below, you can make a menu for your VKontakte community with your own efforts.
Creating a VKontakte group menu online
If earlier, to create a menu, you had to bother yourself with entering various codes, which is quite difficult for people who do not have programming skills, but now you can create a high-quality and beautiful menu Online contact groups are possible using specialized services.
So, now let’s take a closer look at how such constructors work. It is worth noting that they all have identical functionality, so once you understand one, you can freely work in any of them.
The principle of creating a menu can be divided into several steps:
Step 1. Decide on a design template.
On sites that allow you to create a group using templates, professional designers work who draw dozens of templates with high quality different styles and colors. You can choose the one that suits your group. Subsequently, you will have the opportunity to change the template at any time.
Step 2: Determine the number of buttons.
Decide how many link buttons to various pages will be on your menu.
Step 3. Specify links and captions.
Step 4. Verification and export.
Make sure that the completed menu works the way you wanted it and then upload it to your community. The services will do everything themselves necessary pictures, will generate a code, and with your permission, upload everything to your public page.
Step 5. Making changes.
If you need to make changes, for example, add new buttons, correct links and inscriptions, change the design, just go to your account, make the changes and export the menu again.
As you have already seen for yourself, creating a high-quality, affordable and beautiful menu using special servers is best option for VK administrators. It is worth noting that such servers offer free services only for one time - trial. Subsequent use of resources of this kind must be paid for. But, despite this, the result of using the functionality will undoubtedly justify your investment.
Create a banner for a VKontakte group for free!
There are specialized sites where, without much effort, software, You can make yourself a beautiful banner for the VKontakte group. For example https://bannermakers.ru/banners-vk/.
In addition to creating a menu in this way, there are also ways to create a menu in a VK group in other ways. Read about it below.
VK menu wiki markup
Wiki markup is a great assistant in creating a beautiful and effective community! It is very convenient and effective way public design in popular network"VKontakte". This markup is very similar in its action to html code. But for those who are not involved in programming,
it will be quite clearer due to the ease of implementation. This markup got its name thanks to Wikipedia, where numerous users for the first time had the opportunity to familiarize themselves with the main features of its functions. Wiki markup allows people without programming skills to easily and quickly create a group:
· Create spoilers and tables graphically.
· Format images and text.
So, let's move on to analyzing how to create a menu for the VK community?
Of course, in the process of designing a group menu, additional recommendations may be required, but in general, you can understand the principle of creation using this guide. If we consider html, then to study and work with it you need to spend several days or about a week. Working with Wiki markup with good memory will only require some time. How should it be created? What approaches should be taken?
Let's dwell a little on its history, and then we'll talk about technology. Ward Cunningham first introduced people to the concept of “wiki,” which means “quick” in Hawaiian. Thus, he expressed the simplicity and speed of using markup.
Fast registration
Now we will look at the questions: “How to make a menu in a group in VK” and clarify how to implement it effectively. In the process, you can take several paths, each of which has its own direction and leads to the final goal - having a high-quality group menu.
We'll deal with it in order. If the group carries the meaning of a social direction, then a text menu can be introduced. Its advantages lie in its serious appearance. It is advisable for commercial and entertainment-type communities to determine the rate on the menu - graphics. Don’t forget that there are ready-made templates for VK group menus. The use of images will draw visitors' attention to what should be visible. Using this approach will give you the opportunity to make being in a group more fun and relaxing. Wiki markup allows you to create a group menu with pictures and photos, create tables, embed and open links, and much more. Of course, this is not the entire list of functions, but designing your community’s menu is easy and on a fairly impressive scale.
Basics of Wiki markup in creating a menu for a VK group
 Thematic pictures and photographs will allow you to create a VK group menu that is beautiful and interesting. It is important to know that on VKontakte it is possible to insert the necessary photo or picture using wiki markup only when they have already been uploaded to the site’s albums. So, let's go to the album and decide on the desired photo and copy her address. Let's say it will be like this: photo14523_90678. Now you need to capture him in doubles square brackets. The result should be like this: []. What if you need to attach a link or text to an image or photo? Or maybe there is a need to edit the external image? Then the following action will help here: you need the file to look like this - [[photo14523_90678|options|text/link]], and instead of the last three words you need to substitute what you need. Text - enter what you need. Here, additional explanations will probably be inappropriate. Link translated from English is “link”. Designated so that the visitor's car understands where it needs to go. Options - the following values are set here:
Noborder - removes the frame located near the photo. Box - the image is located in a window.
Nopadding - spaces between images are not displayed.
NNNxYYYpx or NNNpx - indicate the size of the image (in pixels).
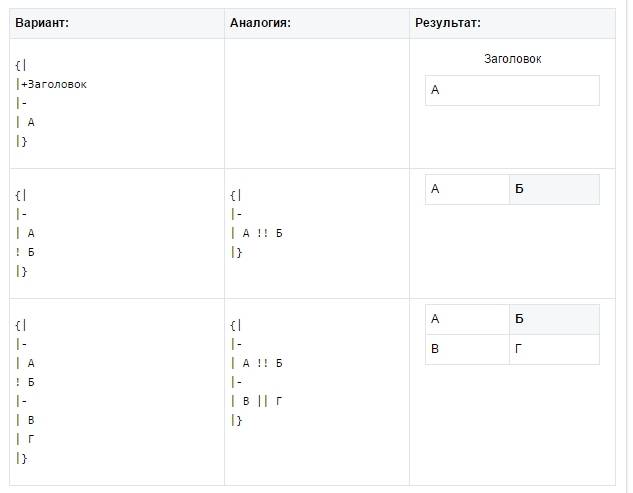
As a rule, it is necessary to embed an element into the text and graphic menu of a VK group that allows you to present information in a form convenient for the visitor, namely tables. Few communities on VKontakte can survive without it. To create a table using wiki markup, you need to use a certain list of symbols. Below you will find out what functionality each symbol is responsible for:
(| - designation of the beginning of the table. It is impossible to do without this symbol when creating a table; it is a required attribute.
| - used to give cells a transparent effect.
|+ - using this character set, the table name is placed in the center. This is not a mandatory attribute, but it should be placed immediately after the signs that characterize the beginning.
|- - this is how new lines are designated (also for cells).
Designs dark color. If this symbol is missing, you must use the sign from point No. 2.
|) is a set of characters indicating the end of the table. This is an optional attribute. But it is still recommended to use it to prevent errors from occurring.
Now let's look at how to fill a cell. All information that must be included in them is placed after the | signs. If you need to separate cells from one another, you just need to duplicate it like this: ||.
Now you have studied step by step the information on how to make a menu in a VK group using wiki markup. Using the example of creating a menu for your public page, everything will become even clearer to you.
How to make a menu in a VK group with a new design 2018
The new design of VK not only brought convenience to the functionality of the site, but also some confusion for public administrators. In this section, we will look step by step at how to create a menu for a group in a new design.
So, a guide on how to make a menu in new version VK is fast and, most importantly, without errors in the code in front of you. By following the instructions exactly, you can create the menu yourself, correctly and quickly! Let's begin!
1. Open the menu image in Photoshop or another graphics editor.
2. We examine the size of the picture and if it exceeds 600 pixels in width, we change the size to 600, the height of the picture changes proportionally, we don’t set it manually!
3. Use the cutting tool and cut our image into buttons.
4. Save the image in the “for WEB” parameter. Now the Photoshop work is finished. Let's go to the community.
5. Go to the community settings in “Materials”, select “Restricted” and click “Save”.
6. Go to home page, in the “latest news” subsection, click “edit”.
7. So we ended up in the Wiki editor, now the most basic activity will begin. Change the “latest news” column to “menu” or any other and click the camera icon, insert all the chopped pieces from the saved folder.
If pictures appear instead of code immediately after entering the wiki markup menu editor, you need to switch the wiki markup mode!
Now we have the code for our menu, but it needs a little modification to remove the spaces between the images. Now our code looks like this: [][-][-][-][-]
Turning to the preview, we will notice that the images are not where they should be, and, in addition, there are spaces between them.
8. Editing the code: By default, VK has built-in permission to maximum size The image width is 400px, the first button turns out to be 600, we change the parameters of the first button 400x89px to 600px, there is no need to specify the height. We also enter the following tag into each line: nopadding must be separated by a semicolon.
Important! Do not click on ENTER after lines of code if you want to have two buttons next to each other on the same menu line. The editor will automatically move to a new line those parameters that do not fit! This code should look like this after editing:
[][-][-][-][-]
Now, going to the “preview” we see that everything is in its place. We add the necessary links to each of the buttons to the code; for a clear example, the link to the first button is not clickable here! Don't forget to remove extra space between | And ].
[][-][-][-][-]
After making sure that everything is done as planned, click “save” and return to the page. Please note that in the new 2018 version there is no “return to page” button, so you just need to click on the page name at the top.
9. Now we need to pin our menu. To do this, copy the link to the page from our menu and return to the main page of the group.
10. You need to paste the copied link into the new message field. After a piece of the menu is displayed, the link must be deleted! And using the camera icon you need to add a pre-prepared image for the banner. Put “on behalf of the community” by clicking on the circle to the left of the “send” button and click on “send”
11. Now let’s fix the menu, refresh the page and evaluate our result. The entire work, slowly, takes approximately 15-20 minutes.
How to make a menu in a VK group with transitions
Now let's look at how you can make a VK group menu with transitions.
So, how do you make one wiki menu inside another? First of all, the first menu must be ready. We will start from the picture already cut into buttons. We add cut pieces of the image through the camera stash in the wiki editor. If pictures appear instead of the code, it means that the wiki markup mode is not enabled; before adding an image, click<>
Don't forget to click "Save" at the bottom of the page! If necessary, you can change the size of the image and add the nopadding tag to the code, by default it is absent, and the size of the image should be a maximum of 400 pixels in width, if the image needs to be corrected to the desired size!
1. After editing the code, save and click “return”.
2. Check that the first menu is displayed correctly.
3. If everything is as it should be, click “edit” again.
Now you need to create new page wiki where the second menu will be located. At the very end of the code we write the menu value for public VK 2, or any text you need. Save and go back. Below should form active link with a new name. For maximum convenience, open it in another browser tab.
While your newly created page is still empty, click “edit” or “fill with content”
Just like we did at the very beginning, we add sections of the second menu, save and see what the new menu looks like.
If everything is as it should be, copy the link to the new menu page in the address bar of your browser.
Let’s say a new menu should open when you click on the “Reviews” button of the first menu. You need to go to the tab where we created the first menu and find the third line and paste the link from the buffer, save and return.
Thus, when you click on the “Reviews” button, our second menu will open.
How to make a VK group menu from your phone
 If you are “lucky enough” to work as an administrator of VK groups or create your own group with only a phone, then if you adapt, it is quite possible to create a group menu from your phone without experiencing much effort.
Everyone knows that the creators of VK offer their users a fairly convenient mobile version, and you have already learned about in different ways creating a menu. However, manually entering codes using wiki markup is possible, but not entirely convenient. But downloading a template from websites of specialized services and inserting it into the necessary fields is quite simpler and more convenient, and it won’t take you very much time. Thus, you can administer VKontakte groups simply and conveniently.
VKontakte group menu templates
All of the methods described above to create a VK group menu are quite simple, and if you apply them in practice, you can make sure that there is absolutely nothing complicated about it. Adapting to the introduction of pictures and tables using wiki markup is quite simple and quick. But it’s even faster and more convenient to use ready-made templates for group menus, which can be found either on the resources mentioned above, or downloaded from blogs and websites of the same users.
It is worth noting that the templates imply the presence of pictures and images of various topics. They also have versatile designs. If you don't have time to search for images, or don't have enough imagination to create a colorful menu, you're better off using already ready-made menus
High-quality design of the VKontakte community page is already half the success in achieving the goal for which the group is created. Statistics show that the presence of navigation significantly increases page traffic and also increases the number of subscribers. The community page, where all the information is structured, creates the impression of the administrators’ serious approach to business, as well as their practical skills in leading a group and reliability. In this article we will talk about the menu for the VKontakte group, how to create it and make it most convenient to navigate.
Varieties of menus for the VKontakte community
Now there are two types of VKontakte group menus. Their templates, of course, are available on the Internet, and you can do everything strictly according to them. However, the result will not be creative and original, and therefore will not attract large number subscribers.
So, there is a closed menu and an open one.
Closed gets its name because the subscriber needs to open it themselves. To do this you just need to click on the link. Any word can be used as a link, usually “open” or “menu”. Although, some are sophisticated and invent original links.
Open is a post that has been pinned. It contains a valid link to the menu. This type is still quite young; it appeared not so long ago, or rather with the advent of the function of pinning a post to the wall of a page. An open menu is the most effective by far and is more attractive than a closed one. The first option is less productive, since group visitors may simply not notice the link to it.
So, VKontakte? The answer is quite simple. To create both types of menus for the VKontakte group, wiki markup is used. This is very handy tool, it allows you to create tables, graphs, format and edit images, work with links, and more. However, now everything is much simpler for the creators of the VKontakte community than several years ago. The social network automatically converts all content into wiki markup.
The open menu for the VKontakte group is now more popular, but the closed menu is practically not used anymore. Therefore, it would be reasonable to consider in more detail the creation of open type. Next, you will learn how to make a menu in the VKontakte group ( step by step instructions presented below).
Stage one
On at this stage you need to select images. They will create a presentable appearance pages. Pictures can be found on the Internet or made yourself using photo editors. The second option is suitable only for those who are good at drawing on a computer and are proficient in Photoshop.

The first picture is an avatar. The second (central) is the image-action. The avatar parameters must be at least 200 x 330 pixels. The central image is at least 390 x 280 pixels.
Stage two
Open the group page and find "Community Management". The link is located under the front photo of the page on the right. After following the link, find the “Materials” section in the information, and then click “Restricted” in this paragraph.
On the main page, click on edit in the “Materials” line. In the editor form that appears, specify the name, sections, and then be sure to click the button below to save. After that, return to the page using the button in the upper right corner.
Stage three
Copy the page address. The first row of numbers after the word “page” is the community number, the second is the group page number. You definitely need to know this when thinking about how to create a menu in the VKontakte group. The address must be inserted on the wall along with the central image. To attach a picture, click “attach” and “photo”. Next, select and paste. Then click send - this will publish the post.
Stage four
Place the first picture in place of the main community photo. A record of this action along with a picture will appear on the wall. It has no use there, so it needs to be removed.
This is all. When users click on the central image, the group menu will open to them.
How to create a table in the menu?
Every administrator thinks about how to make a menu in the VKontakte group. The instructions presented above can only help you create a basic menu. Further it needs to be improved.

The table is very convenient for navigating the menu for the VKontakte group. Creating a table requires knowledge of certain symbols.
- (| means beginning;
- |+ central location;
- |- s new line;
- | transparency;
- ! dark cell fill;
- |) denotes the end.
How to create links?
In the question of how to make a menu in the VKontakte group, there is important point regarding links. They can be designed in different ways:

- Just leave a link. To do this, put the link in square brackets.
- Make a link with a word or phrase. Open, paste the link, after the link put the sign | and close the square bracket.
- Image link. You can do this using this example: [].
Most often, everyone learns on their own how to create a menu in the VKontakte group. Knowledge comes with experience through trial and error. However, beginners can still be given a few recommendations.

- The image size should not be less than 130 pixels. This will significantly degrade the appearance of the menu.
- The width of the image is no more than 610 pixels.
- A wiki page cannot contain more than 17 unclosed tags.
- When you set the width indicator, the height automatically changes according to the proportions.
- You can create a list inside a table using />.
- A maximum of 8 list units can be placed on one line.
Besides everything else, there are special programs for easier use of wiki markup. These are both educational applications and real assistants that will do everything for you.
For example, the Interactive FAQ (beta) application allows you to test your abilities in wiki programming.

Its operation is simple: the user is presented with a ready-made menu, and is required to enter the markup code. At the end, the result is compared with the original.
The Wiki Editor program does not teach or train its users anything. With its help, you can create a menu even without basic programming skills. The easy-to-use editor writes the codes itself - the user only needs to control it.
Thus, anyone who plans to use the group to promote their business or just for fun can create a VKontakte menu. The menu makes business promotion much more effective and attracts users to the group page. A menu makes a community look presentable and more professional than its competitors who don't have one.
VKontakte groups are additional opportunity not only make money on the Internet, but also promote your own business. What does the success of a group depend on? It depends on how actively you will promote it, as well as how competently it will be designed.
When creating a VKontakte group, you must do the following:
- Write a description of the group.
- Choose the optimal avatar.
- Add interesting content.
- Come up with an effective name.
- Create a menu for the group.
If almost all of these points are clear immediately after reading them, then creating a menu for a VKontakte group is often accompanied by a lot of questions. How to create a menu for a VKontakte group? To do this, we have compiled detailed instructions, thanks to which you can easily create an interesting and beautiful menu.
Instructions for creating a menu for a VKontakte group
Setup.
First, you will need to go to the group settings and enable materials:

It is better to bet limited, because... at open materials every user will be able to create them in your community.
2. New field in the group.
After setup, a new “Latest News” field should appear in your group:

To change the contents of this form, you will need to click the "Edit" button, after which the new form, into which you can embed various files, including a menu for the group:

Now you need to create or download a menu for your group.
3. Creating a menu for a VKontakte group.
To present an example, we will use the program Photoshop and create a new menu. After opening the graphic editor, create new file and set the approximate dimensions to 700 by 1050. After that, add background picture and draw menu buttons with the inscriptions:

4. Dividing a picture into parts.
In order to individual elements the pictures were copied, we need the “Cutting” tool:

Use this tool to select the area around each button:

Now in the menu we select special saving of the created menu:

In the example, we divided the picture into 5 parts, so now we have 5 separate images that will need to be assembled into one picture.
5. Insert pictures.
Now we return to the editor of the “Latest News” field and add pictures there:

Once you select the menu files, you should have the following code:

6. Setting up the code.
Simply inserting images is not enough to make the menu work; you will need to set some parameters. First, we add the “nopadding” tag to remove the separation between the individual parts of our menu:

And now the most important thing is to indicate the link to the page, after a horizontal slash in each line, here is an example:

As you can see, in the example we have specified various links to navigate from the menu. All that remains is to change the name of the link that opens the menu and you can check what we got:

As you can see, there is nothing complicated in creating a menu for a VKontakte group. If you don't have Photoshop or you don’t know how to draw (like me), then download ready-made menus on the Internet, the choice is quite wide.
Group menu design, useful tips.
High-quality design of any page on the Internet increases interest in it. After changing the community design, you will immediately notice an improvement in the statistics. Making a menu in a VKontakte group is not difficult, and if you decide to use it, consider these useful recommendations:
- After Wiki creation markup (menu code), save it in text file. If something goes wrong, you will have the opportunity to restore the menu.
- You can easily find a VKontakte group menu template on the Internet. This will be useful to everyone who does not know how to work with Photoshop and other graphic editors.
- Also, to make work easier, menu buttons for the VKontakte group can be downloaded on the Internet and simply installed on any background.
- Do not take too small pictures for the menu; on the contrary, it is better to use a huge format, otherwise the quality will be lost.
- It is better not to make the menu width more than 610 pixels, otherwise it may not be displayed correctly on the page.
- There are special editors for working with Wiki markup, but you will have to understand them separately; they are created for professionals.
- Don’t rush to finish your work in the graphics editor; try different colors, fonts, backgrounds, and so on.
- The menu in the VK group looks better if combined with an avatar. To do this, you need to adjust the size of the image.
Professionals create a new menu in the VKontakte group in a few minutes. Beginners do not always manage to do everything efficiently. You shouldn’t add just anything, as it may, on the contrary, scare away subscribers. Therefore, it is better to turn to professionals or special services, it's not that expensive.

Beautiful group menu for 100 rubles
Many different designers have been created to create a VKontakte group menu online. Prices vary everywhere, as do available features. Comparing services, we can confidently say that Menumake is the best option. Even a beginner will take no more than 5 minutes to create a menu, and the system will automatically add it to the desired group. How does this all happen?
- We go to the site and log in via VKontakte. Will open full list groups in which you are an administrator. Select the desired community and click “Create menu”:
- The editor opens, in the center there is a “Select template” button. Click on it and select ready-made template VKontakte menu, large choice:

- After this, menu items are added. Everything is simple here, you specify the menu text and, on the contrary, add a link where the user will be directed when clicked:

- Under the settings items are additional options. You can choose a different background, change the font, color, its location, and so on:

- There is a preview on the right created menu. Adjust the parameters until you get the desired result, and then click on the “Load menu to group” button:

- Before the download begins, a window will open in which customers are reminded that they need to pay 100 rubles for this service. It includes adding an album, placing a graphic menu in the VKontakte group and its code:

Payment on this site can be made using bank card or via PayPal. The administration is also ready to accept other electronic money through the Yandex.Cash system. For just 100 rubles you will have a VKontakte group menu, and new design will definitely help in the development of the site.
Where to order a menu for a VKontakte group?
The service presented above works according to a special algorithm. What if the user has certain requirements and wants to add something original? In this case, it is better to turn to designers and professionals. Finding them is not difficult; special sites have also been created for this:
Wiki markup and photos for uploading to a separate album.
Errors when creating a VKontakte group menu
Inexperienced users often try to save money and do everything themselves. Without certain skills (at least the ability to work with graphic editors), the result is just anything. Some menus in VK groups cause laughter, and all because these mistakes are made:
Error 1.
Most often, poor quality menus occur when its developer tried to add something unusual and creative from himself. Graphic editors They allow you to add a bunch of different patterns, arrange buttons in a non-standard way, and so on. All this is an additional burden, the menu should be, first of all, convenient, so it is better to make it simple and stylish.
Error 2.
Sometimes the emphasis is on the background image, since it takes up most of the menu. The buttons should be huge, completely dividing the main image into several parts. The fact is that almost 50% social traffic go online with mobile devices. It’s easy to click on small items with the mouse, but small screen it's simply impossible.
Error 3.
In order to interest the visitor and force him to click on at least one VKontakte menu item, some add 10 or more buttons. Nobody needs such navigation; on the contrary, it confuses the user. It is better to choose 3-5 main points without presenting a huge catalog.
Error 4.
The menu often contains links to third-party sites, and this annoys users. They don’t want to leave VKontakte, so it’s better that the points direct them to internal pages social network. If you need to present a catalog or something else, it’s better to create a discussion and put a link to the site in it.
Error 5.
Menu items should be thoughtful and really useful to users. For example, in the online store group it makes sense to add the items Delivery, Catalog, Contacts. IN information groups- Rules, Prices for advertising, Links to discussions. Remember, each point should bring the visitor closer to the target action (order, request, etc.).
Newbies constantly make the same type of mistakes; this interferes with the design of the VKontakte group menu and reduces its effectiveness. If the menu is useless, what's the point of it? It should be useful to both the administrator (who directs people to required pages), and for the visitor who is looking for the necessary information).
It’s quite possible to develop a group menu for free with your own hands, especially now you have detailed instructions. However, it is better to trust the professionals and spend a small amount. The design of communities affects their development, and now VK has been updated and images have been added at the top, which also needs to be used for a beautiful appearance.