How to install CWM Recovery on Android: step-by-step instructions. How to install TWRP Recovery on Android - step-by-step instructions
Because the topic Android firmware devices is very relevant, I decided to write about installation CWM Recovery Android smartphone or tablet. There are several ways to do this: for some, all actions are performed on the device itself, but this requires root rights, while for others, a computer is used to install custom recovery. Whatever seems easier or more convenient to you, use it.
via ROM ManagerThe first way to flash Recovery firmware is to use the ROM Manager program. This application has a separate item that allows you to install ClockWorkMod Recovery in a couple of minutes.
I would like to note right away that ROM Manager requires root rights to work. You can read how to get them.
After that go to official page https://clockworkmod.com and see if your device is on the list of supported ones.
1. Now open the ROM Manager and select the first item “ Recovery Setup».

2. In the next window in the section “ Install or update Recovery" select " ClockworkMod Recovery ».


4. At the bottom, click on “ Install ClockworkMod».

5. The download process will begin. At good internet connection it lasts a couple of seconds.

6. At the end of the download, you will be asked to grant root access to the application. Select " Provide».

7. That's it! You will see a notification " Successfully flashed ClockworkMod recovery!" Just click " OK».

This is how easy it is to flash CWM Recovery via ROM Manager. Now you can open it and you will find new items in it that were not in the standard one.
Method 2. Install custom Recovery on Android using the FastBoot utility
All steps described below are the same as installation TWRP Recovery: .

Unzip the folder to disk " C:" - there will be " inside tools", and in it the file " android" Launch it.

Select " Android SDK Platform-tools" and click " Install package».

Check the box " Accept License" and then click " Install».

After installation is complete, in the folder " tools_version-windows" will appear " platform-tools", and it contains " fastboot" And " adb" They will be useful to us later.

UPD: The “platform-tools” folder on my computer is in a different directory than yours. The fact is that this article was written back when there was an installer for the Android SDK. Starting from version 25, installation is carried out only from a ZIP archive: because of this, part of the instructions had to be edited. Therefore, the path to ADB and Fastboot is different from mine, everything else remains unchanged.
If you have Sony device, HTC, Nexus, Huawei or LG (some models), then Bootloader is blocked. How to unlock it is described on our website:
- Unlock Bootloader on HTC
- For Nexus: instructions
- For Sony: instructions
- Unlock
- Unlocking Huawei bootloader
- Unlocking LG bootloader
Let's start flashing the Recovery firmware:
1. First of all, go to this page and download the file version " recovery-clockwork.img» for your device. Please note that most devices have both a touch and classic version. Download the one you like best.
2. Now place the CWM recovery file in the “ platform-tools" I also renamed it to " recovery.img"(later you will understand why). I recommend that you do the same.

3. Connect your tablet or smartphone to your computer using USB.
In this case, the device must be loaded into fastboot mode. Typically, to do this, with the device turned off, you need to hold down the key combination: Enabling + Volume down. But this combination may differ depending on the device manufacturer.

UPD: it’s much easier to switch to fastboot mode as follows: enable USB debugging on the device, go to command line(step 4 below tells you how to get into it) and enter the commands sequentially, and after each press “ Enter».
cd/ cd path to "platform-tools" adb reboot bootloaderI got it like this:
Your path will look different. If you acted exactly according to the instructions, it will come out (in any case, look at the path in the corresponding line of Explorer):
cd\tools_r25.2.3-windows\platform-toolsIn the screenshot you can see how I entered the same commands. As a result, the device will boot into fastboot mode.

4. Now open the command line (or skip this item and continue working with it if you have just transferred Android to fastboot mode through it). The easiest way to get there is to press the key combination “ Win» + « R" and enter:
cmdAfter that, click " OK».

5. You will be taken to the command line.

6. Now you need to specify the path to the folder with the firmware. Type the following command to go back to the folder.
cd/Click " Enter».

7. My path to the recovery folder is: “ C:\ Program Files(x86)\Android\android-sdk\platform-tools" So I enter (you enter yours):
cd Program Files (x86)\Android\android-sdk\platform-toolsAnd again we press “ Enter».

8. All that remains is to enter:
fastboot flash recovery recovery.img« recovery.img" is the name of the file being flashed. Remember I advised you to rename the recovery file? We did this for convenience so as not to enter something like " recovery-clockwork-6.0.4.7-flo.img».
After entering this command, press “ Enter».
9. As a result, we receive the following message.

Congratulations! You have successfully installed custom recovery (CWM) using Fastboot utilities!
Method 3. Flash Recovery via the Rashr application
This method is also incredibly simple and convenient, but requires root rights. Their receipt is written at the beginning of the article in “ Method 1».
1. Install the Rashr - Flash Tool application, open it and provide Root rights.

2. In the list of options, select " CWM Recovery».

3. Then the program will display a list of available Recovery for your device. In my case, Rashr showed 2 options: ClockworkMod with support for taps on the screen and the classic option (controlled by the volume and power buttons).

4. When you see the download prompt, click " Yes».

5. Then the download of CWM Recovery for your Android smartphone or tablet.

6. At the end, a notification will appear that the firmware was successful and you now have a modified recovery installed. You can reboot into it and try it out. To do this, click " Yes».

Perhaps this installation method can be called the simplest. The only thing it needs is root rights.
Method 4. Install Recovery on Samsung in Odin
If you have samsung device, you can install ClockWorkMod Recovery on Android using the proprietary Odin utility. Here I will briefly tell you what to do.
- 1. Find and download recovery for your Samsung phone or tablet.
- 2. Connect the device to the PC via USB and put it into boot mode. How to do this is written in the full article at the link above.
- 3. Open Odin and click on " AP" (in some versions of Odin this field is called " PDA»).

- 4. Click the button Start" and wait until the firmware is completed.
That's all! I hope you found this article helpful!
Users who do not like the standard recovery menu on Android have an excellent alternative in the form of TWRP Recovery, but the question arises regarding how to install TWRP Recovery.
This option Recovery differs, first of all, in that all its functions are completely touch-sensitive.
That is, you will not need to use the volume buttons and phone menu to select certain items in Recovery.
Often all this is extremely inconvenient and only causes unpleasant emotions. Therefore, many people decide to install TWRP Recovery.
Besides the sensory choice, it has many other benefits. But we won’t consider them now, but instead we’ll talk about installing this custom recovery.
Content:Option #1. GooManager
This application has now been renamed TWRP Manager. It is one of the simplest, and therefore most convenient, for setting the menu we need.
All actions are performed in the same window. In general, the developers did their best.
The installation process is as follows:
- First you need to download the manager to . There is a corresponding link for this.
- Next, the application is installed and launched. After this, you should go to the application menu. This is done by swapping to the left.
- In this menu you will only have to select “Install TWRP”.
- In the next window you just need to click “Install Recovery”.
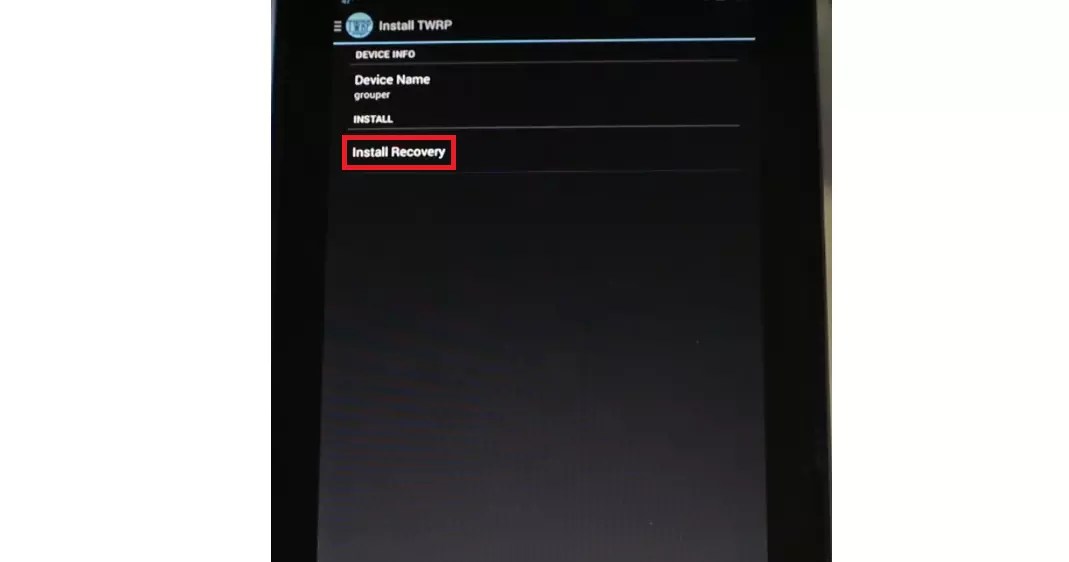
Rice. 2. “Install Recovery” in the manager
- The installation file will be searched. Its name should include the name of your device. For example, if you have Samsung Galaxy S3, then the downloaded file will be called “openrecovery-twrp-1.1.1.1-i9300.img”, and “i9300” here, in fact, means S3 (this is the code this phone).
- So, if the name of the downloaded file does not contain the name of your device, you should not install it. It is better to use other methods described below. And if there is, all you have to do is click “Yes” in the message that appears after downloading.

That's all, the process is completed, and you can safely use the new menu.
But it's not that simple.
Attention! To use this program you need root rights.
One of the most simple ways give the device the so-called is to use the Root Checker application.
All you need to do after downloading and installing it is just go to the “Verify root” tab and click on the same inscription a little lower.

Rice. 4. Using Root Checker for assigning root rights
In principle, this is true for almost all the methods described in this review. Therefore, before performing each of them, assign root rights to your device.
This, by the way, is useful in many other cases when you need to add some unusual functions to your phone or tablet.
Now let's get back to installing the recovery.
Option #2. Official TWRP App
Of course, the creators of this wonderful and convenient menu also made own application to install recovery.
But the problem is that often the operating system itself blocks its bootloader.
Therefore, you have to use the above-mentioned manager or other programs, which we will talk about later.
However, you should not try to understand why this happens. You won't succeed. Also don't be afraid unofficial applications to install TWRP.
All of them are absolutely safe, at least those described in this article.
So, to use the Official App, do this:
- It all starts, of course, with downloading. Here is the download link to Google Play.
- After installation, open the program. In the first window, click on the “TWRP FLASH” button at the bottom.

Rice. 5. “TWRP FLASH” button in the first window of the Official App
- In the next window, select your device. To do this, click on the drop-down menu where it initially says “ Select Device» .
- Next, click on the “Download TWRP” button to download installation file. Here the principle is the same as in the first option - if the name of your device is not in the name, then something is wrong. And it's very easy to check. You need to go to the “Download” folder or the place where all downloaded files go and check the recovery file there. When this step is completed, the program may automatically determine what needs to be installed. If this is not the case, then the field under the device will still contain the inscription “Select a file to flash”. Then click on it and select the downloaded installation file.
- In the end, you just need to use the “FLASH TO RECOVERY” button.

Rice. 6. Main menu TWRP installation via Official App
As we see, in in this case Everything is also quite simple. We recommend trying to use the Official App first. But this does not always work out.
Then you need to take one of the managers mentioned in this article.
And if neither the Official App nor GooManager wants to cope with the task we are considering, then there is also ROM Manager.
Hint: Also, in cases when something doesn’t work out for you, write about it in the comments. We will definitely help you solve the problem and install TWRP.
Contact us!
Option #3. ROM Manager
Using this manager is even simpler than the previous two. The process is as follows:
- From the very beginning, the program is downloaded from Google Play. Here is the link. Then it is installed on your smartphone/tablet. This happens in the same way as with any other application.
- After launch, a welcome window will appear describing the functions of ROM Manager. Click "OK" to continue.
- Next, click on the three vertical dots on the right top corner and select the previously downloaded recovery file. This is what will be installed.
- Then in the section " Recovery Mode» select the item “Recovery Setup”.
- In the next window you will need to click on the item responsible for TWRM (it will be located next to “ClockworkMod Recovery” in the section "Install or Update Recovery").
- Finally, in the last window you need to click on “Install”, wait for the download to finish the desired file and its installation. The user can only observe this process, but not participate in it.

Rice. 7. Using ROM Manager
As you can already understand, in this case it is necessary to manually download the .img file in advance, that is, the one that is needed to install the recovery.
And you can do this on the official website of this custom extension twrp.me. The download process is as follows:
- First you need to go to the me/Devices page and use the search bar to find your device there.
- From the suggested options that appear under the search, select the one you need. There can be several .img for one device - they differ depending on the processor model or other features.

Rice. 8. Selecting the installation file on twrp.me
- Next scroll the page to the “Download Links” section. If you are in America, click on the link “Primary (Americas)”, and if in other countries, then your option is “Primary (Europe)”.

Rice. 9. “Download Links” section of the twrp.me website
- After this, all that remains is to dump the file into memory / or directly to the memory card.
The need to download will be relevant for most of these managers. In particular, this is true for Flashify.
There comes a time in the life of every Android smartphone user when he wants to optimize software part your device. Install a new kernel, unlock a radio module tied to a contract operator, or even install more new version Android. Most often, such actions cannot be performed using the device’s built-in tools: standard Recovery has a meager set of functions, allowing you to reset to factory settings or install something signed by the manufacturer software. For maximum control over your smartphone, you will have to install an extended version of Recovery, which is being created by a community of enthusiasts around the world - CWM Recovery.
What is Recovery: standard and custom
Any smartphone or tablet may begin to work incorrectly over time. This may be due to user error or a software glitch, but the problem does occur and needs to be addressed. To do this, the device has the ability to start at the start of a special mode operating system- Recovery. It's not even loading the OS, it's launching it specialized program, designed to correct errors in the device and some other actions.
Standard Recovery, installed from the factory, has very limited capabilities:
- clearing user and system data;
- installation of official system updates.
In addition, there are devices in which there is no access to Recovery at all, since the manufacturer does not want the user to be able to update the firmware.
Therefore, enthusiasts install custom Recovery, the capabilities of which are incomparably wider. This includes installing any system components, selectively clearing or deleting user settings, a built-in file manager, mounting the device as removable media when connecting to a computer and much more. Such a program is the only chance to revive the device if the Android system on it is damaged and does not work properly.
The leader in downloads and installations is ClockworkMod Recovery(CWM).
Benefits of CWM Recovery
ClockworkMod Recovery is system utility an order of magnitude more powerful than the built-in factory one. Thanks to it you can create complete backups operating room Android systems, and also install various software and all kinds of kernels and firmware on the device, and much more that factory Recovery does not do. ClockworkMod Recovery is installed instead of the factory menu in a special section of the device’s internal memory.
There are almost hopeless situations in which ClockworkMod Recovery can help. For example, if a smartphone or tablet cannot boot for any reason, this utility will help restore the operating system, with all its applications and settings.
Installing CWM Recovery - methods for every taste
Ways CWM installations Recovery a lot. Inexperienced user will prefer utilities with graphical interface, "guru" - command line and FastBoot. In addition, different hardware can be supported by different utilities, and access to command line and completely closed. Installation of custom Recovery is performed in the same way.
Rom Manager utility - installing CWM Recovery from Android
Rom Manager is a system utility that can be installed from the store Google applications. In addition to Recovery firmware, the program allows you to manage all Recovery functions from Android without rebooting your smartphone. You will be able to create Backup firmware and restore them, install Android kernel OS, new firmware both from a memory card and OTA (over the air). You can also format memory cards connected to your smartphone, manage partitions on them, and much more.
Eat regular version programs and Premium. Free option It can do practically nothing and is intended for familiarization. Therefore, you should purchase the advanced version of the application.
To install CWM Recovery on your device using Rom Manager, you need to:
The utility will download the Recovery image from the Internet; while it is running, the smartphone must be connected to a Wi-Fi or 3G network. Internal section smartphone or microSD card must contain enough free space to download and unpack the image.
The program has not been updated since 2014 and is guaranteed to support only certain device models.
Table: smartphone models that support the ROM Manager program
| Acer Liquid | Advent Vega | Captivate (MTD) | Commtiva Z71 (Boston, Blaze, and more) |
| Dell Streak | Dell Streak 7 | Droid Eris (CDMA) | Droid Pro |
| Elocity A7 | Epic4G | Evo Shift | Galaxy S Captivate |
| Galaxy S Fascinate | Galaxy S i9000 | Galaxy S Vibrant | Galaxy Tab - ATT |
| Galaxy Tab - T-Mobile | Galaxy Tab - Verizon | Geeksphone ONE | Geeksphone Zero |
| Google Galaxy Nexus gt-i9250 | Google Nexus One (GSM) | Google Nexus S | HTC Aria (GSM) |
| HTC Buzz (Wildfire) | HTC Click/Tattoo | HTC Desire | HTC Desire CDMA |
| HTC Desire HD | HTC Desire S | HTC Dream (GSM) | HTC Evo (CDMA) |
| HTC G2 | HTC HD2 | HTC Hero (CDMA) | HTC Hero (GSM) |
| HTC Incredible (CDMA) | HTC Incredible S | HTC Legend | HTC Magic (GSM) |
| HTC MyTouch 4G | HTC Sensation | HTC Thunderbolt | Huawei Ascend |
| Huawei Pulse | Huawei Pulse Mini | Huawei U8150 Ideas | i9000 (MTD) |
| Ion/MyTouch 3G (GSM) | LG Ally | LG Optimus 2X | LG Optimus One |
| Motorola Backflip | Motorola Cliq | Motorola CLIQ XT/Quench (MB501) | Motorola Droid (CDMA) |
| Motorola Droid 2 | Motorola Droid X | Motorola Milestone | Motorola XOOM |
| MyTouch Slide | Nook Color | Nook Color (old) | Spice MI700, Commtiva Link N700 and more) |
| T-Mobile G2X | Vibrant (MTD) | Viewsonic GTab | ZTE Blade |
When flashing an unsupported smartphone, you act at your own peril and risk getting a “brick”. If CWM Recovery is already installed and you need to manage it through Rom Manager, there should be no problems. Smartphone users and Samsung tablets must also be careful.
Video: ROM Manager - quick access to Recovery functions
Possible problems with the Rom Manager program
Before running the utility, it is important to make sure which version stock recovery installed. Performance is guaranteed only with version 2e and lower. Version 3e blocks Rom Manager, and the result may be a dead smartphone. To find out the Recovery version:

FastBoot - installing CWM via ADB using a computer
This method is the oldest and most correct. Here we write the CWM Recovery image directly to the Recovery section of the smartphone’s memory. The method will work if the device’s bootloader is not locked, which often happens Samsung smartphones and Sony. You also need to make sure that the device’s file system contains a special Recovery partition. Before starting work, do not forget to enable USB debugging on your smartphone.
If the conditions are met, we proceed to preparing and recording CWM Recovery:

Video: Recovery firmware via FastBoot
Rashr is another program for installing CWM Recovery from Android
Rashr is a program very similar to Rom manager, which we discussed above. But there are a number of important differences:
- the program is supported by developers, latest version released January 2017;
- Rashr is free, all program functions are available immediately after installation;
- the program supports significantly more devices than Rom Manager, and the risk of bricking your smartphone is minimized.
To install a custom Recovery using Rashr, you need to do the following:

Do not forget that all firmware operations and manipulations with internal memory must be carried out with the battery charged to 90–100%.
Recording CWM Recovery using Odin for Samsung smartphones
Owners of smartphones and tablets Samsung They were lucky - the manufacturer released the Odin service utility for them, with which you can flash CWM Recovery.
Download to your computer Odin program and get started:
- Transfer your smartphone to Download mode- turn off the device, hold down the “Power”, “Volume Down” and “Home” keys. Then press the Volume Up key to confirm your selection.
- Then connect your smartphone to your computer and run the Odin program on it. If the device is recognized normally, the utility will display the number of the virtual port to which it is connected. By pressing the PDA button, specify the path to the downloaded archive from CWM Recovery.
- Then click Start and patiently wait for the firmware process to complete. All that remains is to disconnect the cable and reboot the device.
How to log into CWM Recovery after installation
Logging into CWM Recovery is very simple:
- Turn off the power of the smartphone.
- Simultaneously hold down the Volume Up, Home and Power buttons.
- As soon as the device screen lights up, release the buttons.
If your smartphone has Cyanogen Mod firmware, you can configure the shutdown menu, then the “Reboot to Recovery” item will be present when you long press Power.
You can also enter CWM Recovery from the Rom Manager or Rashr utilities.
Table: possible errors with CWM and how to resolve them
| Error | Cause and solution |
|---|---|
| FastBoot or Rashr cannot install Recovery |
|
| CWM Recovery does not see the memory card | The memory card is not formatted or contains unsupported file system. Format it using desktop computer or laptop. |
| CWM Recovery does not see internal memory devices | CWM Recovery is installed, which does not support your device or partially supports it. Download the correct image and flash the firmware again. |
| CWM Recovery menu does not work | Installed CWM Recovery for a similar device, but with different key codes. Install the correct image. Alternatively, you can install a TWRP Recovery build with touchscreen support. |
| CWM Recovery won't start | CWM Recovery is not installed correctly. Reinstall the program. |
We looked at several ways to install CWM Recovery on a smartphone or tablet. Universal method no, each of the programs works with certain types of devices. Carefully study the documentation before installing the firmware, use the experience of others and success is inevitable. If there is no CWM Recovery for your device, do not try to flash an image from a similar one. It's better to be without Recovery than with a dead device.
Type of stock recovery
But in this case, we are interested in installing custom assemblies, which is only available for third-party Recovery. They are created by a huge community of developers of the operating system from Google, and their capabilities are much wider compared to stock ones. Installing a new recovery is essentially similar to flashing the stock kernel (OS) firmware on your phone. Only in this case the user switches to TWRP mode or Clockwork Mod. Note that prerequisite To install third-party recovery, you need to obtain administrator rights (root access).
How to enter recovery mode
To reflash Android, the first thing you need to do is enter recovery mode. To do this, you will need to turn off the device and then enter the required combination of hardware keys. Depending on the manufacturer mobile device, it may vary, but the most common ones are:
- Power/lock buttons + volume down.
- Home key + power button + volume up.
- The same as the previous point, but the volume button is missing.
More accurate and detailed instructions information on how to launch the recovery menu can be found on the developer’s official website. You need to press several keys at once and hold them until a green robot appears on the screen. The whole process is clearly presented in the video, which you can watch below.
Algorithm of actions
And so, let's get to the fun part. The algorithm for flashing an Android smartphone through recovery mode is quite simple and looks like this:
- Find and download to memory card required version firmware in the form of a zip archive.
- Turn off your mobile phone and enter recovery mode according to the instructions presented in the previous section.
- In the menu that appears, select Wipe / Factory reset to return to factory settings (if necessary). This way you can restore the parameters of an incorrectly operating OS.
- To install new firmware select “Install” (located in the upper left corner).
- Specify the path to the archive directory with the firmware and start the process.
After this, the process of installing new firmware on your smartphone or tablet will automatically begin. When finished, a corresponding notification will appear on the screen and you can restart your mobile device. To do this, select “Reboot” and then “System”.
The entire firmware process is clearly demonstrated in the video below.
Recovery firmware
As mentioned above, standard menu recovery is intended for diagnosing sensors and functions of a mobile device. It can also be used to install official updates. But for use custom firmware, you will need to reflash the recovery on your phone. To do this you will need TWRP or CWM Recovery, which you can install using special utility Rashr— Flash Tool. Please note that before installing it on your phone, you need to obtain administrator rights.
The program interface looks as simple as possible. The user only needs to follow the installation instructions by clicking on the “next” button. If CWM Recovery is already installed on your mobile phone, the program will prompt you to standard features: Firmware or reset to factory settings.
Nowadays, you won’t surprise people with a smartphone. Almost every 3rd person in Russia has such a gadget. Few people buy expensive devices, only the wealthy part of society. Therefore, most have gadgets on a budget basis. After a short period of time, when using it, the phone's memory runs out, the RAM memory becomes clogged, or other problems arise. Then people start experimenting with their phones, deleting something or installing some programs for system tasks, etc.
An unknowing person soon turns his smartphone into a brick. And to prevent this from happening, there are special forums where they talk about any gadget and give various step-by-step instructions for solving problems with your device.
IN at the moment, You are on exactly such a forum. In this article, I would like to tell you, as a beginner, how to easily and quickly flash a custom Recovery firmware for your smartphone. That is, replace (install) a modified one instead of the native, official Recovery.
Why are modified recoveries installed? Firstly, due to their various functions, you can perform various system actions with the gadget. Next, you can install any unofficial firmware to the phone (modified firmware). Also do Backup your device for further recovery. The following modified recovery firmwares exist: CWM Recovery, TWRP Recovery.
In this article, I will not explain in detail about modified firmware for recovery. On the Internet there is large number information on this issue.
Personally, I use the second type of firmware, namely TWRP Recovery.
In order to quickly and without any hassles install one of these firmwares, we will use the program - Mobileuncle MTK Tools
. This program is only suitable for those phones (smartphones) that run on a processor MTK.
To further perform actions with the phone, you must have Root rights, you must become the administrator of your gadget. How to do this? Our forum will also help you with this problem. Eat whole topic on this issue.
And lastly, you must download the recovery file itself, in following format: recovery.img
.
Remember!!! Each smartphone needs its own recovery file.
Preparatory part
1. We get Root rights to the phone.2. Download the archive with the program to your computer ().
3. Unpack the archive onto your computer. Read the instructions in the archive.
4. Drop the program onto your phone into the root of the CD card or into the created folder.
5. Download the file recovery.img, for your phone!
6. Upload the file recovery.img to the root of the CD card
This completes the preparatory part. Next we move on to step by step installation. Once again, this type of installation is suitable for any beginner in this not difficult task!
Installation

1. Install the program Mobileuncle MTK Tools on your phone. After installation, an icon will appear, a green smiley face in a mask (ToolHero).
2. Launch the program ToolHero(you can read the contents).
3. An update window will pop up. Do not update the program under any circumstances!
4. Click on the Recovery tab.
5. The program will find your file itself recovery.img on your device and show it to you.
6. Click on the Install button.
7. The modified recovery will be installed on your Android system.
8. Through the program ToolHero, reboot to the menu modified recovery.
This completes the installation of the modified recovery.
Tip: First of all, as soon as you go into Recovery, do Data backup your phone.
Warning!!! IN Recovery menu, I advise you not to press anything! Otherwise, there may be problems with the phone! Or it will turn into a brick. Just visually familiarize yourself with the menu and tabs. You can use it only after studying each menu tab. Find out what each tab does and how it works. Only after this can you use the program in full. Material for familiarizing yourself with the modified recovery can be found on forums on the Internet. If you don’t know where to get the material, write to me and I’ll help!
Good luck! Successful actions!