How to burn an ISO disk image to a USB flash drive. How to burn any ISO image to a USB flash drive
Increasingly, modern laptops are being produced without a drive. optical disks. Over time, disk drives and optical discs and will completely disappear, just as floppy disks have already disappeared. Due to the lack of a drive, install operating system from disk is not possible. In this case, you have to use bootable for installation. In this article we will talk about how to do bootable USB flash drive via UltraISO.
Step No. 1. Create a boot disk image.
In order to create a bootable USB flash drive through we need a boot disk image in ISO format. If you already have an ISO image, then you can skip this step and go straight to the next step.
Paste boot disk and run Ultra program ISO. Next, on the toolbar, you need to click on the “Create CD image” button or press the F8 button on the keyboard.
After this, the “Create CD/DVD image” window will open in front of you. Here you need to select the folder in which you want to save the resulting image. You also need to make sure that the created image will be saved in ISO format.


Once the process is complete, you will see a message asking you to open the created ISO image.

Click “YES” and proceed to creating a bootable USB flash drive via UltraISO.
Step No. 2. Create a bootable USB flash drive using UltraISO.
In order to make a bootable USB flash drive via UltraISO, we need to open the disk image. If you clicked the "Yes" button after completing ISO creation image, then you already have a disk image open. If not, then you can open the disk image you need using the "Open" button.

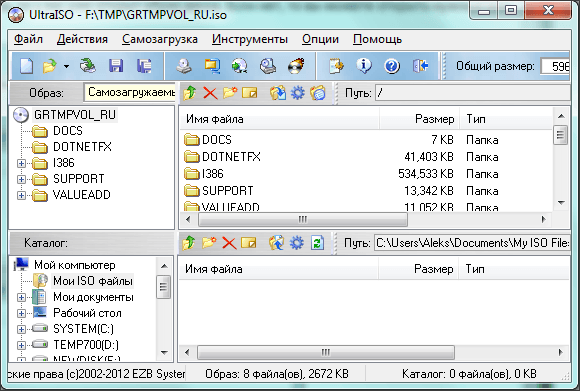
After opening the disk image, files and folders should appear in the UltraISO program window.

After this, a window will open in front of you through UltraISO. Here you need to select a flash drive and click on the “Burn” button.

It should be noted that when creating a bootable flash drive, all data located on the flash drive will be deleted. A special window warns about this. To start the process of creating a bootable USB flash drive, click on the “Yes” button.


After completing this process, you will receive a bootable USB flash drive ready to use.
In addition to UltraISO, you can use other programs to create a bootable USB flash drive. For example, Novicorp WinToFlash, UNetBootin, Windows7 USB/DVD Download Tool and others.
In this article I will tell you how to burn an image to a flash drive (in in this case Windows image) for subsequent installation of the system on a computer. Nowadays, many people have laptops and netbooks that simply do not have an optical drive, or there is no way to install windows from a disk; this is where creating a bootable one comes to the rescue windows flash drives 7. This article is primarily aimed at these tasks.
We will write the image to a flash drive in two ways. The first method will be implemented using a very good ultra iso program, and the second using WinSetup From USB. We will start by considering actions to work with ultra iso, since this method less labor-intensive and the process of creating a bootable Windows 7 flash drive will be quite fast. The second method will remain for those who, for some reason, “didn’t work out” with the first option.
Method No. 1
So, let's go. First, download the program Ultra ISO. After the program has been downloaded, installed and launched (click trial period, if you don’t want to buy), you can start a fairly simple process of writing Windows to a flash drive:
1. You must specify the path to the image that should be placed on your hard drive:
Click “File” => Open (Fig. 1)
Fig.1

Rice. 2

Rice. 3
Method No. 2
This method will also tell you how to write windows to a flash drive. What you will need for this option:
1. A little free time;
2. Computer (with iron, which supports booting from a flash drive);
3. Program for preparing a flash drive ( download);
4. Actually the flash drive itself (even an SD card will do);
5. An image of the operating system that we want to install.
As an example, I will show how we will write an operating system image to a 4GB SD cardMicrosoft Windows 7Home Premium 64-bit. I would like to immediately draw your attention to the choice of operating system. If your computer has less than 4GB of random access memory (RAM), then you should install a 32-bit (x86) version of the operating system, since a 64-bit version will simply clutter RAM unnecessary processes.
Insert the flash drive into USB port and format it to FAT32 or NTFS using Windows. To do this, you need to go to My Computer, find the flash drive there and right-click on its icon. IN context menu You should select “Format...”. In the formatting window, select the file system FAT32 or NTFS (the latter will be better if the flash drive has a capacity of more than 4GB), and also select the cluster size " Standard size cluster" and click the "Start" button. Everything is shown in the picture:

Next, we download a small program in which we will do all the operations we need. There are several programs of this type, but I chose WinSetupFromUSB because it does not require installation and takes up almost no space on disk and easy to use.
Let's launch the program. First, we need to select the device on which we will burn the image. This is done in the drop-down menu at the top (if the flash drive is not displayed in this menu, click on the Refresh button). Next, we need to prepare the flash drive for recording the image, because if we simply copy the image, it will be impossible to enter the system installer, because there is no boot sector. To create it, click on the Bootice button.

In the Bootice utility window that opens, click the Process MBR button, then see if the Grub4Dos checkbox is checked (if not, check it) and click the Install/Config button. In the Config Grub for DOS window, click on the “Save to disk” button, the program will display a window that boot record successfully written to the drive.

We return again to the Bootice utility window, where we click the “Process PBR” button and do everything the same, without changing anything in the last window, click OK.

That's it, now all we have to do is write the image to a flash drive, this is done in the main program window, which we saw immediately upon launch. You need to check the required box - if you are going to install Windows XP, then this is the first checkbox, but if Vista or Seven - the second. Next, click on the “…” button on the other side of the checkbox and set the path where our unpacked image is stored on the hard drive, or simply mounted in a virtual drive using DaemonTools or Alcohol. Click on the “GO” button and wait until the process finishes.

Upon completion, the program will display the message “Job Done!” That's it, dear friends, you can reboot and start installing the operating system.
Also, I advise you to read the article regarding
These days, many laptops and netbooks do not come with CD-ROM drives. Why? There are many reasons for this. The absence of CD and DVD-ROM makes the device lighter, thinner and more compact. In addition, most users prefer a USB interface to a disk drive. Therefore, during the operation of the laptop, you have to write down various software to flash drives. Including installation images operating systems (OS).
This is not difficult to do. Especially if you are using a very useful multifunctional program Ultraiso.
First of all, download and install the application. There shouldn't be any problems with this. The Internet is full of trusted resources from which you can easily download the Ultraiso installer. The installation process of the program is also simple and straightforward.
Next, to write the image to the media, we will need a flash drive. The minimum storage capacity is 4-8 GB. This is enough for an “average” iso image with some game, Windows OS (XP, Vista, 7, 8, etc.) or Linux. In this case, it is best to first delete or move all the information from the flash drive. We also recommend that you format the media.
Finally, download to hard drive laptop or PC OS image. For example, from the official website. Here link to the same Windows 10. Some people download distributions from torrent trackers. There are many options. The main thing is to get licensed, clean software and under no circumstances download a poorly upgraded version with malicious software.
Let's start work
All preparations are left behind. So, we can start initial stage image entries:

For reference! Ultraiso is free to use for a limited time only. On at the moment The test period is 30 days.
Connect the USB flash drive and start recording the image

We are waiting for the end of the process of writing the image to the flash drive.
Now we have reached the final stage of recording the image onto the media. In fact, everything has already been done. All that remains is to wait. The Ultraiso program itself works quickly. But the system can slow down. Depending on the power of the computer and its characteristics, it takes on average from 5 to 20 minutes to write an image to a flash drive.
As soon as the “Recording Complete” message appears, you can close Ultraiso. Then you should check for the presence of the image on the USB drive. Depending on the selected OS, the amount of memory occupied on the flash drive will differ. Least required for Windows distribution XP, most of all for the “ten”. It is also worth noting that if you followed everything strictly according to the instructions, then the media name should change (usually to the name of the image).
By the way, you can now use the created bootable USB flash drive to install the operating system. Just do this through the BIOS menu.
It should be noted that using the method described above, you can write two images (and even more) to the media, if necessary. But only if you plan to use a flash drive to store data. If a USB drive is needed to install the OS, then it is better not to do this.
For reference! Some users complain that sometimes the Ultra ISO program does not record images weighing more than 4 GB. This is no coincidence. The utility simply automatically formats the flash drive in FAT32, where there is a limitation on the size of the files that can be written. You need to independently change the media format to NTFS, and then, when working in Ultraiso, skip the formatting step and immediately click on “Burn”.
What's the end result?
As you can see, burning an image to a flash drive using Ultraiso is not difficult. It also takes a little time. Just a few minutes. If you have any questions, you can always contact us for help or take another look at this article. What else is important? At a minimum, what is easy to create using this utility Bootable USB drives with OS of various families, generations and versions, including not only Windows, but also DOS, Linux, MacOS, etc. You can use Ultraiso to record an image of a game or some other useful software. For example, the same antivirus program.
Thus, this program will be useful to every user. Therefore, be sure to download it to your computer and try it out.
Not all modern laptops have a DVD drive; we are silent about ultrabooks, whose manufacturers initially abandoned the ability to read/write discs for the sake of an ultra-thin body. Therefore, reinstalling the operating system from a disk, as we are all used to doing, will no longer work and we need to look for another option. That is why we decided to tell you through UltraISO - a program that allows you to work with images. Of course, there is more convenient software, tailored specifically for creating bootable flash drives. In addition, it is paid, but there are a number of analogues distributed free of charge. But if you stopped at UltraISO program, we will not challenge your decision and will help you understand its functionality. Well, get your flash drive ready, let's get started!
Create a bootable USB flash drive using UltraISO
So, first of all, we need to acquire the operating system image itself. This could equally be Windows 7 or the newer “Ten”. As a rule, bootable media created not only for installing the OS, but also for resuscitating the computer. However, this is no longer so important - after all, in this instruction we are considering the creation bootable version.It is not for nothing that the name of the program contains the prefix “ISO”, symbolizing the extension of the image file. The image itself can be downloaded on the Internet, on the official website, or borrowed from a friend. This is not so important, the main thing is that it is complete and works flawlessly.
We will need a flash drive with a memory capacity of at least eight gigabytes. This is more than enough. Copy important data from it first, because the media will be formatted.
Creating a bootable USB flash drive using UltraISO
Let's assume that you already have the program installed. Let's get started:
By exactly repeating the steps described above, you will actually write the operating system onto the flash drive and be able to install it.
How to create a bootable USB flash drive from a DVD
At the beginning of the article, we said that the image can be taken from anywhere: download it from the official website, from a third-party resource, or burn it from disk. So let's quickly look at the last option.Let’s imagine that you borrowed a boot disk with Windows 10 from a friend, but for some reason you don’t want to install the OS from it. It is not at all necessary to create an ISO image via third party program, and then make a bootable USB flash drive according to the instructions above - you can go the other way, shorter, by writing the bootable USB flash drive directly: 
Well, now you know how to make a flash drive bootable. All that's left to do is learn how to restore/install Windows from it. But that's another story...
Often when your computer breaks down you have to use a bootable flash drive. With its help you can get to the recovery partition, run command line or edit the registry even if the system itself does not start or does not respond. In this way, you can solve many startup problems and avoid reinstalling the system, and if this does not help, then the same flash drive will be useful for reinstalling the OS. So it doesn’t hurt to have a bootable flash drive at home in reserve.
Typically, bootable flash drives are made from iso image. This is a file that represents copy optical drive . You can unpack it using conventional archivers and work with it, you can use special programs, which are capable of emulating the operation of optical drives and working with a file through them, there are also many applications that will allow you to write an image to another medium, which will be discussed in this article.
Preparing a flash drive
For starters, it's worth transfer from flash drive all information, because during the recording process, all data will be deleted. If you don’t mind losing information, you can leave it on the drive; in most cases, the programs themselves will delete it during operation. You can also format the flash drive, this is required to record some images, it's worth finding out what type file system ntfs or fat32 is required, and recode the flash drive to it.
Third Party Applications
This section will list the utilities that are best used to create a bootable drive.
Ultra ISO
It is better to download the program from the official website; others may contain versions with malware or with additional files, link to the page https://www.ultraiso.com/. After downloading, you will need install file, there is nothing complicated about it, all actions are performed using the usual installation wizard. After starting the program, you should click on the file - open, and then specify the path to the downloaded image. Then, the window will appear full list files. Next you need to click on Bootstrap - Write down image of a tough disk.
After which a window will open in which you should select drive, and then all you have to do is click on record and wait for the process to complete.
Rufus
It is also better to download this program from trusted sources; you can download it from the link https://rufus.akeo.ie/?locale. Unlike the previous utility, this one specializes only in creating boot and multiboot drives. IN top line you should select the drive to which recording will be made; in the next paragraph you need to specify partition scheme, which will depend on the system being installed. In the bottom block you should definitely note “ Create a boot disk", indicate the downloaded iso as the source. 
The remaining parameters can be left as default.
WinSetupFromUSB
You can find the utility at http://www.winsetupfromusb.com/downloads/. The program itself is quite easy to understand and use. All you need to do is indicate the drive, check the box below it if this is the first image to be recorded, then check the box for the required system version and indicate the path to the downloaded element.  Further required click ongo and wait for the process to complete.
Windows 7 USB/DVD Download Tool
The official utility, which can be obtained directly from the developer’s website https://www.microsoft.com/ru-ru/store/b/home?rtc=1. The program is easy to use, in the first window you need to specify the file, in the next you need to specify the drive, and then you just have to wait for the recording. 
Daemon Tools Ultra
This application has many options for working with virtual drives and disk images can be downloaded on the official website https://www.daemon-tools.cc/rus/products/dtultra. After installation, all you have to do is click on tools, then on burn image, after which you will only need to specify the flash drive, image and select recording options that you can leave with default settings.
UnetBootin
A utility for creating bootable flash drives based on Linux, you can download it at https://unetbootin.github.io/. Here you should indicate the version of the system, after which the program will download it, or the path to the image, as well as the drive on which the recording will be made. 
WinToFlash
You can download the program at https://wintoflash.com/home/ru/. In the first window, which is called the transfer wizard, you need to press only on further, and in the second indicate the image file and the path to the flash drive. 
Possible faults
Some utilities refuse to work without NET Framework , usually, it is installed on every computer because many applications require it to work. If the user does not have it, then latest version You can download it from the Microsoft website, but you will have to search for the rest. The problem may also be a version mismatch, 64 bit systems may refuse to write to a flash drive if the action itself is performed in a 32-bit environment. In this case, you should try using a different image or another utility.