What should I do if the msconfig system configuration utility does not start? Fix msconfig utility launch error
When it becomes necessary to configure the operating room Windows systems, many users resort to using a variety of utilities from third-party developers. At the same time, without even suspecting the existence of built-in tools for solving these problems.
One of the most powerful and simple tools The msconfig utility is used for configuration. It can be run on any computer running the Windows operating system, and you do not need to install any additional programs. With this program you can manage the loading of the operating system, installed services and. In addition, using this program you can quickly launch other built-in tools for managing the operating system. In this article we will try to consider the msconfig program and its main capabilities in as much detail as possible.
Launching msconfig is very simple, and there are several ways to do it. The easiest way is to start using search. Open the Start menu or Start screen if you have Windows 8 and type "msconfig". After this, you just need to click on the program icon.

Launching a program using the Start menu
You can also use the Run menu. To launch the Run menu, press the Win + R key combination. After that, enter the command “msconfig” and press enter.

Running a program using the Run menu
In addition, msconfig can be run using the command line or from the folder, the msconfig.exe program can be found in the Windows\System32 folder.
Configuring Windows using msconfig
So, we have launched msconfig, we can get to work. The interface of this program consists of several tabs: General, Download, Services, Startup and Service. Let's look at all the tabs in order.

General Tab
On the General tab, you can select the operating system boot option.
- Normal startup – startup with loading of all drivers and services.
- Diagnostic startup - startup with loading only the main drivers and services.
- Selective launch – launch with loading of selected elements of the operating system.

The second tab is called "Download". Here you can configure the operating system boot process. For example, if your computer has several Windows versions, you can specify which system will boot by default. Here you can also specify other settings related to loading the operating system.
The third and fourth tabs are the most useful for the average user. The third tab is called “Services”; here you can disable/enable services installed on the system.

Services Tab
If you do not have the proper experience, then it is better not to disable standard services. This may lead to unstable work operating system. To hide standard services, check the box next to “Do not display Microsoft services.”

Don't display Microsoft services
Moreover, after hiding standard services, working with the list becomes much easier. You can easily find and disable services that you do not need, which will increase the speed of the system.
The fourth tab is called “Startup”. Here you can manage programs that load automatically when the operating system starts. For example, you can.

Last tab msconfig utility is the “Tools” tab. You can run others here standard means to control the operating system.

Service tab
To do this, select the right remedy in the list and click on the start button.
How to use msconfig?
There can be many scenarios for using the msconfig program. In most cases regular users use msconfig to remove not necessary programs from startup and disabling services.
Also, msconfig can be used as a tool for diagnosing and testing the system. You can run the operating system using diagnostic startup and check its stability. If the operating system continues to fail in this mode, then most likely the problem is in the system files. If the system works stably, then the problem is in the installed applications.
So, it was necessary to run msconfig for some specific purposes. But the error "Windows could not find msconfig. Check that the name was entered correctly and try again. To search for a file, click Start, and then click Find."
- The first thing you need to do is check your computer for viruses and get rid of them.
- Then we will make sure that the file for launching this utility is in place. Go here \Windows\System32\msconfig.exe
If it is missing, then insert a USB flash drive with installation Windows or a disk, press Win and R at the same time. Then enter:
expand \i386\MSCONFIG.EX_ systemroot%\PCHealth\HelpCtr\Binaries\msconfig.exe - If it doesn’t help, then check the registry. Press Win and R at the same time and enter regedit. Let's come here
C:\WINDOWS\PCHealth\HelpCtr\Binaries\MSConfig.exe
Then we come here and check the default value C:\WINDOWS\PCHealth\HelpCtr\Binaries\HelpCtr.exe - Another option could be a stopped service. Go to “Control Panel” -> “Administration” -> “Services”. We look for the “Help and Support” service and if it is stopped, click “Start service”.
- Alternatively, you can try to run system file recovery. To do this, you must have a flash drive or disk with installation Windows. Press Win and R at the same time, enter sfc /scannow, click “OK”. The verification procedure will then begin. If it turns out that system files were damaged, deleted or modified, you will be prompted to install Windows and start recovery.
If you have any questions, write in the comments 😉
The Windows 7 operating system allows you to manage the boot parameters of installed operating systems, manipulate services and startup. The “System Configuration” utility, called by the msconfig command, is intended for this.
How to enter the msconfig.exe configurator?
There are several ways to launch the utility. We will give 3 of the simplest ones.
Search string
To launch the utility, you must enter the word in the search bar of the Start menu msconfig, and then select the found utility from the search results.
Run command
Open the Run submenu located in the Start menu and type in the text field msconfig, then press Enter or the “OK” button.

Command line
Open Start - All Programs, and then in the Accessories folder select " Command line».
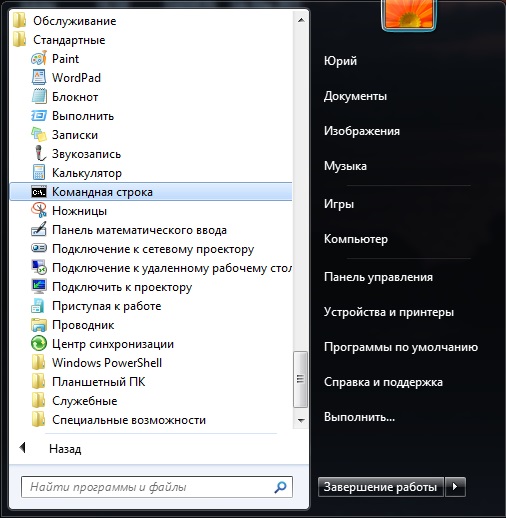
In the window that opens with a black background, enter msconfig and press Enter.

In addition to the listed methods, it is possible to open the utility directly from the folder where it is located. To do this, go to the C:\Windows\System32 directory and run msconfig.exe.
Correctly configuring msconfig for current needs
The "System Configuration" (MSCONFIG) utility window has several tabs: "General", "Boot", "Services", "Startup" and "Service".
General
The “General” section is designed to select one of three options for loading the operating system. By default, "Normal startup" is selected, which loads everything necessary drivers, services and programs at startup.

The user can install “Diagnostic startup” to load only the drivers and services necessary for the system to function. This mode is used to identify the causes of errors in Windows work 7. For example, when loading you started to see an error unknown to you, or after some time the computer simply reboots or displays blue screen"death". The cause may be errors in drivers or system files, or the error may be caused by installed application. If in diagnostic mode there are no problems with the system, then the user program is to blame.
“Selective startup” serves for further diagnostics and identification of the causes of problems in the system. You can sequentially enable additional services and startup programs. It is recommended to start the system by first enabling system services, then enabling items in startup and rebooting. In the last step, enable “Use original boot configuration”, which will correspond to the usual version launch the OS. This way, you can localize the cause and identify the group of programs or services that lead to errors.
The "Download" section allows you to manage the download of installed operating systems. If you have multiple systems installed, you can configure which one will boot first. To do this, select one of the systems from the list and click on the “Use as default” button. Additionally, you can set the waiting time for the user to select a particular system by changing the time interval in the “Timeout” field.

Here you can also configure additional download parameters. Enabling the " Safe Mode» will allow you to start the operating system with disabilities. In this case, only the most necessary drivers and devices are loaded. This mode is used to diagnose software faults.
There are several options for working in safe mode:
- "Minimum download" essentially allows you to download minimum set drivers and use only the required number of devices, without support for network services and devices.
- "Another Shell" allows you to additionally use the command line in safe mode, however Windows Explorer will be unavailable, just like the network.
- "Recovery Active Directory» – allows you to launch Windows Explorer in safe mode with support for Active Directory directories.
- “Network” – loads network services and devices.
- “Without GUI” – disables the operating system boot animation.
- “Boot log” – enables the ability to save information about system boot to a file (keep a boot log). The log is saved in the file “Ntbtlog.txt”, which is located in system folder%SystemRoot%.
- “Basic video” – makes it possible to replace video card drivers. That is, instead of installed video drivers, they will be used standard drivers VGA.
- “OS Information” – allows you to display information about loaded drivers during system boot.
You can also set other additional boot options for Windows 7 by clicking on the corresponding button under the OS list. The purpose of this section is to set limits on the use of physical resources at startup.

- “Number of processors” – limits the use of cores multi-core processors, indicating their number.
- “Maximum memory” – sets the limit of used RAM.
- “PCI blocking” – allows you to limit the use of I/O devices connected to the PCI bus.
- “Debugging” – activates debugging mode. It is used primarily by driver and software developers.
Services
“Services” section – used to enable and disable all operating system services. During system diagnostics, you can disable some services to identify the causes of malfunctions. To hide system services, check the “Hide Microsoft services” checkbox. After that, on the “General” tab, set the “Selective startup” mode and enable the “Load system services” item. On the Services tab, disable all others custom services, restart your computer. If problems do not arise after this, then the user services are the cause. Now turning on services consistently, you can easily determine the source of the problems. If the problem does not disappear, then the reason lies in the system services. Disable all services and then enable them one by one to identify the source of the system failure.

“Startup” section – allows you to enable or disable automatic start certain programs when the OS starts. To disable automatic download any program, you should uncheck the box next to the selected program and click the “OK” button. You can manage startup parameters to diagnose problems or increase system boot speed. Often, while using a computer, a user has up to 20 applications in startup, most of which he is not even aware of. Naturally, such a number of programs significantly slows down loading Windows. If you are diagnosing the system, you can disable all programs in startup, and then turn them on one by one to determine the source of the error.

Service
The “Service” section is used to launch additional system utilities. Here the user can run additional funds diagnostics, administration and management of the operating system. Just select the utility you are interested in (there are brief description each of them) and click on the “Launch” button to open it.

As you can see, the “MSCONFIG” utility is quite easy to use and allows you to diagnose software problems when the Windows system boots. But still chaotic changes in this application can lead to undesirable consequences, so write down the changes you make so that in case of problems you can easily return everything to its original position.
What to do if the msconfig utility does not start?
The question immediately arises: what “overhead” are you running this utility behind? If we assume that you are a programmer and are well versed in the structure of Windows, then you know perfectly well where win.ini is and where system.ini is, and you can edit them directly “on the spot”, it’s another matter if you are not a very advanced user , then most likely, after browsing the Internet, you will launch this utility for two purposes. The first thing is to fix boot.ini, or fix startup.
Let's start with the first one, with boot.ini, boot.ini is this file that determines from which disk and which operating system will boot. In general, the system boots “by default” from the C:\ drive, but in practical work On a computer, I also came across the fact that there are two different operating systems on two different disks, say on one XP, on the other ’95 or NT, I gave this solely as an example. There were also options when the same operating system is installed on different disks, and the second copy is kept “every fireman”, if the computer starts to work unstable, something happened due to old age with motherboard or problems with the hard drive, then having a “spare set” of Windows is sometimes very justified. There were also some very incidents where there were two “sets” of the same operating system on one disk. This happens when an operating system is installed on the disk for the second time, and at the same time Windows carefully leaves the old copy intact, renames itself Windows.0 (1,2,3...) and the computer continues to work. Get rid of old system not so simple, and at some stage it’s easier, without removing it from the list, just shove it at the very end so that it doesn’t load “by default”.
Accordingly, if problems arise and it becomes impossible to manually select each time the required copy operating system, then it makes sense to correct boot.ini, and if you Windows problems, then msconfig may not start from its usual place, namely some kind of “command line” in the start menu.
And it doesn’t make sense to launch it from there in order to “fix” boot.ini. It is more convenient to edit the boot.ini file in the “My Computer” menu with the right button, “Properties”, “Advanced”, “Boot and system recovery...”, the “Options” button and in the window that opens the “Edit” button. Notepad opens, and in the notepad there is a boot.ini file, which you can correct as needed. The main thing is to be fully aware of what you are doing, why you are doing it, and what the consequences of your wrong actions may lead to.
I won’t describe in detail how exactly to edit the boot.ini file, because if you are not very computer savvy, then it’s better not to go there!
The second reason why an ordinary user may need to run the msconfig utility is to fix startup. It is no secret that almost all programs installed on a computer dream of installing a module for requesting their updates on the network for you to autoload. On the one hand, it’s a useful thing, but on the other... When there are a lot of people who want it and they all register themselves in autoload, then by doing so they steal your precious RAM and slow down both the system boot itself and the speed of the computer. Therefore, autoloading still needs to be “cleaned” from time to time. Something has to be sacrificed. And besides, if your Internet is not “Unlimited” and not so “fast”, well, let’s say, mobile, then unnecessary updates, which are often very voluminous, by and large, are of no use to you. It’s better to use your hands and when it’s more convenient for you.
In the course of the story, I will mention how easy it is to put any program into startup. If you constantly need this program, then, of course, this is where it belongs. For me, such programs include Punto (semi-automatic switching of the keyboard layout) and, accordingly, connecting to the network.
Other users have their own favorite programs that they constantly need.
The program is included in autoload simply. Menu “Start”, “All Programs”, “Startup” with the right mouse button and in the “Explorer” menu that opens. You can simply enable the program into startup by dragging the shortcut to the “Startup” menu, but to put things in order and clean anything, I personally find it more convenient this way, through “Explorer”.
But let's get back to autoloading. Not all programs that we then see in the “tray”, in the lower right corner to the left of the clock, can be seen in startup through the “Start” menu.
Actually, it is most convenient for this purpose to use the msconfig utility, but if it does not work for some reason, then you will have to use third party programs startup maintenance. Personally, for the most common tasks I use the Advanced utility package System Care, there, in the toolkit, among other things, there is startup cleaning.
But not everything is reflected there. I don’t know why. Most full information Still, only msconfig gives information about startup, but if necessary, before reinstalling the system, you have to use the services of “third-party clients”.
All examples are considered for Windows XP
Manage the boot parameters of several operating systems, configure the list of applications and services for startup, explore the built-in utilities for monitoring and systematizing operating system components such as system recovery, resource monitor, task manager, registry editor and many others - the built-in software will help you deal with all this system utility MSConfig.
But what if MSConfig won't start neither through a call using the Run miniform, nor through command line mode? In this case, we will share with you some tips on how to correct the current situation and tell you what measures should be taken in order to bring MSConfig back to life.
What is MSConfig and what does it do?
Essentially, it is a program for configuring OS settings Windows family. If the system is in standard mode stopped starting, you can try to find a service or component that is interfering with normal loading and disable it in the system so that the error is corrected. The whole task is to know exactly which service is an obstacle in a given situation, and then simply disable it by selecting the appropriate box.
If MSConfig fails to launch, it usually displays an error message stating that the file was not found and prompting us to use a manual search tool to locate the utility. Most often, this result is a consequence of massive virus attack. Let's try to avoid unpleasant consequences by resolving the situation in our favor.
So what should you do if MSConfig won't start?
1. The very first step that should be taken in this situation is to scan your operating system for viruses with a powerful antiviral agent that you trust (this could be Avast or 360 Total Security, as well as any other reliable software package). In addition to this, you should first download the most latest versions antivirus databases so that the inspection is effective and efficient.
2. The next action that we will resort to in the hope of restoring the functionality of the utility is checking the access rights restrictions. It is worth noting that under account With limited rights, MSConfig does not start in a number of cases. Therefore, if you are using just such an account, try to run the utility again.
3. Another useful method to fix the problem with starting the MSConfig utility is to try to start it in safe mode.
In Windows 10/8.1/8 - insert a bootable CD with an operating system into the laser drive and boot the computer from it. You can also use a USB flash drive, if it is more convenient for you (in this case, you will have to first make a number of settings in the BIOS, and one of our next articles will be devoted to this). When loading, the login screen will appear. Click the “System Restore” button at the bottom.

Next in boot menu select the section “Diagnostics” -> “ Additional options" -> "Download options". If you did everything correctly, you will see a list of operating system startup modes, in which 3 items will correspond specifically to safe mode. Press the F4, F5 or F6 keys, following the instructions on the screen.

When the system is finally loaded, we log into Windows under an administrator account and perform all the necessary manipulations in MSConfig, after which we check the standard loading in action by disabling necessary services and applications.
In Windows 7/Vista/XP - while loading the operating system, press the F8 key repeatedly until a list of boot options appears on the screen, including support for VGA mode, debugging, boot network drivers, and safe mode, which is what we actually need. Select the “Safe Mode” option and press Enter.

Important note: the button must be pressed just before the Windows logo appears. You should repeat the press many times, otherwise you will miss the right moment, and the loading procedure will have to be repeated again, from scratch.
If MSConfig still does not work, try the next step in the instructions.
4. Perform a Windows system file check.
In Windows 10:
Right-click the Start button and select Command Prompt (Admin) from the pop-up menu. In the prompt that appears (in the place where the cursor is blinking), enter the command “sfc /scannow”. As a result, system objects will be checked for integrity. This operation will take a little time (10 to 15 minutes), so just sit back and wait for the text message with a report on the results of the procedure.

After the above-mentioned time period, the testing procedure will be completed, and we look at its results. If you see the message “Files required for correct Windows works, have been replaced by unknown versions,” then you’ve hit the nail on the head. Paste boot disk with Windows OS and follow the instructions of the wizard.
If you see a message in front of you that “Windows Resource Protection has not detected any integrity violations,” then the system files are not damaged, and the reasons why MSConfig does not start should be looked for elsewhere.

On Windows 7:
To run a similar check procedure in earlier environments, you can resort to the Run mini-window. Having selected it in the start menu, enter the query “cmd”, and then repeat all the same steps described earlier.


This concludes our article on why the MSConfig utility does not start in the Windows operating environment. Using the above recommendations, you can bring the utility back to life and configure the computer boot in accordance with your preferences and wishes, which is what we wish for you.