Is it possible to install Linux on a tablet? Changing a robot to a penguin, or how to install Linux on a tablet
Detailed instructions for converting any device running under Android control, V full-fledged computer based on Linux.
Running Linux on Android is possible! And you don’t need a device with root rights for this: all the necessary software is available in the official store Google Play. In just 10–15 minutes you can get an operating system that differs from Android in advanced functionality.
Note: if you follow our instructions, Linux OS will be running in a virtual environment. Android will still work in background. To call such a system complete would be incorrect. Nevertheless, it copes well with a list of standard tasks.
Close everything before installation Not required applications and clear the RAM of your Android device.
1. From the Google Play Store, install GNURoot Debian and XServer XSDL.
2. Before you start installing Linux, make sure that your device is connected to a stable Wi-Fi networks. Launch GNURoot. The required environment packages will begin downloading.
Installation takes from 30 seconds to several minutes depending on the speed of your Internet connection. Ignore the tickers until the following message appears:
root@localhost:/#
Those familiar with the concept of “root rights” should not be scared by this line: the application will not cause any harm to the device, since it works in a “sandbox”.
3. Enter the following command:
apt-get update
Wait until the packages are downloaded. This will be indicated by the line Reading package lists...Done.
4. Now enter another line:
apt-get upgrade
To the question “Do you want to continue?” enter English letter Y and press Enter. The installation of packages will begin.
This time the installation procedure will take a little longer. Wait patiently for the installation to complete until the coveted line appears:
root@localhost:/#
Wednesday Debian Linux installed, and now you can proceed to deployment graphical shell.
5. Installation of all Linux distribution packages is performed with the following command:
apt-get install lxde
There is also an option to install the system kernel using the line:
apt-get install lxde-core
Confirm the installation by re-entering Y and pressing Enter. The package download process will begin.
During installation, make sure that all files have been successfully downloaded, and that when unpacking, your device has not run out of free space. Otherwise, the system startup will fail.
6. To complete the installation operating system You need to download three additional utilities:
- XTerm - to access the terminal from the Linux graphical shell;
- Synaptic Package Manager - for managing apt packages and downloading applications;
- Pulseaudio - for installing sound drivers.
All three utilities are installed using one GNURoot terminal command:
apt-get install xterm synaptic pulseaudio
About 260 MB of data will be downloaded to the device.
7. Now minimize the GNURoot application and open the previously installed XServer XSDL. Agree to download additional fonts. After the installation is complete, tap on the screen several times (the application will ask you to select the resolution and font size - it all depends on your preferences) until you see a splash screen with a blue background and white text.
Re-launch GNURoot and enter the following two commands one after the other:
export DISPLAY=:0 PULSE_SERVER=tcp:127.0.0.1:4712
startlxde &
The sequence for further restarting the system (when you want to open Linux again) looks like this: run XServer XSDL and wait for the blue screen, open GNURoot and enter the two commands above, return to XServer XSDL.
If the terminal complains about an invalid command, return to step 5 of these instructions and try installing a bare kernel. Check the memory status of your Android device.
8. Now open XServer XSDL, wait a few seconds, and you'll have Linux ready to go.
To install applications, in the lower left corner, open the Start menu and select Run. Type Synaptic and press Enter.
In the window that opens, use the search and install the necessary applications. It could be Firefox browser, GIMP image editor, office suite Libre and other Linux compatible programs.
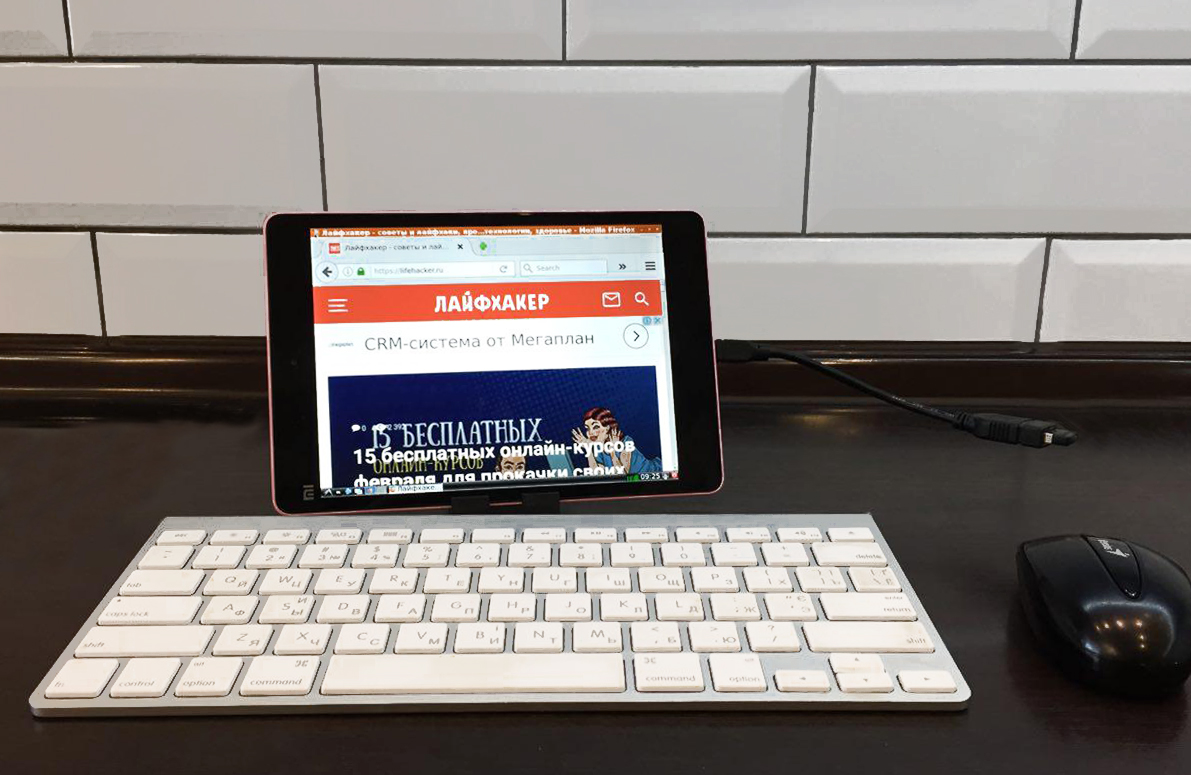
Of course, this option for installing Linux cannot be called a full-fledged launch of the operating system on Android. Virtual Linux has several limitations, but when used wireless mice and keyboard (possibly connected using an OTG adapter and a USB hub), you can turn your smartphone or tablet into a laptop computer with the functionality of an adult OS.
In this article we will tell you in detail how to install Linux to an Android device. For installation and full-fledged work alternative system you will need: a smartphone or tablet, a software emulator, root rights and several gigabytes of free space.
1. Installation applications complete linux installer
Enter into the menu Google search Play the word “emulator” and get a list of several tens or so identical utilities. They are all good, but we focused on the Complete Linux Installer application. It is completely free, perfectly localized and equipped with detailed instructions for beginners.
The program can be downloaded from http://goo.gl/5C6Xa. The installation algorithm for Complete Linux Installer is no different from installing any other software, so we will not dwell on this point.
2. Working with the Complete Linux Installer application
Before starting to work with the program, I would like to emphasize once again: what we are describing in this article is not installing Linux instead Android, but emulation of the operation of one system in another.
So, launch the application and agree to install additional software components. It is working with these modules that will subsequently make it much easier for you to use the operating room. Linux systems.
As mentioned earlier, Complete Linux Installer requires root rights, which the application will remind you of in a pop-up window. We provide the program full access to the system functions of the mobile device.
This completes the initial preparation of the emulator for operation. The main application menu will open in front of you. Go to the sub-item “Installation Guide”.
The emulator will scan the hardware of your gadget and display a list of operating systems that are guaranteed to run on your device. mobile device. We choose Ubuntu 13.10 as an example.
From this moment on, the program begins to “guide” you through the stages of installing the operating system, accompanying each necessary action detailed instructions. For example, after reading the emulator requirements in the first step, be sure to install “Terminal” and “VNCViewer” in the second. Only after this select “Download image”.
Read the description of the differences between distributions of the Linux operating system and choose the one you need.
Create at the root external storage gadget folder with the name future system. This will make the search much easier for the program. necessary files. In our case, we create the “ubuntu” directory. Unpack the downloaded archive into this folder.
As a result, two files should appear in the “ubuntu” directory. One of them is with the .img extension. This is the image of the Linux system being launched.
After completing these steps, go to the “Launch” sub-item of the main menu of Complete Linux Installer and click the auxiliary menu “Settings” in the right top corner windows. By selecting the “Edit” option, provide the application with the full path to executable file systems. Confirm your choice by clicking on the “Save Changes” button.
This completes the next stage of installing an alternative operating system into the memory of your gadget. Feel free to select the “Run Linux” option.
The application will launch a terminal in the background to run test commands and request root access to the device's system functions. We allow it.
Now your smartphone or tablet will be able to work as an emulator of the Linux operating system and you will have access to all the capabilities of the operating system with a penguin on the logo - from executing simple commands in the terminal to installing a full-fledged graphical environment. Linux installation on Android is complete.
Running Linux on Android is possible! And you don’t need a device with root rights for this: all the necessary software is available in the official Google Play store. In just 10–15 minutes you can get an operating system that differs from Android in advanced functionality.
Note: if you follow our instructions, Linux OS will be running in a virtual environment. Android will still be running in the background. To call such a system complete would be incorrect. Nevertheless, it copes well with a list of standard tasks.
Before installation, close all unnecessary applications and clear the RAM of your Android device.
1. From the Google Play Store, install GNURoot Debian and XServer XSDL.
2. Before you start installing Linux, make sure your device is connected to a stable Wi-Fi network. Launch GNURoot. The required environment packages will begin downloading.
Installation takes from 30 seconds to several minutes depending on the speed of your Internet connection. Ignore the tickers until the following message appears:
root@localhost:/#
For those familiar with the concept of “”, don’t let this line scare you: the application will not cause any harm to the device, since it works in a “sandbox”.
3. Enter the following command:
apt-get update
Wait until the packages are downloaded. This will be indicated by the line Reading package lists...Done.
4. Now enter another line:
apt-get upgrade
To the question “Do you want to continue?” enter the English letter Y and press Enter. The installation of packages will begin.

This time the installation procedure will take a little longer. Wait patiently for the installation to complete until the coveted line appears:
root@localhost:/#
The Debian Linux environment is installed, and now you can proceed to deploy the graphical shell.
5. Installation of all Linux distribution packages is performed with the following command:
apt-get install lxde
There is also an option to install the system kernel using the line:
apt-get install lxde-core
Confirm the installation by re-entering Y and pressing Enter. The package download process will begin.
During installation, make sure that all files have been successfully downloaded, and that when unpacking, your device does not run out of free space. Otherwise, the system startup will fail.
6. To complete the installation of the operating system, you must download three additional utilities:
- XTerm - to access the terminal from the Linux graphical shell;
- Synaptic Package Manager - for managing apt packages and downloading applications;
- Pulseaudio - for installing sound drivers.
All three utilities are installed using one GNURoot terminal command:
apt-get install xterm synaptic pulseaudio
About 260 MB of data will be downloaded to the device.
7. Now minimize the GNURoot application and open the previously installed XServer XSDL. Agree to download additional fonts. After the installation is complete, tap on the screen several times (the application will ask you to select the resolution and font size - it all depends on your preferences) until you see a splash screen with a blue background and white text.

Re-launch GNURoot and enter the following two commands one after the other:
export DISPLAY=:0 PULSE_SERVER=tcp:127.0.0.1:4712
startlxde &
The sequence for further restarting the system (when you want to open Linux again) looks like this: start XServer XSDL and wait for the blue screen to appear, open GNURoot and enter the two commands above, return to XServer XSDL.
If the terminal complains about an invalid command, return to step 5 of these instructions and try installing a bare kernel. Check the memory status of your Android device.
8. Now open XServer XSDL, wait a few seconds, and you'll have Linux ready to go.

To install applications, in the lower left corner, open the Start menu and select Run. Type Synaptic and press Enter.

In the window that opens, use the search and install the necessary applications. This could be the Firefox browser, the GIMP image editor, the Libre office suite, and other Linux-compatible programs.


Of course, this option for installing Linux cannot be called a full-fledged launch of the operating system on Android. Virtual Linux has several limitations, but if you use a wireless mouse and keyboard (possibly connecting with an OTG adapter and a USB hub), you can turn your smartphone or tablet into a laptop with the functionality of an adult OS.


Linux Deploy. This application is open source code, designed to automate the process of installing, configuring and running GNU/Linux distributions on Android platform inside the chroot container. The application creates a disk image on a memory card or other media, mounts it and installs the selected Linux distribution there. Installation into a file, directly onto a memory card partition, into a directory with the ext2/ext3/ext4 file system and into RAM is supported. Applications from a Linux distribution run in a chroot environment, run in parallel with the main system and are comparable in speed. All changes made to the device are reversible, i.e. The application and the components it created can be completely uninstalled.
Installation of the Linux distribution is carried out over the network with official mirrors on the Internet. Since Linux work Deploy is based on system call Linux kernels, then only Linux distributions. Through the program interface you can control the installation process of the Linux distribution, and after installation you can start and stop services installed system(there is support for running your own scripts). The installation process is displayed as text reports in the main application window. During installation, the program itself configures the working environment, which includes the base system, SSH server, VNC server and a graphical environment to choose from. You can also manage the parameters of SSH and VNC servers through the program interface.
Installing a Linux distribution takes about 30 minutes. The recommended minimum size of a disk image without a GUI is 512 MB, and with graphical interface- 1024 MB (for LXDE). After the initial installation, the password for access via SSH and VNC is assigned as “changeme”, which can be changed standard means distribution, or through the application settings.
Characteristics:
- Supported distributions: Debian, Ubuntu, Kali Linux, Arch Linux, Fedora, CentOS, Gentoo, openSUSE, Slackware, RootFS (tgz, tbz2, txz)
- Installation type: file, partition, RAM, directory
- Supported file systems: ext2, ext3, ext4
- Supported architectures: ARM, ARM64, x86, x86_64, architecture emulation mode (ARM<->x86)
- Methods of connecting to the container: CLI, SSH, VNC, X server, framebuffer
- Management interfaces (CLI): Android terminal (or adb), telnet, web interface (terminal via browser)
- Desktop environment: XTerm, LXDE, Xfce, MATE, other (manual setup)
- Supported languages: multi-language interface
ATTENTION!
This program comes WITHOUT ANY WARRANTY, and the author is not responsible for any possible consequences its use. It's free software, and you can redistribute it under the terms of the GPLv3 license.
GNU/LINUX INSTALLATION INSTRUCTIONS
- Connect WiFi or another network with Internet access. Installation is carried out over a network and will not work without Internet access.
- Make sure your device has received superuser rights (root). Install latest version Linux programs Deploy and run it.
- When you first launch the application, the update of the working environment is automatically launched, which is a directory containing all the necessary scripts, settings and container profiles. Working environment settings can be viewed in the " Settings -> Working environment ". The environment directory should not be changed unless there is a reason to do so. It is useful to leave the option " enabled. Settings -> Keep the screen on" ("Settings -> Screen Lock"), while the application is active, the screen, WiFi and processor will not go into sleep mode.
- The program supports working with several profiles, where the parameters of each GNU/Linux instance are stored. You can quickly switch between instances through the profile management window (opens by clicking on the icon in the main window header). By default, a profile is created with the name "linux". Go to the settings of the current profile (the far right button) and configure the necessary options for installing and running the GNU/Linux distribution ( see parameter description).
- Linux Deploy 2.x does not require installation on the BusyBox system, but in rare cases you may need to use the system BusyBox. To do this, install ®BusyBox compatible. In the BusyBox parameters, before installation, you must select the option " Replace applets". Then in the settings of the Linux Deploy working environment you need to specify the path to the system BusyBox in the " field Settings -> PATH variable" ("Settings -> PATH variable"), For example, /system/xbin, and start updating the working environment" Settings -> Update environment" ("Settings -> Update ENV").
- Run the installation of the selected distribution: " Menu -> Install" ("Menu -> Install"). The installation log is displayed in the main window of the application. Installation takes about 30 minutes on average. The image creation stage for a size greater than 2 GB may take long time(about 15 min.).
- If the installation is completed without errors, you can start the Linux system with the " START" ("START"). This will launch the services specified in the parameters - SSH, VNC and others.
- To access the console of a Linux system via SSH, you must install ConnectBot (or another SSH client). To access the Linux desktop, you must install an X server, such as XServer XSDL. In the settings you should specify the IP of the device to connect, for the same device - 127.0.0.1. The password for SSH and VNC is specified in the container parameters. You can change the current user's password from the console using the passwd command. To run programs as root, use the sudo command (for example, sudo synaptic). By default, the root user (unless specified as a username in the settings) does not have a password, but you can set a password for it with the command sudo passwd root.
- To stop the Linux system, all services running under it and unmount the disks, just press the button " STOP" ("STOP").
- Linux Deploy allows you to manage containers through the CLI (interface command line). To access the CLI, you can use telnet or a web browser, having previously activated the appropriate management interfaces in the settings.
- To reduce the time for installing the base system or in case of problems with installing the system from official repositories, you can import a container from a pre-prepared archive. For this purpose there is a repository of containers created with using Linux Deploy and available through the application interface in the " Repository" ("Repository"). Just select the desired container in the repository interface and click the " Import" ("Import"). After this, a new profile, the parameters of which can be changed if necessary. Then you just need to run the installation" Menu -> Install" ("Menu -> Install"), the installation path will be prepared (an image for the container will be created), the container archive will be downloaded, unpacked and configured. After completing the procedure, you can start the container with the " START" ("START").
PROGRAM UPDATE
After updating the program, the working environment is automatically updated. If necessary, the update can be started manually: " Settings -> Update environment" ("Settings -> Update ENV"). Program (environment) updates do not affect an already installed GNU/Linux system, i.e. the installed system cannot be damaged or changed in any way due to an update.
To change the settings of an already installed system or to return the settings to the original ones, you need to perform the configuration: " Menu -> Configure" ("Menu -> Configure"). If some components are selected in the parameters, then the configuration will install packages for the selected components.
UNINSTALLING A PROGRAM
Before uninstalling the program, you need to stop the GNU/Linux distribution using the button STOP, if you cannot stop the distribution, it is recommended to reboot the device. After that, run the command " Settings -> Delete environment" ("Settings -> Remove ENV"). After this, you can delete the application. Deleting an application with an unmounted container is dangerous; deleting an application version lower than 1.5.3 also deletes all data from all partitions mounted in the container! There may also be .img files that are created on the memory card when installing distributions , such files can be deleted manually through any file manager.
Download the application to install Linux on Android - Linux Deploy on Android you can follow the link below.
Good day everyone.
My story begins with reading this article, after which I decided to purchase a miracle of Chinese tablet manufacturing: a superpad. This tablet was taken as a toy for “digging a little”, part-time, a reader, a game for pairs and a watch on a long journey... I’ll immediately note that I have two USB hard drives of 500 GB and 1TB, on which everything that is most important for a fun life is stored , and they are split into ntfs and ext4. And, naturally, the tablet does not see them.
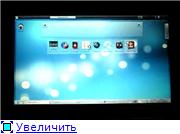
Here's my volunteer
This is the first reason to dig deeper. After viewing 200 forum pages on xda-developers.com, certain
On at this stage All attempts to open this tablet were shelved. Until the glorious time for the student - the session. And since during the session students do absolutely everything, as long as they are not in the subject, the fun night gatherings on the Internet on obviously bourgeois sites have resumed. And the brilliant idea came to install Orthodox Linux on this tablet, in my case - ubuntu.
What came out of this, see below.
It’s clear that you can’t just pick it up and install it... well, where did ours go...
We will need: 
Let's look at the main stages android downloads and linux
| 1.Power on and boot ROM code execution | Power on and boot ROM code execution |
| 2. The boot loader | The boot loader |
| 3. The Linux kernel | The Linux kernel |
| 4. The init process | The init process |
| 5. Zygote and Dalvik | console(bash, zsh...) / wm(kde, gnome...) |
| 6. The system server | Boot completed |
| 7. Boot completed |
As you can see, the differences start from the init execution stage.
It's the easiest thing to change.
I’ll write honestly, I thought that you could only use the Android init and that it was tightly screwed to the kernel. And even after receiving an example of a working ramdisk from another tablet, I didn’t think it would start...
ramdiska contents
bin dev etc home init init.rc lib linuxrc mnt newroot opt proc root sbin sys tmp usr varIn /bin there is busybox, in /sbin there is switch_root with a link to it.
Init code from ramdisk from zt-180
#!/bin/sh echo Starting from initram image. Echo Waiting for SD-CARD wake up... sleep 3 echo "Mounting new rootfs" mount -t ext2 /dev/mmcblk0p2 /newroot && echo OK echo Hold on, switching root... exec switch_root /newroot /sbin/init echo hrm, have a shell instead exec /bin/ash
All that remains is to flash the ramdisk into memory (I used burntool under xp) and - voila, the boot stage. Yes, I flashed it instead of recovery, so for launch Linux You have to hold down the keys when starting.
So, the loading stage has been completed and you should be patient, since the console shows no signs of life, and everything loads quite slowly. 
Setting up autologin for the first console
In /etc/init/tty1.conf replace the last line with exec /bin/login -f Yor_Login< /dev/tty1 >/dev/tty1 2>&1 then in your ~/.bashrc you can write commands that will start during automatic login.We are fighting the X-server
For me it definitely didn’t work well with the touchscreen, xorg.conf and xterm... I removed the synaptic driver and put the following in ~/.xinitrc:#!/bin/bash # $Xorg: xinitrc.cpp,v 1.3 2000/08/17 19:54:30 cpqbld Exp $ # /etc/X11/xinit/xinitrc # # global xinitrc file, used by all X sessions started by xinit (startx) # invoke global X session script #. /etc/X11/Xsession xclock -geometry 50x50-1+1 & exec xterm -geometry 80x66+0+0 -name login

Fighting the work environment
I wanted to install kde because I really like the graphics rendering with the qt library. I’ll say right away: yes, it installed and started, but HOW...First, I immediately set up autologin:
in /etc/kde4/kdm/kdmrc we find and change the following to suit ourselves
AutoLoginEnable=true # If true, auto-login after logout. If false, auto-login is performed only # when a display session starts up. # Default is false #AutoLoginAgain=true # The delay in seconds before automatic login kicks in. # Default is 0 AutoLoginDelay=3 # The user to log in automatically. NEVER specify root! # Default is "" AutoLoginUser=Login # The password for the user to log in automatically. This is NOT required # unless the user is logged into a NIS or Kerberos domain. If you use this # option, you should "chmod 600 kdmrc" for obvious reasons. # Default is "" AutoLoginPass=Password
and, as written, we do chmod 600 kdmrc in the console under root, so that bad people don’t spy on our password.
Secondly, at the entrance the screen saver hung for a suspiciously long time, and I, having doubts, called startkde from the console. After a long and tedious display of all sorts of errors, the plasma finally loaded in netbook mode. Graphic effects are turned off, since we are sitting under a framebuffer, and in some places there are wild slowdowns, but still this is kde and it has loaded!
Fine-tuning everything to suit you
Each has its own, I haven’t done any optimization yet, but there’s a lot to be done: speed up loading, optimize the workspace. I’m looking towards a more lightweight wm – e16 – but haven’t made it the main one yet. you also need to calibrate the touchscreen, fortunately virtual keyboard already available in kde.I'm looking towards openbox +