Program for checking usb hard drive. How to check if a disk is healthy using chkdsk. What to do if there is a bad sector on your hard drive
CrystalDiskInfo free program for inspection and tracking hard conditions disks. It allows you to give a general assessment and monitor the condition hard drive.
The interface of the CrystalDiskInfo program is simple, understandable and in Russian. The program gives detailed information about the hard drive installed on the computer: firmware, serial number, total time work. Displays parameters of the S.M.A.R.T. self-diagnosis system: performance, reading errors, track search time.
The program weighs only 4 megabytes. You can download it from the link given below.
After downloading, launch installation file: Click the “Run” button.

Select the folder where the program will be installed and click “Next”.

If you do not need to install an additional add-on and search engine Yahoo!, select with a marker « Custom installation» and uncheck the boxes. Click “Next”.

If not all screenshots for installing the program are shown here, then you don’t need to change anything in them, just click “Next”. After the installation process is completed, click “Finish”.
The main functions of the program include the following:
— monitoring temperature indicators hard drives;
— viewing information about current modes and hardware characteristics;
— monitoring of data from the S.M.A.R.T. self-diagnosis system;
— ability to change noise/performance settings;
— temperature change graph;
— resetting counters for sectors with failures;
- support external hard disks.
After starting the program, its main window appears. Pay attention to the state of the processor. If the value is Good, then no action needs to be taken - the disk is stable. The processor temperature is indicated below: it should not exceed 50 degrees. All additional information about the hard drive is displayed at the bottom of the screen.

To load the program along with the operating system, go to the tab. By selecting the “Launch Agent” item, the tray will display hard temperature disk.

![]()
Will give you the opportunity to quickly check the current status and performance of hard drives.
Rate this article:The PC records user information and system data on the hard drive. Over time, the drive becomes littered and wears out. Logical errors appear related to OS failures, indexing, file table, and physical errors - bad sectors. The program will help you find and eliminate all faults. hard checks disk for all kinds of errors and bad sectors. Let's talk about such programs and the features of their work.
Checking your disk for errors is necessary if your computer:
- freezes when opening and saving files;
- reboots itself;
- The OS began to load more slowly;
- When accessing the disk, specific sounds appear.
The drive can be damaged by power surges, incorrect shutdown of the PC, shock and shaking. As a result, some sectors are no longer readable - they are called “broken”. Single problem sectors do not make work difficult, but if their number grows, try to correct the errors as soon as possible.
Applications for testing
When choosing a program to test a disk, consider its type - HDD or SSD. The former are still more common, but the latter are often used as the main or additional storage. Some applications are universal and can test any type, others are tailored only for one type.
Windows built-in tools
Quickly checking the disk for errors in Windows 7 and 10 is possible with a built-in utility. In Explorer, click on to the desired disk right-click, go to “Properties” in the submenu. In the window that opens, go to the “Service” tab.

Click on “Check”. In the settings, select whether you need to immediately correct system errors and restore bad sectors. At the end a detailed report will be displayed.
There is another option to check hard drive through the command line for serviceability. Press Win+R and enter cmd, in the black window paste chkdskC: /f /r. The “C:” parameter means that drive C will be checked; to test other drives, enter the corresponding letter in the command.
Victoria HDD
Victoria HDD understands perfectly how to check a hard drive for errors and performance:
- in the “Standard” tab, select the desired drive;
- go to “SMART” and look at the result of the background test - good or bad;
- in the “Tests” section, check the “Ignore” option to start simple testing;
- the utility will start the test, bad sectors will be colored blue– unreadable, green, orange or red – slow;
- To correct errors, run the test again with the “Remap” option enabled.

The application can also restore and reassign broken areas, scan more than 1 TB, and conduct surface flaw detection.
HDDScan
Able to identify various storage problems. How to check a hard drive in HDDScan for bad sectors:
- Select the verification source from the list;
- Click “SMART” and view the results of the background scan;
- on the round button on the right select “Surface test”;
- check the "read" option and run testing.

At the end, the results will be displayed in the form of graphs, color schemes blocks and text report.
HDD Health
The HDD Health application implements a background disk scan in Windows. It analyzes the state of the surface, displays statistics on sections and rotation temperature. The program hangs in the tray and issues notifications if there are problems.
SSD Life
Simple SSD check disk. Conducts diagnostics, displaying drive health indicators as a percentage. The program has portable version, free and extended paid. When installed on your computer, you will be able to run SSD Life in the background to constantly monitor status changes. It will monitor the temperature of the SSD drive; for some manufacturers, you can change the operating speed and noise level.

Conclusion
We figured out how to check your hard drive for all errors. Select a testing program according to the drive type and run the test. If many errors are found as a result, monitor the status regularly so as not to lose all the data.
A computer or laptop is associated specifically with errors and malfunctions in the hard drive. In this article we will figure out how to check the health of your hard drive using Windows tools and programs specifically designed for this purpose.
Checking for errors using standard tools
This method is equally effective for Windows Xp, Vista, 7, 8 and 10. Required:
If the notification “Windows cannot scan the drive that is currently in use” appears, click “Schedule scan”.
So now we do a reboot, and when the system boots, it will run a performance test through the BIOS and fix media errors. Its duration can range from 2-3 minutes to an hour, depending on the characteristics of the hard drive and its capacity.
Checking the hard drive for errors via the command line
To start the scan, you must complete the following steps: go to “Start/All Programs/Accessories/Command Prompt”. Right-click and click “Run as Administrator”.


In the window that appears, execute the command “chkdsk disk_partition: scan_parameters”. It should be taken into account that this method Works exclusively with drives that have been formatted in FAT32 or NTFS.
An example command is “chkdsk C: /F /R”. Its essence is as follows:
- Section C will be checked for errors;
- Any problems found will be automatically corrected (parameter F is responsible for this);
- Damaged sectors will be checked and information will be restored (parameter R);

If you want to diagnose a drive used by the system in at the moment, you will see a special notification. You will be prompted to run the scan the next time you boot your computer. To agree with this, press Y, to refuse - N. Based on the results of the check, you will have access to information about the verified data, the number bad sectors and the errors found.
To get full list parameters, run chkdsk with a question mark as a parameter. But if you need a regular check for errors and sectors, then the above information will be enough for you.


It happens that errors found during scanning cannot always be corrected immediately; it is likely that this is due to the program running at that time. In this situation, an offline scan of the drive will be required: it is disconnected from operation, diagnostics are carried out, and then it is connected back. To do this, you need to enter “chkdsk C: /f /offlinescanandfix” (C: - disk partition) into the command line. If it is not possible to disable it, the check will be performed at the next reboot.


If necessary, after the inspection you have the opportunity to study the inspection log. To do this you need:
- Go to Windows/Applications Logs;
- Right-click on Application/Search;
- Search for the word Chkdsk;


Software check
Of course, the above method is not always effective. Therefore, we will look at a number of programs such as Victoria. They will allow for the most thorough analysis hard state disk on a computer or laptop.
Victoria

A utility for diagnosing and testing hard drives. It will help you not only detect problems in its operation, but also eliminate them.
The program has a number of advantages and useful functions:
- Reads the hard drive passport and provides detailed information;
- 5 diagnostic modes;
- Eliminates crashes;
- Displays unstable areas;
- Hides defects;
- Evaluates media performance.
It is one of the best today. It can solve problems with bad sectors and quickly bring any type of hard drive into working condition.
HDD Regenerator

One of the most effective programs to assess the status and troubleshoot drives. It makes it possible to obtain information about the current SMART status of the selected device and complete control over it.
Among the main features are:
- Simple and intuitive interface;
- Complete security;
- NTFS and FAT support;
- Pre-scan mode;
HDD monitoring in real time;
That is, with the help of a regenerator you can test the hard drive as efficiently as possible.
TestDisk

Designed to determine the status and test drives. In addition to simple diagnostics, it also detects bad sectors and corrects any errors found. Its main functions include:
- Perform an analysis of the current state of the hard drive;
- Search for bad sectors;
- Recovering deleted partitions;
- MFT fix;
Checking external hard drives;
In addition, the utility has a number of functions that are related to the recovery of deleted files.
Hitachi Drive Fitness Test


An excellent program designed to find and fix problems on drives. It is universal, since diagnostics of any drives can be carried out. With its help, you can very quickly find out the current position of the hard drive, as well as get information about it additional information.
Includes:
- Quick but thorough check;
- Support for all components;
- Monitoring;
- Data statistics;
This utility is suitable for all devices and can even be used on a netbook.
Seagate Seatools for Windows

Used to check and test the status of the hard drive. She finds any problems and failures.
- The utility can fix:
- Equipment incompatibility;
- Violations file system HDD;
- Errors in installed drivers;
- Viruses and malware that infect the file system;
In addition, it provides complete information about the media and all related indicators. As the developers say, this utility incredibly effective for self-correction minor problems SSD errors and HDD, and is able to completely restore their functionality.
So now you have complete information Learn how to determine if your hard drive is working properly and how to fix problems with it yourself. Choose the option that suits you best or the one you like and act!
Video: checking the hard drive using standard tools
The hard drive is an important, but far from perfect, component personal computer. For some users it does not work reliably, it crashes, data from it is lost or is significantly damaged. One of the most common problems with a hard drive is the appearance of so-called “broken” (bad) sectors on it, which become a “headache” for many users. In this article, I will talk about the reasons for the appearance of bad sectors on a hard drive, list a number of programs that allow you to recognize them, and also explain how to check a hard drive for bad sectors on your PC.

What are “bad sectors”?
As you know, a traditional hard drive consists of several rotating magnetic disks, over which magnetic heads move, magnetizing any part of the disk and thus writing information onto it (in the form of zeros and ones).
The disk itself is divided into tracks, and the latter, in turn, are divided into sectors onto which the information the user needs is recorded.
Due to certain reasons (I will list them below), information from a number of sectors cannot be read by the hard drive. Such sectors receive the status of “bad sectors” (bad sector), and the system tries to either restore the functionality of such a sector (restore), or reassign the address of such a bad sector to the backup sector (remap), or completely clean up the bad sector (erase). In the case of remapping, spare workable sectors are usually located at the end of the hard drive, and the hard drive spends additional time accessing them, which inevitably affects the speed of the hard drive, loading various applications and programs. Next, I will tell you how you can check your computer’s hard drive for bad sectors.

Reasons for bad sectors
What are the reasons for the appearance of bad sectors on HDD disk? Usually they are as follows:
- Gradual “shedding” of the surface of the hard drive due to its wear, due to which there are more and more bad sectors on the disk;
- Physical impact on the hard drive due to various types of external shocks;
- Power surges in the network, which directly affect the integrity of data on the hard drive and lead to the appearance of bad sectors;
- Incorrect shutdown of the computer (improper operation), as a result of which bad sectors appear on the hard drive.
Symptoms of bad sectors
Due to the reasons described, there are more and more bad sectors on the hard drive, which begins to directly affect the operation of the operating system. In particular, you may notice the following:
- The system boots slowly;
- The system slows down (freezes) when reading and writing data from the hard drive;
- The system refuses to boot at all (quite often in the middle of the process);
- The computer sometimes restarts for no reason;
- Various errors regularly occur while the OS is running.
After we have described the symptoms and reasons for the appearance of bad sectors, let’s move on to a description of how to check a hard drive for bad sectors.
The best ways to check your hard drive for bad sectors
So how to check bad sectors (and fix them)? Below I will describe a number of methods that have proven their effectiveness in working with various hard drives.
Method 1. Use the CHKDSK system utility
The simplest and convenient way to find and fix bad sectors on an HHD hard drive - this is to use the functionality system utility CHKDSK.
- To take advantage of its capabilities, launch Explorer, right-click on an inactive volume (on which there is no operating system installed), and select “Properties” from the menu that appears.
- In the window that opens, go to the “Service” tab, there click on the “Run check” button.
- Check the boxes next to the two verification options, click on “Run”, and wait for the process to complete.

The same can be done for the system volume (on which the OS is installed). The only thing is that this may require a system reboot, but after the system reboots, it will begin checking the disk for bad sectors.
You can also run CHKDSK through the console. To do this, run the command line as an administrator and enter:
chkdsk c: /f /r - (instead of: if necessary, specify a different letter of the problem drive) press enter and wait for the process to complete.

Method 2. Use the Victoria HDD program to analyze and treat the disk
Victoria HDD is probably the most popular program to check the hard drive for bad sectors (and to restore the latter). It effectively checks and repairs bad sectors, has good reviews from specialists, and can be used in both classic graphic mode and DOS mode.
One of the Wiki bonuses is the ability to read the SMART indicator of your hard drive, which allows you to monitor in sufficient detail the degree of its performance (the “SMART” tab of the program). In addition, the Victoria program carries out “remapping” (reassignment of damaged sectors), resets bad sectors, conducts detailed test surface of the hard drive, ranking sectors into different groups depending on the speed of reading information from them.
- To use this program, download and run it.
- Then go to the “Test” tab, select “Ignore” there and check the surface for bad sectors.
- If such are found, you should select the “Remap” mode in the same tab, this will allow you to reassign addresses from bad sectors to backup ones.
- If, after remapping, bad sectors remain, you can try to restore them using the “Restore” function, while the “Erase” function completely erases data in bad sectors, writing zeros there.
In general, the functionality of “Victoria” is quite extensive, and to get a full description of it, you need to go to the material specifically about using the program.
Method 3. Use the HDD Scan program to check the hard drive for bad sectors
Another program that can check a hard drive for bad sectors is HDD Scan. This is a fairly popular utility that offers several different tests (Surface Test, Smart Offline Tests, etc.). Select Surface Test, check the “Read” box on the right and run a disk surface test.
The program will analyze the response time of the available sectors and give us the result in graphical mode.

Method 4. Check your hard drive with HDD Regenerator
Program HDD Regenerator allows you to check and restore data on your hard drive, the same applies to bad sectors. I note that the program is paid, but those interested can search for free options online.
- To take advantage of the program’s capabilities, you need to launch it, select the disk to work with, decide on the scanning mode (I recommend Normal Scan), and then select the “Scan and repair” option.
- Then it will be necessary to specify the scanning boundaries (starting from sector 0) and monitor the scanning process itself.
- Depending on the response speed, sectors will be marked with different letters and colors.

Method 5. Scan the disk with HDD Health for damaged sectors
Another program for checking the disk surface for damaged sectors. HDD Health analyzes the general condition of the disk, provides detailed statistics according to available sections (using SMART technologies, including the general condition of the structure, the disk rotation temperature indicator, the presence of bad sectors, and so on).
Icon running program is located in the system tray, and the program itself notifies the user as necessary about any problems in the operation of the hard drive.

Recovering a hard drive, removing BAD (bad) sectors [video]
Typically, checking a hard drive for bad sectors is carried out using special software tools, the Victoria HDD level or HDD Regenerator. The most effective of all the programs listed in the article, Victoria HDD, allows you not only to check the surface of the hard drive for bad sectors, but also to restore them, remap them and clean them. If bad sectors begin to appear on your hard drive, then I recommend using the functionality of the above programs; they have proven their effectiveness in working with the hard drives of many users.
CHKDSK- standard application to check the hard drive for errors, detect bad sectors on the hard drive, and correct file system errors. CHKDSK (short for Check Disk) is built into operating system Windows.
The Chkdsk.exe program finds file system errors, bad sectors on the hard drive, and eliminates detected problems. If checking the disk for file system errors reveals problems, the CHKDSK check runs when the computer is turned on.
When using Chkdsk.exe in different versions Windows, there are some differences:
- In Windows XP, the chkdsk utility finds file system errors and repairs bad sectors on the disk.
- In Windows 10,Windows1,Windows 8,Windows 7, Windows Vista With default settings, CHKDSK finds file system errors but does not fix them. To correct file system errors and check disk sectors, you must manually set certain parameters.
Problems in the Windows operating system affect its performance. File system errors occur in the following situations:
- Due to a power outage - when sudden shutdown computer, an unexpected system failure may occur (to prevent such situations, use UPS - uninterruptible power supplies).
- If the system is infected with malware.
- Due to a computer hardware malfunction.
Bad sectors may appear on the surface of the hard drive. When checking a disk using chkdsk, bad bad sectors of the hard disk are marked as damaged, and the system no longer reads or writes information from bad sectors of the disk. The system will try to recover data from damaged sectors (clusters, directories), if possible.
Examination disk chkdsk runs in two modes:
- V graphical interface means of the system;
- with the help command line.
If your computer does not boot due to a problem, you can check your hard drive using installation DVD with Windows operating system. After booting from removable media, in the system recovery options, select the command line to run a disk error check.
In this tutorial, I will show you how to use the CHKDSK application using the Windows 10 operating system as an example.
CHKDSK check for file system troubleshooting in GUI
The easiest option for checking the file system for errors is to run the CHKDSK program in the graphical interface using system tools.
Follow these steps:
- Launch Explorer.
- Right-click on the local disk on which you want to scan.
- In the “Properties: Local disk (X:)” window, go to the “Tools” tab.
- In the “Check for errors” section, click on the “Check” button.
- In the “Checking errors (Local disk (X:))” window that opens, select “Check disk”, despite the fact that the operating system writes that no errors were found when checking the disk.

Available in Windows 7 additional options checks, to run them you need to check the boxes next to the following items:
- Automatically fix system errors.
- Check and repair bad sectors.
- The scanning process begins and will take some time. Checking time depends on size local disk and the amount of data on the disk.

When checking file system errors, the status is scanned:
- Checked basic structure file system.
- File name connections are checked.
- Security descriptors are checked.
- The USN log is checked.
- After completing the verification process, information about its result will open. IN in this case, the disk was successfully checked, no errors were found. If errors are found, you will be asked to fix them.
For detailed information, click on the "Show Details" link.

In the Event Viewer window, click Details.

In the “Event Properties” window, in the “General” and “Details” tabs, it is available detailed information about the result of the disk check.

The information obtained about checking the disk for file system errors can be copied to Notepad or another text editor for further study.
How to run CHKDSK (check disk) on the command line
chkdsk command to check the hard drive with given parameters executed from the command line:
- Run Command Prompt as Administrator. Read How to Find the Command Prompt in Windows
- To check system partition (system disk) in the command line interpreter window, enter the command:
- Press the "Enter" key.
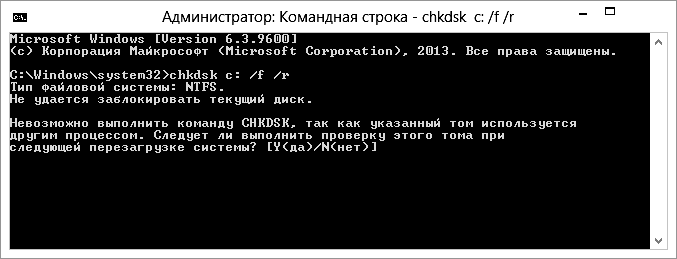
- A message appears in the Command Prompt window indicating that the CHKDSK command cannot be executed because the specified volume is in use by a system process. To start checking the system disk after rebooting the system, press the “Y” key and then press the “Enter” key.
- During system reboot will be tested and restoring the system disk.

A sample command template looks like this: ["chkdsk" (application name)], space, [drive letter of the drive being checked followed by a colon ("c:", "d:", "f:", etc.), path, or filename], space, [command options].
Command parameters have the following meanings:
- /F - checks the file system and automatically corrects errors found.
- /R - search for bad sectors on the disk, restore the contents (the command requires the /F key, example: “chkdsk C: /F /R”).
- /V - display full file paths, display file names on disk, in file NTFS system– display messages about cleaning.
- /X - disconnect the disk before checking, descriptors of this disk will not be checked (the mandatory /F key must be set, example command: “chkdsk C: /F /X”).
- /I - Performs a less stringent check of index items; CHKDSK performs a faster but less thorough check.
- /C - skips checking cycles within the folder structure.
- /L: size - Changes the log size to a value specified in kilobytes.
- /B - reset the scan results, re-check previously found damaged ones sectors of hard disk (the /R key is required, example command: “chkdsk C: /F /R /B”).
In most cases, to check the file system and eliminate bad sectors on the hard drive, it is enough to use the “F” and “R” flags.
How to disable disk check in CHKDSK when Windows boots
In some cases, disk check runs when you turn on the computer, before loading the Windows operating system. In most cases, you need to wait until the check is completed, restart will not follow.
Constantly checking the disk every time the system starts indicates that there are problems and the need to fix them. Perhaps you should think about replacing hard disk. There are programs, for example, that constantly monitor the status of computer disks.
To turn off launch Chkdsk at booting Windows you can use 2 methods: changing values in the operating system registry, or using the command line.
Disabling disk check on the command line:
- Run Command Prompt as Administrator.
- In the command line interpreter window, enter the command (“C:” is the name of the drive on which you want to disable the startup of Check Disk when the system boots), and then press the “Enter” key:
- If you need to disable scanning on several drives, add the corresponding drive letters to the command separated by spaces, for example, “chkntfs /x c: d:”.
- Using the command “chkntfs /d” you can return the original settings.
Turn off automatic check disk when loading the operating system in the following way:
- Launch Registry Editor (type “regedit” in the search field, run the command).
- Follow the path:
- Click on the “Session Manager” option.
- Find the “BootExecute” parameter, left-click on it.
- The Edit Multiline window displays the default value.

- To disable disk check during Windows startup, before the asterisk add the parameter:
- To disable scanning on multiple partitions, add drive letters separated by a space. Example for drives “C:” and “D:”:
Conclusions of the article
System application CHKDSK built into the operating system Windows system, is used to check the file system for errors and to detect bad sectors on the computer’s hard drive. Using the utility, you can fix system errors and eliminate the negative impact (disable writing and reading) on the system due to the presence of bad sectors of the hard drive.