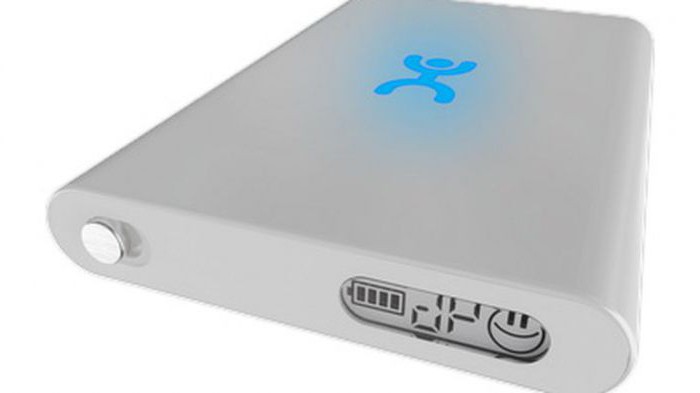
What is the apn type in the phone settings. View and change the access point name (APN) on iPhone and iPad
Smart setup Internet Yota guarantees the normal functioning of a tablet PC or smartphone on the network. To do this, you need to correctly enter the access point name – APN. It serves as a kind of identifier with which the subscriber mobile communications gets access to the Internet and can send MMS.
Automatic setup
Yota makes every effort to ensure that its future subscribers do not have to make unnecessary touches on the touch screen and configure anything. When inserting a SIM card into your gadget, the user needs to wait a little, after which the name of the mobile operator – Yota – will appear on the screen. The operator independently sends all the access point settings APN Yota, which are automatically registered in the mobile device. Then you can turn on data transfer and try to use the Internet.
If identification on the network and automatic APN setup went without problems, then one of the icons (GPRS, 3G, 4G LTE) will appear in the status bar, depending on the signal strength in the coverage area of the Iota network. However, the reason for low Internet speed or its complete absence may be incorrectly set parameters, which can be set manually.
Manual setting
Manually register an APN access point for Yota in a device with touch screen as simple as setting an alarm on it. It will only take a few minutes to solve this problem.
On Android device
To set up APN Yota, owners of devices running Android OS will only need to specify two parameters located in the section: Settings > More > Mobile network> Select SIM card > Access Points (APN). Next, you can edit an existing access point or create a new one. Among the proposed list of parameters, we are only interested in two lines in which we should enter:
- “Name” – yota;
- "APN" - internet.yota.
This completes the setup of Yota on Android. It is worth noting that the values of the remaining parameters do not need to be changed. On different mobile devices ah menu names may vary slightly. However, intuitively you can always get to entering the parameters of the access point.
On iOS and Windows Phone
Setting up a Yota access point in products from Apple and Microsoft involves filling out just one line (APN - internet.yota), which can be found in the section:
- for iPhone: Settings > Cellular connection> Cellular data.
- for WinPhone: Settings > Access point > Add access point.
Possible problems
Sometimes Internet users from Iota find themselves in a situation where the actual data transfer speed is lower than the declared one, although the Internet settings Yota are correct. In this case, the smartphone is in an area with 4G LTE coverage. The problem is hidden in the incorrectly set “Network mode” setting, which is located in the following tab: “Other networks” or “More” > “Mobile network” > “SIM card selection”. The user should select the item with automatic detection networks (LTE/3G/2G). The choice in favor of “Only 3G (WCDMA)” or “Only 2G (GSM)” is justified in cases where the subscriber is outside the coverage area of 4G LTE. This reduces the load on the battery.
Yota subscribers should remember that high speed internet available only on one tablet device without the right to distribute to other users. When illegal Wi-Fi activation access point, the speed is reduced to 64 Kbps. In this Yota case proposes to return maximum speed and fully distribute the Internet via Wi-Fi for additional fee, as evidenced by a pop-up window on the tablet screen indicating affordable tariffs. At the end of 2016, Yota tariffs for smartphones underwent changes - they now do not have unlimited Internet, and a ban on Wi-Fi distribution and downloading torrents is disabled.
Yota is a telecom operator that is radically different from others. This is manifested not only in advertising or design: the user can make almost all settings in the application, without leaving home. Favorable rates And unlimited Internet will appeal to young people. And communication without roaming throughout the vast territory of Russia will be convenient for people whose work requires frequent business trips. However, problems may arise at first. For example, in the settings Internet APN Yota. This article will help you deal with them.
Yota - the mobile operator of the future
Yota really does provide unlimited Internet at a fairly affordable price. The quality is different network connection from other operators only by speed. The named operator makes the Internet available in different places RF. So, you can now enjoy it while staying outside the city.
Another nice feature of Yota is the lack of roaming. If the user has moved to another city, prices for communication services remain the same. Unfortunately, this feature is only available for thirty days in a new region. Next, the operator offers to change the tariff.
All operations with your SIM card can be easily carried out in the application. The option of tariff and other manipulations is available there.
However, not everything is so rosy. Yota has disadvantages that stop many people from buying their SIM card:
- Limited coverage area.
- Working with the application. For many users it does not function and is “buggy”, and in general not everyone is ready to spend time studying it.
- The phone will not be able to distribute the Internet. In addition, problems arise in Yota - APN settings. Sometimes you have to configure the SIM card yourself.

How to install a SIM card?
You just need to activate the card. Need to download Yota application(for iPhone in the AppStore, for Android in PlayMarket), and then insert the SIM card directly into the smartphone. You should also add an access point (APN) - internet.Yota. There is no need to change other settings. After all these manipulations, check the box next to the “Data Roaming” line and then restart your mobile device. Everything is ready.
If the application on your phone does not work or for some other reason you cannot use it, you can type the following commands:
- *567# - activation;
- *106*N# - connection to a package of minutes and the Internet (N - amount of selected time).
Automatic Network Setup
As soon as the SIM card is activated, you will receive a message with data for installing the Internet. Modern mobile phones quickly recognize these coordinates. If a message has been deleted or sent to the spam folder, it is possible to receive it again automatic settings Networks. To do this, you can contact a consultant through the application, by phone or using the operator’s website.
If the phone cannot determine these parameters on its own, then you need to install the Internet manually. To do this, you just need to understand Yota. Setting up APN is quite easy.
What to do before setting it up manually?
Before you start creating an APN yourself, you should review some settings on your phone. Perhaps this small check will help save a lot of time and nerves. To begin with, it’s worth recalling that all MMS and Internet parameters come as an SMS to your phone and are installed automatically. So what to do in the APN Yota settings? You need to be sure that this did not happen, and only then start working with the connection.
IP hone 5 owners need to know: the model does not support operation with Russian companies mobile operators. In this case, it is better not to purchase Yota at all. The Apple smartphone of this release is not intended for Russian providers.
If the phone supports domestic operators, and its owner can't wait to manually configure it, it's worth checking the coverage map. The region is part of the network zone, which means Yota will function normally. You also need to disable WI-FI on your mobile device and enable Yota data transfer. APN settings should only be made with the connection enabled. Without this, you cannot start work.

Setting up APN on a mobile device
Creating an access point is slightly different depending on operating system phone. On Android, just follow these simple commands to set up the Internet:
- You need to go to the “Settings” section, click on “more”.
- Setting up APN Yota on Android is very simple - you select the “mobile networks” item on the page that just opens, and then click on “Access points” and configure the Internet there. You just need to enter APN: internet.Yota and come up with a name for it.
If you have connection problems on your Apple device, don't despair - it's quite easy to install. This is done as follows:
- First you need to go to the "Settings" section.
- Next, find “cellular communications” and click there.
- The “cellular data” section will appear on the screen. In it, enter APN internet.Yota, and leave all other fields empty.
If you happy owner Windows Phone There are also problems with the Internet, they can be easily fixed. This is done by analogy with Android. You need to go to the “settings” section, select “access point” and add it - internet.Yota. After rebooting, you can enjoy unlimited Internet on your phone.

How to install a modem
Many people prefer home Internet to mobile Internet. What should users do in this case? of this operator? In order for APN 4g lte to occur, you need to follow the following procedure:
- In the “username” item you must enter Yota1.
- In APN - internet.Yota.
Similar to setting up a mobile connection. U home Internet Yota has many advantages. You can easily switch from one tariff to another or immediately pay for the annual provision of services.
For many inexperienced users Problems may arise with seemingly basic things. How to activate a SIM card or set up the Internet in Yota? APN settings, as you might guess, are unknown to the average user. Many are accustomed to such services from employees of cellular communication stores and do not understand what to do. In this case, there are two options: go to the salon or try to set everything up yourself. For those who preferred the latter, this article will be useful.
Every phone connected to the Megafon network wonders how to set up the Internet? Without the correct settings, it will be impossible to use the network and MMS. This also applies to regular phones, and widely used smartphones.
When you install a SIM card in any modern mobile device, it is configured automatically. However, sometimes it happens that the settings themselves were not installed or were not registered - then you need to configure the phone manually. This review will tell you how automatic configuration occurs, as well as how to enter the settings yourself.
Ordering Internet settings from Megafon
Using SMS commands, the user can get Megafon Internet settings for his phone. If you need to set up access, you must send to the number 5049 number “1”, after which you will receive an SMS containing your profile settings. You need to save them and activate your profile, then try to log into the network. On Megafon, GPRS settings are also available in help desk, to do this, dial the number 0500, name the model of the phone you are using and wait for a service SMS with the settings.
By visiting the Megafon website, on it, in the Self-Service Services section, you can find another subsection with Mobile Device Settings, in which you can order individual settings suitable for any model mobile phone. We select the phone brand, model, as well as the ordered data in the drop-down lists, below we enter the phone number used to send the required settings.
Internet settings Megafon manually
APN (or access point) settings on Megafon can be done manually. To do this, create a new profile, containing the following data:
- Profile name: indicate, for example, Megafon (absolutely any names are acceptable here);
- Home page: type megafon.ru (you can also enter any address, since this setting concerns home page, used by the phone's built-in browser);
- Access point: enter internet;
- Authentication: select “normal”;
- Login with password: no need to fill out.
There may be settings for a proxy server, but it is recommended to disable the use of a proxy; you do not need to fill in any data here. After filling specified settings, by opening the browser, you can try to launch the Internet on your phone.
If you need to figure out how to set up the Internet on Megafon using 3G technology, then there is no need to additional settings third generation networks, just go to the item called “Mobile Network Properties” and check that there is a WCDMA network search there (or the forced registration function for WCDMA networks is installed).
When making the above settings, remember that the menu item in which the Internet profile settings are located, depending on specific model smartphone may be different. In addition, there may also be differences in the names of the fields to be filled in, for example, “Access Point”, as well as “APN” - this is a similar name.
Setting up MMS on Megafon
Procedure MMS settings for the Megafon operator is almost identical to the order for the Internet. To get a working function that allows you to receive and also send multimedia MMS messages, you need to send the number “3” to the number 5049. After a short time, a message will be sent to your phone containing the necessary settings: you need to save them, then apply them and try to send an MMS to any Megafon number. In the same way, you can order automatic settings through the Megafon website, having previously selected your phone model from the list provided there.
Setting up MMS on your phone manually
In cases where you cannot accept the automatic settings or install them, you will have to enter the settings manually. To do this, create a profile on your phone, indicating the data below:
- Profile name: you can simply type MMS (you can enter anything);
- Server address or home page: indicate http://mmsc:8002 (no changes);
- Proxy: must be “enabled”;
- Proxy address: enter the numbers 10.10.10.10;
- Port field for the proxy used: 8080;
- APN (or the name may be “Access Point”): mms;
- The user and password fields do not need to be filled in.
As with setting up an Internet profile, some items may have different names depending on the smartphone you are using.
Setting up the Internet on Megafon 3G (4G) modems
Such popular 3G and 4G modems offered by Megafon are usually sold with the settings already made: after purchasing the device, it is connected to any USB port, after which you need to wait for the installation to complete, which starts automatically control program modem After this, everything is ready to go online.
If the data that was present in the automatically created profile was lost, then you can configure the Megafon-modem manually. To do this, you need to create a profile and it states the following:
- Profile name: specify any name, for example Internet Megafon;
- Access point or APN: internet;
- Number to call: dial *99# in the field;
- The username and password field is not required.
You are now ready to check if you have an Internet connection.
And you even activated it yourself, but something went wrong and the Internet doesn’t work? Don't be upset - setup mobile internet Yota is extremely simple and will not take much time, and this article will tell you in detail about all the nuances of connecting and setting up the Yota Internet on devices running Android, iOS and Windows Phone.
Automatic Internet settings Yota
After the first installation of the Yota SIM card and its activation, an SMS message from the operator with automatic Internet and MMS settings is immediately sent to your phone. Almost everything modern devices recognize these parameters without any problems and configure themselves for correct operation with the Internet.
If you accidentally deleted this message or it was simply lost in SMS spam, you can re-order automatic Yota Internet settings, or through the company’s official website - in a chat with a specialist contact center. You can also contact a consultant and find out the parameters for setting up mobile Internet through mobile application Iota.
If your gadget is not able to recognize the received automatic parameters, then you can enter the data manually, especially since you only need to fill out one field, or rather, create an APN access point.
Manual Internet setup Yota
Self-configuration mobile Internet from the Yota operator is carried out in three simple steps:
Step 1. Check if data transfer is enabled.
Before you start setting up mobile Internet on your Yota SIM card, make sure that data transfer is turned on on your phone. Don't neglect it simple action, and then you won’t have to worry unnecessarily if, after creating an access point, you find that the Internet still doesn’t work.
- On Android: menu item “Settings” → “More” → “Mobile network” → “Data transfer” - check the box next to “Mobile data”.
If your phone has two SIM cards, then make sure that the Yota SIM card is activated in the “Mobile Data” section. - On iOS:“Settings” → “Cellular” - activate the “Cellular Data” item. Here, in the “Cellular” submenu, go to the “Data Settings” → “Voice and Data” tab and select your preferred data network - 2G/3G/4G/LTE.
- On Windows Phone:“Settings” → “Network and wireless communication» → « Cellular network and SIM card" - activate data transfer by moving the slider to the "on" position.
Step 2. Create an APN access point
The process for creating an access point is slightly different depending on your device's operating system, but ultimately you only need to fill out one line: "APN: internet.yota" and come up with a name for the created access point, for example “Internet Yota” or simply “Yota”. The name of the created access point does not matter - it is rather necessary so that the user himself does not get confused in the created settings, and on many phone models it is impossible to save an unnamed access point.
- On Android:“Settings” → “More…” → “Mobile networks” → “Access points (APN)” → “Create an access point.”
Set a name new point access - for example, Internet Yota and fill in the "APN" field - internet.yota.
Leave all other fields, including username and password, blank.
Check that the "APN type" field is set to "default" or "supl". - On iOS:“Settings” → “Cellular” → “Cellular Data” → “Data Options” → “Cellular Data Network” - specify APN: internet.yota, and leave the rest of the fields blank.
Save your changes. - On Windows Phone:“Settings” → “Network and wireless communications” → “Cellular network and SIM card” → “SIM card options” → “Internet access point” - select “Add Internet access point”.
Here, enter the values in two fields: “Profile name” - Internet Yota and, in fact, “Access point” - internet.yota.
Save the created access point.
Step 3. Reboot the phone
This is mandatory and very important step! In order for the manually entered Yota Internet settings to take effect and the mobile Internet to work, you need to restart the phone. To put it simply, you need to first turn it off and then turn it on again. As soon as the device is fully loaded and the SIM card is registered in the Yota network, you can enjoy all the benefits of the operator’s unlimited mobile Internet!
MMS Yota settings
Service sending MMS not very popular among Iota subscribers. This is understandable - why pay for this type of message when any picture, melody or even short video is owned by modern gadget can I send it for free via messenger?
However, there is a small group of users who, for a number of reasons, prefer to use MMS. If you are one of them, and your phone is not configured to work with MMS automatically, then here is an algorithm on how to set the necessary parameters for sending MMS manually:
- On Android:“Settings” → “More…” → “Mobile network” → “Access points (APN) - click on the icon for creating a new access point and fill in the required fields:
Name: MMS Yota
APN: mms.yota
MMSC: http://mmsc:8002
Proxy MMS: 10.10.10.10
Port: 8080
APN Type: mms - On iOS:"Settings" → "Cellular" → "Cellular Data Network" → "MMS" and enter the following values:
APN: mms.yota
MMSC: http://mmsc:8002
MMS proxy: 10.10.10.10:8080 - On Windows Phone:“Settings” → “Network and wireless” → “Cellular network and SIM card” → “SIM card options” → “Add MMS hotspot”.
Create an access point with the following parameters:
Name: MMS Yota
Access point: mms.yota
WAP gateway: 10.10.10.10
WAP gateway port: 8080
MMS center: http://mmsc/
MMS center port: 8002
Also check that your phone allows data transfer— how to do this is described at the beginning of the article (Step 1).
If everything is fine, then restart your phone for the new settings to take effect. Ready! You have set up MMS Yota on your phone!
As you can see, the Yota and MMS Internet settings are so simple that absolutely any user can solve the problem of not connecting to the Internet or sending MMS and getting their device working. I sincerely hope that this article helped you understand the issue of setting up Iota mobile Internet and MMS, regardless of the model of your gadget, be it Android, iOS or Windows Phone.
Video instructions on how to set up an APN access point on Yota using an example Asus smartphone Padfone2:
This may come in handy:
Many people today decide to become clients operator Yota, do this in order to use high-speed mobile Internet on more than attractive terms. And when buying a SIM card, you need to know how to correctly configure your device so that the Internet works correctly and on maximum speed. Today we will figure out how you can configure an APN access point on Android so that the Internet on your gadget works correctly.
Why set up an access point
First of all, knowledge of how to correctly configure a Yota access point on Android devices may be required by owners of those gadgets on which automatic settings were not received or were installed incorrectly. As you know, operators automatically send access settings files to the network when installing new SIM card into the device. However, the abundance of brands and models of Android smartphones and tablets today is so wide that it is simply impossible to create configuration files for all of them, and universal settings are not always installed correctly.
In addition, you may need to configure an APN access point from Yota on Android if you perform a general reset on the device. If the user, for any reason, has reset his gadget to its factory settings (it started to glitch, work slowly, or it was the most quick way clear memory), Internet settings are automatically deleted. Therefore, tuning may also be required in this situation.
Setting up a Yota access point on Android - step-by-step instructions
In order to correctly configure a device running an operating system from Google, you must correctly and accurately follow the list of steps outlined in the instructions below:
- Take a device with a Yota SIM card installed in it.
- Go to the “Settings” section located on the main screen of the gadget.
- Find the “Mobile network” item in the settings menu and go to it.
- Pay attention to the list of available sections in the category. Find “APN access points” and go to this subdirectory.
- In order to add a Yota access point on Android, in open section click on the “Add” button, “Add APN”, “Create APN point” (depending on the type of device, the name of the button may be different).
- In the next window you need to specify the parameters of the new access point. Enter the following information:
- Specify the value “Yota” as the name for the new parameter (no need to use quotes);
- In the APN field, enter the internet.yota address;
- In the APN type field (APN-Type), specify the default, supl parameter.
All other fields, including password, proxy server, etc., should be left blank.
- Click on the "Save" button.
After making all the settings, you may also need to restart your device before using the Internet. Once your Android smartphone boots up, you can start surfing the web.
Note that in this way the Yota access point is configured not only on Android smartphones, but also on tablets, since the interface of this operating system is almost identical on all devices (if we talk about sections in the settings menu).
Other ways to set up a Yota hotspot on Android
If the option with manual setting APN access point does not suit you due to possible complexity, you can also get settings by contacting the appropriate specialists from Yota company. You can:
- Contact the nearest customer service center;
- Write a letter to the support service, sending it to the address [email protected];
- Send your question to text message to number 0999.