Setting up a VPN connection and Windows VPN server. Installing your VPN on VPS hosting from scratch
Many businesses use a VPN to transfer data between computers. To configure VPN Windows 7, XP, 8 and 10 have built-in software, which allows you to create a private virtual network in a few minutes and use it to protect private information.
Settings via Control Panel
On Windows XP, Vista and later versions of the OS, you can create and connect to VPN networks using built-in software. Let's consider this connection step by step:
If the remote VPN server receives the correct data, then within a few minutes the computer will connect to the new private network. In the future, you do not need to configure the connection each time; it will be located in the section quick selection connections. 
Additional connection properties
For the connection to work correctly, it is recommended to slightly change its parameters. To do this, after clicking the Connections button in the menu that appears, select the Properties button. You can also open these properties through the “” section from the Control Panel.

Follow the instructions:
- Go to the section " General", uncheck " First dial the number for this connection».
- IN " Options» disable the item « Enable login domain in Windows».
- In the section " Safety"needs to be installed" Point-to-Point Tunnel Protocol (PPTP)" From the checkboxes we mark “ Password Authentication Protocol (CHAP)" and following it " Microsoft CHAP protocol version 2 (MS-CHAP v2)».
- In the section " Net"check only the second box (TCP/IPv4). You can also use IPv6.
Setting up a VPN on Windows xp, 7, 8, 10 through the Control Panel is the same in terms of execution algorithm. The exception is a slightly modified design depending on the operating system version.
After the connection is established, you need to figure out how to remove the VPN. To do this, just go to the section “ Changing adapter settings» from the Control Panel. Next, right-click on the unnecessary element and select “ Delete».
Setting up a Windows XP connection
The connection setup process is almost the same as in Windows 7.


Now the connection can be made through the networks menu. You just need to enter the user and password to log in.

Creating a VPN Server
This instruction is valid for versions from XP and higher. Unfortunately, through standard remedy creating virtual private networks you can connect only one user per session.

If you do not create a permanent IP or domain name, then to connect the user you will have to change the server address each time.
This completes the creation of the server; now you can connect one user to it. To log in, use the login and password from the previously created account.
VPN server on Windows XP
This instruction is relevant for Windows settings 7, 8 and 10. In XP, the settings wizard is used for settings.

In the future, user and IPv4 protocol settings are made as on other versions of Windows.
Setting up a connection via Windows 8 and 10
VPN connection on Windows 8 has become easier to use and is carried out through small program. It is located in the section " Net» - « Connections» - « VPN».

A VPN connection on Windows 10 and 8 can be configured not only through “ Control Panel", but also through the built-in program. In it you need to specify the connection name, server address and login information.

After entering the data, the network can be started from the connections menu. At this point, the question of how to create a VPN connection can be considered resolved.

How to create a VPN server, errors
If the user has any problems connecting to the VPN, this is indicated by a pop-up window with the number and description of the problem.
809
It is the most common and occurs when connecting via a MikkroTik gateway with the L2TP protocol.
To fix it, you need to perform 3 configuration steps:

If after these settings error 809 is not resolved, then you need to change the registry. To do this, use the Win + R key combination and enter regedit Next, go to the section HKEY_LOCAL_MACHINE\System\CurrentControlSet\Services\Rasman\Parameters. Next, create a DWORD value named ProhibitIpSec with a value of 1.

After this, restart your PC.
806
After setting up a Windows 8 VPN, you may see error 806. It occurs when incorrect setting network or network cable connection.

Let's look at solving these problems:
- Go to settings to change adapter settings.
- Next, create a new incoming connection and add a user with an Internet connection to it.
- In the connection properties, you need to select protocol version 4.
- Now you need to go to the additional settings of the TCP/IPv4 protocol and uncheck the “ Use default gateway on remote network».
- Now you need to allow incoming connections in your firewall TCP port 1723 with GRE protocol resolution.
- You also need to set a permanent IP on the server and configure data transfer to port 1723.
Thus, the remote server will transmit all data through this port and the connection will not be broken.
619
On Windows 7 it occurs when the security of the VPN connection is incorrectly configured.

In most cases it occurs when incorrect insertion user name and password, but can also appear if the connection is blocked by a firewall or if the access point is incorrect. If all entered data is correct, then the error is due to incorrect security settings. They need to be reset:
- In the VPN connection properties, go to the security tab and use the recommended settings.
- You also need to assign the item “ Data encryption required (otherwise disconnect)" After this, you need to save the changes and turn off the computer to restart.
A VPN connection allows you to reliably protect all transmitted data. Thanks to additional encryption protocols, unwanted parties will not be able to view information sent between users and servers. The main thing is to correctly configure the connection to the server.
Video on the topic
The L2TP protocol is more preferable for building VPN networks than PPTP, mainly for security and higher availability, due to the fact that a single UDP session is used for data and control channels. Today we will look at setting up an L2TP VPN server on the Windows server 2008 r2 platform.
PPTP
Point-to-Point Tunneling Protocol is a protocol invented by Microsoft for providing VPN over dial-up networks. PPTP has been the standard protocol for VPNs for many years. This is a VPN-only protocol and relies on various methods authentication for security (MS-CHAP v.2 is most often used). Available as a standard protocol on almost all operating systems and devices that support VPN, allowing you to use it without the need to install additional software.
Pros:
- PPTP client is built into almost all operating systems
- very easy to set up
- works quickly
Cons:
- insecure (the vulnerable authentication protocol MS-CHAP v.2 is still used in many places)
L2TP and L2TP/IPsec
Layer 2 Tunnel Protocol is a VPN protocol that does not itself provide encryption or privacy for traffic passing through it. For this reason, IPsec encryption protocol is typically used to ensure security and privacy.
Pros:
- very safe
- easy to set up
- available on modern operating systems
Cons:
- works slower than OpenVPN
- may be required additional customization router
And so let's go back to the settings for deployment VPN L2TP servers we will use Windows Server 2008 R2, however, everything said, with minor amendments, will be true for other Windows versions Server.
We will need an installed role, which should contain how to do this, we described in detail in the previous article where we raised PPTP VPN, Therefore, I see no point in describing this process again; further we will assume that the role Network Policy and Access Services you already have installed and contains Routing services and remote access . General deployment VPN L2TP servers very similar to deployment PPTP VPN, with the exception of a few settings which we will talk about in detail.
Go to Server Manager: Roles -Routing and remote access, right-click on this role and select Properties, on the tab General check the boxes IPv4 router, select local network and call on demand, And IPv4 remote access server:

Now we need to enter the pre-shared key. Go to the tab Safety and in the field Allow specific IPSec policies for L2TP connections check the box and enter your key. ( About the key. You can enter an arbitrary combination of letters and numbers there; the main principle is that the more complex the combination, the safer it is, and remember or write down this combination; we will need it later) In the tab Authentication Service Provider select Windows - Authentication.

Now we need to configure Connection security. To do this, go to the tab Safety and choose Authentication Methods, check the boxes EAP protocol And Encrypted verification (Microsoft version 2, MS-CHAP v2):

Next let's go to the tab IPv4, there we indicate which interface will accept connections VPN We will also set up a pool of addresses issued to clients L2TP VPN on the tab IPv4 (Set the interface to Allow RAS to select an adapter):

Now let's go to the tab that appears Ports, right-click and Properties, select a connection L2TP and press Tune, we will display it in a new window Remote access connection (incoming only) And On-demand connection (incoming and outgoing) and set the maximum number of ports, the number of ports must match or exceed the expected number of clients. It is better to disable unused protocols by unchecking both checkboxes in their properties.

As a result, you should have only the ports you need in the number you specified in your list of ports.

This completes the server setup. All that remains is to allow users to connect to the server. Go to Server Manager: Configuration - Local users and groups - Users -Select user and right click - Properties. On the tab Incoming calls - Network access rights expose Allow access. (If your server is running Active Directory, then the settings must be entered in the appropriate equipment)
And don’t forget to transfer the ports on your router, and also open them in your Firewall:
- IKE - UDP port 500 (Receive\Send)
- L2TP - UDP port 1701 (Receive\Send)
- IPSec ESP - UDP port 50 (Receive\Send)
- IPSec NAT-T - UDP port 4500 (Receive\Send)
Roskomnadzor was in earnest. The department blocks websites and services. The other day I got to Telegram messenger. Roskomnadzor also plans to completely block VPN services or force them to cooperate.
In short, goodbye to anonymity? No matter how it is!
While discussing the issue of blocking with editor-in-chief Nikita Goryainov and my colleague Artem Bausov, we started thinking about creating our own VPN. In the wild 2000s, we all dabbled in online shooters and had to create our own server at the dawn of our acquaintance with computers.
Now the situation was more acute than ever. In Russia, active blocking of everything that is objectionable to Roskomnadzor continues, in Ukraine it is having its own fun. Mail.ru, Yandex and a dozen very useful resources without unnecessary dancing, residents are not allowed.
Well, we are for democracy, aren’t we? In this material, I will try to tell you as simply and in detail as possible how to make your own VPN server for a ridiculous 75 rubles a month.
Why your own VPN?

IN App Store And Google Play dozens of services that allow you to bypass blocking. But almost all VPNs do not perform well. The speed is incredibly slow, the advertising makes you sick, and you have to reconnect almost every 10-15 minutes.
In addition, when you use a public VPN (and a free one at that), you have absolutely no idea where your traffic goes and what happens to it on the remote servers of yet another fly-by-night service.
Life is easier and safer with your VPN. And the 70 rubles you have to pay monthly for your VPN is a guarantee of your safety.
Creating a cloud server

Don't be afraid of these words. It's not that scary. Even if you are far from network settings, protocols and are afraid of IP addresses, I will try to outline the procedure in as much detail as possible and illustrate each step.
Well, let's go!
ArubaCloud is our everything
There are dozens of cloud server options online. But we need “cheap and cheerful”, right? One of these is Italian cloud server ArubaCloud.
What's good about it? The minimum cost is 1 euro (75 rubles) per month of servicing a remote server. What is meant by remote server?
Imagine an old 1-core computer with 1 GB RAM and 20 GB hard drive. And for just 75 rubles, such a computer is given to you to be torn to pieces remotely.
Here are the characteristics of that same budget car:

But, believe me, for our tasks and deploying our own VPN server, this power is quite enough.
Let's get started
Register on ArubaCloud
Step 2. We launch the utility and carry out simple settings.
First you choose New and fill out the appropriate fields as described in the screenshot below.

Connection Name: put any name here. Just name your connection.
PC Name: The IP address that is specified in the server settings immediately after its creation (step 4 of these instructions).
User Name: In SSH this is exactly vdesktop. You indicate exactly that. The password is the one specified in the administrator password.
You start the connection and after a couple of seconds you see the operating room desktop Ubuntu systems Virtual Desktop.

The final step remains - creating your own VPN.
Creating your own VPN server
This setup takes just a few steps. You are only one command away from your own VPN server in the terminal.
Step 1. In the lower left corner, tap on the icon (a la the Start menu in Windows). Select System Tools -> LXTerminal. In the terminal that opens, enter the following command (be careful):
wget https://git.io/vpnsetup -O vpnsetup.sh && sudo sh vpnsetup.sh
Note: the command specifies -O (the English letter "O", not zero).

Press Enter and wait a couple of minutes for the installation to complete.
Step 2. At the end you will receive a message with all the details of your own VPN server. BE SURE TO SAVE this data, write it down and copy it to several secret places so you don’t have to look for it later.

That's it, the VPN server is running. Now you can safely connect it to any device.
Turn on your VPN on iPhone
In order for a settings item with VPN to appear on your iPhone, install any mobile VPN application from the App Store. It is only needed to activate the menu item.

After installing the VPN app, open Settings -> VPN and, having created own VPN, enter the following information.
ADDITION:Name: Any VPN name you decide
Type: IPsec Xauth PSK (or IPsec)
Server address: here is the IP address of your cloud server
IPSec ID: leave it blank
IPSec Shared Key: specify the IPsec PSK password from the terminal
Username: Username from the terminal (usually vpnuser)
Password: Password from terminal
For reasons that are not entirely clear, many users are faced with a situation where they connect to the VPN, but the Internet refuses to work.
In this case, run the command in the terminal:
sudo nano /etc/ipsec.conf
Replace sha2-truncbug=yes on sha2-truncbug=no and reboot Linux.
You can give your VPN server login details to your relatives and friends. No one except your family and selected people will have access to it. As a bonus, you get a remote server. If you wish, you can deploy file storage there or run not too demanding system resources services.
Virtual Private Network, aka VPN, aka, virtual private network. In fact, in a sense, such networks should be considered a step back, however, a forced and extremely effective step. VPNs allow you to return from global networks to local networks, albeit on a rather unusual scale.
VPN allows you to unite computers scattered around the world into virtual local networks; at the same time, you can interact with other members of the network as if everyone were connected to the same router - play on a local network, open shared folders through “Network Neighborhood”, as well as print on “shared” printers. So, we suggest you learn how to create VPN networks, connect to them, and also solve some problems that may arise (although not necessarily) while using them. Even though general principle always remains the same, we will talk about how to install a VPN on Windows 7.
Creating a server
Let's start creating a VPN server - a computer to which other users of our website will connect. virtual network. First of all, we need to get to the Network and Sharing Control Center. To do this, perform the following steps:"Start" button; "Control Panel"; "Network Control Center and shared access».

If on the right top corner you see the inscription “Category”, you need to click on it and switch the mode to “Large icons” - this display mode is used in our instructions.
As a result, you should see something like this:

The window displayed on your screen allows you to control almost any aspect of your computer's networking. Here you need to click on the “Change adapter settings” icon.

To begin creating an incoming connection, follow these steps:

Now you have a window like this on your screen, with a number of small exceptions.

Firstly, there may be other items in the list of accounts, and also, you are unlikely to use “vpnuser”, which we will now create by clicking on the “Add user” button.

Fill in the following fields:“User” - the client’s login is indicated here; “Password” and “Confirmation” - the password of the account being created (the values must match); field " Full name» optional - it can be left empty, as it does not affect functionality.

After filling out the fields, click on the “OK” button. If you want to add several more VPN users (this may be useful for further control over them), repeat the procedure as many times as necessary. When the creation is finished, click “Next”. In the next window, check the “Via the Internet” box, otherwise the “Next” button will be unavailable. Accordingly, after the checkbox, click on the button and we get the following window:

All that remains is to configure the protocols. Regarding their choice, it is better to leave everything as is. However, if you plan to use applications that require IPv6 support, you can check the box next to this protocol, however, in 99% of cases this is not necessary.
It is extremely important to configure IPv4 correctly:

Everything is necessary so that you can find connected users in the future. In addition, this way you can limit the maximum number of connected people, which can be very useful. When finished, click "OK" and then the "Allow access" button. The VPN server has been created. All that remains is to click on the “Close” button and start setting up clients. Also pay attention to the chapter “Port Forwarding” - it may be useful.

Connection on a computer
Let's start setting up client computers. First of all, you need to find out the server address, if you connect to a “homemade” VPN server, to do this you need to go from it (from the server), for example, to the site myip.ru, which will clearly and clearly display your IP address. In the future, we recommend using services in the spirit of DynDns - so as not to waste time searching for an address.
So, to establish a VPN connection, do the following:

This click will launch a short connection wizard, in the first step of which you need to select “Connect to a workplace” and click “Next”.

Now select the first item from the list. You don’t even have to think about the second one in the 21st century - it is needed for DialUp modems.

If you did everything correctly, it's time to enter the server address. This can be either the IP address that we looked at on the server, or a domain name that can be obtained through dynamic DNS services.

In our case, the address is indicated as 157.57.121.54, however, in your case the numbers will probably be different. You can fill in the “Destination name” field at your own discretion - it will not affect the operation of the network. Also, it’s worth checking the “Don’t connect now” box so as not to waste time during the setup process.

Once the required data is specified, click “Next” and begin filling out the fields:
- “Username” - here you enter the login specified when creating the VPN server;
- “Password” - similar – indicate the pre-set password for the VPN user;
- Optionally, you can check the “Remember password” checkbox.
All you have to do is click on the “Create” button and your VPN connection is ready. If the server is running and you are confident that your actions are correct, you can connect now using the “Connect now” button. In addition, you can always establish a connection using the network icon in the lower right corner.

That's it. If everything has been done correctly, then you can start using your virtual network, however, we recommend that you read this article to the end - even if everything works fine now, there is a risk that problems will appear sooner or later and it is better to be prepared for them.
VPN server in Windows 7
First of all, it should be noted that the built-in VPN server in the “seven” has one important and extremely unpleasant limitation - only one person can connect to your server at a time. If you want more, install Windows Server, however, you can find a fairly effective patch online that removes this annoying limitation - after applying it, several connections will become available. In addition, sometimes for a complete setup it is necessary to configure the firewall and forward ports - we will tell you about this now.
Video: Creating a connection
Setting up firewalls
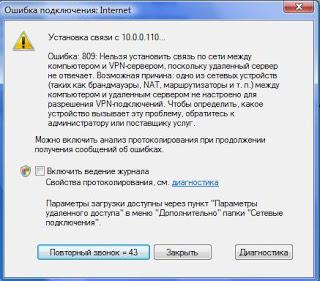
In some cases, the connection is established, but there is no connection between the computers. It's all about the built-in firewall (or firewall) of Windows.
To make it more friendly, you need to indicate that you trust the connected users.
We establish a connection, go to the “Network Center” and look for the connection icon. On the client it is called “RAS”, and on the server it is called “VPN connection”.

Click on them on both machines and select “Home Network”.

That's all, your problems should disappear.
Port forwarding
Another catch is that home routers and ADSL modems do not open the ports required for VPN by default. In this case, you will have to do it manually.

You will have to open the ports on the server, or rather, on the router to which it is connected - how this is done is described in detail in the instructions for your device, but we will only inform you that the Windows VPN server uses TCP port 1723. Also, if available such a feature, disable GRE blocking.
Setting parameters
Even when the VPN server is already configured, you can change its settings. To do this, open the “Change adapter settings” window that we used in the first part of the article, then right-click on the “Incoming connections” icon and select “Properties”.

A window will appear on your screen where you can edit, delete, and add users, as well as configure protocol settings and IP address ranges. In other words, change the parameters that were specified when creating the connection.
Attention! This function Only works fully if the connection is idle - if anyone is connected to you, disconnect it before changing parameters.
Error 807
The network error about an interrupted connection with number 807 is a real scourge for novice admins. To get rid of it (or at least find out the cause of its occurrence), you need to take several steps:

As an additional measure, try setting everything up again.
Enabling debug logs
Sometimes to receive additional information it is necessary to record all server events in a file that is easy to read. To run this process, press Win+R and in the window that opens, enter: netsh ras set tracing * enabled.

Press Enter and go to the Windowstracing directory, there you will find several files (5 pieces) containing detailed information about connection attempts and transmitted data. They open to anyone text editor. Disabling recording is done with a similar command, however, the word enabled must be replaced with disabled. VPN is a great solution for a number of cases. However, it has gained the greatest popularity in the corporate environment. Let's say you're on a business trip with your laptop, but want to use it as if you were in the office. In this case, a VPN is exactly what you need.

Besides, similar solution often used for remote access to printers - despite the fact that there are a lot of modern protocols, such a solution still remains simple and convenient.
And, of course, we must not forget about games - a VPN network greatly simplifies the launch game programs, designed to work on a local network. Naturally, all this is far from full list possible VPN applications. Functions of this service can be useful to everyone, so keep these instructions ready.
>Besides powerful computer and an impressive list additional programs for convenient surfing and safe work on the Internet, you need reliable server- a tool that provides communication with people, services, companies and information sites. Among different types the best choice would be a VPN server, if only because it is included as an option operating system Windows. Read on, and you can launch and configure it on Windows 7 yourself and at no cost.
Connecting and setting up a VPN server
Don't be alarmed. Create and prepare for correct operation VPN server is not difficult, but prerequisite- you have administrator rights.
What is a VPN server
Literally, VPN (Virtual Private Network) translates as “virtual private network.” Technically, this is a set of protocols and solution architecture that provides secure communication in the digital environment. By essence of VPN is a secure add-on on top of the usual virtual network.
Installing and configuring a VPN server will not require much time from you, since it is already built into the operating system Windows system. According to experts, the most successful private server configuration is contained on this platform.
This is what it looks like simplified diagram connections via VPN server
The server's job is to create tunnels connecting the user to the endpoints he wants to get to. Moreover, the information is encrypted using a complex algorithm, which is almost impossible to decode. No one from the outside can enter the tunnel. The server blocks such attempts, leaving personal information well protected - correspondence, calls, messages, video and audio files.
What is it for?
The essence of the answer is in the tasks that the server performs. It not only brings together many devices in the virtual space, such as computer terminals, laptops, tablets and even mobile devices. Its technology provides anonymity, data encryption and security confidential information from interception by intruders.
Some will object: we have no need for anonymity and data protection, because there is nothing to hide. Let me not believe you. It’s not just criminals who use encrypted traffic; most are not averse to protecting data so as not to “share” access passwords to their bank card or not become the target of blackmail due to leakage of personal information. As they say: it is stupid to leave the door of the house open if the world does not consist only of good and good people. Anonymity also adds a nice detail - the ability to visit resources that were previously inaccessible for various reasons.
 One of the most common reasons using VPN- reluctance to be tied to the workplace
It’s also a good idea to mention the benefits of using a VPN:
- scalability - no additional costs are required when connecting another participant;
- flexibility - it doesn't matter where you access from;
- A valuable opportunity to work anywhere.
A VPN server is extremely necessary when creating corporate networks, when for the safe operation of a company or enterprise it is necessary to limit access to unauthorized persons to information circulating among employees. Using technical solutions VPN, it is not difficult to organize the confidentiality of clients located outside the company.
How to create and configure on a computer with Windows 7: step-by-step instructions
The sequence of actions that need to be performed to launch and configure a VPN server on the Windows 7 platform is as follows.
- Open the Start menu and go to the Control Panel tab.
 Go from the Start menu to Control Panel
 - In Computer Settings, select Network and Internet.
 Open the “Network and Internet” section
 - In the window that opens, click “Network and Sharing Center.”
 Select "Network and Sharing Center"
 - Then click “Set up a new connection or network.”
 Select “Set up a new connection or network”
 - Select “Connect to Workplace” in the new window.
 Click on the “Connect to workplace” button
 - Then click on “Use my Internet connection (VPN)”.
 Select "Use my Internet connection (VPN)"
 - When prompted to establish an Internet connection immediately or defer this action, select “Delay setting up an Internet connection.”
 Select “Delay Internet connection setup”
 - Next, write the server address, destination name and come up with a name for the connection.
 Enter the VPN server address and write the name of the connection in the “Destination name” field
 - In the next window, enter the username and password that are registered on the VPN server. In the “Remember this password” field, check the box so that you do not have to enter it every time you connect. Be sure to save.
 Enter the username and password registered on the VPN server. Check the box "Remember this password"
 - The connection has been created. Click the "Close" button. For convenience, create a shortcut to the program on the “Desktop”.
 Close window
 - Go to the Start menu again, then Control Panel, Network and Internet, Manage Networks and Sharing, where select Change adapter settings.
 Go to “Change adapter settings”
 - Find the VPN connection in this window and right-click on it, then go to its “Properties”.
 In the VPN connection window, right-click on it and go to its “Properties”
 - Next, select “Security”, where in the “VPN Type” field select “Point-to-Point Tunnel Protocol (PPTP)”, and in the “Data Encryption” field click on “Optional”.
 Open “Security” and in the “VPN Type” field select “Point-to-Point Tunnel Protocol (PPTP)”, in the “Data Encryption” field select “optional”
 - In the same window, only on the “Network” tab, uncheck the boxes next to the “Client for Microsoft networks" and "File and Printer Sharing Service for Microsoft Networks."
 On the “Network” tab, uncheck the boxes next to the items: “Client for Microsoft Networks” and “File and Printer Sharing Service for Microsoft Networks”
 - Then, without closing the window, go to the “Options” tab and uncheck the box next to “Include Windows logon domain”, then click “OK”.
 On the “Options” tab, uncheck the box next to “Include Windows logon domain”, then click “OK”
Before starting, the VPN will ask for a location. Best choice- “Public place”, then the greatest privacy in the digital space will be ensured. If desired, in the “Connection” menu, configure the settings for encryption and use of other devices.
If you still have questions about installing and configuring a VPN server in Window 7, watch the video.
Video: how to set up and configure a VPN connection in Windows 7
Setting up for multiple clients
The process of connecting new private network participants is as follows.
- Go to “Control Panel” => “ Network connections" => "Creating a new connection."
- Start working with the “New Connection Wizard” => “ Direct connection to another computer" => "Accept incoming connections."
- The “Wizard” will prompt you to indicate those devices with which you plan to receive incoming connections, but they are not suitable, so click on “Next”. When the “Wizard” asks a question about VPN, stop at the “Allow virtual private networks” item.
- Entering authorization parameters. The “Wizard” prompts you to select those users who are allowed to log into the virtual private network. Select and click the “Add” button. When prompted by the Wizard, enter the new username and password.
- Configure TCP/IP protocols. Select the appropriate item in the list of protocols and click on the “Properties” button. To allow the client to access the local network, activate the “Allow callers access to the local network” option. Next, designate the range of IP addresses that connected participants can use.
Troubleshooting installation and operation problems
Launching a VPN is often accompanied by errors. The machine reports them in three digits. Thus, errors with a digital value of 6** report the working status of the network, but you need to check the entered information. This refers to the communication protocol type, password and name. Code 7** provides information about the presence of errors in the connection settings. Code 8** hides problems with network settings or those related to a banal lack of Internet connection.
Let's look at common mistakes and how to fix them.
Error 807
This error indicates that the network connection has been interrupted. Common reason- problems with traffic transmission due to low quality Internet connection or server overload.
 This is how the system reports error 807
There are many options to solve the problem. Try re-creating the VPN connection. Didn't help? This means remove the KV958869 system or, better yet, restore it to its previous state. Didn't work out again? Then change the connection type from automatic to “PPTP”. Please note that error 807 also occurs when blocked by a firewall/firewall, so try disabling them.
Error 868
We're talking about malfunction VPN ports. Often the termination occurs due to an incorrect DNS server name. Therefore, first of all, look at the TCP/IP protocol. It's either listed incorrectly DNS address, or not entered at all.
 This is what error message 868 looks like
Determine the status of the local network connection. In the “Network Connections” tab, follow these steps: “Start” => “Control Panel” => “Network and Internet” => “Network and Sharing Center” => “Change adapter settings”. The detected defect will dictate further actions.
So, if there is no local network connection, connect via VPN. No result? Check if the cable is working. When it is disabled, you will see it on the corresponding icon blue screens with a red cross. Try using the right key to first disconnect and then reconnect the connection. Nothing happened again? Then do the same “disconnect/connect” operation with the cable (manually).
Is the error still there? Check your connection. Open it with the right button and see how many packets have been sent - there should be at least 5-7. If the shipment received less or is completely empty, then find out how the equipment works. Go to “Administration” in this way: “Start” => “Control Panel” => “System and Security” => “Administration” => “Services”. Find the DHCP client in the list of services. Restart it with the right button. Then restart your PC.
A non-working state can also be caused by blocking port 53. Your excessive caution simply played a cruel joke - you yourself programmed the security system in such a way that it does not allow absolutely everything. In this regard, it is recommended to check whether port 53 is blocked. Even if “Port is open” is written, this does not mean that the connection is working. Here we only mean readiness to connect. Just create an allow rule for port 53 in TCP protocol and UDP. No result? Then you will have to resort to a last resort, that is, reinstall Windows.
Be sure to watch the video from detailed instructions port opening. It also shows ways to correct port connection errors.
Video: opening a port on a local network
Errors 734 and 741
Error 734 occurs when the PPP Link Control Protocol is interrupted, and error 741 is due to the machine not recognizing this type of encryption.
 Error 734 can be resolved using a simple algorithm
They will help correct the situation simple steps. Double-left-click the VPN and open Properties, then Security, and uncheck “Data encryption required.” Confirm your intentions.
This is only a small part of the problems that arise when launching a VPN, but almost all of them can be solved quite simply and without much time.
What is OpenVPN
The most popular solution for organizing a private network is OpenVPN. The main advantage is economy, since the traffic is compressed. Among the disadvantages of the program is the complexity of configuration, which we will now deal with.
OpenVPN - special program to set up a VPN connection. Naturally, you first need to install it on your computer. It is better to take the download file from the official website of the program:
The installation process is quite simple, except that you will need to temporarily disable the antivirus. When loading the program into the system, a virtual network adapter TAP-Win32 Adapter V9 and driver for it. OpenVPN's task is to set the IP address and mask of the local add-on.
First of all you need to copy configuration file, which should be provided to you by your provider. Save the data in the C:\Program Files\OpenVPN\config folder. Once in it, click on the “Insert” item.
OpenVPN should only be run with administrator rights, otherwise the program may not work correctly. Be sure to change the compatibility properties in the OS. On OpenVPN, open Properties, find Compatibility, and check Run this program as an administrator. Next, confirm your actions by clicking on “OK”. A connection log window should appear.
If you followed all the steps correctly, then setting up a VPN via the OpenVPN protocol for Windows 7 was successful. Still having difficulties? Look at the screenshots step by step instructions Open VPN settings and a short video.
Setting up the program step by step (photo)

Copy the configuration file to the C:Program FilesOpenVPNconfig folder

Confirm your access request

Run Open VNP as an administrator: go to “Start” and right-click on the OpenVPN shortcut, select “Properties”

Open the program menu in the tray (right corner) and select “Connect”

A window will open with the contents of the connection log
Video: Installing OpenVPN GUI
Setting up IPSec VPN
The IPSec standard is specifically designed to enhance the security of the IP protocol. Allows you to confirm authenticity (authentication), and also checks the integrity and encryption of IP packets. IPsec contains protocols for secure key exchange:
- RFC 2401 IPSec
- RFC 2402AH
- RFC 2406 ESP,
- RFC 2409 IKE.
How to set up a VPN using IPsec is described in step by step guide below.
- In the Control Panel, click View: Small Icons, then go to Control Center.
- Next, find “Set up a new connection” on the “Change network settings” tab.
- Complete the action by clicking on “Connect to Workplace”. Go to it via the “Connection or network setup” tab.
- What you do next depends on whether a VPN was previously installed on your machine. If yes, then in the pop-up window click “No, create a new connection and continue with your actions.” If not, select “Use my Internet connection.”
- Don't forget to add your VPN address, and in the "Destination Name" line, write the server name. Don't forget the mark. Select the “Installation for future connection” column and continue with your actions.
- Next, add your password and login registered on the VPN server. In the window that opens, agree to connect.
- Then, in the Network and Sharing Center, change the adapter settings.
- Finally, select VPN Type. This will be an IPsec VPN. Of course, note that encryption is optional. IPsec VPN channel is ready!
To conclude the topic about IPsec VPN, I would like to emphasize the usefulness of the program, given the two disadvantages that VPN has. The first and most serious is the vulnerability of the PPTP protocol. We are talking about the insufficient reliability of single-factor authentication. In other words, when we confirm our access rights only using a login and password. In this case, the login or user name is usually known, and the password quite often falls into the hands of a hacker (for example, when a Trojan virus is introduced into your OS). Then outsider receives full access to the local network. The second drawback is that there is no way to verify that the connection was made by a trusted user and not by the same attacker who gained access to the account.
Video: setting up an IPsec tunnel between two Mikrotik routers
Now, user, you know, if not all, then the basic steps for creating and setting up your own, full-fledged and completely secure virtual network based on a VPN connection in Windows environment 7. You also learned how to properly configure OpenVPN and IPsec VNP programs. Rest assured, a private server guarantees the same full connection as a regular one. Your computer will not notice the difference between a VPN and a channel without encryption, but the security of your work in the digital space increases several times.