Raspberry Pi - what can be done based on the Raspberry Pi? Smart home control system based on Raspberry Pi
The Raspberry Pi mini-PC could quickly become a popular platform for various kinds of projects - both commercial and not so much. There are several reasons for this, including the low price of the computer, its relative versatility and openness.
As a result, interesting projects began to appear with enviable regularity, and some of these projects are presented in this collection. There are both quite serious systems and projects that can be called entertaining, from the “why not?” series.
Supercomputer based on Raspberry Pi and Lego

One of the most interesting projects based on the Raspberry is a supercomputer made of 64 Raspberry Pis. The elements used to create the “server cabinets” were a regular Lego set.
SD memory cards with a capacity of 16 GB were used as ROM for this system. Such cards were installed in each “raspberry”.
How to do something like this? Detailed instructions from the creator, professor at the University of Southampton Simon Cox, follow this link.
Pi based weather balloon

Computer enthusiast Dave Ackerman decided to use his own mini-PC to create a weather balloon that could take photos from the stratosphere. Detailed.
After a few months of work, Dave was actually able to launch his probe, which flew more than 30 kilometers, worked at temperatures of -50C in a very rarefied atmosphere (1% of the standard).

The probe recorded all the necessary parameters, including temperature, humidity, density, and altitude. The coordinates were also recorded. Among other things, a camera was also used, with which we managed to get many excellent photographs.

Internet phone
Based on the “raspberry”, the usual one was improved landline phone with rotary dialer. Instead of a regular board, the developer installed a Raspberry Pi.
After a series of manipulations, the developer was able to create a Skype phone as a standalone device, without the need to connect to a regular computer.
Here's how it looks and works:
Gaming station

This is a habrauser project. An interesting device that allows you to play a whole range of old games for a large number of consoles, including NES, SNES, Sega Genesis, PlayStation, as well as SCUMMVM, zxspectrum.
The author wrote that “the entire system is based on the RetroArch port, based on the libretro library, which allows the use of emulators of various consoles.” Regarding graphical shell, then EmulationStation was used, also RetroPie.
Raspberry based tablet
This tablet has interesting name- PiPad, and wood was used as the material for the body. It all looks like this:

The tablet display diagonal is 10 inches. Well, all other characteristics coincide with the characteristics of the “raspberry” itself. True, this is not a couple of hours of work, but thorough work. Detailed instructions for creating a tablet based on the “raspberry” are inside.
The OS is Raspbian Linux with XBMC.
Wall calendar organizer

An Instructables user with the nickname Piney created a useful gadget for himself - an interactive wall calendar with the ability to add tasks and events.
The software platform is the usual Google Calendar, all data from which is transmitted via WiFi to this wall-mounted device.
Detailed instructions on how to create something similar are here.
Own radio station
I don’t know how legal it is, but the project is really interesting. Dedicated to those who have always wanted to become a DJ at their own radio station.
True, the coverage of such a radio station is relatively small: an area equal to the area of the stadium.
DVD changer
The person who created this thing just got tired of constantly changing DVDs. The result was this project, which was done simply because it could be done. Why not?
Lighting system for Christmas
There is not much time left before the New Year and Christmas, so if you have an extra raspberry, you can create a lighting system for your own home or apartment. How to make such a system is described. And below is a video showing how it works.
In general, the scope of use of the Raspberry Pi is very wide, much wider than the creation of photo frames and laptops. Developers are trying to improve their device by releasing new, updated versions of the mini-PC and additional modules for it. For example, Raspberry Pi B+ was released in the summer, and the company recently introduced . And after some time (unfortunately, it is impossible to say more definitely), the release of Raspberry Pi A+ is planned.
Raspberry Pi is an innovative product from English developers. Their main goal was to popularize computer education among the general population, make programming a more extensive and accessible discipline, and encourage more people create something new using new technologies.
The product name Raspberry Pi means "raspberry pie", the manufacturing company thus emphasized that this computer is intended primarily for children.
What is this invention and what is the application of Raspberry Pi in modern world, we will talk about this below.
Features of the Raspberry Pi computer
The Raspberry Pi device is a small computer in the form of a single board without a housing. The developers encourage children and adults to pay attention not only to the use of computers, but also to study them from the inside, and also offer to use their imagination and make others something of their own using this computer.
According to the developers, the Raspberry Pi device should perform the following educational goals:
- to interest schoolchildren in developing programming skills;
- contribute to the endeavors of young programmers;
- help experienced computer scientists discover new horizons and make new achievements in the field of programming.
In the Raspberry Pi's home country of the UK, a complete kit can be purchased for just £75. The kit itself consists of the following components:
- the Raspberry Pi mini-computer model B itself;
- micro CD (8 gigabytes);
- keyboards;
- optical mouse;
- Micro CD Card Adapter;
- power supply;
- HDMI and micro USB cables.
The first batch of Raspberry Pi was produced in the Middle Kingdom, but since the end of 2012, production has been entirely transferred to the UK, to a plant in Pencoed (Wales). On average, the plant produces about 40 thousand Raspberry Pi mini-computers per week.
Raspberry Pi Specifications
So, what are they technical specifications this unique computer without a case, let's find out:

Using a Raspberry Pi computer for home
The most commonly used Raspberry Pi minicomputer model is the 215 MB Model B RAM with Ethernet support. There is also another modification of the device, in which the components are placed more compactly; it also has four USB port, the number of GPIO input and output ports in it is significantly greater, in addition, there is no composite video output.
The applications of the Raspberry Pi computer are quite wide. Despite the fact that this device is not very powerful, it is still a fully functional computer. If you need a machine to solve simple problems that do not require the use of powerful computing resources, then you can safely connect a Raspberry Pi to the device standard machine elements:
- monitor;
- mouse;
- keyboard;
- connection to any Linux OS distribution.
At home, you can use the Raspberry Pi device for the following purposes:
- creating a home media server;
- as a data storage server;
- as a “think tank” for automated machines or robots;
- as a home automation server (or smart home system).
 As we see, spheres Raspberry applications Pi for private needs may be different. Basically, these are narrow-profile tasks related to the work of programmers or other developers. And if we talk about widespread use, then it’s worth familiarizing yourself with the features of using Raspberry Pi for home automation systems or the so-called smart home. Let's look at the practical side of this issue.
Any home automation system or so-called smart home is quite complex and multi-structured. In addition to the fact that it is designed to carry out certain scenarios that are given to it by the user, it has the ability to make its own decisions in a certain emergency situation. We can safely say that such a system has the makings of artificial intelligence.
Many people today apply the concept of “smart home” to everything, for example:
- GSM alarm systems;
- water flow sensor;
- light control, motion sensors, etc.
All these phenomena can be part of the structure of home automation, but they cannot constitute it separately.
The home automation system (“smart home”) includes the following components:
- central server;
- it is connected via an RS485 interface to controllers that are located in every room and area of the house;
- controllers are connected to certain management devices to protect, control and regulate the operation of the system.
This network architecture of this system is good because the home owner does not need to run inconvenient wires from each device to the server, but simply connects the controllers to which they are connected via a single UTP cable. One pair of its wires is used for the RS485 interface, while the others power sensors and controllers. It is worth noting that the work structure is designed in such a way that if one or more of the controllers fails, or even the operation of the central server is disrupted, this will not affect the operation of the system as a whole.
And the Raspberry Pi mini-computer in this system and is the central server. You need to install a Web server on it, with the help of which any user, through his mobile device (smartphone, tablet or laptop), will be able to use a regular browser to have data about all the processes that occur in the house and manage these processes. The user has access to the server using a login and password via a home local network or via a global network if logged in via a Wi-Fi device.
TO serial port UART devices, using a matching device via the RS485 interface, connect controllers that are equipped with a different set of pins or inputs. You can also connect a GPS model to the same interface and use it to access the system via mobile or landline telephone communication, if the user is in an area where there is no Internet access. Access is also permitted through a password, as in the previous case. Another device on the network is radio module, with which you can bind to common system all radio sensors and remote controls.
So, the current version of the home automation system based on the Raspberry Pi computer consists of a central server and controllers with an RS485 interface, which are needed to communicate with the server. Their description looks like this:

Now let's find out how the Raspberry Pi device was used by the inventors to create innovative products. Let's look at some of them.
Kano constructor
The Kano construction set for children is not just an ordinary construction set, it is a modular computer; even a child can assemble such a puzzle. The designer set includes the following:

Thus, even a child can assemble a computer himself, which is then connected to a monitor or TV via HDMI port.
This construction set was originally created for children, but has become popular among adults. Funds for the development and implementation of this project were raised through a fundraising platform for creative inventions. Thanks to assembled computer Can perform the following actions:
- record music;
- watch videos in HD format;
- write programs;
- create your own games.
Flying device SkyJack
Other inventors, based on the Raspberry Pi computer, have created the SkyJack drone, which is controlled via a Wi-Fi connection. Such a device is capable of reaching helicopter altitude, tracking and controlling the paths of military helicopters, and can also be used to intercept radio signals and create interference. However, despite such capabilities, the device is approved for mass use due to its short range.
Poppy: robot alien
Poppy robot was created using 3D printing French company INRIA Flowers. The robot is controlled by a Raspberry Pi mini-computer. The design of the robot repeats the biological structure of a person, it has joints, a spine and tendons, its gait is similar to that of a human, it walks, stepping from heel to toe and evenly guiding the center of its gravity.
What is No More Woof?
No More Woof is a device that is still under development, and is based on the Raspberry Pi. With its help, the owner will understand what his dog wants. So, the device will be attached to the animal’s head and work on the principle of an electroencephalograph, that is read information from a dog's head and transfer it to the owner via Raspberry Pi. When such a device will be ready and exactly how it will be used is still unknown, but similar headsets, although not so advanced, have already been used by professional dog handlers.
Everyone sees that with the advent of the new millennium, the interest in computers among the new generation and beyond is exclusively consumer. Children do not want to learn to program and create something new, but want to be exclusively “users”. The Raspberry Pi developers are confident that their device will return people's former interest in studying computer science and will force them not only to use new technologies, but also to create them.
I'm not a particularly big Linux expert (almost a beginner), so I'll be very happy with constructive criticism in the comments.
Everyone who wanted it bought a Raspberry Pi 3 a long time ago, and I was waiting for something unknown :) However, I recently got my hands on this computer, so I want to share my impressions and useful (for someone) tips on setting it up.
Hardware

The computer was ordered on AliExpress immediately with a case and power supply (Model B, 1 GB of RAM). The memory card, microSD SanDisk 16 GB class 10, was already lying around the house. Considering its price, the entire “ system unit"cost approximately 3000 rubles.
A regular Full HD TV was connected as a screen ( hdmi cable accidentally lying around in the pantry). From the peripherals, I initially connected only the keyboard and mouse, connecting them to USB ports.
Raspberry in certain cases It heats up noticeably (while showing a thermometer icon in the upper right corner of the screen), so additional ventilation holes were drilled in the case almost immediately. The efficiency of complete radiators is so-so, you need to look for something more serious if you are going to load the computer at 100%.
operating system
Choosing an OS for Raspberry Pi 3 is a delicate matter. If anyone doesn't know, this is an ARM processor. That is, ordinary Linux distribution will not fit on the device; a specially prepared assembly is required.
Actually, due to the relatively specific hardware, there will be many other difficulties with programs, etc. in the future.
There are several official and unofficial Linux builds for this mini-computer. Which one to use depends on the task at hand. In my case, the Raspberry Pi 3 will be used as a regular home computer for work and entertainment (sounds somewhat ambitious). After trying several operating systems, I settled on the main official distribution, Raspbian Stretch 9.1 (the newest at that time). In my opinion, it is faster, more stable and more versatile than the others.
Installing the OS on Raspberry is very simple. Download the image, unpack the .img file and write it to the memory card using a special program (for Windows, for example, Win32 Disk Imager).
A more detailed description of the OS recording process can be easily found on the Internet.
After finishing recording, the memory card must be inserted into the appropriate slot of the Raspberry Pi. Then we turn on the device into the electrical network and start initial setup(inserting the power supply into a power outlet is the standard way to turn on this computer).
If you thought that the Raspberry Pi 3 could compete on equal terms with a regular home computer for 20,000 rubles, then this is not at all the case. Raspberry will work much slower, and a number of tasks are completely inaccessible to it. However, the mini-computer copes well with certain functions. For example, it will cope perfectly with the role of a terminal for not too “heavy” web applications.
Setting up Raspberry Pi 3 (Raspbian OS)

When you first start it, you don’t even need to select or click anything. The system is almost ready for use. After reboot, the desktop appears.
Although there’s nothing much to be happy about here - you’ll just have to configure more things in the already installed system 😉
First we connect to the Internet. With a wired connection, the Internet should already work on its own. In my case, Wi-Fi is used, so you need to click on the red crosses on the taskbar (network connections icon), select the wireless network and enter the password. Everything is almost the same as in other operating systems.
It will allow you to do everything further actions in the terminal with superuser rights. Otherwise, you will have to add sudo at the beginning of every second line (or even more often).
All other commands are given in the article without sudo. That is, it is assumed that the above recommendation has been implemented.
We immediately update the package database and device firmware:
Apt update apt upgrade rpi-update
Then go to the Raspberry Pi settings: “Start” (raspberry icon) > Preferences > Raspberry Pi Configuration. Click “Change Password...” and set New Password(simultaneously for the user and superuser). This will avoid some problems in the future.
By default, Raspbian creates the user pi with the password raspberry.
Let's set it up further. Hostname (computer name on the network) does not need to be changed. My image is not displayed on the entire screen (a thick black frame around the perimeter), so I switch the Underscan parameter to the “Disabled” position. On the “Performance” tab, change the GPU Memory value to 128 (you can leave 64, but some applications may not be enough).
Go to the “Localization” tab. Click “Set Locale...”. Select Language: ru (this will give at least some translation of the OS into Russian). We set the time using “Set Timezone...”. In my case, Europe/Moscow. Select the main keyboard layout via “Set Keyboard...”. I recommend United States/English (US), because everyone is already used to it. Just in case, go to “Set Wi-Fi Country...” and also select RU.
After all this, click “OK” at the bottom of the window and agree to reboot.
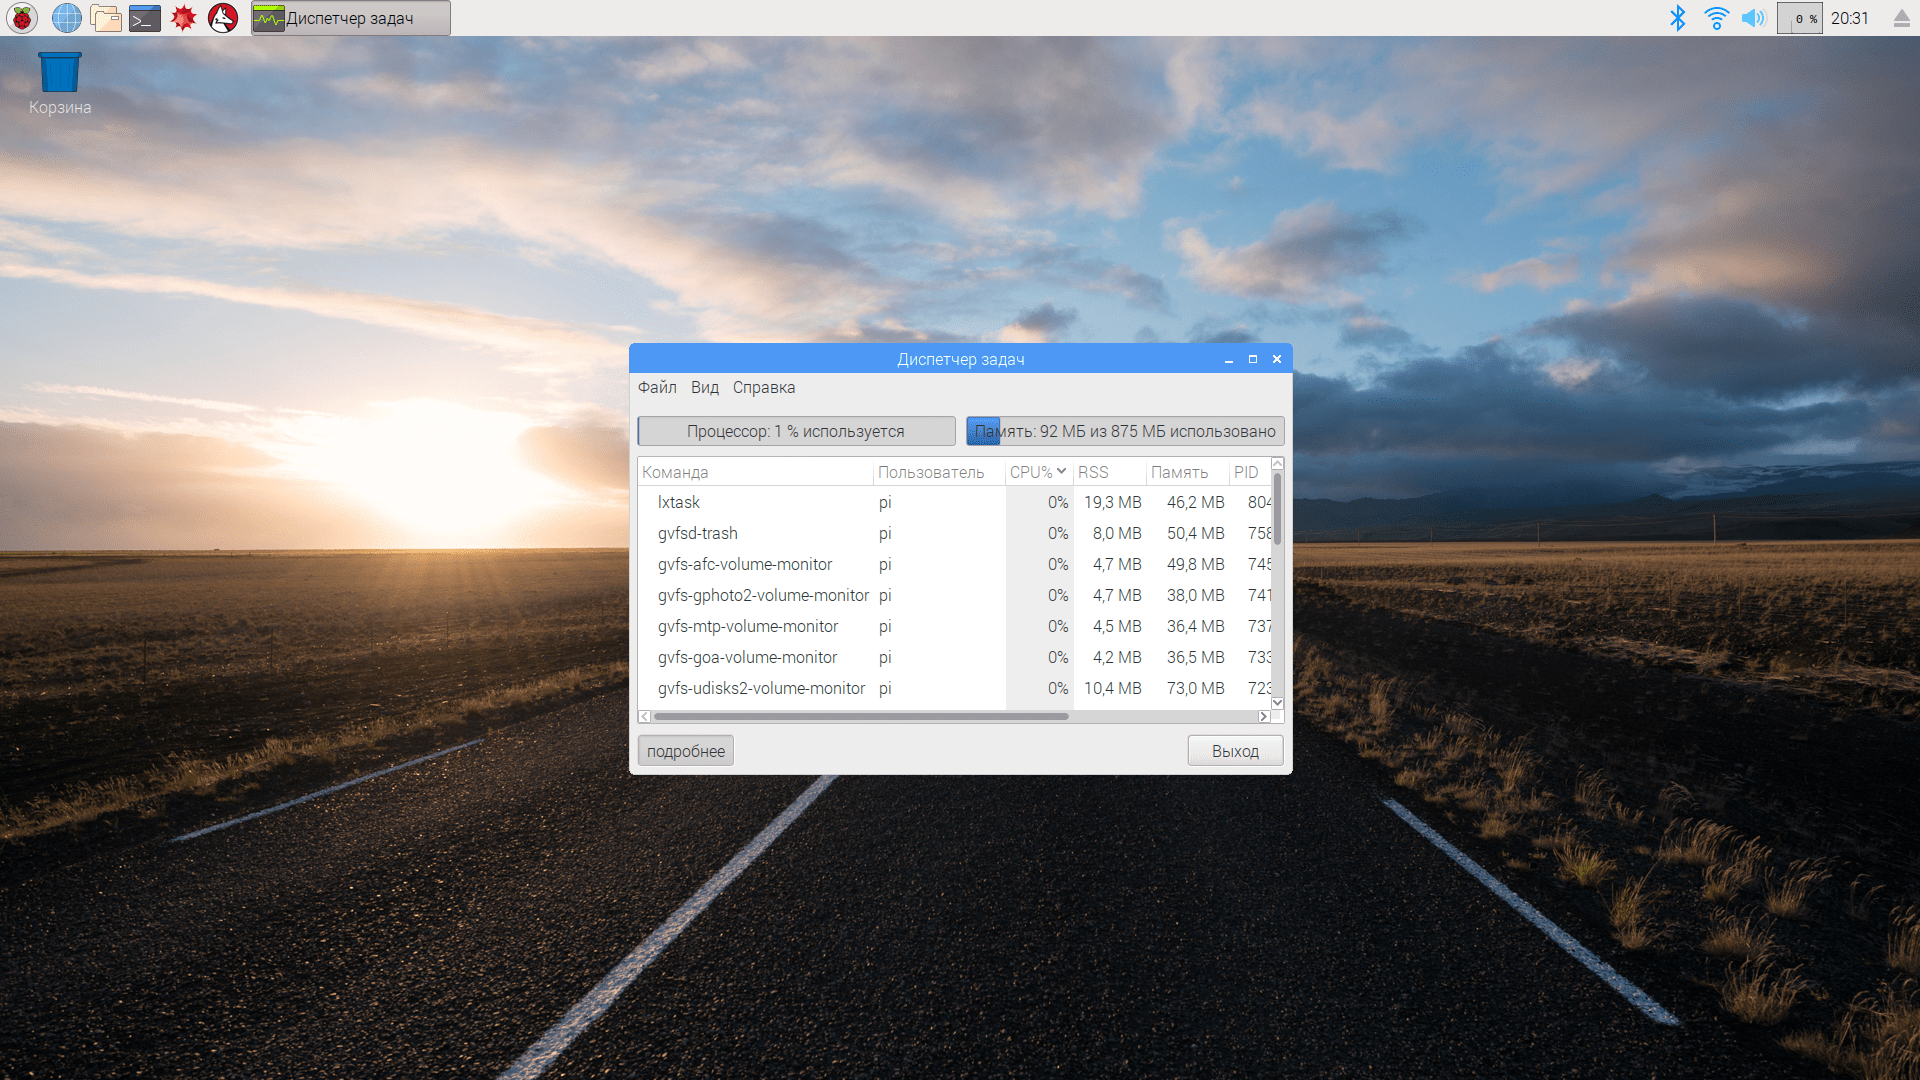
For fun, let’s see how much RAM the operating system takes up in its new state (the task manager is called via Ctrl + Alt + Del or from the application menu). 92 MB! If only Windows took that much :)
Customizing the appearance
For convenience, we bring the desktop to a more familiar view (in this case, to a view similar to Windows). Right click on the panel, “Panel Settings”. Switch Edge to the “Botton” position - the panel moves down. Go to the “Panel Applets” tab, remove unnecessary ones, add what you need. Removed Ejecter and CPU Usage Monitor. Added Minimize All Windows and Keyboard Layout Handler (keyboard layout switch).
Through the latter we add the Russian layout. Right click on the flag, “Keyboard Layout Handler Setting”. Uncheck “Keep system layouts”, click “Add”, select ru. We change the keyboard shortcut to switch layouts with the button under the Change Layout Options inscription.
The “Close” button in this window does not work, but the cross in the corner does. This is an old bug in many Linux builds (it’s strange that it hasn’t been removed yet).
There is a Bluetooth icon on the panel. We disable the Bluetooth module through it if we are not going to connect any wireless devices.
Change the set of icons on the left. Right click on one of the icons, “Application Launch Bar Settings”. We pull out a couple of shortcuts from the menu onto the desktop. Changing the wallpaper (I prefer something more monochromatic):

Numlock
By this time, the non-functioning numeric keypad was already starting to irritate me. When the system boots, Numlock is turned off (this also happens in other versions of Linux). I don't want to turn it on every time. It's time to fix the situation. Install the numlockx program:
Apt install numlockx
Add it to startup. For example, we open file manager, go to the folder /home/pi/.config, create a file there autostart(without extension) with a single line: @numlockx -on.
You can use any other method of adding to startup.
Problem with USB flash drives and hard drives
At first glance, everything is in order with removable media. They are detected correctly upon connection, all files are displayed and opened normally. But you can’t write anything to flash drives, because they are connected in “readonly” mode (with rare exceptions).
The problem can be solved simply by installing an additional driver:
Apt install ntfs-3g
After installation, you need to reboot the system.
All available drives were checked - writing, changing and deleting began to work (not only in NTFS, but also in FAT32).
For some reason, there was no problem initially on one small USB drive that had just been formatted in Windows.
Programs included
It's time to look at what is already installed on the system. Let’s just go through the application menu (we don’t take console utilities into account).
In the “Programming” section there are more than a dozen applications specifically for programming (we will ignore them).
The Office category contains exclusively programs from the LibreOffice package (the famous free analogue Microsoft Office). Useful applications for working with documents. Creating and editing not very complex files on the Raspberry Pi 3 occurs with minimal slowdowns.
The “Internet” section contains, in my opinion, two useful applications. The first is VNC Viewer. Good control option remote devices. The work speed is acceptable. Second - Chromium browser. Almost the same as Chrome, only without the frills. Sites work with at different speeds. Some are really fast, some are very slow (depending on the type of site and its optimization). For example, VKontakte scrolls through with slight jerks, and Odnoklassniki is already moving with a creak (although in general you can use both). Even YouTube works tolerably well in it (a special extension is installed). IN full screen mode The video, of course, jerks, but in widescreen it looks fine. That is, on this computer, working on the Internet is more or less accessible (at least, it is more comfortable than on the average smartphone).

When running on the Raspberry Pi 3, most applications exhibit slight frame tearing (the bottom of the image updates slightly later than the top). This trouble is due to the lack of vertical synchronization (tearing). On regular computers the problem is easily solved, but I haven’t found a solution for Raspbian. Again, a lot depends on the specific hardware.
In "Standard" minimum set useful applications: calculator, terminal, viewer PDF files, notepad, archiver (which can do almost nothing), task manager, image viewer, file manager and utility for creating a copy of the system - SD Card Copier.
We have everything we need, a little extra, we set the rest according to our needs.
Skype
There were almost always some problems with Skype on Linux. The current version is simply a wrapper for the web interface. Instead of trying to run it under Raspbian, we'll just use the web version directly.
The Raspberry Pi 3 does not have a mini-jack connector for a microphone. Option 1 - find a microphone with USB connector. Option 2 - connect a cheap external USB sound card with the usual connectors. In my case, everything was even simpler (though not entirely) - the webcam turned out to have a built-in microphone, i.e. two devices occupied only one slot.
Let's open Skype. Through Chromium we go to the address web.skype.com/ru and log into your account. Then click on the green lock in address bar: Allow camera, microphone and Flash. The microphone still didn’t want to work. It turned out that I had to click on the video camera icon (in the address bar on the right), then instead of “Default”, select the correct audio device.

I made a test video call with friends. Sound passes normally in both directions, video is also transmitted (slows down a little).
Office Application Expansion
The LibreOffice package is, of course, not bad, but now it is in English, does not check spelling and does not display MS Office documents very correctly, since the system does not have a single font from Windows. Open the terminal, install Russian localization, spelling dictionary and fonts:
Apt install libreoffice-l10n-ru hunspell hunspell-ru ttf-mscorefonts-installer
This is much more common:

Our regular archiver can only work with typical Linux formats, so we need to help it by adding support for more popular archive types (7z, RAR and a couple more):
Apt install p7zip-full unrar-free
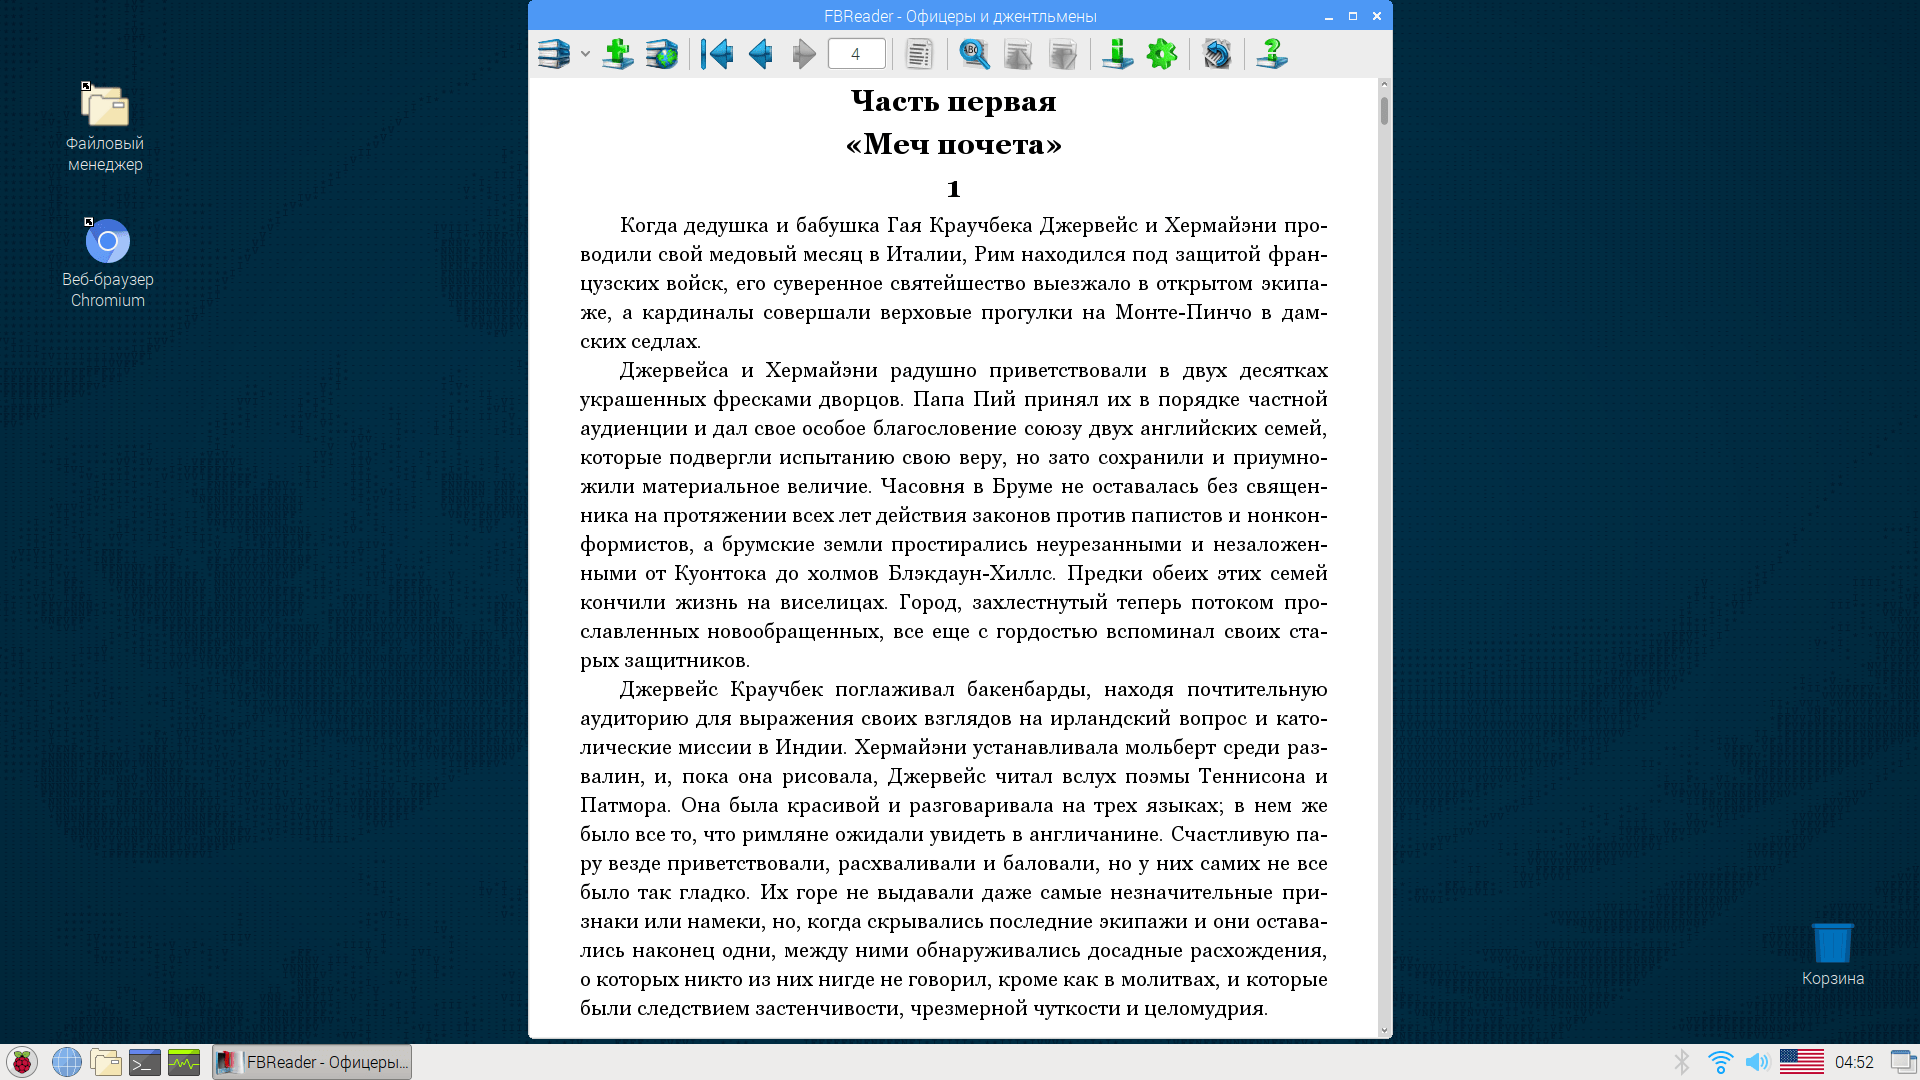
Let's install more advanced programs for reading e-books Evince and FBReader to open different types e-books:
Apt install evince fbreader
Evince didn’t appear in the menu on its own, so I had to go to “Options” > “Main Menu Editor” and check it.
Setting up a local network
If you have local network, then the Raspberry Pi 3 is already connected to it (in the case of an open and correctly configured network). To have convenient access to it, in a standard file manager you need to open the “Go” menu, select “Network”, open the “Bookmarks” menu, click “Add to Bookmarks”, switch the “Directory Tree” view to “Entry Points”. Now the link to the network will be at hand every time you open the file manager.
You can also install another file manager, for example, Thunar.
Everything seems to be fine: network resources accessible, files are opened, copied and even deleted. Only at the entrance to almost every network folder the system asks for a password (which we changed at the very beginning of working with the OS). Other computers on my network (both Windows and Linux) access the same resources without passwords. I have not yet been able to remove this password (I enter it every time).
In order for the computers included in the LAN to be displayed at the top level, we edit the Samba settings /etc/samba/smb.conf. Only the file needs to be opened with superuser rights. For example, enter the following command in the terminal (after executing sudo -i):
Leafpad /etc/samba/smb.conf
Changing the parameter value workgroup to the name of our working group, save the changes, reboot. Now, when you log into “Network,” you can immediately go to the desired computer (without opening two more folders).
Network settings are provided as an example. In other cases, this approach to working with a LAN may simply not work.
Connecting to a network printer
Since we have office programs, we will most likely need to print documents. In the network discussed above, there is a single printer installed, connected to a PC running Windows 10. The printer is already networked, but you need to somehow add it to Raspbian. To do this, install the CUPS and samba-client programs:
Apt install samba-client cups
CUPS will not let us into the settings just like that. Therefore, we need to add our current user to the lpadmin group:
Usermod -aG lpadmin pi
Management in CUPS occurs through a web interface. Enter the address into the browser 127.0.0.1:631 , then go to the “Administration” section, click “Add a printer”. Enter your username pi and the password that was set when setting up the system (at the beginning of the article). Check “Windows Printer via SAMBA” and click “Continue”.

Further important point. In the “Connection” field you need to enter the printer’s network address. In this case smb://192.168.1.6/hp1010. What does it consist of: smb://- SAMBA protocol, 192.168.1.6 - local address of the computer to which the printer is connected, hp1010- network name of the printer.
The computer address on the LAN must be static, and it is advisable to specify the printer name only in Latin letters (without spaces).
Click “Continue”. Enter the name of the printer for our system and, just in case, check the “Allow sharing to this printer”, click “Continue”. Select the driver for the printer (the list is impressive), click “Add printer”. We save the parameters. We print some document for the test and enjoy life.
Working with graphics
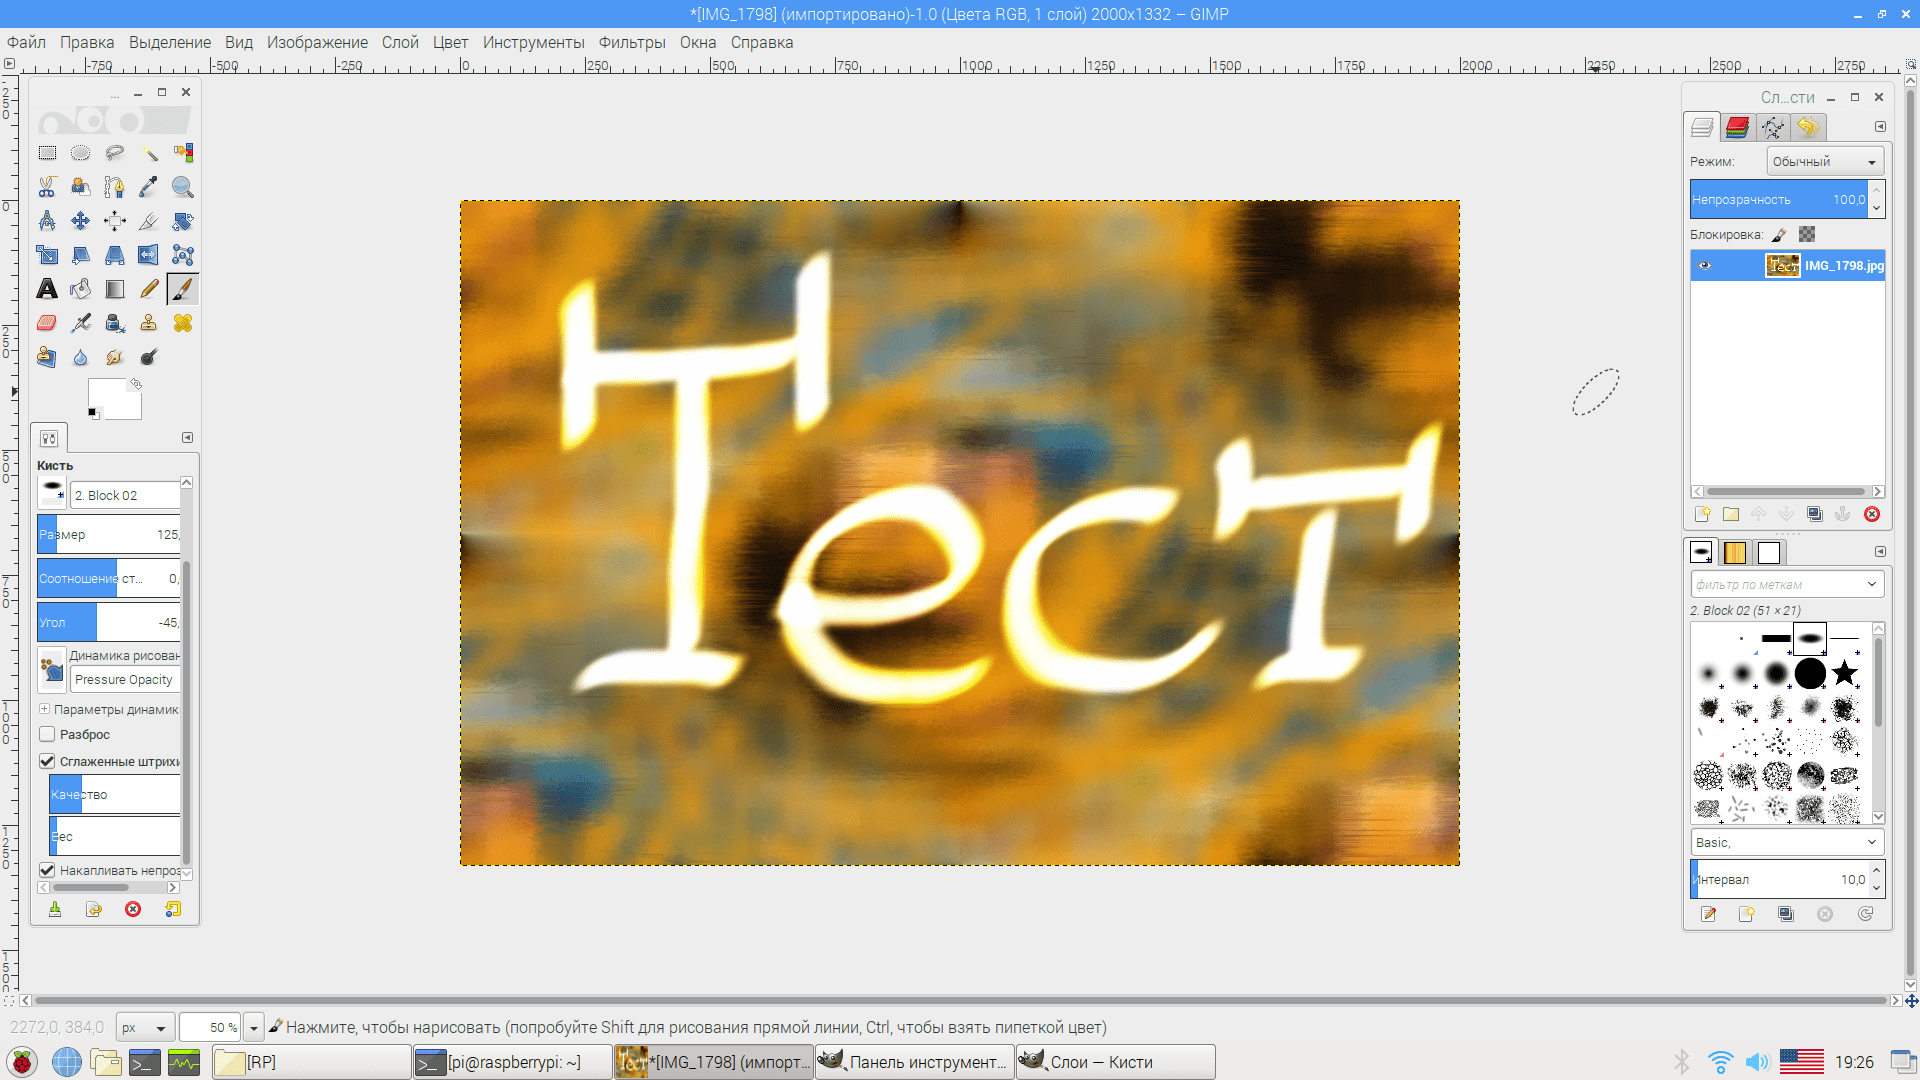
You can install the classic graphics editors GIMP and Inkscape on the Raspberry Pi 3:
Apt install gimp inkscape
They generally work correctly, but slowly. Simple manipulations with not very big pictures a mini-computer will do it (crop the photo, correct the colors, add an inscription, draw a logo). Serious graphic tasks, naturally, require serious power.
Watch video
Here again everything comes down to non-standard hardware. Conventional players simply do not work on it (or work with big problems). We were able to find only two programs that cope with video playback: OMXPlayer and Kodi. We will use both.
OMXPlayer is already installed on the system, but it is a console version, so it is not very convenient to use. To open video files double click we do the following. Right-click on the file and select “Open with...”. Go to the tab " Custom command" IN top line enter omxplayer -b. Check the “Run in a terminal emulator” and “Set the selected application as default for this file type” checkboxes. In the application name we write, for example, omxplayer. Click “OK”.
These steps must be done for each video file extension.
OMXPlayer does not allow you to switch between windows. Control keys: “q” - exit, “-” and “+” - volume control, “←” and “→” - rewind.
Kodi is a pretty serious media center. It understands significantly more codecs than OMXPlayer, has a built-in DLNA client and other goodies. First you need to install it:
Raspberry's Wi-Fi is rather weak, so you won't be able to watch a decent-sized video over the network through it. Take care of the wired connection.
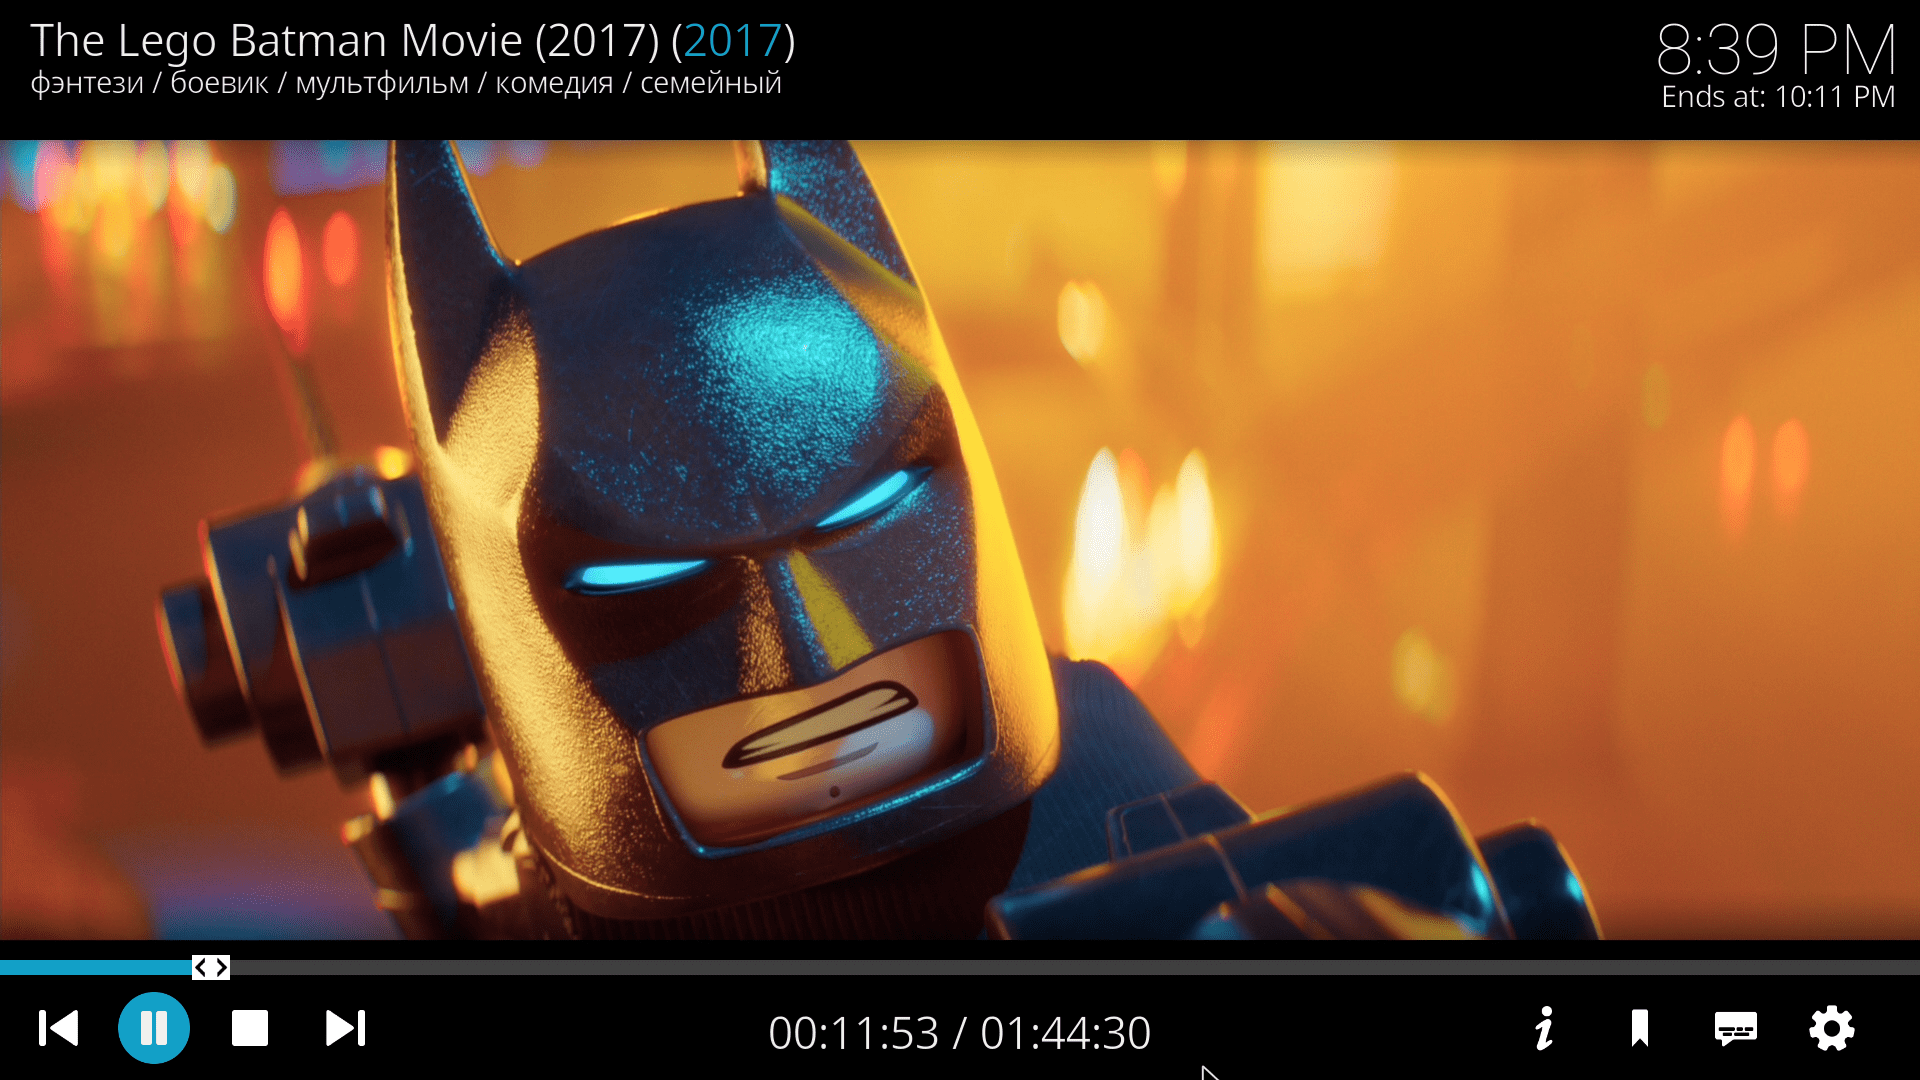
With Kodi on the Raspberry Pi 3 you can watch some pretty awesome movies. Tested on a Full HD file of 40 GB in size with a bitrate of 40 Mb/s (via DLNA). For more than 2 hours, not a single slowdown or other problems. Some Smart TVs, when playing the same file from the same DLNA server, froze in the middle of the video (we had to turn it off/on).
Listening to music
With sound playback everything is much simpler. Many players are supported. The standard OMXPlayer can also play music, but this is not necessary. We installed Audacious, which is not particularly overloaded with anything, but has a familiar appearance and normal functionality:
Apt install audacious

Torrent client
Everything is fine here too. Installed Deluge:
Apt install deluge
Why him? Because I'm used to it. Deluge is no better or worse than others. It just does its job as it's supposed to. For the test, I downloaded Raspbian Stretch Lite through it. I didn't notice any problems.

Games
Of course, it’s difficult to call the Raspberry Pi a gaming platform, but it’s quite possible to play on it. For the most part, we are talking about the launch of games that were released on old consoles. Long attempts to build something like RetroPie as a separate application (rather than an entire OS) were unsuccessful. Search individual applications for each console is also a rather tedious task, so I settled on Mednafen:
Apt install mednafen
First of all, go to “Global Settings” and select Video Driver sdl instead of opengl (well, Raspberry does not have normal OpenGL support). After this, game images (ROMs) will begin to work normally (not all, of course).
Only NES and Sega Mega Drive worked at normal speed (although most platforms were not tested, because there is no interest in them).
You can add games to the Mednaffe interface and launch them from there, or you can not even launch Mednaffe - just open the file with the game image, like any other, by double-clicking (it will not work for all platforms).
It’s inconvenient to play console games on the keyboard, but you just have an Xbox 360 gamepad at hand. The controller works without additional drivers, all that remains is to configure the buttons. To do this, open the “Systems” section in Mednaffe, go to the desired console, open the “Input” subsection, and click “Controller Setup”. Select “Port 1” (the first controller), double-click in the Key column and press the button on the gamepad that corresponds to the inscription in the Action/Button column (for each line).
If the settings are not applied, launch the game of the desired format from the interface (the new parameters should take effect), after which the settings will already be in effect when launched by double-clicking.

Several native games that deserve attention can also be installed. For example, Battle for Wesnoth (reminiscent of HOMM III) and OpenTTD (reminiscent of SimCity 2000). Both games have been translated into Russian.
Apt install wesnoth openttd
Finishing touch
After installing many programs, all sorts of “garbage” remains. It would be nice to delete it with the following command (this will also free up some space):
Apt autoremove
More information
- A screenshot is taken with the key Print Screen and is automatically saved to your home folder (/home/pi).
- If you want to speed up your Raspberry Pi 3 a little, connect it to a low resolution screen (eg 1366x768).
- Applications can be found in standard utility"Add/Remove Software", which is somewhat similar to Synaptic.
- To connect to a monitor without an HDMI connector, you can use a cheap HDMI to DVI-D adapter or the same cable.
- Raspberry can display three special indicator icons on the screen (regardless of the installed OS and desktop environment): lightning - low voltage, half red thermometer - high temperature chip (80–85 degrees), completely red thermometer - critical temperature(above 85 degrees).
Conclusion
Overall, I was pleased with the mini-computer. For its price, it provides a very wide range of functionality (the article discusses only some options for its use). For experienced Linux users, setting up the Raspberry Pi 3 will seem easy. Others will be able to use the already configured system without any problems.
You can even teach a cat to click on windows.
In addition to enthusiasts, Raspberry may also be of interest to companies with a large fleet of machines. For example, purchasing 20 classic system units for a call center for 12,000 rubles. and the purchase of 20 “raspberry” computers for 3000 rubles. - these are completely different things (180,000 rubles in savings).
Only you need to take monitors with at least DVI-D - we’ll subtract another 15,000.
At home use Raspberry Pi 3 will do a good job as a silent media server, retro set-top box, auxiliary computer for another room, etc., etc....
Appearance in 2012 and the Raspberry Pi computer sparked the creativity of many people, giving rise to many innovative approaches to computing systems, not seen since the days of the eight-biters.
Indeed, we can say that the golden age of computer technology has arrived again. With that in mind, below are 25 projects you can make with the Raspberry Pi.
Provides a huge selection of cases of various shades, made according to modern technology plastic molding And their price is quite reasonable.
2. Make your own Pi case

Want to make your own enclosure? A drawing of the case is stored in it, which can be printed. This template can be cut and glued.
3. Watching a video from Raspberry Pi

Now that your Pi is in a beautiful case, it's time to connect it to your TV and watch media content using OpenELEC OS. After studying the instructions, you can set everything up in the shortest possible time.
4. Mini web browser

Since your Raspberry Pi is connected to your TV, why not surf the web on the big screen? You need something better than Midori for these purposes, so try Chromium. Just go to the terminal, type sudo apt-get install chromium-browser and press Enter.
5. ZX Spectrum Pi

The ZX Spectrum gets a second life inside the Raspberry Pi. To emulate this 8-bit beauty, type in the terminal sudo apt-get install fuse-emulator-common and press Enter. Enter "y" to confirm download and installation.
Once Fuse is installed and you are returned to command line, write sudo apt-get install spectrum-roms fuse-emulator-utils and press Enter. And then, back at the command line again, type sudo amixer cset numid=3 2 and click Enter.

If Spectrum has whetted your appetite for old school, then check out Project RetroPie. With it, you can emulate the treasures of old consoles such as SNES, Mega Drive and other similar ones. The installation is not very fast, but the result is worth it. Follow these instructions and you will succeed. You can download classic games for free.

8. Windows 3.0 on Pi

Since we started talking about retro, we can try running DOS 6.22 and Windows 3.0 using QEMU. To get started, visit Kirsle and extract VirtualBox image(VDI), then using VirtualBox, convert VDI to IMG by typing vboxmanage clonehd "image.vdi" "image.img" --format RAW (instead of image, enter the name of your image).
Next, install QEMU by writing sudo apt-get install qemu . Then convert the original image to a QEMU qcow image by typing qemu- img convert -f raw image.img -O qcow2 image.qcow . Finally run the image by entering qemu image.qcow . All this, of course, is far from perfect and tends to freeze, but still a fun thing!
9. Robotics

Robots are cool, except probably for the ones that try to kill all people. There are many projects related to robotics. The MagPi e-magazine (from page 9) describes how to make a robotic arm powered by a Raspberry Pi.
10. More about robots

Since we touched on the topic of robots, there is another great project that involves the joint use of the Big Track platform and Raspberry Pi.
11. Programming training
The Raspberry Pi provides an excellent programming framework with a wide range of programming languages to choose from. Read about some of them on the eLinux wiki.

Scratch is a programming language that is easy to learn and simple to work with. It is well suited for children starting to learn programming, as well as for creating serious projects. Get to know this.

Although you can play Spectrum games using an emulator, programming in BASIC language via the emulator is not the same. In this case, use SpecBAS, which is a remake of Sinclair BASIC.

Raspberry Pi is small and mighty! It is an excellent hacking tool. Try running a security bypass test on it.
15. Firefox OS on Pi

16. RISC OS for Pi

If you're nostalgic for the past, then try running RISC OS on your Raspberry Pi. Files and complete instructions are .
17. Keyboard made from aluminum cans

Keyboard made from beer cans? There is one! The Robofun team connected an Arduino board along with 40 aluminum cans to a Raspberry Pi. You can look at this.
18. BitTorrent Server

If you frequent guest various torrent sites, so why not create a dedicated torrent machine? Just plug it into your router and leave it to do its thing. Documentation, scripts and files can be found on snapdragon:IT blog.
19. Cloud server

Do you want to organize your own cloud server? Thanks to OwnCloud you can do this. Follow the instructions and set up the script from petRockBlog. And in no time you will become a cloud provider.
20. Raspberry Pi drone

This is a brilliant concept - a UAV on a Raspberry Pi. Just think about the possibilities! This Maggie creation is perhaps the first quadcopter based on the Raspberry Pi.
21. Weather station

Allows you to create a wonderful school project - a weather station on Raspberry Pi. Using Maplin's USB weather station, this minicomputer can record all the necessary information.
22. 10 inch touch screen

Using a 10-inch touchscreen and an HDMI to LVDS converter, you can make a touchscreen with a Raspberry Pi. The complete set can be purchased from Chalkboard Electronics and then assembled as in the video below.
23. Home automation


Minecraft fans, rejoice! It is also available on Raspberry Pi.

Regular Raspberry Pi boards are designed for simple computational work. But, after reading the instructions from the guys from the University of Southampton, you can turn your minicomputer into a supercomputer.
Translation website
Thank you for your interest in the website information project.
If you want interesting and useful materials to be published more often and with less advertising,
You can support our project by donating any amount for its development.
The Raspberry PI 3 is a single board computer the size of a bank card. Like regular computer it has peripherals and interfaces. It allows you to perform many of the functions available on powerful desktop systems. It practically performs all the functions of a computer and even more. Raspberry has great graphics capabilities and can be used as a platform for developing gaming applications. On the other hand, it can be used to develop measurement and robotic systems using sensors and actuators.
From this article you will learn:
Welcome to the pages of my blog kip-world! Gridin Semyon is with you. Friends, I often experience delays in publishing articles. So please excuse me.
I finally got to the very root of my resource. This is what I started everything for. 1.5 years have passed.
I am writing these lines on my favorite topic - single-board computers and the Raspberry PI in particular. I ordered the board itself from . Just on November 11th, at that time there was a holiday in honor of shopping and there were crazy discounts in the Chinese store.
So, I took the opportunity...
How many potential possibilities does this thing contain? Unfortunately, it’s not very popular in Russia. I dug through so much information. Most of it is in English.
Now I am at such a level that I understand everything in general terms. I am going to expand and deepen this knowledge.
Let's start with a description...
Description of Raspberry PI
Miniature and silent computer, capable of communicating with the outside world using a GPIO input/output system. His abilities are limited only by your knowledge and imagination.
What applications can there be on Raspberry PI 3:
- Home server for data storage;
- Bitcoin Mining;
- Robot controlled by WI-FI or with machine vision
- Game console or slot machine;
- Home weather station;
- Tablet;
- Security system with facial recognition;
- "Smart" home;
On this machine you can assemble any automation. Build any robot.
The most important criteria for any automation system are as follows:
- Drawing up the main algorithm and using libraries;
- Taking into account the speed of the operation processing cycle;
- Taking into account the sampling and polling speed of analog signals;
- Availability of network connection;
Let's start with the main technical characteristics:
| SoC | Broadcom BCM2837 |
| CPU | ARM Cortex-A53 (4 cores) |
| GPU | Broadcom VideoCore IV |
| RAM | 1GB LDDR2 |
| Built-in adapters | 10/100Mbit Ethernet, Bluetooth 4.1 LE, Wi-Fi 802.11n |
| Ports | 4xUSB 2.0, HDMI, 3.5mm audio output, 40-pin GPIO, Camera Serial Interface (CSI), Display Serial Interface (DSI) |
| MicroSD card slot |
What comments can I add from all of the above?
The main operating system is Linux. The OS is registered on a microSD flash drive and inserted into the appropriate slot.
And if your operating system crashes, then it’s okay. You can re-record at any time.
The main processor architecture is ARM Cortex-A53. What does this mean? About the fact that we can flash one of many operating systems:
- Raspbian (a Debian derivative tailored for Raspberry). By the way, this operating system used in hosting servers
- Raspberry PI Desktop
- UBUNTU Mate
- Snappy UBUNTU Core
- Windows 10 IOT
- LIBREELEC
- PINET
- RISCOS
- Weather station
To start learning, I suggest trying out Raspbian. You must first understand how to use the Linux OS in general.
The following interfaces are available for Raspberry:
- UART (Serial);
- I²C/TWI;
- SPI with selector between two devices;
- Ethernet 10/100 Mbit with output to a standard 8P8C socket (RJ45);
- Wi-Fi 802.11n and Bluetooth 4.1 provided by the Broadcom BCM43438 chip;
Regarding the power supply of a single board computer. There is a micro-USB on board that accepts 5 Volts. Can be powered via PINs. But it is best to connect a 5 V power adapter with an output current of 2 A. This way, there will be enough power capacity for the devices that you will connect to USB.
So he is able to perform mainly only narrow tasks - local ones. In general, it is interesting to use the RPI + Arduino combination directly. I always wanted to try it.
What you need to run Raspberry PI
To get started you will need:
- The minicomputer board itself;
- A set of copper radiators (I highly recommend it if you want your raspberries to work longer);
- Any body (not necessary, but desirable);
- Power supply 5 V at 2.5 A;
- Map microSD memory with a minimum volume of 8 GB;
Then we need peripherals to work, basically like a regular computer.
- Monitor or TV with HDMI output;
- Keyboard;
- Mouse;
If you have a VGA monitor, no problem, switch to HDMI using a special converter.

We will talk to you about installation and first use later, when the raspberry finally arrives at my home.
To implement various software functions Raspberry basically. You can write in Java. There is also a very childish object-oriented programming language called Scratch.
It can also be used for Raspberry, quite realistically.
Examples of projects with raspberries
What can you do with Raspberry PI 3? And a lot of things, a lot. There are just a lot of examples of implementation.
I will post mostly English-language videos, since they are the most informative::
1 GameBoy on Raspberry PI Zero
Or alternatively:
And the second part:
2 Quadcopter on RPI
3 “Smart” home on RPI
4 Full-fledged “home” server
5 Luxurious video recorder for the car
This is just a small part of what I listed. Unfortunately mostly in English.
Best regards, Gridin Semyon