We connect the TV to the computer as a monitor. How to connect a computer to a home TV? Methods that work
Instructions
To connect TV and to the systemic block There are several different options you can use on your computer. To begin, select a port in TV e, to which you will connect the video card of your PC. There are several basic connectors that are designed to transmit digital or analog signal. The first type includes DVI and ports, the second - S-video and VGA.
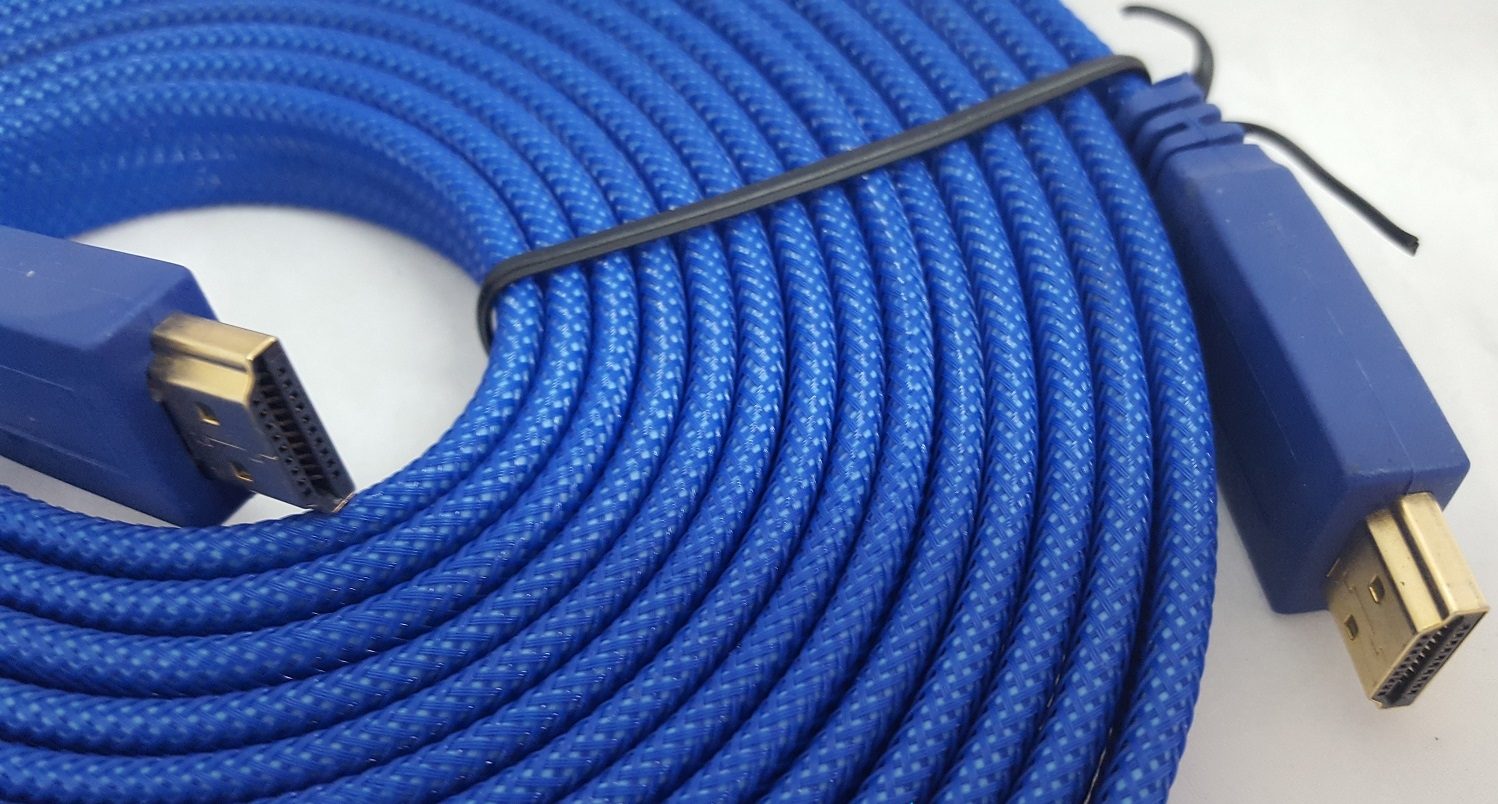
If you happy owner modern powerful computer, then you're in luck. Most likely, your video card already has an HDMI port. In this case, you just need to purchase an HDMI-HDMI cable and connect your computer to TV ohm
Relatively older video card models have two connectors: VGA and DVI. A DVI-HDMI adapter was invented especially for such cases. Connect it to the video card, insert an HDMI-HDMI cable into it and connect it to TV ohm
Please note important point: For many video adapter models, the DVI port does not transmit sound, unlike the HDMI connector. In this situation, you need to purchase a cable with an audio connector (3.5 mm) on both ends. Connect it to the Audio Out port on the sound card and the Audio In jack on TV e.
It is not enough to simply connect TV and system unit. You still need to adjust the image settings. Turn on your computer. Right-click on the desktop. Go to Screen Resolution. At the top you will see icons for two displays. Choose the one that symbolizes TV.
If you want to expand the work area, then select “Expand screens”. If you need to get an identical image on both screens, then select “Duplicate these screens”.
Not all video card models support dual-channel operation. You can find out about it immediately after Windows boots: on the screen TV and only the desktop background image will be displayed. In such cases, click on the icon symbolizing TV, and select “Set this screen as your primary screen.”
Related article
To set up a TV connection to a desktop computer, you need to take into account several nuances. This mainly concerns the choice of the type of connection between the two above-mentioned devices.

You will need
- - VDI-HDMI cable.
Instructions
Examine the connectors located on your TV and system unit. Identify the appropriate types. Remember that you can connect not only identical channels. To ensure the best picture quality transmitted to the TV, it is recommended to use digital channels data transmissions such as VDI and HDMI.
Select the connectors through which you will connect the TV to the system unit. Usually carried out DVI connection video card port with the HDMI connector of the TV. To do this, you will need a DVI-HMDI adapter and an HDMI-HDMI cable. Using these devices, connect your TV to your PC’s video card.
Turn on both of the above equipment. Be sure to open the TV settings menu and select the desired port from which the signal will be received. Now start setting up your computer's video adapter settings.
If you are using a TV without a monitor, then you only need to adjust the screen resolution. In Windows Seven, right-click on the desktop and select "Screen Resolution". Set the appropriate resolution and click the Apply button.
If you want to use the TV and monitor simultaneously, then perform detailed settings. First, determine which device will be the main one. Click on it graphic image in the "Screen Resolution" menu and activate the "Set this display as primary" option.
Now select the settings for the second display. To display the same image on the monitor and TV, select the “Duplicate screen” function. To use these devices for a variety of purposes, select the Extend Screen feature. This will allow you to run simultaneously various programs and applications on both displays. This function is used most often at home.
Video on the topic
Tip 3: How to connect an analog TV to a computer
Watching movies on the small display of a laptop or desktop computer is not as pleasant as on a large screen TV, even if it is not liquid crystal or plasma. You can connect your computer to almost any analog TV.

You will need
- S-Video cable
Instructions
To connect, you should use the S-Video connector, which can be found on almost any stationary or, as well as on most analog models. By connecting and using an S-Video cable, you can duplicate the image, but the sound will come from the sound computer.
Following the instruction manual TV, search for a new channel. Among other signals coming from television, you will also find a video signal that is transmitted from the computer’s video card. Save the channel to memory TV and enjoy watching!
Video on the topic
Sources:
- computer to analog TV
Tip 4: How to connect a TV to a computer's video card
Even though a certain category of monitors may support video high resolution, many people prefer to watch their favorite films on TV. In order not to buy expensive players or external hard drives, you can connect the system unit to the TV.

You will need
- DVI-HDMI cable.
Instructions
Start by selecting the connector to which you will connect. It's no secret that there are analog and digital video signals. The VGA, S-video and SCART ports are intended for transmission of the first type, and DVI and HDMI for the second type. In video cards you can find all these connectors except SCART. Let's discard it right away.
In a situation where the purpose of the connection is to view high resolution, it is best to use. Those. All that remains is to choose between HDMI and DVI ports. The fact is that only new video adapters are equipped with an HDMI port. But there is special cable-transmission adapter digital signal DVI-HDMI.
Connect to video card computer using the cable described above. Please note that you can use an HDMI-to-HDMI cable and a DVI to HDMI adapter. Turn on the TV, open the settings menu and select the desired port as the main signal source.
If you plan to watch videos on the TV screen and work at the computer at the same time, then select the “Extend screen” option. Launch the video player and move its window outside the monitor. It should appear on the TV screen.
Video on the topic
Sources:
- how to connect TV to computer at the same time in 2018
Tip 5: How to set up a TV that is connected to a computer
Many users use modern LCD and plasma monitors instead of monitors. This allows you to significantly improve image quality and get more pleasure from watching a movie or gameplay.

You will need
- - HDMI-HDMI cable.
Instructions
First, select the cable with which the TV will be connected to the computer system unit. To improve image quality, it is better to use digital channels such as DVI. An HDMI connection allows you to stream and beep. This will save you from having to purchase an additional cable. Connect to your computer's video card.
Turn on both devices. Open the TV settings menu. On at this stage you just need to specify the port through which you made the connection as the main signal source. Complete this action.
Wait for loading operating system and configure the video card operating parameters. If you are using a TV instead of a monitor, then simply set the appropriate resolution. Open Control Panel and select Adjust Screen Resolution from the Display menu. Select required resolution and click the "Apply" button.
When using the TV and monitor simultaneously, do additional settings. Open "Connect to external display» in the “Screen” menu. Select the hardware on which all applications will initially run. Activate the “Set this screen as primary” feature. It is better to choose a monitor as your main display.
Now enable the “Extend this screen” feature. Click on the graphic image of the TV and set the appropriate resolution. The computer setup is complete at this stage.
Open the TV menu and make detailed picture adjustments. Adjust brightness and contrast. Expand or narrow the picture if your TV allows it. Match the refresh rate of your TV and monitor. This will reduce the load on the video card.
Sources:
- how to set up TV via computer
For those users who download films from the Internet and burn films to discs, it is important that the film has a beautiful cover. There are a lot of offers on specialized sites ready-made covers for Blu-Ray, which you just need to download and print. Well, if you haven’t found a suitable cover online, you can make it yourself.

You will need
- - graphic editor Adobe Photoshop installed on your computer;
- - special program installed on the computer.
Instructions
Launch the Adobe Photoshop graphics editor. After that, download the cover template - Blu-ray Cover from the website. In the window that opens, under the “Add to Favorites” button, click “Download File”. Extract the files from the .zip archive by right-clicking on the archive and clicking “Extract”.
Open the bluraycovers.psd file from the archive in Adobe Photoshop by pressing Ctrl+O. Take a look at the layers panel - “Layers” (if there is no panel, then press F7 in top row keyboard keys). Make the “Bk” and “Example” layers invisible - click on the “eyes” to the left of them. Open the “Blu ray Cover” folder by clicking on the arrow next to it. Do invisible folder"Box Art". Save your changes by pressing Ctrl+S on your keyboard.
When choosing a digital TV, it is absolutely not necessary to overpay for Smart function TV or purchase a separate TV set-top box with this function if the house has a computer even with average performance. After all, there is a convenient and simple solution - connect your computer to your TV.
Connecting a TV to a computer - maximum possibilities
Connected to a computer digital tv, it can be turned into an advanced media center based on the Windows operating system. Naturally, with all the ensuing benefits - the use of functional software video players, watching videos online, access to video hosting content, Internet television, computer games on a big screen, playing pictures of any format, etc.
Connecting a TV is possible even if your computer has a budget office video card. Any more or less modern model budget video card works without problems with two screens. Of course, when watching videos in Full HD, slight stuttering is possible, but there will be no problems with regular video content. The ideal option for watching movies in Full HD is a multimedia video card in the computer assembly. This one won’t break the bank like a gaming video card, but its performance will be higher than an office video card.
How to connect digital TV to a computer or laptop? Let's look at this issue in detail below.
1. HDMI connection
LCD and plasma TVs typically have multiple HDMI inputs and at least one computer input– VGA or DVI. Functional models have all three types of input.
HDMI is modern interface, it can provide the best image quality. The capabilities of an HDMI connection are not limited to image transmission; this interface also includes audio transmission. Both video and audio from video content played on your computer can be output to a connected digital TV.
Having an HDMI output is a standard for laptops today. Rare modern laptop models may not have it. But with video cards of desktop computers, not everything is so simple. The presence of an HDMI port increases the final cost of the video card. And it's rare that integrated GPUs have an HDMI output. For this interface, you need to specifically purchase an external video card for your computer.
An HDMI connection between a TV and a computer is, of course, the best option, but you can also get by with a connection using standard computer ports VGA and DVI. Moreover, for an HDMI connection you need an HDMI cable. Not every digital TV comes with one, and this is still, albeit small, an additional expense. You can look for an HDMI cable in the box from a Samsung TV, but it is unlikely that such a cable can be found in addition to budget options. It will have to be purchased separately.

If one of the devices has only a VGA port, and the other only DVI, the connection problem can be solved in a budget way. Buy either an adapter or a VGA-DVI cable. DVI-HDMI adapters are more expensive, and there is no point in buying them. This adapter will provide image quality at the level DVI interface, and will not transmit sound.
In our case, you need to connect the TV to the computer via the HDMI interface. When choosing a different connection interface - VGA or DVI - the only difference will be in connecting the VGA or DVI cable, respectively. Steps for setting up the connection in the TV menu and in Windows system will be the same.
Process HDMI connections- the cable is simple: on the TV we find the HDMI input and connect one end of the cable to it, and connect the other end of the cable to the HDMI output of the computer or laptop.
2. HDMI input on TV
The HDMI port on a TV is usually located either on the back or on the side panel. In our case, the TV is equipped with an HDMI input on the back, next to computer port VGA.

Select any of the available HDMI ports.

3. HDMI output on computer
The standard placement of the HDMI port on laptops is left sidebar, next to the USB ports.

HDMI port On the system unit, the PC is located at the back, on the video card output panel.

A common mistake when connecting a TV to a PC is to use the ports of an inactive, usually built-in video card, while the active video card is an external one, built-in as a separate card. This is an easy mistake to make with computers. VGA ports and DVI. With HDMI port probability incorrect connection will be smaller due to the rare presence of this input on integrated video cards. However, this point is worth considering.
4. Connect to a computer in the TV settings
After installing a cable connection to the computer, you need to set the desired signal source on the TV. To do this, we need a TV remote control, and on it a button for displaying possible sources. On Samsung and other models created on the basis of components of the South Korean corporation, which includes a remote control, the list of sources is called up by the “Source” button.

We will see a list of sources directly on the screen. Next, use the navigation buttons to select required interface– in our case, this is “HDMI 1” – and press the remote control button “Enter”. If the TV was connected to a computer via a VGA cable, you would need to select “PC” as the source.

If the cable is connected correctly, if the signal source is selected correctly in the TV menu, the Windows system will automatically see the device as a second computer screen. And it will automatically expand the desktop display to it in the case of a computer.

In the case of laptops new screen, as a rule, is duplicated.
The image may not initially be perfect. Certain moments can be configured additionally.
5. Adjusting the image in the TV menu
Some image parameters for the selected source are configured in the TV firmware. In our case, for example, you can press the “Menu” button on the remote control, select the “Image” section...

and install required parameters screen brightness, tone, noise reduction, change the picture format if necessary.

Such minimum set settings should be in every digital device.
6. Image adjustment using Windows
If the video driver is installed on Windows, the computer should be able to see any connected second screen, in particular a digital TV. If there is no desktop image, you can try to solve the problem by telling the system to detect connected screens.
In Windows 10, right-click on the desktop and select "Display Options".

In the parameters window, click the “Detect” button.

If the TV displays working Windows table, in the options window you can apply some settings to it. The Identify button will help you determine which screen in the visual panel at the top is a TV. By selecting it, you can set TV as the main screen, change the preset (in the case of a computer) expansion option to duplicate the screen or display it on only one of the screens. You can access the resolution settings by clicking the link. « Additional options screen".

From the drop-down list of standard resolutions, you need to select the most suitable one for your TV. Next, click “Apply” to apply the selected resolution. To make it easier to move the mouse cursor between screens, their location can be changed by dragging them on the visual panel.

To set up a second screen in versions of Windows 7 and 8.1, right-click on the desktop and select "Screen resolution".

In the window that opens, to detect the second device, click the “Find” button. The rest of the second screen settings are almost the same as those discussed for Windows 10.

7. Image adjustment using the NVIDIA video card driver
In the list of standard resolutions Windows settings There may not be an optimal resolution for TV. A higher resolution can limit the visibility of the edges of the screen, and a lower resolution can leave “mourning” stripes around the perimeter. Non-standard custom resolution can be installed using the driver NVIDIA video cards. To do this, right-click on the desktop and launch the driver service - NVIDIA Control Panel.

In the section "Changing Resolution" Select the TV from the two connected screens and click the “Settings” button just below the proposed resolutions. Next click "Create Custom Permission".

In the window that appears, indicate the optimal horizontal and vertical dimensions for the TV screen. Click the “Test” button.

The tested resolution will be applied, and if it satisfies, we save it in the testing window. If not, then click “No” and set other values.

Discussed above convenient option settings when optimal resolution TV screen has been previously installed and its value is known. For the first time, it is better to set the appropriate resolution using another section of the NVIDIA Control Panel - "Adjusting the size and position of the desktop". Here you also need to select TV as the custom screen in step #1. In step No. 2, select the “Size” tab and set the option to resize the desktop to active. Applying the changes.


The perimeter of the edges will appear on the screen, which can be changed using the width and height sliders. Having reached optimal sizes, click “Ok”.

We save the non-standard resolution.

In both cases, the non-standard resolution configured with using NVIDIA Control Panel will be available in the drop-down list of system screen settings resolutions.
8. Image adjustment using the Radeon video card driver
Video Card Driver Service Radeon-Catalyst Control Center – may offer less functionality compared to NVIDIA Control Panel. However, some things can be customized. On the desktop, right-click and launch Catalyst Control Center.

Catalyst Control Center interface does not always come with drivers Radeon video cards, as is the case with NVIDIA. Typically, Catalyst Control Center is installed by manually installing the video card driver from installation disk or from the official website (http://support.amd.com/ru-ru/download).
For digital models Catalyst Control Center provides a separate section - “My Digital Panels”. Here you can flexibly adjust the TV screen, in particular, use scaling if system settings The screen does not have the optimal resolution. In the “Scaling Settings” subsection, by dragging the slider, you can experiment with the image until you get desired result. The result is secured with the “Apply” button at the bottom.

9. Setting the sound from the TV speakers
If your PC comes with a good speaker system, the HDMI audio advantage is not necessary. Budget and mid-range laptops with their wheezing, barely audible speakers are a completely different matter. When connecting an HDMI TV to a laptop, it is, of course, better to output the sound to the speakers of the first one.
Unlike the image, sound is not automatically output to the TV speakers after connecting an HDMI cable and selecting a signal source. The sound needs to be adjusted separately.
In versions of Windows 7, 8.1 and 10, right-click on the volume icon in the system tray. Select "Playback Devices".

In the window of available audio playback devices that appears, select your TV. Its name is usually displayed the same as when defining the screen. At the bottom, click the “Default” option.

That's it - the sound will be output to the speakers. In the same way, only by selecting the source audio playback device, the audio output is configured when the TV is turned off.
Have a great day!
So, you are the happy owner of LED, LCD or plasma TV. And of course, you probably already read in the instruction manual that any personal computer can easily be connected to it, thereby turning it into a large monitor. After this, you can not only enjoy your favorite games on a huge screen, but also, for example, watch videos in 3D format if your television receiver supports this function. That is, in this case, you can safely do without a Blu-Ray player. It does not matter what kind of PC you have - “standard”, i.e. in the form of a system unit, laptop or netbook. The standardization of connection interfaces makes it easy to perform this operation without any tricks or “dancing with tambourines.”
We carry out a technical “audit”
Before you move directly to connecting your PC, you need to find out what set of interface connectors your television receiver has. Today, manufacturers can install the following connectors to connect external video devices:
Carefully inspect all the connectors that your television receiver has and personal computer. Determine what types of interfaces are present on them.
What is required to connect?
In order to connect a PC to a television receiver, you will need a special interface cord and possibly a driver for correct operation computer with your TV. After you decide on the interfaces available to your equipment, you will need a cable that has the appropriate interface connectors.
Cords, cables and adapters for connection
An interface cord may be included with your TV or personal computer.
In addition, such a cord can be used from a connected DVD or Blu-Ray player by borrowing it for a while.
VGA cable:

DVI cable:

HDMI cable:

Adapters
In addition to the so-called standard cables, which have connectors at both ends for connecting to the same type of interface, there are cords designed to connect devices with different interfaces.
For example, a PC with a VGA video output can be very easily connected to a TV that has a DVI input using a DVI-VGA adapter cord. This is due to the fact that technical parameters Some of the main signals in these interfaces coincide. Special adapters for these connectors are also produced.


You can purchase these cable products and adapters in a showroom that sells radio equipment or in a specialized radio store.
If your television receiver does not have HDMI connectors, but only has a VGA or DVI input, then you will need another additional cable to output sound to TV. As a rule, this is an audio cord that has a standard 3.5’’ mini-jack connector on both sides. Take care of it in advance before connecting. 
To connect, you need to connect HDMI help cable between PC and TV. In this case, on both devices the cable must be connected to the connector labeled HDMI.

- Turn off the power on your PC and TV.
- Connect the TV and your personal computer using a cable.
- Turn on the TV and give it a few seconds to enter operating mode.
- Turn on your personal computer.
- On your TV, select the appropriate connection type – HDMI input. If you have several of them, then select the one to which you connected the PC accordingly.
- If everything is done correctly, the operating system will load on the screen.
- After the OS is loaded, it is possible that the operating system will ask you to install a driver for an external video device - that is, your TV, because for a PC, a TV is a “new monitor”, i.e. other equipment. If there is no driver on the disk that came with your television receiver, try searching for it on the Internet on the website of the manufacturer of your TV. If you cannot find it, refuse to install it and work with standard driver operating system developer.
If you have any Problems with sound output to TV HDMI interface
, check the properties of the audio system - lower right corner, "speaker" icon in system panel. Right-click on it (!) and select “Playback Devices”.  Then in the “Sound” window that opens, select your television receiver and click the “Default” button.
  This will switch the sound output not through the audio output of your PC, but through the HDMI input of the TV. If for some reason your television receiver is not in the list, turn it off from the network and turn it on again without leaving this menu. If these steps do not help, try restarting your PC.
For connection, use a DVI or VGA cable, respectively, and for different interfaces on the PC and television receiver, use an adapter or a corresponding “adapter” cable.

- Turn off power to all devices.
- Connect your TV and your personal computer using a DVI or VGA cable. If necessary, use an adapter or “transition” cable.
- Connect the output using an audio cable sound card your PC and the audio input of the TV, for outputting sound to the TV receiver. If you do not want to listen to sound on your TV, you do not need to connect this cable. In this case, you can listen to the sound on speaker system PC, if you have one, or using headphones connected to the sound card output.
- Turn on your TV and wait a few seconds until your TV is ready to use.
- Turn on your PC.
- Select the appropriate connection type on your TV – VGA or DVI input.
- If you did everything correctly, you will see the operating system loading on the screen.
- If after loading the operating system asks you to install additional drivers for the new device, follow the same recommendations as for an HDMI connection.
Try never to disconnect or connect interface cables while the power is on on devices. Otherwise, this may lead to damage to the interface input, or even failure of one of the devices!
Modern TVs can easily replace a computer display. But how does a computer connect to a TV?
We have collected various ways solutions to this common problem.
Connection selection

Attention will be given first optimal options regarding image quality, with which you can easily make a connection. After this, several additional methods will be given.
There is a possibility that the user will need to buy a cable from the store. Usually it is not very expensive, but it can be purchased various devices You can go to a specialized radio store or a retail chain that sells consumer electronics.
Please note that the presence of gold plating on expensive cables does not in any way affect the quality of the displayed image.
So, here are a few options for how to connect your computer to your TV:
- HDMI - ideal option, because to work with it you just need to connect the connectors. As a result, not only sound, but also image will be transmitted well. The only possible problem is that the sound from the laptop may sometimes not work.
- VGA- one of the easiest ways to connect television. To do this, you only need a cable, which is sold complete with monitors. There is a possibility that the user has a home unused device. If necessary, you can buy it at a specialty store.
- With cable from DVI the situation is the same - to work with it you only need to buy an adapter and cable.
- Alternatively, you can use a composite cable S-Video. You can work with it either through a cable or through an adapter. It’s just that he’s not considered the best way connections because the image may not be very clear. So such a connection does not apply if there is modern technology. The connection occurs in the same way as when working with household players.
Connecting using HDMI
Surely many users have heard about this connector. It is on all modern TVs.
The HDMI cable has the same connectors on both ends.
You can buy a cheap cable. But if the user plans to work in 3D mode, it is better to use latest version HDMI cable.
A similar socket is located on the video card near the monitor connection.
If missing discrete video card, the nest will be located on motherboard, that is, near the USB port. However, it will look similar.
With a laptop everything is much simpler - it has the same HDMI socket. But it’s located on different sides depending on the model the user is working with.
Sometimes the TV is hanging on the wall and it can be very difficult to insert the cables from behind. It is for this situation that a cable with plugs at right angles is sold.
Alternatively, buy a special HDMI corner.
VIDEO: How to connect a computer to a TV via HDMI
How to connect a computer to a TV via HDMI
How to connect a computer to a TV? Wired and wireless methods
Connecting a TV to a computer via a VGA connector
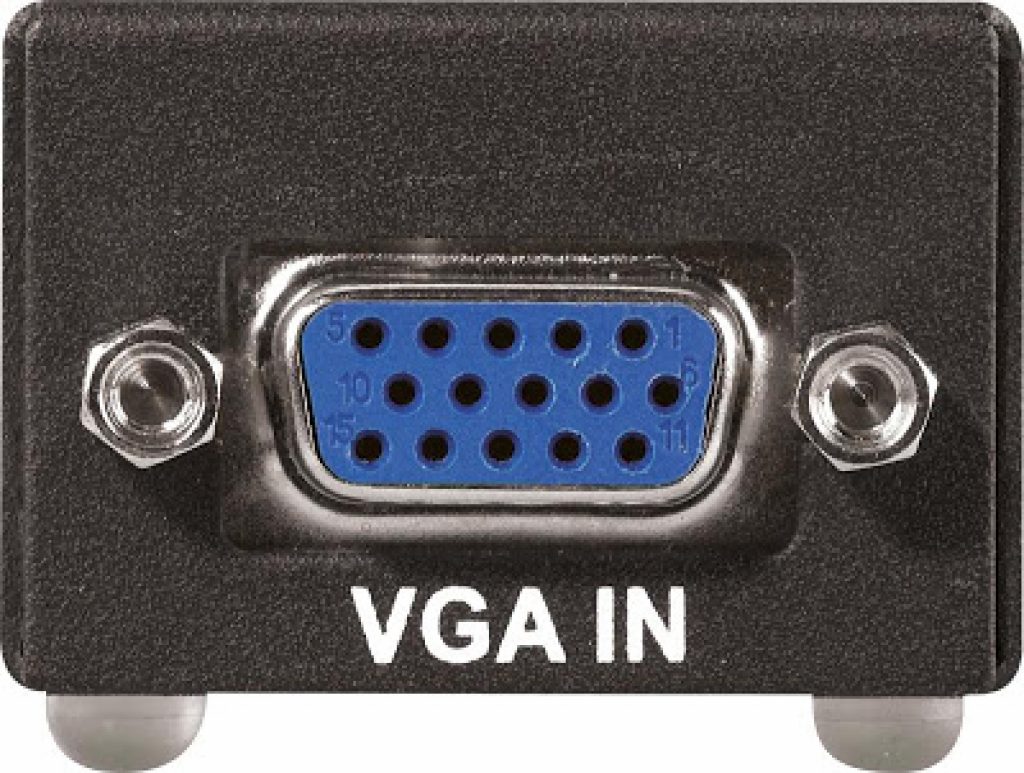
Video Graphics Array is an interface designed to receive and transmit analog video signals. Transmitting sound to this option There is no connection between the TV and the computer.
Before connecting, make sure that both devices - the computer and the TV - are equipped with VGA connectors and there is a special cable available.
To make such a connection, your computer must be equipped with an operating system of at least Windows 7.
Connect the PC and TV with a VGA cable when turned off, then use the remote control remote control TV, press the SOURCE button (in some models this may be INPUT) and in the menu that appears on the screen, specify as an external signal VGA(in some models - PC or RGB).
After this, confirm the selected changes by clicking OK.

Right click on free space on the desktop and in the drop-down list, go to the screen resolution menu.
In this menu you are given the choice of using both the TV and computer monitor, as well as setting the required resolution.
Additionally, you can choose to use multiple screens, which gives you the following options:
- Duplicate screens- a function that allows you to get the same image both on the monitor and on the TV screen;
- Expand screens- will allow you to simultaneously watch a video on the TV screen and, for example, type text on a computer;
- Show desktop 1 or 2 - this function operates only one of the available screens - either a monitor or a TV.
In general, the process of such connection is not difficult, however, it creates some inconveniences associated with the transmission of sound in this embodiment.
It will have to be connected with a separate cable or use an external speaker system for these purposes.
S-Video
Another option for connecting a TV to a computer is to connect using S-Video connectors.
This option is convenient because all TVs and computer video cards (except very old ones) are equipped with an S-Video connector.
All you need to do is connect these devices with an “S-Video to S-Video” cable.

Before connecting, both the TV and the computer must be de-energized, after which you insert one end of the cable into the connector on the computer’s video card, which is a round black socket, and the other into the S-Video socket on the TV.
As the operating system loads on the computer, the TV screen will blink, indicating that it has detected external source signal.
The next step is to configure the video card. To do this, click on an empty space on the desktop and in the menu “ Properties» go to the tab « Options» .
Then select the item « Additionally» and in the window that opens, opposite the name of the video card, activate the item « Clone» .
After use this parameter click on the item « Display" and from available list choose the name of the TV.
Then, on the TV, search for the signal source and adjust the image.
Miracast

Miracast technology differs from DLNA in that this option for outputting multimedia information from a TV to a PC simplifies the task of viewing not only recorded files stored on the gadget’s hard drive, but also played online on one of the built-in web browsers.
That's just Miracast technology there is only one drawback - it is very demanding on computer resources.
So it is supported only by certain computers, as well as tablets and laptops that have powerful hardware.
It is important to implement such modern technologies on the TV itself.
If the TV only optionally supports Miracast, then you will have to spend extra money on an adapter that easily connects to the HDMI port.
Technology wireless monitor is very simple - the displayed image is compressed using a special algorithm.
After this, it is mirrored via Wi-Fi to a large TV display.
In this case, there is no need to connect the TV to one of the local networks using a router.
Thanks to the receivers, a separate mini-network is organized, simplifying communication with a PC.
To successfully transfer the image, install the Wireless Display add-on on your computer and start broadcasting.
A PC and Smart TV can be connected without a special router.
As many probably know, home network can be created without using a router. IN in this case The laptop will serve as an access point.
This is done in several ways:
- You can create a connection in one of the special management consoles;
- Alternatively, use ;
- Use third-party programs, for example, Virtual Router Plus.
Please note that a distinctive feature of most built-in Windows tools– greater reliability and stability of operation.
In addition, users will no longer have to waste time searching for programs and installing them on their personal computer. So the registry won't be too clogged.
This method is considered one of the simplest.
Once logged in as an administrator, proceed to launch the command line. To cope with this Windows 8 task, use the key combination Win+X.
When the menu appears, you must select " Command line" In the seventh version operating system you need to press the combination Windows keys+ R in the window that opens, and also write CMD and press Enter.
Be sure to write the following command netsh wlan set
and after that press Enter.
Creation new network After this it will be completed and you can start launching it. For this purpose, write on the command line
Hostednetwork
It is important to say that you can create a virtual network only once.
However, after the module is rebooted, the user must enter a command to successfully launch the Internet.
As a result, the user will only have to connect the TV to the computer by performing the necessary steps that have already been done when working with the router.
Control TV from PC wireless network Wi-Fi is possible using the same programs.
There are various add-ons that make it much easier to control your TV using a smartphone.
In this case, the phone is used as a control panel.
So, this article provides the basic ways to connect a computer to a TV.
Coping with this task is very easy if you choose suitable option and follow the given instructions. Then the user will not have any difficulties connecting.
If you decide to connect your computer to your TV, you will almost certainly use this connection to watch any films or TV series, or to interesting game in a big company. TV will replace you large monitor, which is characterized by high price and inconvenience in everyday use. You will need a special cable, the name of which depends on the capabilities of both the computer and the TV. Use the recommendations in this article to connect your PC to your TV and vice versa.
The first thing you need to do is decide on the cable to connect. Therefore, you need to carefully inspect the connectors on back cover computer system unit to find out which cables are suitable for it.
If you have a relatively new PC, you will most likely find the following connectors.
HDMI
HDMI is the most common type of connection for projectors and monitors today. Its connector looks like an oblong horizontal hole with many contacts inside. The advantage of this method is that it is very easy to find an HDMI cable: it is sold in any hardware or computer store, and is often included with a TV or other video equipment. If you find an HDMI connector in your computer, then half the work is already done.
DVI
This solution is considered somewhat outdated, but is very necessary if you have old TV, since you won’t find new connectors on it. The DVI connector is an oblong hole that consists of many small squares. It is difficult to confuse it with other exits, since it is quite large. In addition, you need to know that DVI transition is different:
- DVI-I;
- DVI-D;
- DVI-A.
Each of them has a different structure, which is easy to distinguish by eye.


VGA
Also a relatively old connector that is still used by many projectors. To use it, you will have to connect speakers separately or accept that the sound will come from your computer speakers, which is also a good option.


S-Video
A round connector, often found on modern video cards. The quality of signal transmission will be higher than that of VGA.


On the TV you will find exactly the same connectors, but do not rush to despair if the connector on the computer and TV is different. There are many adapters that can be combined with each other. Main types of connection:
- HDMI only connects to HDMI.
- If your computer has a VGA output, you can connect it to the old VGA input on your TV.
- DVI, however, also leads to VGA on the TV, but with best quality images.
- S-Video you can use with S-Video and AV. This option is less preferable as it produces a cloudy image.
You can look for adapters at your local store. For example, there is a transition from S-Video to SCART.


How to connect a PC to a TV - connect the cable to the devices
Unplug both the computer and the TV. Connect the cable. If you do not need a monitor from your computer, then it is also better to disconnect it from the connector of the system unit, so as not to extra load to the computer.
Turn on the power, wait until the computer unloads. You will see that the entire image is transferred to the TV screen. However, you need to tweak the image a bit.

How to connect a PC to a TV - adjust the image on the computer
- To ensure that the image is clear, you need to go to the screen settings settings. To do this, right-click on the desktop and select “Personalization”.


- Go to the “Screen” section.


- Now select “Customize screen settings” in the left menu.


- If you use both a monitor and a TV, and the number of screens is still displayed as 1, then click “Find”.
- Once the second screen is found, you will see the “Multiple Screens” option. In it you need to select “Duplication”.


- Set the screen resolution to the one that matches your TV.

